


Why can’t I overwrite files on a QNAP NAS when accessing it via Client for NFS on a Windows Server?
Applicable Products
- All QNAP NAS series
- Windows Server (any supported version)
Scenario
A user accesses a QNAP NAS shared folder via Network File Services (NFS) from a Windows Server running a supported version. When copying a file with the same name, Windows displays the Replace or Skip Files prompt, indicating that an existing file is present on the NAS.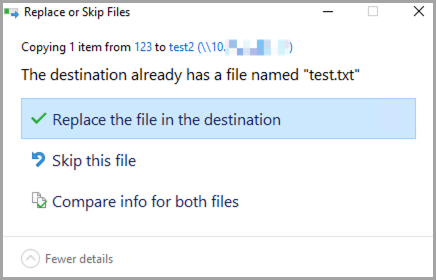
However, after selecting Replace the file in the destination, the operation fails with an access denied or permission error, preventing the file from being overwritten or updated.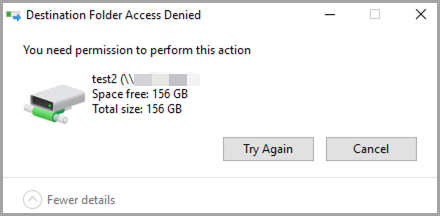
Root Cause
This behavior is a known limitation of the Client for NFS feature in Windows Server and is independent of the NAS configuration. The same behavior is observed across all supported Windows Server versions that include Client for NFS.
- Client for NFS supports only NFSv2 and NFSv3 and does not support NFSv4 ACLs. As a result, it cannot negotiate or modify POSIX ACLs over NFS.
- By default, Client for NFS accesses NFS shares using an anonymous UID and GID. If the NAS does not grant write permissions to this anonymous identity, write operations fail.
- Access is denied unless the anonymous UID and GID are explicitly mapped to a UID and GID that the NAS recognizes and allows to write to the shared folder, regardless of the shared folder’s configured write permissions.
Solution
To resolve this issue, map the anonymous NFS user on the Windows Server to a UID and GID that the NAS allows to write to the shared folder.
You can apply the configuration using one of the following methods.
Method 1: Configure Using PowerShell (Recommended)
- Open PowerShell as an Administrator.
- Launch PowerShell with administrative privileges.
- Run the following commands to map the anonymous UID and GID to
0, which corresponds to the QNAP root user.Set-ItemProperty -Path "HKLM:\SOFTWARE\Microsoft\ClientForNFS\CurrentVersion\Default" -Name AnonymousUid -Value 0 -PropertyType DWord Set-ItemProperty -Path "HKLM:\SOFTWARE\Microsoft\ClientForNFS\CurrentVersion\Default" -Name AnonymousGid -Value 0 -PropertyType DWord - Run the following command to restart Client for NFS or reboot the system to apply the changes:
nfsadmin client restartTipAlternatively, you can restart the Windows Server.
Method 2: Configure Using the Windows Registry
- Press Win + R.
- Type
regedit. - Press Enter.
- Navigate to the following registry path:
HKEY_LOCAL_MACHINE\SOFTWARE\Microsoft\ClientForNFS\CurrentVersion\Default - Go to Edit > New, and then click DWORD (32-bit) Value.
- Create the following two DWORD (32-bit) values inside the default folder:
- AnonymousUid = 0
- AnonymousGid = 0
- Apply the changes by restarting the NFS client:
nfsadmin client restart - TipAlternatively, you can restart the Windows Server.
- Mapping the UID and GID to
0allows Client for NFS to access the NAS as the root user. Ensure that the NAS shared folder grants write permissions to this identity. - Apply these settings on each Windows Server that accesses the NFS share.
- This applies to all Windows versions that support the Client for NFS feature.
- For environments that require fine-grained permission control or NFSv4 ACL support, Windows Server acting as an NFS client is not supported.
Further Reading
For further assistance, ask other users and QNAP experts in the community. Go to QNAP Community


