Applicable Products
Software
- QuWAN Orchestrator 2.9 and later versions
- QVPN Service 3.3 and later
- QNAP NAS running QTS with HBS 3 Hybrid Backup Sync installed
Overview
With QuWAN Express Supernode, two QNAP NAS devices on different networks can communicate over a secure virtual network. This guide shows you how to create a remote backup job in HBS 3 using the QuWAN virtual IP assigned to the destination NAS.
Prerequisites
Before creating a backup job, both NAS devices must first join QuWAN Express Supernode. The IP addresses used in HBS 3 are the virtual IPs assigned by QuWAN after joining — not the physical LAN IPs.
You can refer to the article "How to connect a NAS to QuWAN Orchestrator using QuWAN Express and the Super Node Service?" to learn how to join your NAS to QuWAN Express.
Procedure
Step 1:Open HBS 3 and Start a New Backup Job
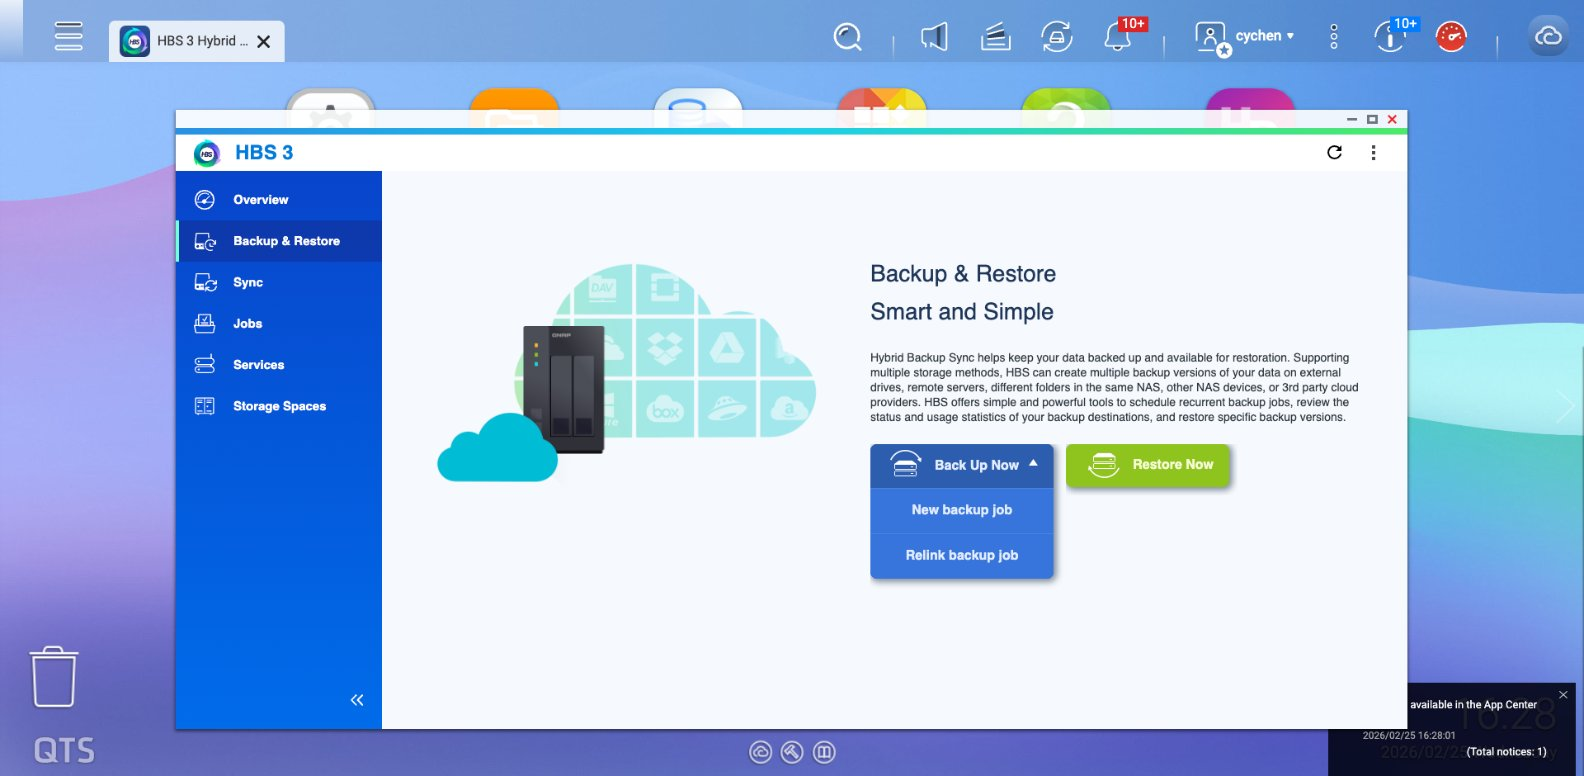
- HBS 3 Hybrid Backup Sync
- Go to Backup & Restore, click Back Up Now, then select New backup job from the dropdown.
- Select the Source Folder

Step 2: Select Remote NAS and Add an Account
- On the destination screen, select Remote NAS.
- Click + Add new account.
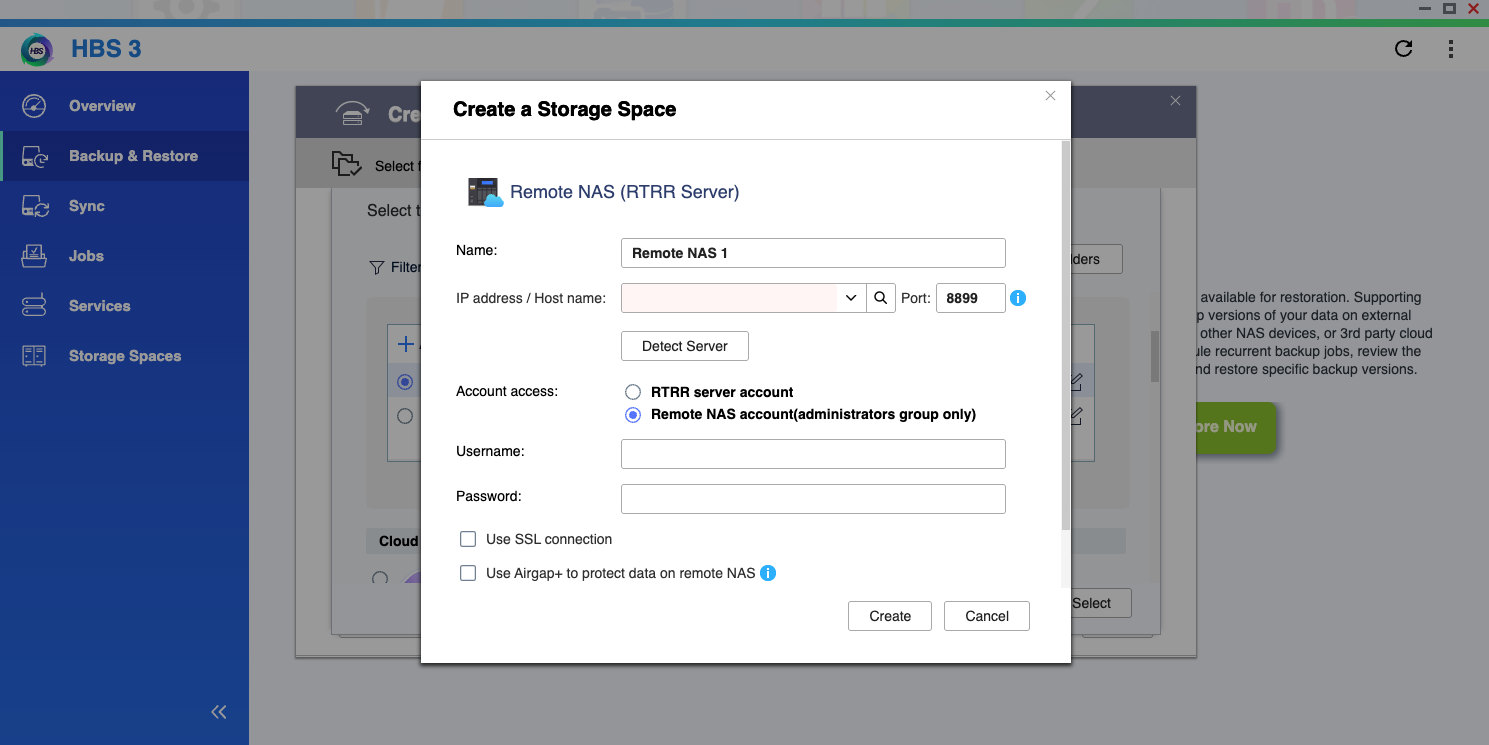
- In the Create a Storage Space dialog:
- IP address / Host name field: enter the virtual IP of the destination NAS you get from QuWAN Express, then click Detect Server to check if it is connected.
- Account access: choose Remote NAS account, and enter the destination NAS user name and password.
- Click Create.

Step3: Task Configuration
Follow the process to complete the task:
- Select the destination folder.
- Set the schedule according to your preference.
- Select your transmission rules.
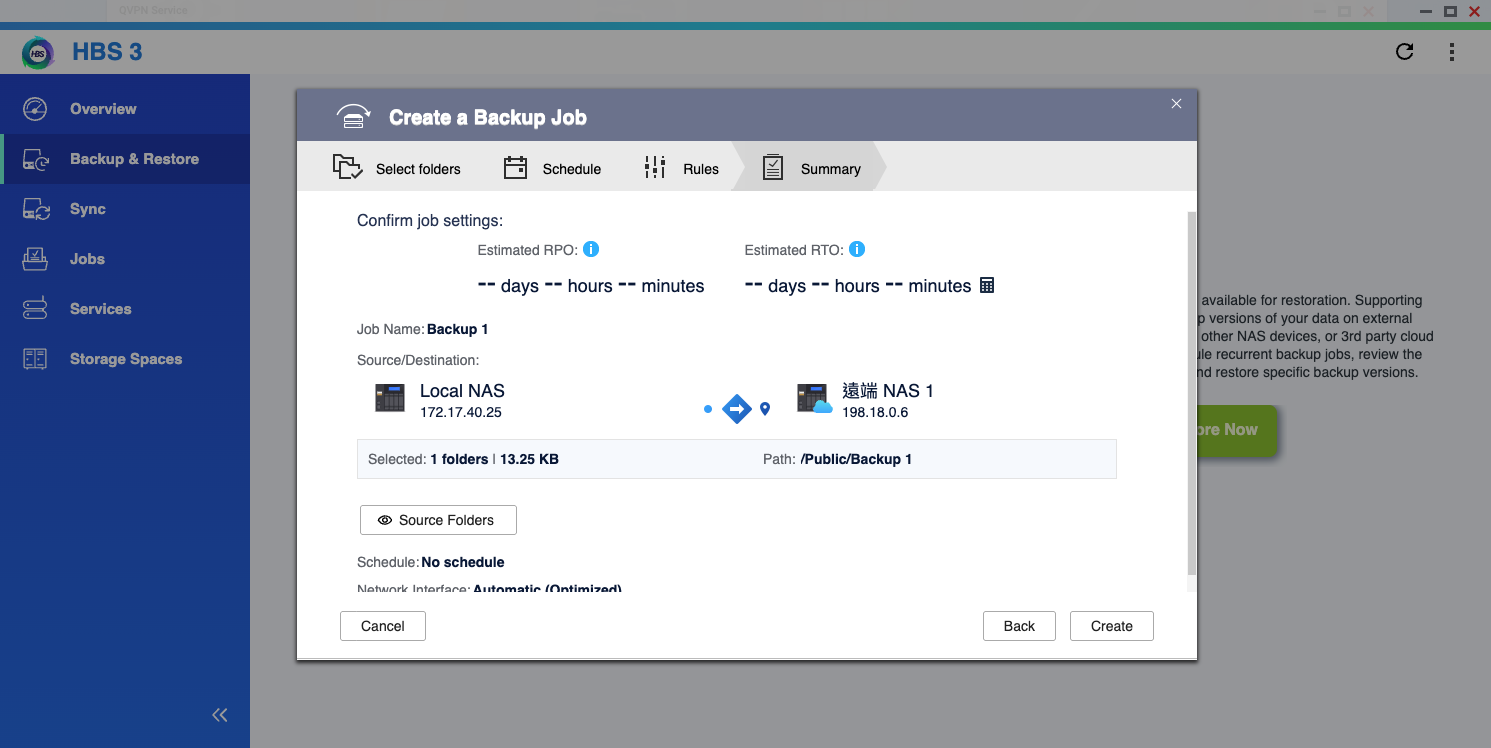
- Check the summary to ensure all settings are correct.
- Click Create.
- Complete your transmission settings; you can now see the page transferring data.

対象製品
ソフトウェア
- QuWAN Orchestrator 2.9 以降のバージョン
- QVPN Service 3.3 以降
- QNAP NAS が QTS を実行し、HBS 3 Hybrid Backup Sync がインストールされています
概要
QuWAN Express Supernode を使用すると、異なるネットワーク上の 2 つの QNAP NAS デバイスが安全な仮想ネットワークを介して通信できます。このガイドでは、QuWAN 仮想 IP を使用して HBS 3 でリモートバックアップジョブを作成する方法を示します。
前提条件
バックアップジョブを作成する前に、両方の NAS デバイスがまず QuWAN Express Supernode に参加する必要があります。HBS 3 で使用される IP アドレスは、参加後に QuWAN によって割り当てられる仮想 IP であり、物理 LAN IP ではありません。
NAS を QuWAN Express に参加させる方法については、記事「QuWAN Express と Super Node サービスを使用して NAS を QuWAN Orchestrator に接続する方法は?」を参照してください。
手順
ステップ 1:HBS 3 を開いて新しいバックアップジョブを開始します
- HBS 3 Hybrid Backup Sync
- バックアップと復元に移動し、今すぐバックアップをクリックして、ドロップダウンから新しいバックアップジョブを選択します。
- ソースフォルダーを選択
ステップ 2:リモート NAS を選択してアカウントを追加
- 宛先画面でリモート NASを選択します。
- + をクリックして新しいアカウントを追加。
- 「ストレージスペースを作成」ダイアログで:
- IP アドレス / ホスト名フィールドに QuWAN Express から取得した宛先 NAS の仮想 IP を入力し、サーバーを検出をクリックして接続されているか確認します。
- アカウントアクセス:リモート NASアカウントを選択し、宛先 NAS のユーザー名とパスワードを入力します。
- クリック作成。
ステップ 3:タスク設定
プロセスに従ってタスクを完了します:
- 選択宛先フォルダー。
- 設定スケジュールをお好みに合わせて。
- あなたの 伝送 ルールを選択します。
- 確認概要すべての設定が正しいことを確認します。
- クリック作成。
- 伝送設定を完了すると、データ転送ページが表示されます。