Applicable Products
- HDP for Business
- HDP for Business Agent 1.0.0.1697 and later
- Windows 10 (64-bit, version 1607 or later), Windows 11
- Windows Server 2016 / 2019 / 2022 / 2025
Purpose
This tutorial shows you how to install HDP for Business Agent on a Windows computer, connect it to your Management Server with a Join Key, and confirm that the assigned backup policy is running.
Prerequisites
- HDP for Business is installed and initialized on a QNAP NAS that acts as the Management Server.
- A Backup Server and a protection policy are ready, so that you can bind them to a Join Key.
- The Windows computer runs a supported 64-bit operating system. ARM-based devices such as ARM64 Windows are not supported.
- The computer has internet access during the first installation. The installer automatically installs the .NET 10.0 runtime components that the agent requires. If the computer has no internet access, install these components manually first. See Note: Installing on a Computer Without Internet Access.
- NetBak PC Agent is not installed on the computer. The two products cannot coexist, and the installer asks you to remove the other product before it continues.
Procedure
Step 1: Create a Join Key on the Management Server
The Join Key defines which Backup Server and which policy the computer is bound to. The agent applies them automatically once it connects.
- In HDP for Business, go to Physical Device and click Add.
- Click Download Agent to download the installer, and copy the file to the Windows computer.
- Click Manage Join Key > Create.
- Select the Backup Server and the Policy to bind, then click Create.
- In the Join Key table, click Copy. The key is 64 alphanumeric characters long.
Step 2: Install the agent on the Windows computer
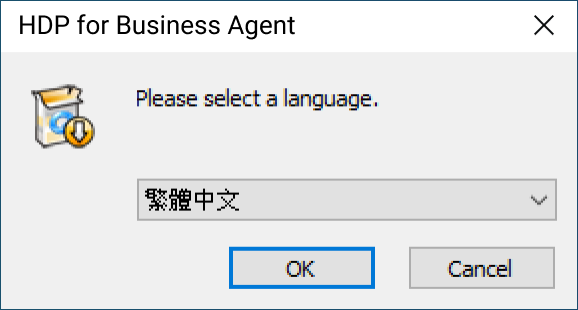
- Run the installer on the Windows computer.
- Select the installation language. Your system language is selected by default.
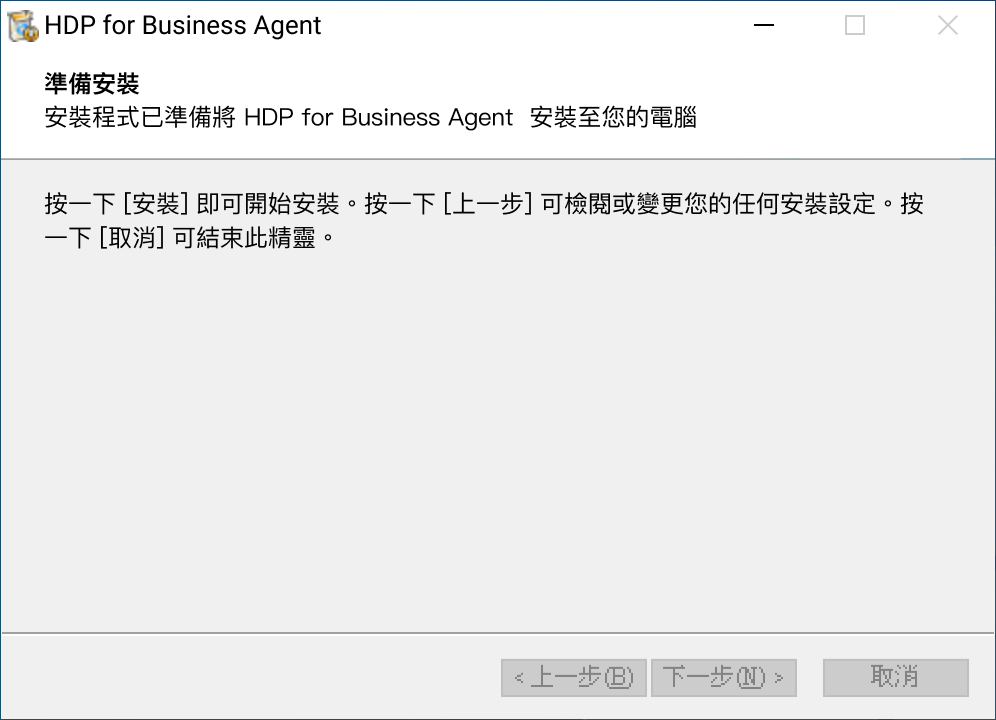
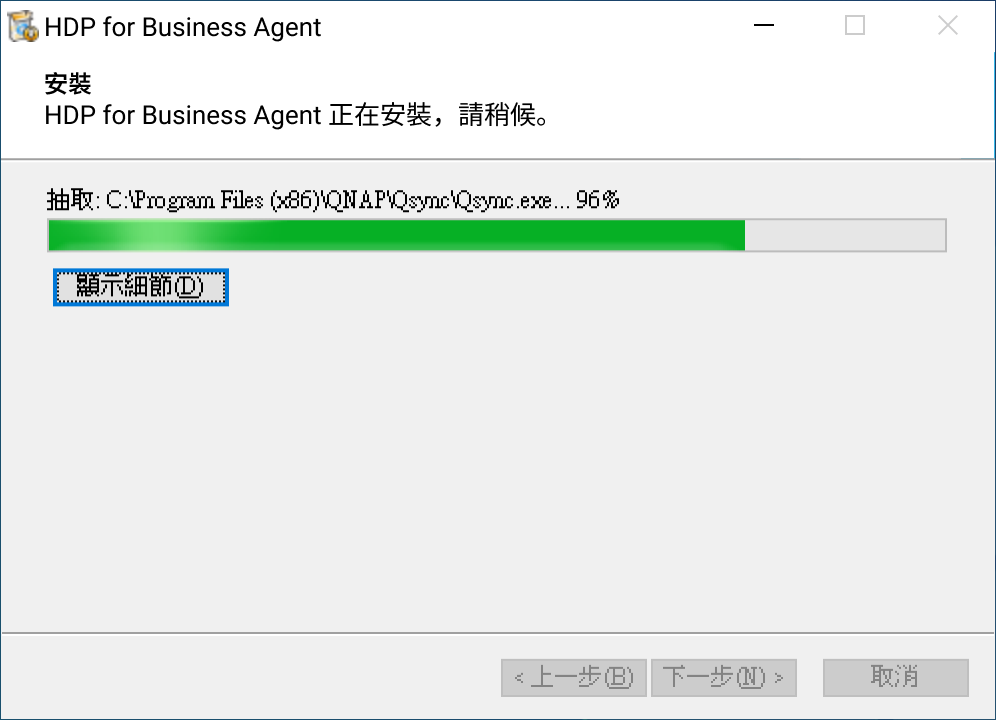
- Confirm that you want to install HDP for Business Agent, and wait for the files to be extracted to
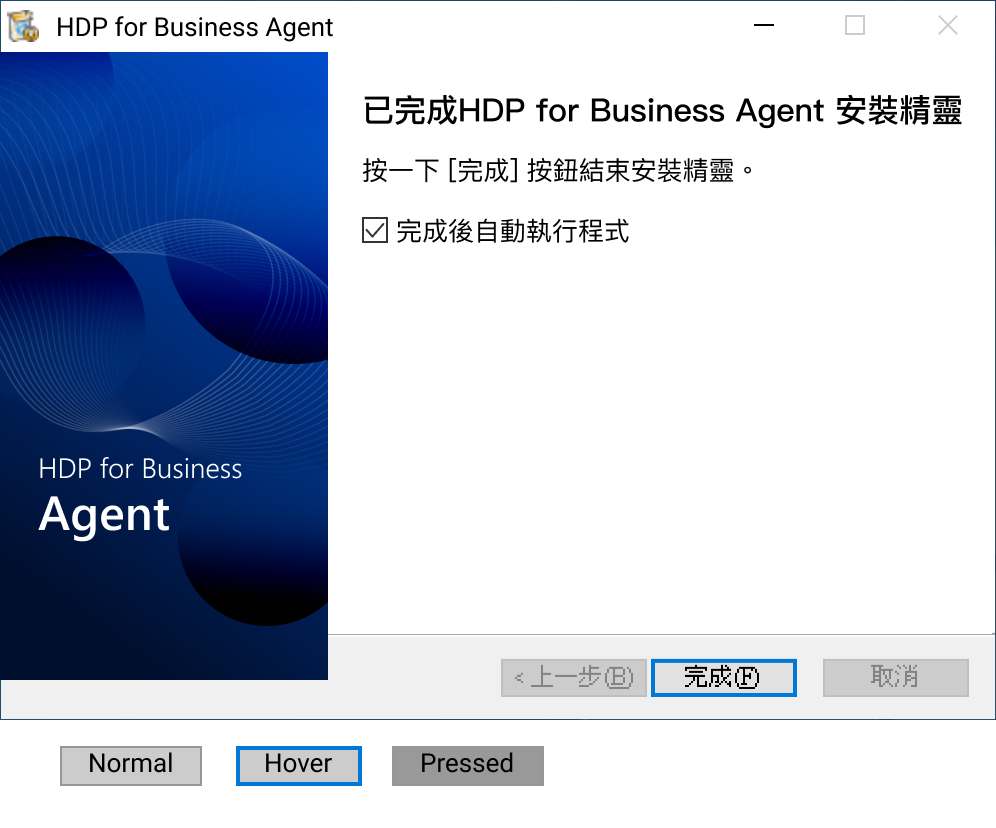
C:\Program Files\QNAP. - When the installation finishes, keep the option to run the application selected, and close the installer.
You can only upgrade an existing installation. Reinstalling the same version and downgrading to an earlier version are not supported.
Step 3: Connect to the Management Server
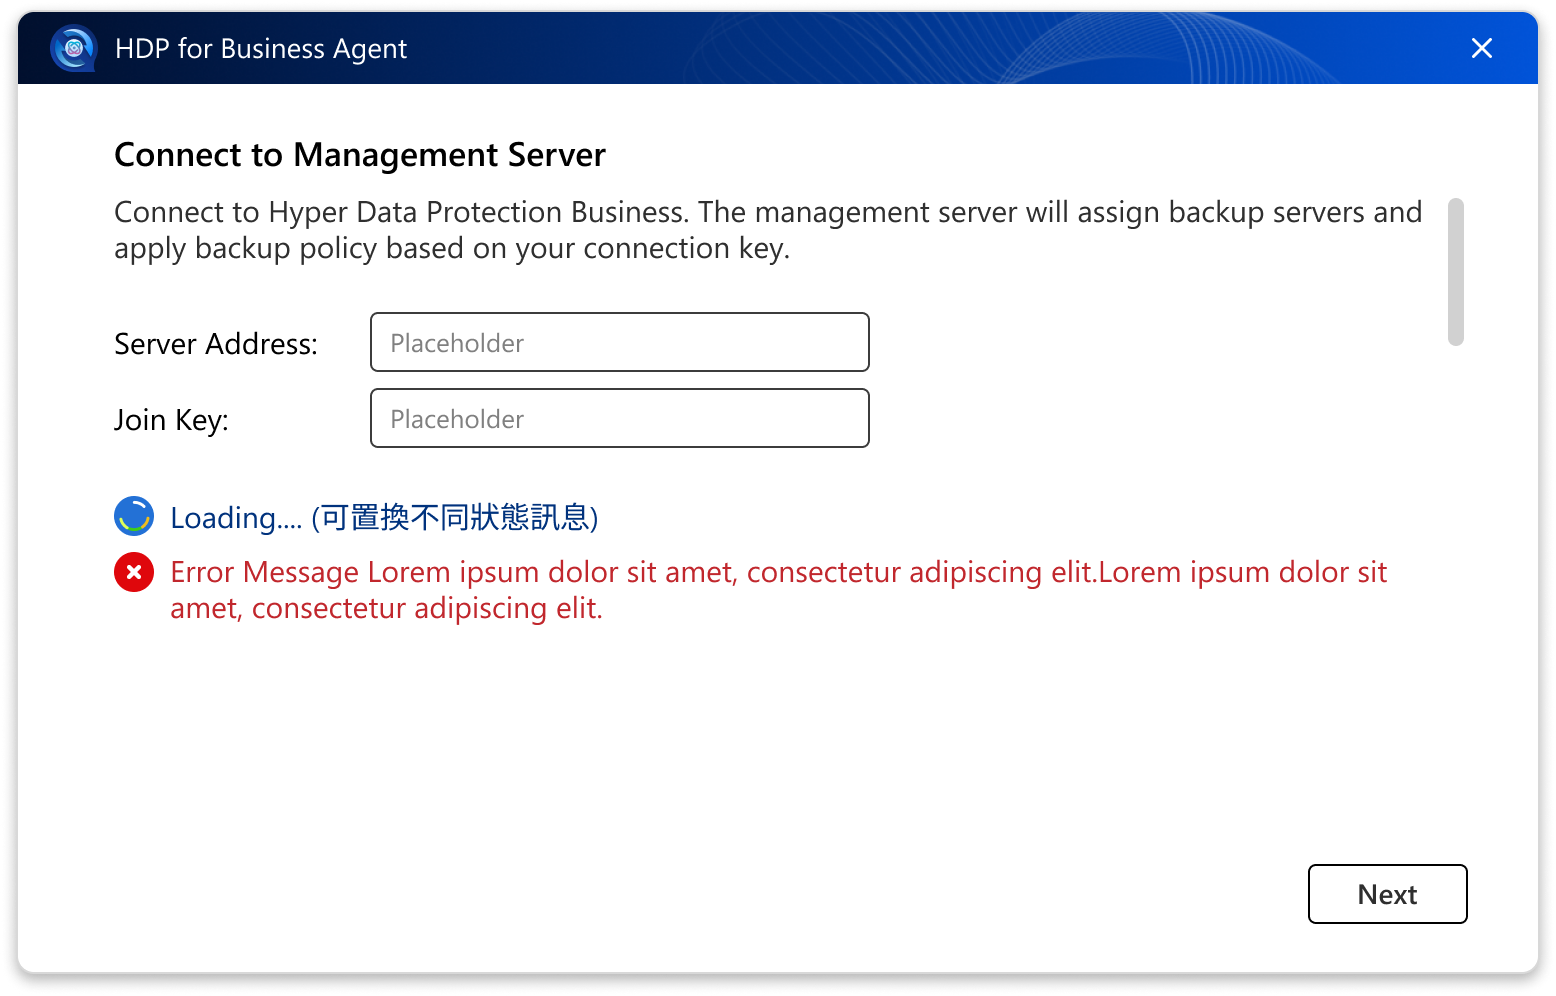
The agent opens the Connect to Management Server screen on its first run.
- In Server Address, enter the host name or IP address of the Management Server, with an optional port number, for example
nas-01, 10.77.216.185, or 10.77.216.185:11443. Do not include http:// or https://. - In Join Key, paste the key you copied in Step 1.
- Click Next.
- If a certificate confirmation window appears, click Continue.
Connecting over HTTPS
If you do not specify a port number, the agent tries HTTPS on port 443 first, and then HTTP on port 8080. QNAP NAS devices use a configurable HTTPS port that is often not 443, so to make sure the connection is encrypted, enter the HTTPS port of your NAS explicitly. To find the port, go to Control Panel > System > General Settings > Secure Connection (HTTPS).
Because most NAS devices use a self-signed certificate, the agent shows a certificate confirmation window when it connects over HTTPS. This is expected. Click Continue to proceed. Your choice also applies to the Backup Server that the agent connects to afterwards.
If you enter a Join Key that belongs to a Backup Server instead of a Management Server, the agent asks you to connect to the Management Server instead.
Step 4: Review the assigned policy
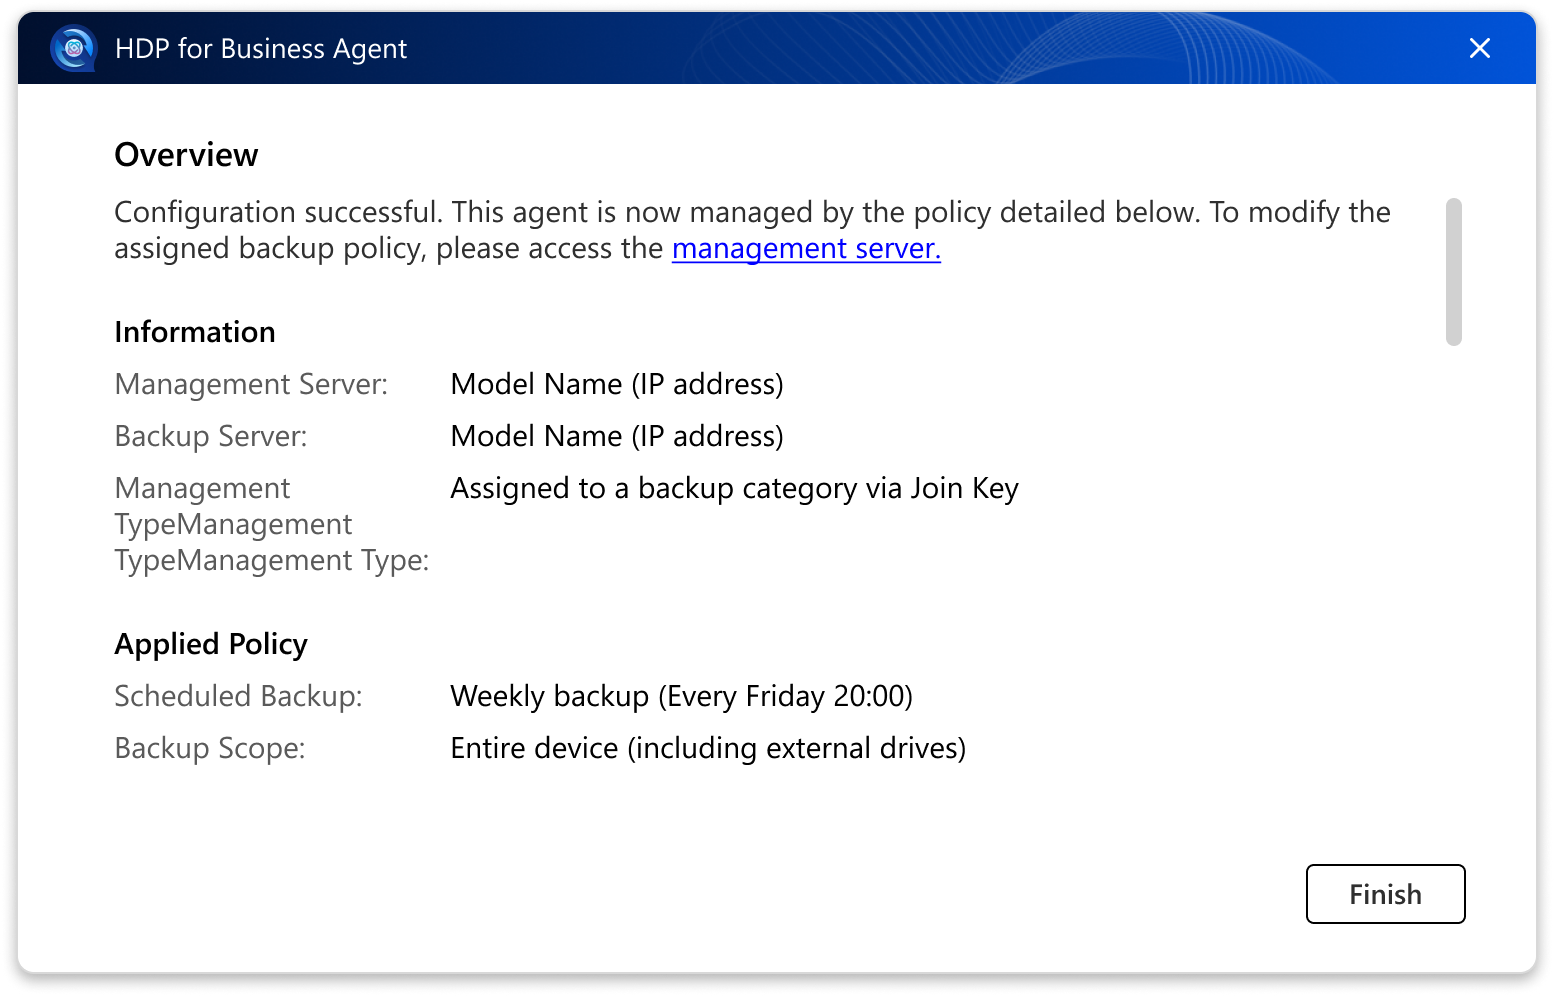
After the connection succeeds, the Overview page shows what the computer is now protected by:
- The Management Server and the Backup Server, each with its name and IP address.
- The applied policy, its backup schedule, and its backup scope.
Click Finish to close the wizard.
Step 5: Check the backup status from the system tray
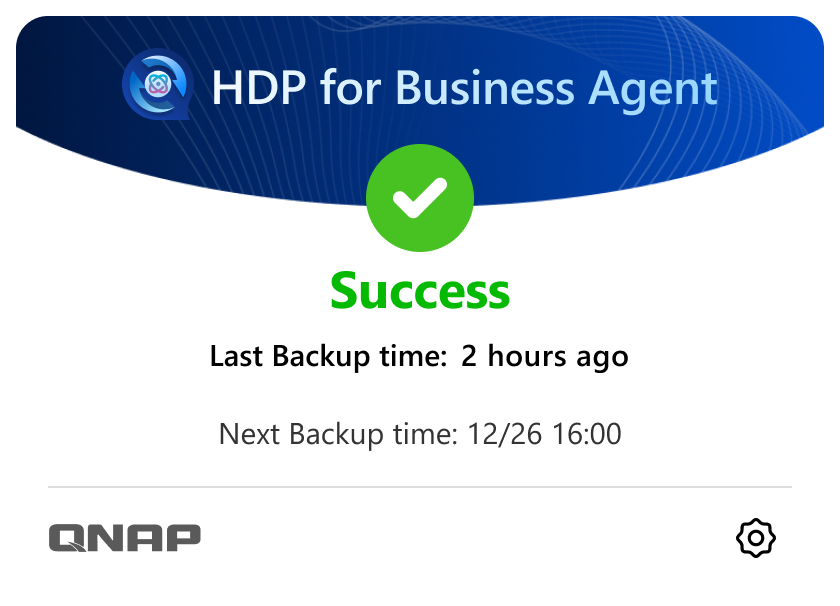
After setup, the agent adds an icon to the Windows system tray and starts automatically when the computer boots. Click the icon to open the status panel.
| Status | What the panel shows |
|---|
| Not started yet | No backup has run yet. The next backup time is shown. |
| Running | A backup is in progress, with a progress bar. The panel shows Finalizing after the data transfer completes. |
| Success | The backup completed. The last and next backup times are shown. |
| Warning | The backup completed with warnings. |
| Error | The backup failed. Open the Logs page for details. |
| Queued | The backup is waiting to run. |
| Stopped | The backup was stopped. The last backup time is shown. |
| Disabled | The backup job is disabled. Enable it again on the Management Server. |
| Network Reconnecting | The network connection was lost. The agent reconnects automatically. |
Note: Installing on a Computer Without Internet Access
HDP for Business Agent runs on the .NET 10.0 runtime. The installer downloads the required components from Microsoft during installation. If the computer has no internet access, install the following components manually before you run the agent installer.
- ASP.NET Core Runtime 10.0
- .NET Runtime 10.0
- .NET Desktop Runtime 10.0
- On a computer with internet access, download the three x64 installers for Windows from the Microsoft .NET 10.0 download page.
- Copy the installers to the offline computer and install all three components.
- Run the HDP for Business Agent installer. When the installer asks whether the .NET runtime components are already installed, click OK to continue.
Install all three components. The agent service requires ASP.NET Core Runtime and .NET Runtime, and the agent user interface requires .NET Desktop Runtime. If .NET Desktop Runtime is missing, the installation still finishes, but the agent prompts you to update .NET when it starts.
Result
The Windows computer is now a protected workload in HDP for Business. To confirm this:
- The computer appears on the Physical Device page of the Management Server, bound to the Backup Server and the policy of the Join Key.
- The system tray panel shows the next backup time, and shows Success after the first backup completes.
- The backup appears in Activities on the Management Server.
What's Next
適用產品
- HDP for Business
- HDP for Business Agent 1.0.0.1697 and later
- Windows 10 (64-bit, version 1607 or later), Windows 11
- Windows Server 2016 / 2019 / 2022 / 2025
目的
本教程將指導您如何在 Windows 電腦上安裝 HDP for Business Agent,使用 Join Key 連線到您的管理伺服器,並確認分配的備份策略正在執行。
先決條件
- HDP for Business 已安裝並初始化在充當管理伺服器的 QNAP NAS 上。
- 備份伺服器和保護策略已準備好,以便您可以將它們繫結到 Join Key。
- Windows 電腦執行受支援的 64 位元作業系統。不支援 ARM 架構的裝置,例如 ARM64 Windows。
- 電腦在首次安裝時需要有網際網路連接。安裝程式會自動安裝代理所需的 .NET 10.0 執行時元件。如果電腦沒有網際網路連接,請先手動安裝這些元件。請參閱注意:在無網路連線的電腦上安裝。
- NetBak PC Agent 未安裝在電腦上。這兩個產品不能共存,安裝程式會要求您在繼續之前移除另一個產品。
程式
步驟 1:在管理伺服器上建立 Join Key
Join Key 定義了電腦繫結的備份伺服器和策略。代理在連線後會自動應用它們。
- 在 HDP for Business 中,前往Physical Device,然後按一下Add。
- 按一下Download Agent下載安裝程式,並將檔案複製到 Windows 電腦。
- 按一下Manage Join Key > Create。
- 選擇要綁定的Backup Server和Policy,然後按一下Create。
- 在 Join Key 表中,按一下Copy。該金鑰長度為 64 個字母和數字字符。
步驟 2:在 Windows 電腦上安裝代理
- 在 Windows 電腦上執行安裝程式。
- 選擇安裝語言。系統預設選擇您的語言。
- 確認您要安裝 HDP for Business Agent,並等待檔案提取到
C:\Program Files\QNAP。 - 安裝完成後,保持選擇執行應用程式的選項,然後關閉安裝程式。
您只能升級現有的安裝。不支援重新安裝相同版本或降級至較早版本。
步驟 3:連線到管理伺服器
代理程式首次運行時會打開連接到管理伺服器畫面。
- 在伺服器地址中,輸入管理伺服器的主機名稱或 IP 位址,並可選擇性地輸入埠號,例如
nas-01、10.77.216.185或10.77.216.185:11443。不要包含http://或https://。 - 在加入金鑰中,貼上您在步驟 1 中複製的金鑰。
- 點擊下一步。
- 如果出現憑證確認視窗,請點擊繼續。
透過 HTTPS 連線
如果您未指定埠號,代理程式會先嘗試使用埠 443 的 HTTPS,然後使用埠 8080 的 HTTP。QNAP NAS 設備使用可配置的 HTTPS 埠,通常不是 443,因此為確保連接加密,請明確輸入 NAS 的 HTTPS 埠。要找到埠,請前往控制台 > 系統 > 一般設定 > 安全連接 (HTTPS)。
因為大多數 NAS 設備使用自簽憑證,代理程式在透過 HTTPS 連接時會顯示憑證確認視窗。這是預期的。點擊繼續以繼續。您的選擇也適用於代理程式之後連接的備份伺服器。
如果您輸入的加入金鑰屬於備份伺服器而不是管理伺服器,代理程式會要求您改為連線到管理伺服器。
步驟 4:檢視已指派的政策
連線成功後,總覽頁面顯示電腦目前受到以下保護:
- 管理伺服器和備份伺服器,各自的名稱和 IP 位址。
- 已套用的政策、備份排程及備份範圍。
點選完成以關閉精靈。
步驟 5:從系統匣檢查備份狀態
設定完成後,代理程式會在 Windows 系統匣中新增一個圖示,並在電腦啟動時自動啟動。點選圖示以開啟狀態面板。
| 狀態 | 面板顯示內容 |
|---|
| 尚未開始 | 尚未執行備份。顯示下一次備份時間。 |
| 正在執行 | 備份進行中,顯示進度條。資料傳輸完成後,面板顯示完成中。 |
| 成功 | 備份已完成。顯示上次和下一次備份時間。 |
| 警告 | 備份完成但有警告。 |
| 錯誤 | 備份失敗。開啟日誌頁面以檢視詳細資訊。 |
| 排隊中 | 備份等待執行。 |
| 已停止 | 備份已停止。顯示最後的備份時間。 |
| 已停用 | 備份工作已停用。請在管理伺服器上重新啟用。 |
| 網路重新連線中 | 網路連線已中斷。代理程式會自動重新連線。 |
注意:在無網路連線的電腦上安裝
HDP for Business Agent 需要 .NET 10.0 執行環境。安裝程式會在安裝過程中從 Microsoft 下載所需的元件。如果電腦無法連線網際網路,請在執行代理程式安裝程式之前手動安裝以下元件。
- ASP.NET Core Runtime 10.0
- .NET Runtime 10.0
- .NET Desktop Runtime 10.0
- 在有網路連線的電腦上,從Microsoft .NET 10.0 下載頁面下載三個 Windows x64 安裝程式。
- 將安裝程式複製到離線電腦並安裝所有三個元件。
- 執行 HDP for Business Agent 安裝程式。當安裝程式詢問是否已安裝 .NET 執行環境元件時,點擊OK繼續。
安裝所有三個元件。代理服務需要 ASP.NET Core Runtime 和 .NET Runtime,代理使用者介面需要 .NET Desktop Runtime。如果缺少 .NET Desktop Runtime,安裝仍會完成,但代理啟動時會提示您更新 .NET。
結果
Windows 電腦現在是 HDP for Business 中的受保護工作負載。要確認這一點:
- 電腦顯示在管理伺服器的實體裝置頁面上,並綁定到備份伺服器和加入金鑰的策略。
- 系統匣面板顯示下一次備份時間,並在第一次備份完成後顯示成功。
- 備份顯示在管理伺服器的活動中。
接下來的步驟


