


How to fix the “Enter network credentials“ error when connecting to my NAS on Windows 10 or later?
Applicable Products
Windows 10 or later
Symptom
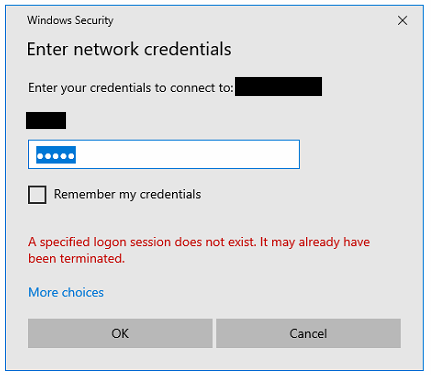
On Windows 10 or later, you may encounter the "Enter network credentials" error when connecting to your NAS.
Root Cause
By default, Windows first tries to access an SMB server using your Windows account credentials. If these differ from your NAS account credentials, the connection is rejected and Windows displays this prompt so you can enter your NAS credentials instead.
Solutions
You can resolve this error by modifying your login credentials or by disabling Windows Hello.
Solution 1: Verify the correct username and password in Windows Credential Manager
- On your Windows PC, open Control Panel.
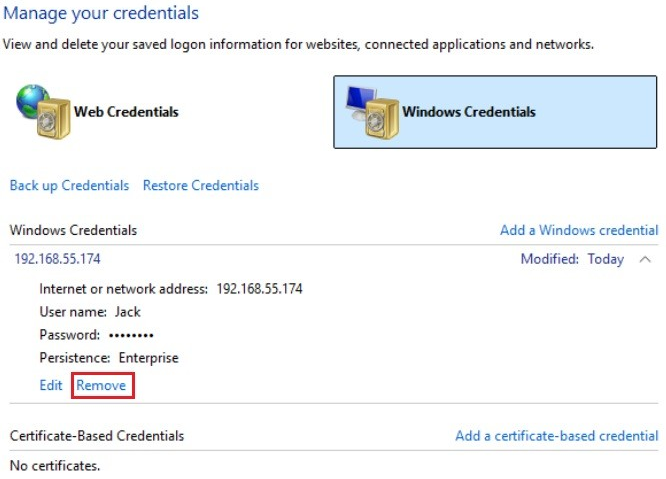
- Go to User Accounts > Credential Manager > Windows Credentials.
- Click Remove to remove the saved Windows credentials for your NAS (identified by IP address or server name).
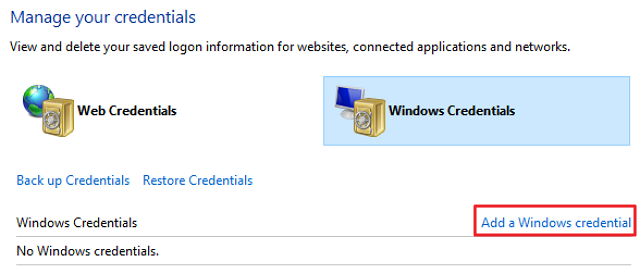
- Click Add a Windows credential.
- In the User namefield, specify your NAS username using the following format:
- For NAS users:
NAS Server Name\Your Username. For example, if your NAS is named "QNAPNAS" and your username is "Jack," enter "QNAPNAS\Jack". - For domain users:
Domain Name\Your Username. If you continue to experience issues, refer to Solution 2.
- For NAS users:
- Complete the following fields as well:
- Internet or network address: Specify the IP address or hostname of your NAS.
- Password: Specify the password for your NAS account.
- Click OK.
Solution 2: Disable Windows Hello
Windows Hello (PIN, fingerprint, or facial recognition) signs you in to your Windows account, but it is not the same as a network username and password. When you are signed in via Windows Hello, Windows can get stuck trying to use that sign-in identity for SMB authentication instead of your stored NAS credentials, causing the login prompt to loop even when your credentials are correct. This is a known Windows behavior, not an issue with your NAS. Disabling Windows Hello removes this conflict.
- Go to the Start button (Windows logo) > Settings > Accounts > Sign-in options.
- Expand the following options:
- For Windows 11:
- Facial recognition (Windows Hello)
- Fingerprint recognition (Windows Hello)
- PIN (Windows Hello)
- For Windows 10:
- Windows Hello Face
- Windows Hello Fingerprint
- Windows Hello PIN
- For Windows 11:
- For each option listed above, click Remove, and then click Remove again to confirm.NoteThe "Remove" button only appears if the sign-in option is already configured.
- Verify your account password and then click OK.
- Try connecting to your NAS again.
Further Reading
For further assistance, ask other users and QNAP experts in the community. Go to QNAP Community


