


How do I securely erase all data on my NAS?
Appliable Products
- NAS running with QTS or QuTS system
Overview
There are many reasons to permanently erase data from your NAS drives — decommissioning hardware, repurposing drives, meeting compliance requirements, or ensuring sensitive data cannot be recovered. QNAP QTS and QuTS hero include a built-in Secure Erase function that handles this using certified overwrite methods.
Why isn't deleting files or reformatting a drive enough?
Deleting files or reformatting a volume only removes the filesystem index — the actual data sectors remain on the disk and can be recovered with widely available tools in minutes. Anyone with physical access to the drive could retrieve your files, documents, credentials, and any other data that was ever stored on it.
Secure Erase overwrites the raw storage media with one or more passes of data patterns, making the original content physically unreadable even with forensic software.
When should I use Secure Erase?
Common situations where Secure Erase is appropriate:
- Decommissioning hardware — retiring a NAS or drive from service and handing it off
- Repurposing drives — reusing a drive for a different purpose or different owner
- Compliance requirements — GDPR, HIPAA, and other regulations require verifiable data destruction when retiring storage that held personal or protected data
- Security policy — organizational policies may require certified erasure before any storage device leaves IT control
- Drive RMA — before returning a defective drive to the manufacturer under warranty
Solution
⚠️ Back up all data before proceeding. Secure Erase is irreversible. Verify your backup is complete and accessible on another device before starting.
Step 1 — Back up your data
Copy everything you need to keep to an external drive, network share, or cloud storage. Confirm the backup is complete and all files open correctly before continuing.
Step 2 — Remove drives from any storage pool
Open Storage & Snapshots → Storage → Storage/Snapshots. Select your storage pool, click Manage → Remove, and confirm. Repeat for all pools. The drives will now show Used Type: Free in the Disks view.
Step 3 — Select the drive and open Secure Erase
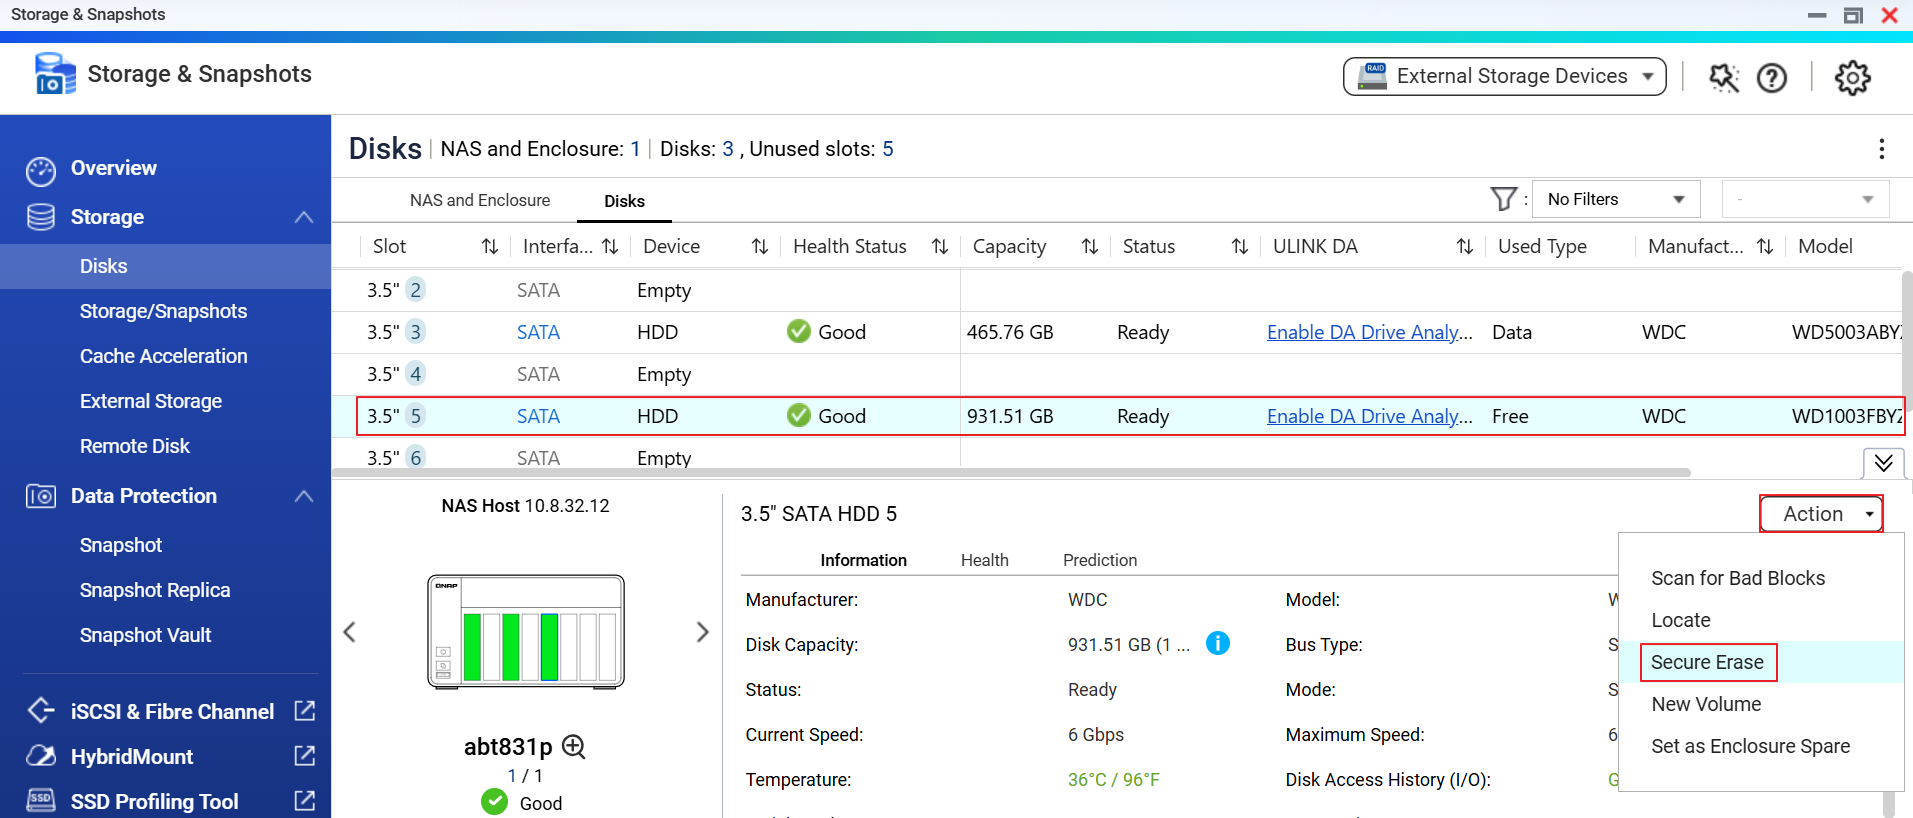
Go to Storage & Snapshots → Storage → Disks. Click a drive to select it — its details appear in the lower pane. Click Action → Secure Erase from the dropdown menu at the top right of the detail panel.
Step 4 — Wizard Step 1/3: Confirm the drive selection
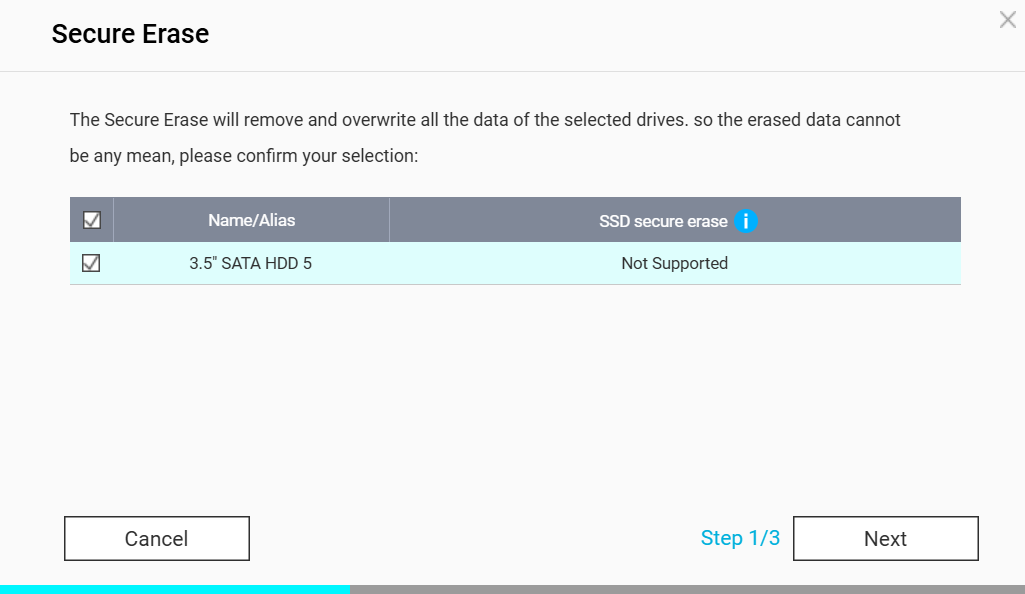
The wizard lists the selected drive(s) and shows whether native SSD secure erase is supported for each. Verify the correct drive is checked, then click Next.
Step 5 — Wizard Step 2/3: Select an erase mode
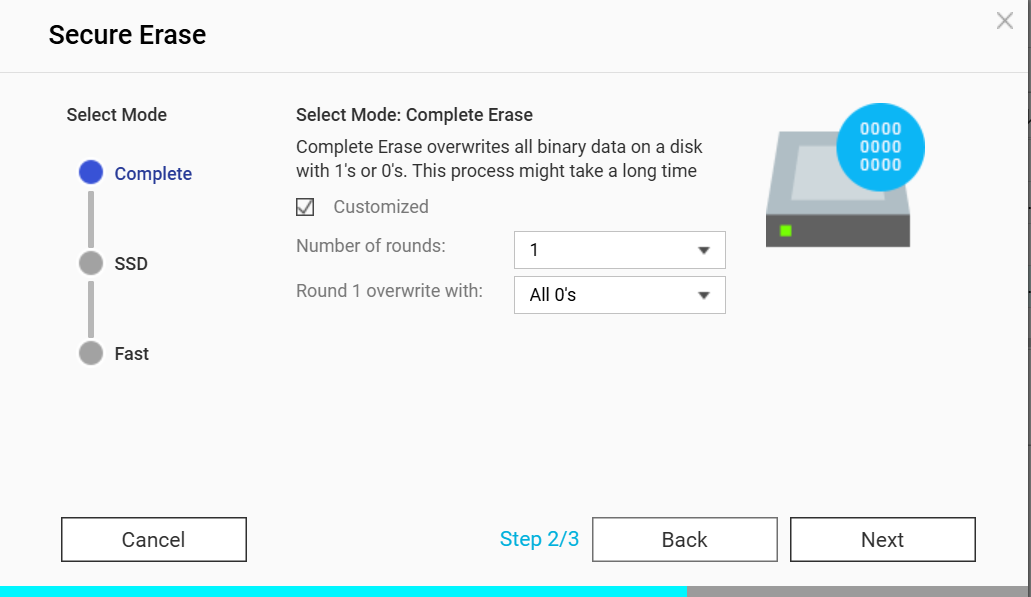
Choose from Complete, SSD, or Fast. For most HDDs, select Complete. You can enable Customized to adjust the number of overwrite rounds and the data pattern per round. Click Next when done.
Step 6 — Wizard Step 3/3: Confirm with admin password and apply
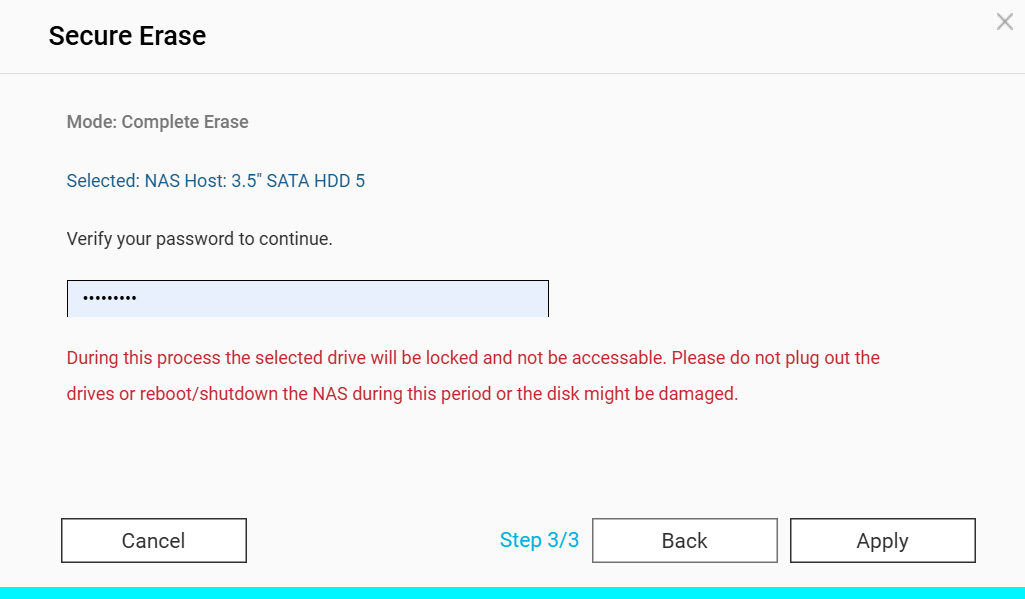
Review the summary (mode and selected drive). Enter your NAS administrator password, then click Apply. The drive will be locked immediately and the erase process begins.
⚠️ Do not unplug the drives or reboot/shutdown the NAS during this period or the disk might be damaged.
Step 7 — Monitor progress until completion
Progress is tracked per drive in the Disks view. Wait for each drive to report Erase completed. You can close the browser — the erase continues running on the NAS. Repeat steps 3–6 for any remaining drives.
Further Reading
What are the three erase modes?
Complete — Overwrites all binary data with 1's or 0's. Supports a customizable number of rounds (1–N) with selectable overwrite patterns per round (All 0's, All 1's, Random). This is the most flexible option and can emulate recognized standards by configuring multiple rounds. Takes longest but gives the highest assurance for HDDs.
SSD — Uses the drive's native ATA Secure Erase or NVMe Format command (where supported), letting the drive's own firmware erase all cells including those hidden from OS-level writes by wear leveling. The recommended mode for SSDs. Typically completes in minutes.
Fast — A quick single-pass erase. Suitable for low-risk scenarios where speed is a priority and the threat model does not include sophisticated data recovery attempts.
Still need help?
Post your question in QNAP Community. QNAP staff and experienced users will reply.


