Applicable Products
- All QNAP NAS devices that support the UPS function.
Overview
You can connect two or more QNAP NAS devices to a single uninterruptible power supply (UPS) by setting one as the UPS master (connected directly to the UPS) and the others as network UPS slaves (receiving UPS status over your network). This helps prevent abnormal shutdowns during power disruptions.
Procedure
To connect multiple NAS devices to one UPS, follow these steps:
Step 1: Connect and configure one NAS as the UPS master
- Use a USB cable to connect the UPS to the first NAS.
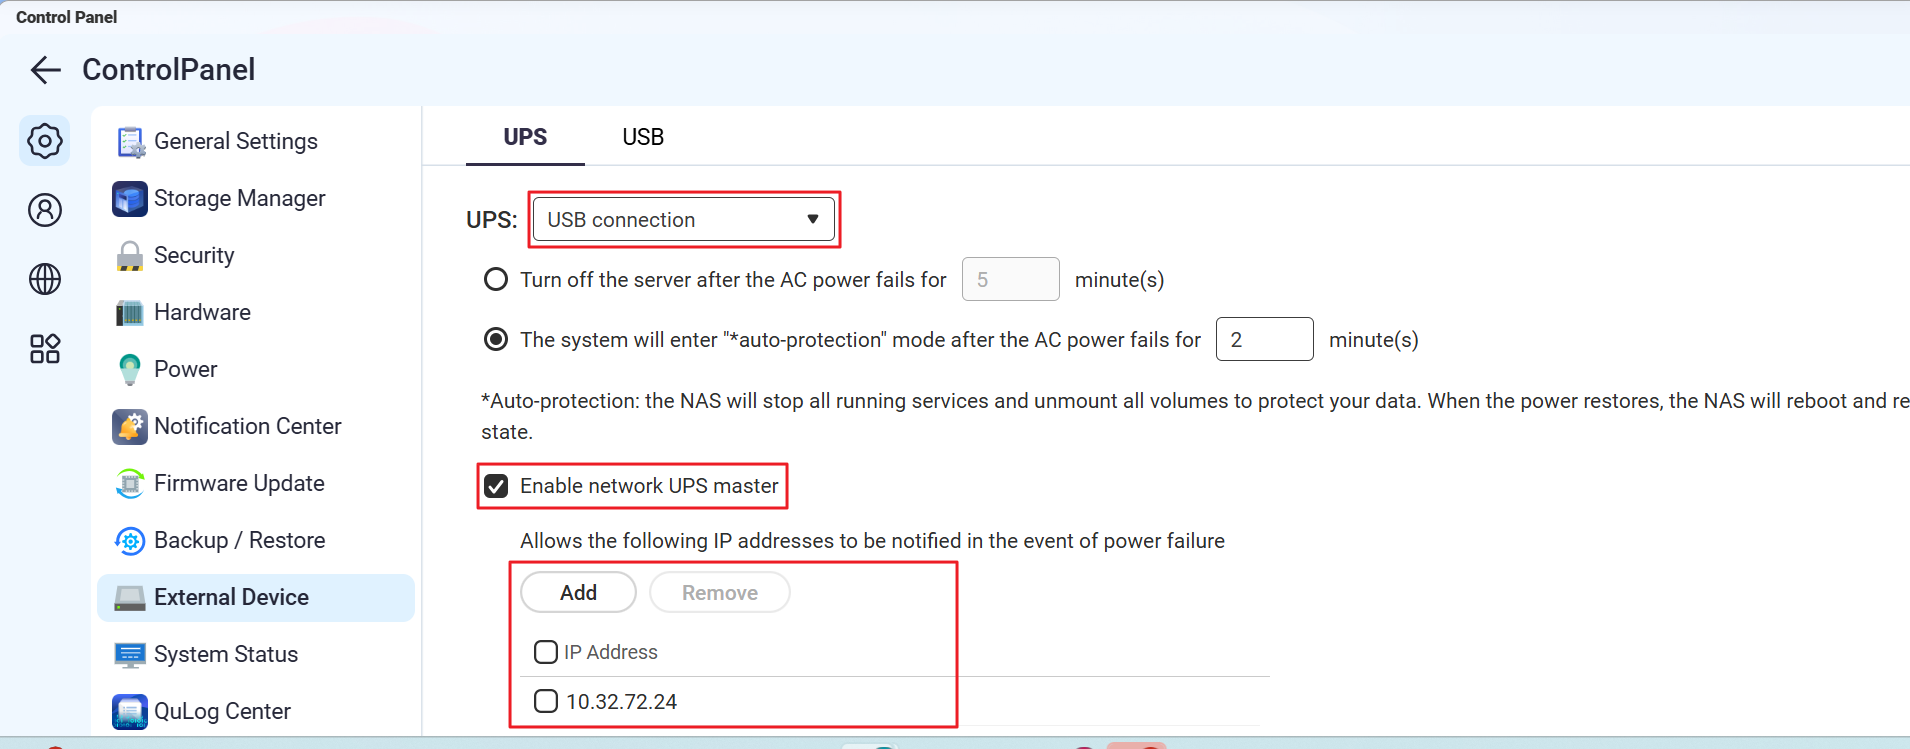
- On the first NAS, go to Control Panel > System > External Device > UPS.
- Select USB connection.
- Choose your desired power management option:
- Power off the server after the power fails for a specified period
- Allow NAS to enter auto-protection mode after the power fails for a specified period
- Select Enable network UPS master and enter the IP addresses of the other NAS devices that will act as slaves.
- Click Apply.

Step 2: Configure each additional NAS as a network UPS slave
A 'network UPS slave' is a NAS device that receives UPS status from the master NAS over your LAN.
- Ensure each slave NAS is on the same subnet as the master NAS.
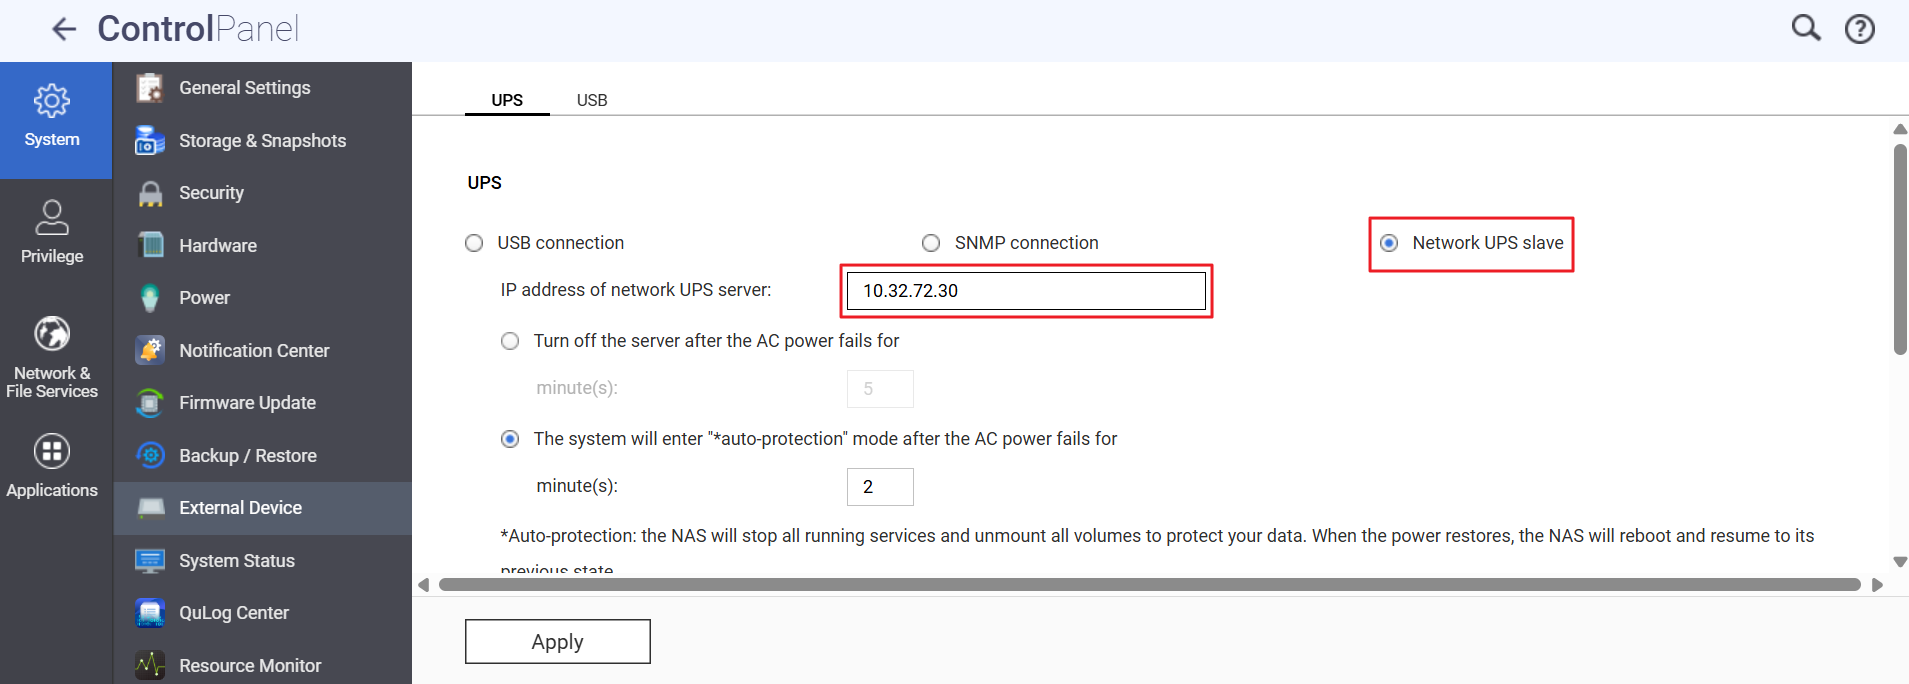
- On each slave NAS, go to Control Panel > System > External Device > UPS.
- Select Network UPS slave.
- Enter the IP address of the master NAS.
- Choose your preferred shutdown or auto-protection option.
- Click Apply.


Reminder: If network connectivity between any slave and the master is lost, the slave may not receive UPS notifications.
You can repeat the 'Configure as network UPS slave' steps for any additional NAS devices.
Test your setup: After configuring, safely simulate a power failure to verify that all NAS devices respond appropriately.
Further Reading
対象製品
- All QNAP NAS devices that support the UPS function.
概要
2 台以上の QNAP NAS デバイスを 1 台の無停電電源装置 (UPS) に接続するには、1 台を UPS マスター (UPS に直接接続) として設定し、他のデバイスをネットワーク UPS スレーブ (ネットワーク経由で UPS ステータスを受信) として設定します。これにより、電源障害時の異常なシャットダウンを防ぐことができます。
手順
複数の NAS デバイスを 1 台の UPS に接続するには、次の手順に従います:
ステップ 1: 1 台の NAS を UPS マスターとして接続および構成する
- USB ケーブルを使用して UPS を最初の NAS に接続します。
- 最初の NAS で、次に移動します コントロールパネル > システム > 外部デバイス > UPS。
- 選択 USB 接続。
- 希望する電源管理オプションを選択します:
- 指定された期間後に電源が切れた場合にサーバーをシャットダウンする
- 指定された期間後に電源が切れた場合に NAS を自動保護モードにする
- 選択 ネットワーク UPS マスターを有効にする そして、スレーブとして動作する他の NAS デバイスの IP アドレスを入力します。
- 適用をクリックします。
ステップ 2: 各追加の NAS をネットワーク UPS スレーブとして構成する
'ネットワーク UPS スレーブ' は、LAN 経由でマスター NAS から UPS ステータスを受信する NAS デバイスです。
- 各スレーブ NAS がマスター NAS と同じサブネットにあることを確認します。
- 各スレーブ NAS で、次に移動します コントロールパネル > システム > 外部デバイス > UPS。
- 選択 ネットワーク UPS スレーブ。
- マスター NAS の IP アドレスを入力します。
- 希望するシャットダウンまたは自動保護オプションを選択します。
- 適用をクリックします。
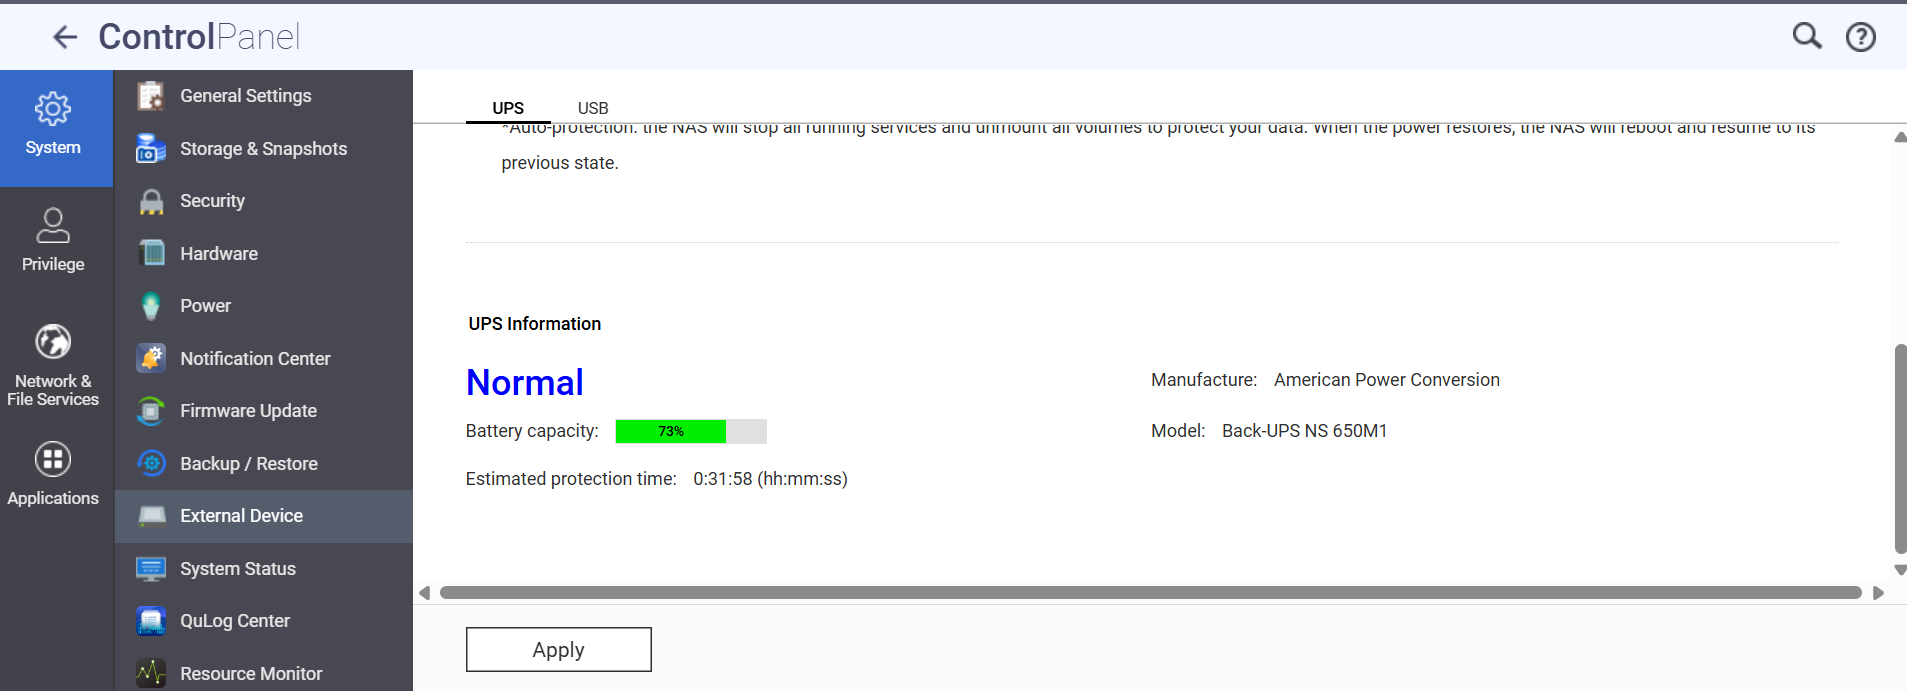
リマインダー: スレーブとマスター間のネットワーク接続が失われた場合、スレーブは UPS 通知を受信できない可能性があります。
追加の NAS デバイスに対して 'ネットワーク UPS スレーブとして構成する' 手順を繰り返すことができます。
セットアップをテストします: 構成後、安全に電源障害をシミュレートして、すべての NAS デバイスが適切に応答することを確認します。
さらに読む