Applicable Products
- All QNAP NAS devices that support the UPS function.
Overview
You can connect two or more QNAP NAS devices to a single uninterruptible power supply (UPS) by setting one as the UPS master (connected directly to the UPS) and the others as network UPS slaves (receiving UPS status over your network). This helps prevent abnormal shutdowns during power disruptions.
Procedure
To connect multiple NAS devices to one UPS, follow these steps:
Step 1: Connect and configure one NAS as the UPS master
- Use a USB cable to connect the UPS to the first NAS.
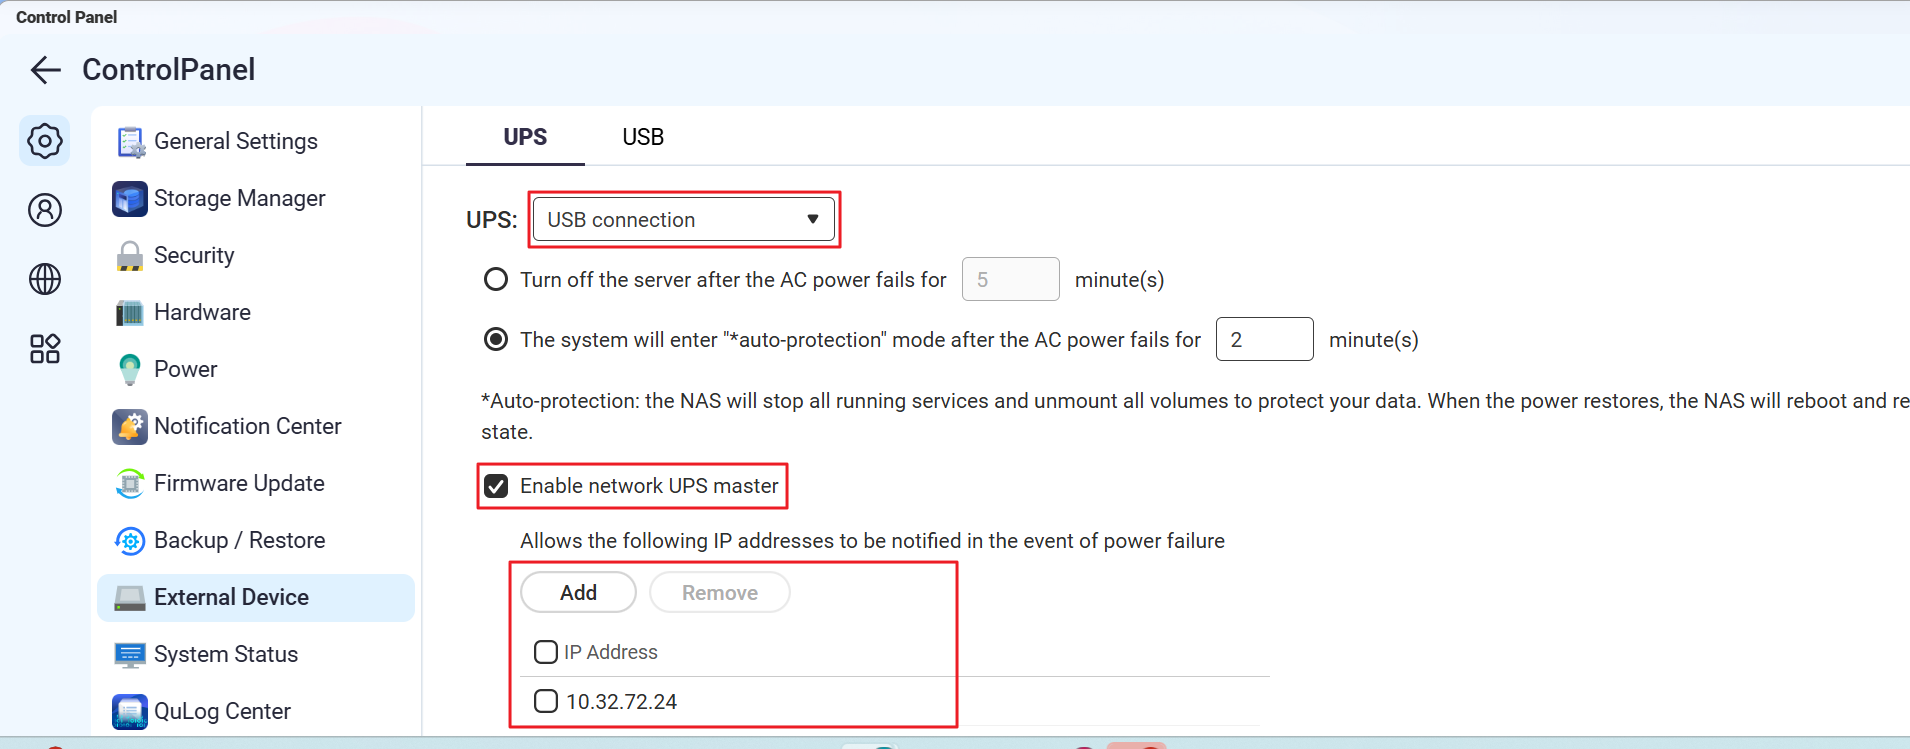
- On the first NAS, go to Control Panel > System > External Device > UPS.
- Select USB connection.
- Choose your desired power management option:
- Power off the server after the power fails for a specified period
- Allow NAS to enter auto-protection mode after the power fails for a specified period
- Select Enable network UPS master and enter the IP addresses of the other NAS devices that will act as slaves.
- Click Apply.

Step 2: Configure each additional NAS as a network UPS slave
A 'network UPS slave' is a NAS device that receives UPS status from the master NAS over your LAN.
- Ensure each slave NAS is on the same subnet as the master NAS.
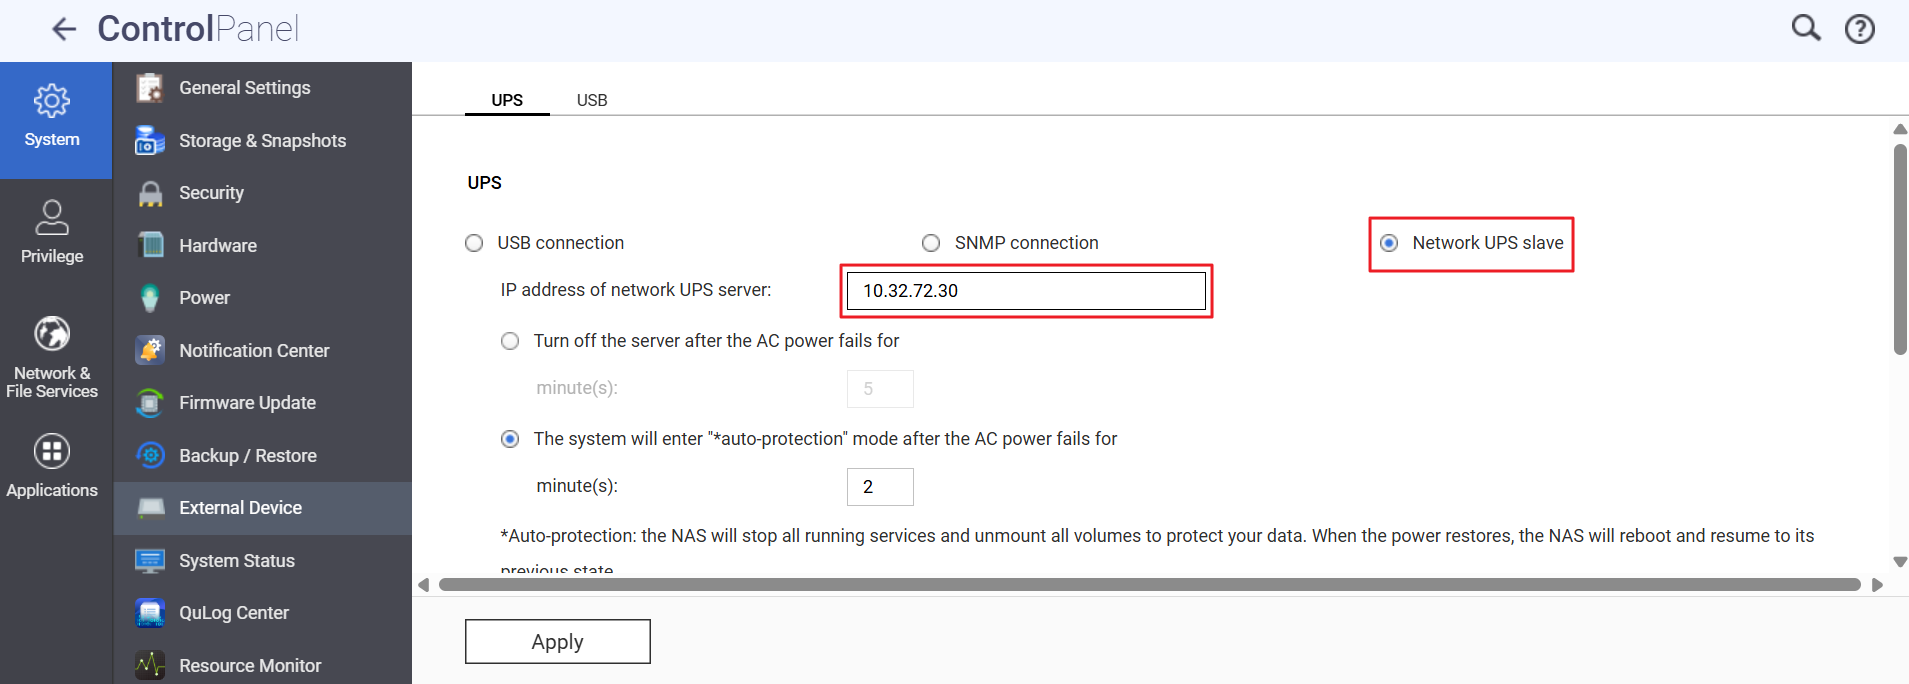
- On each slave NAS, go to Control Panel > System > External Device > UPS.
- Select Network UPS slave.
- Enter the IP address of the master NAS.
- Choose your preferred shutdown or auto-protection option.
- Click Apply.


Reminder: If network connectivity between any slave and the master is lost, the slave may not receive UPS notifications.
You can repeat the 'Configure as network UPS slave' steps for any additional NAS devices.
Test your setup: After configuring, safely simulate a power failure to verify that all NAS devices respond appropriately.
Further Reading
적용되는 제품
- All QNAP NAS devices that support the UPS function.
개요
하나의 무정전 전원 공급 장치(UPS)에 두 개 이상의 QNAP NAS 장치를 연결할 수 있으며, 하나는 UPS 마스터(UPS에 직접 연결)로 설정하고 다른 장치는 네트워크 UPS 슬레이브(네트워크를 통해 UPS 상태 수신)로 설정합니다. 이는 전원 장애 시 비정상적인 시스템 종료를 방지하는 데 도움이 됩니다.
절차
여러 NAS 장치를 하나의 UPS에 연결하려면 다음 단계를 따르십시오:
1단계: 하나의 NAS를 UPS 마스터로 연결 및 구성
- USB 케이블을 사용하여 UPS를 첫 번째 NAS에 연결합니다.
- 첫 번째 NAS에서 제어판 > 시스템 > 외부 장치 > UPS로 이동합니다.
- 선택합니다 USB 연결.
- 원하는 전원 관리 옵션을 선택하십시오:
- 지정된 기간 동안 정전이 발생하면 서버를 끕니다
- 지정된 기간 동안 정전이 발생하면 NAS가 자동 보호 모드로 전환되도록 허용합니다
- 선택합니다 네트워크 UPS 마스터 활성화 그리고 슬레이브 역할을 할 다른 NAS 장치의 IP 주소를 입력합니다.
- 적용을 클릭합니다.
2단계: 각 추가 NAS를 네트워크 UPS 슬레이브로 구성
'네트워크 UPS 슬레이브'는 LAN을 통해 마스터 NAS로부터 UPS 상태를 수신하는 NAS 장치입니다.
- 각 슬레이브 NAS가 마스터 NAS와 동일한 서브넷에 있는지 확인하십시오.
- 각 슬레이브 NAS에서 제어판 > 시스템 > 외부 장치 > UPS로 이동합니다.
- 선택합니다 네트워크 UPS 슬레이브.
- 마스터 NAS의 IP 주소를 입력합니다.
- 선호하는 시스템 종료 또는 자동 보호 옵션을 선택하십시오.
- 적용을 클릭합니다.
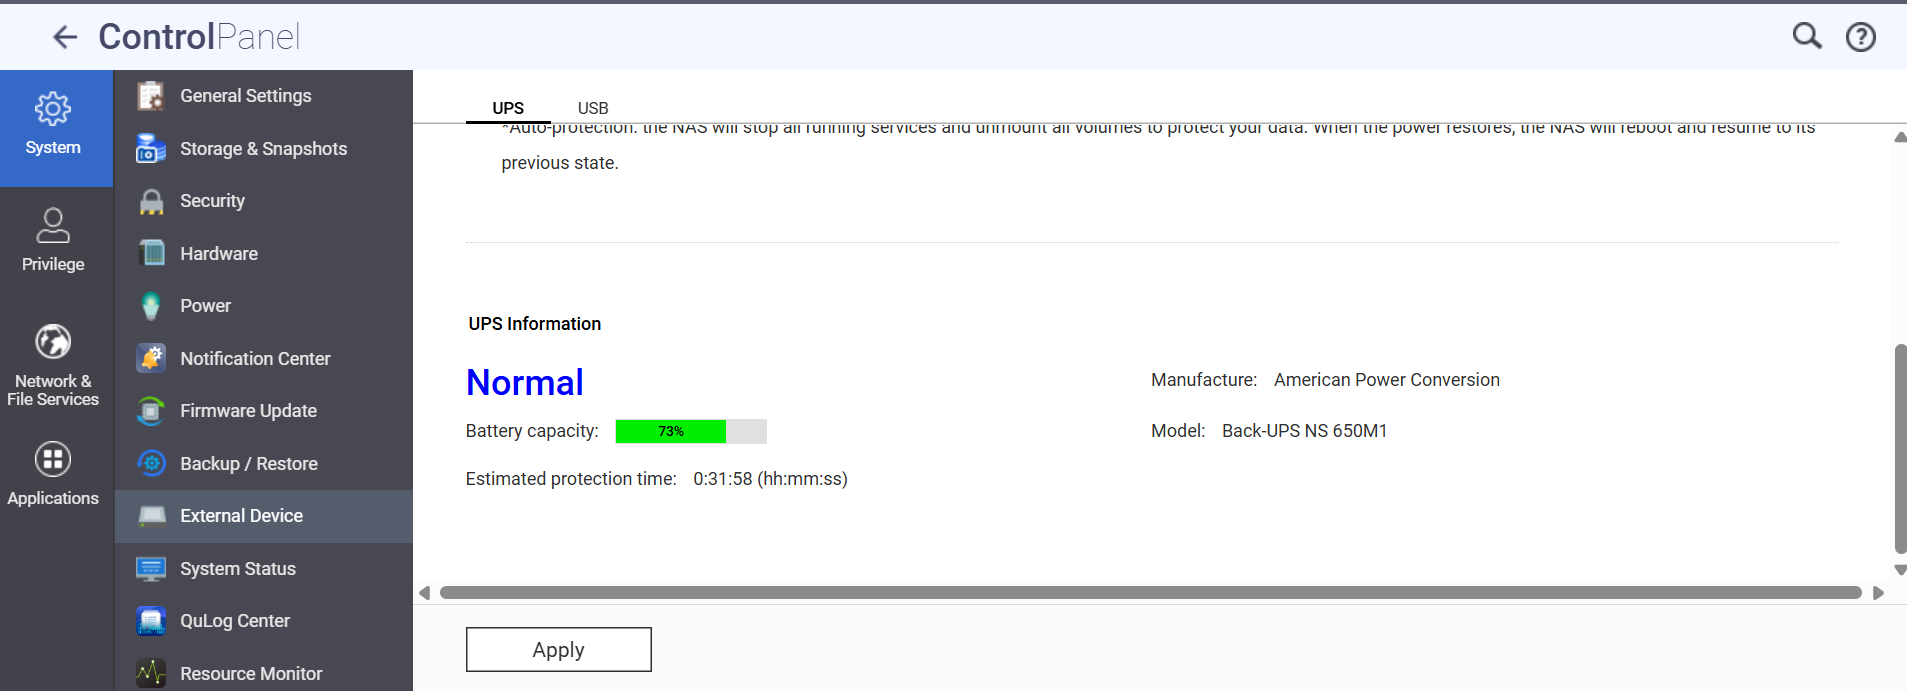
알림: 슬레이브와 마스터 간의 네트워크 연결이 끊어지면 슬레이브가 UPS 알림을 받지 못할 수 있습니다.
추가 NAS 장치에 대해 '네트워크 UPS 슬레이브로 구성' 단계를 반복할 수 있습니다.
설정을 테스트하십시오: 구성 후, 안전하게 전원 장애를 시뮬레이션하여 모든 NAS 장치가 적절히 반응하는지 확인하십시오.
추가 읽기