


How to Set Up NVIDIA GPU to Accelerate Your QVR AI Analysis
Last modified date:
2026-07-14
Applicable Products
- QVR Face 2.2.0 or later versions
- QVR Human 2.6.0 or later versions
- NVIDIA RTX 20~50 GPU Cards
Introduction
You can now use an NVIDIA GPU to accelerate QVR AI analysis. Follow the steps below to set up your NAS to enable GPU acceleration for QVR Face/QVR Human.
Details
Step 1. Download & install NVIDIA GPU Kernel Driver.
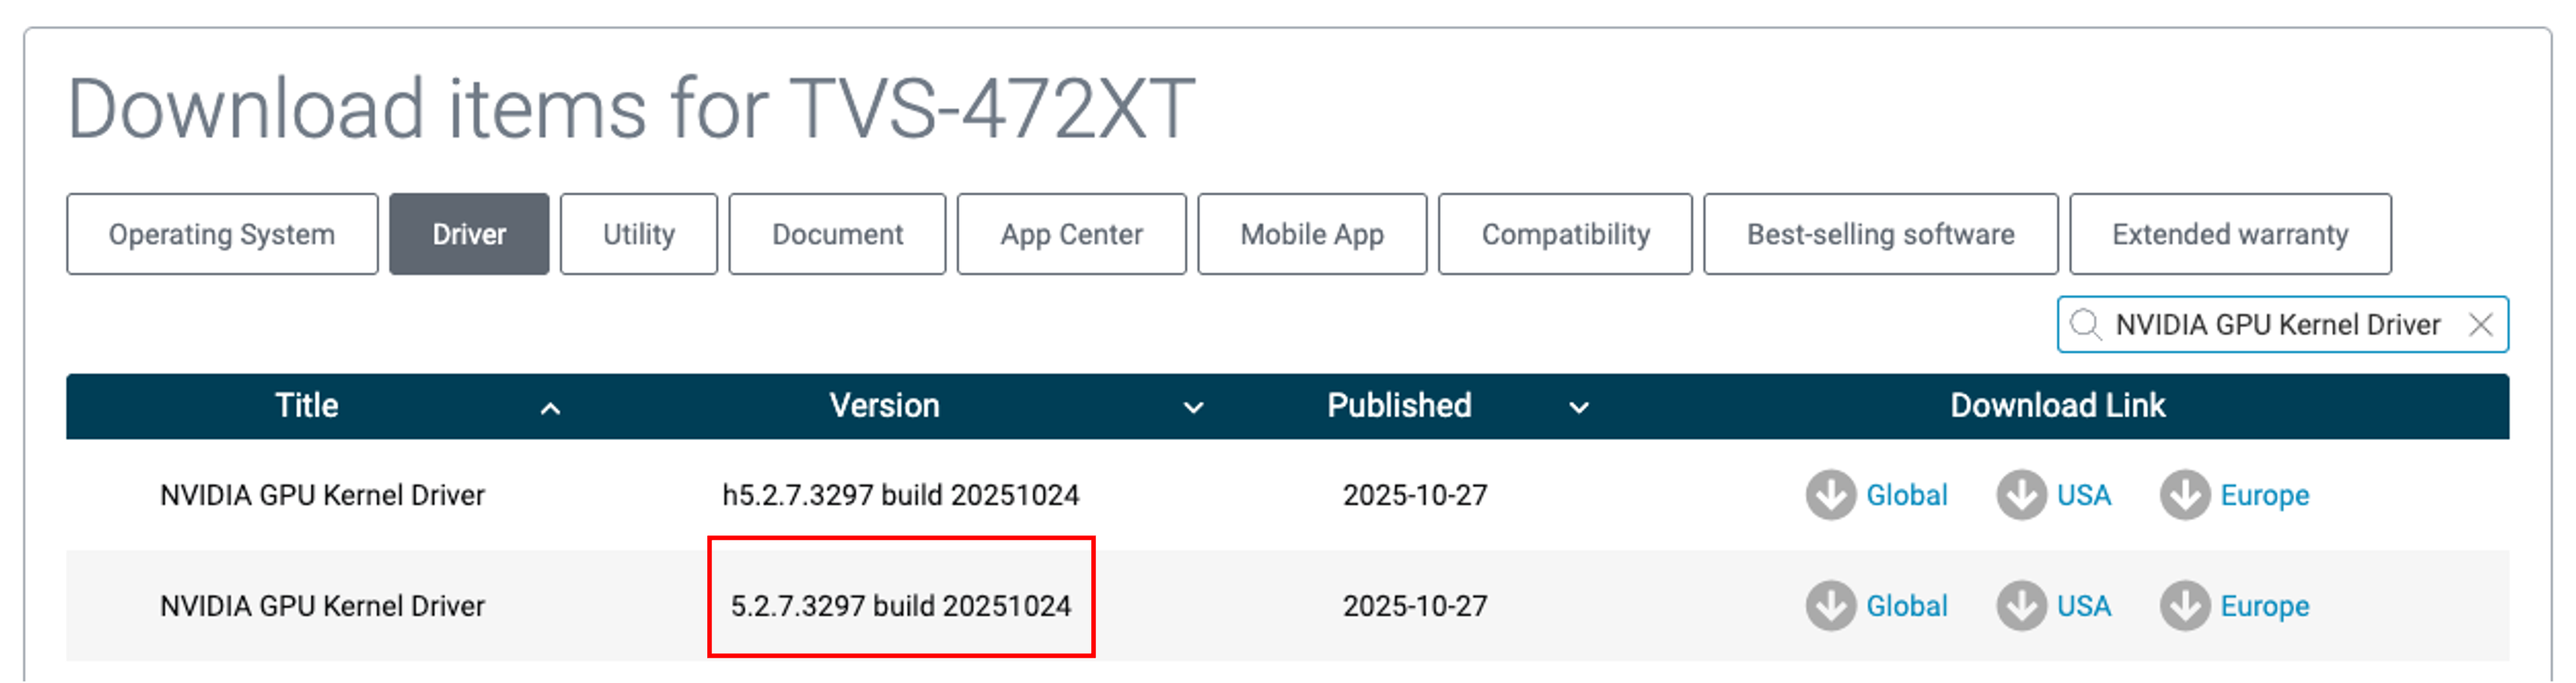
- Go to QNAP Download Center.
- Select your product type, number of bays, and NAS model. The compatible items for your NAS will appear.
- Click the "Driver" tab and search for "NVIDIA GPU Kernel Driver".
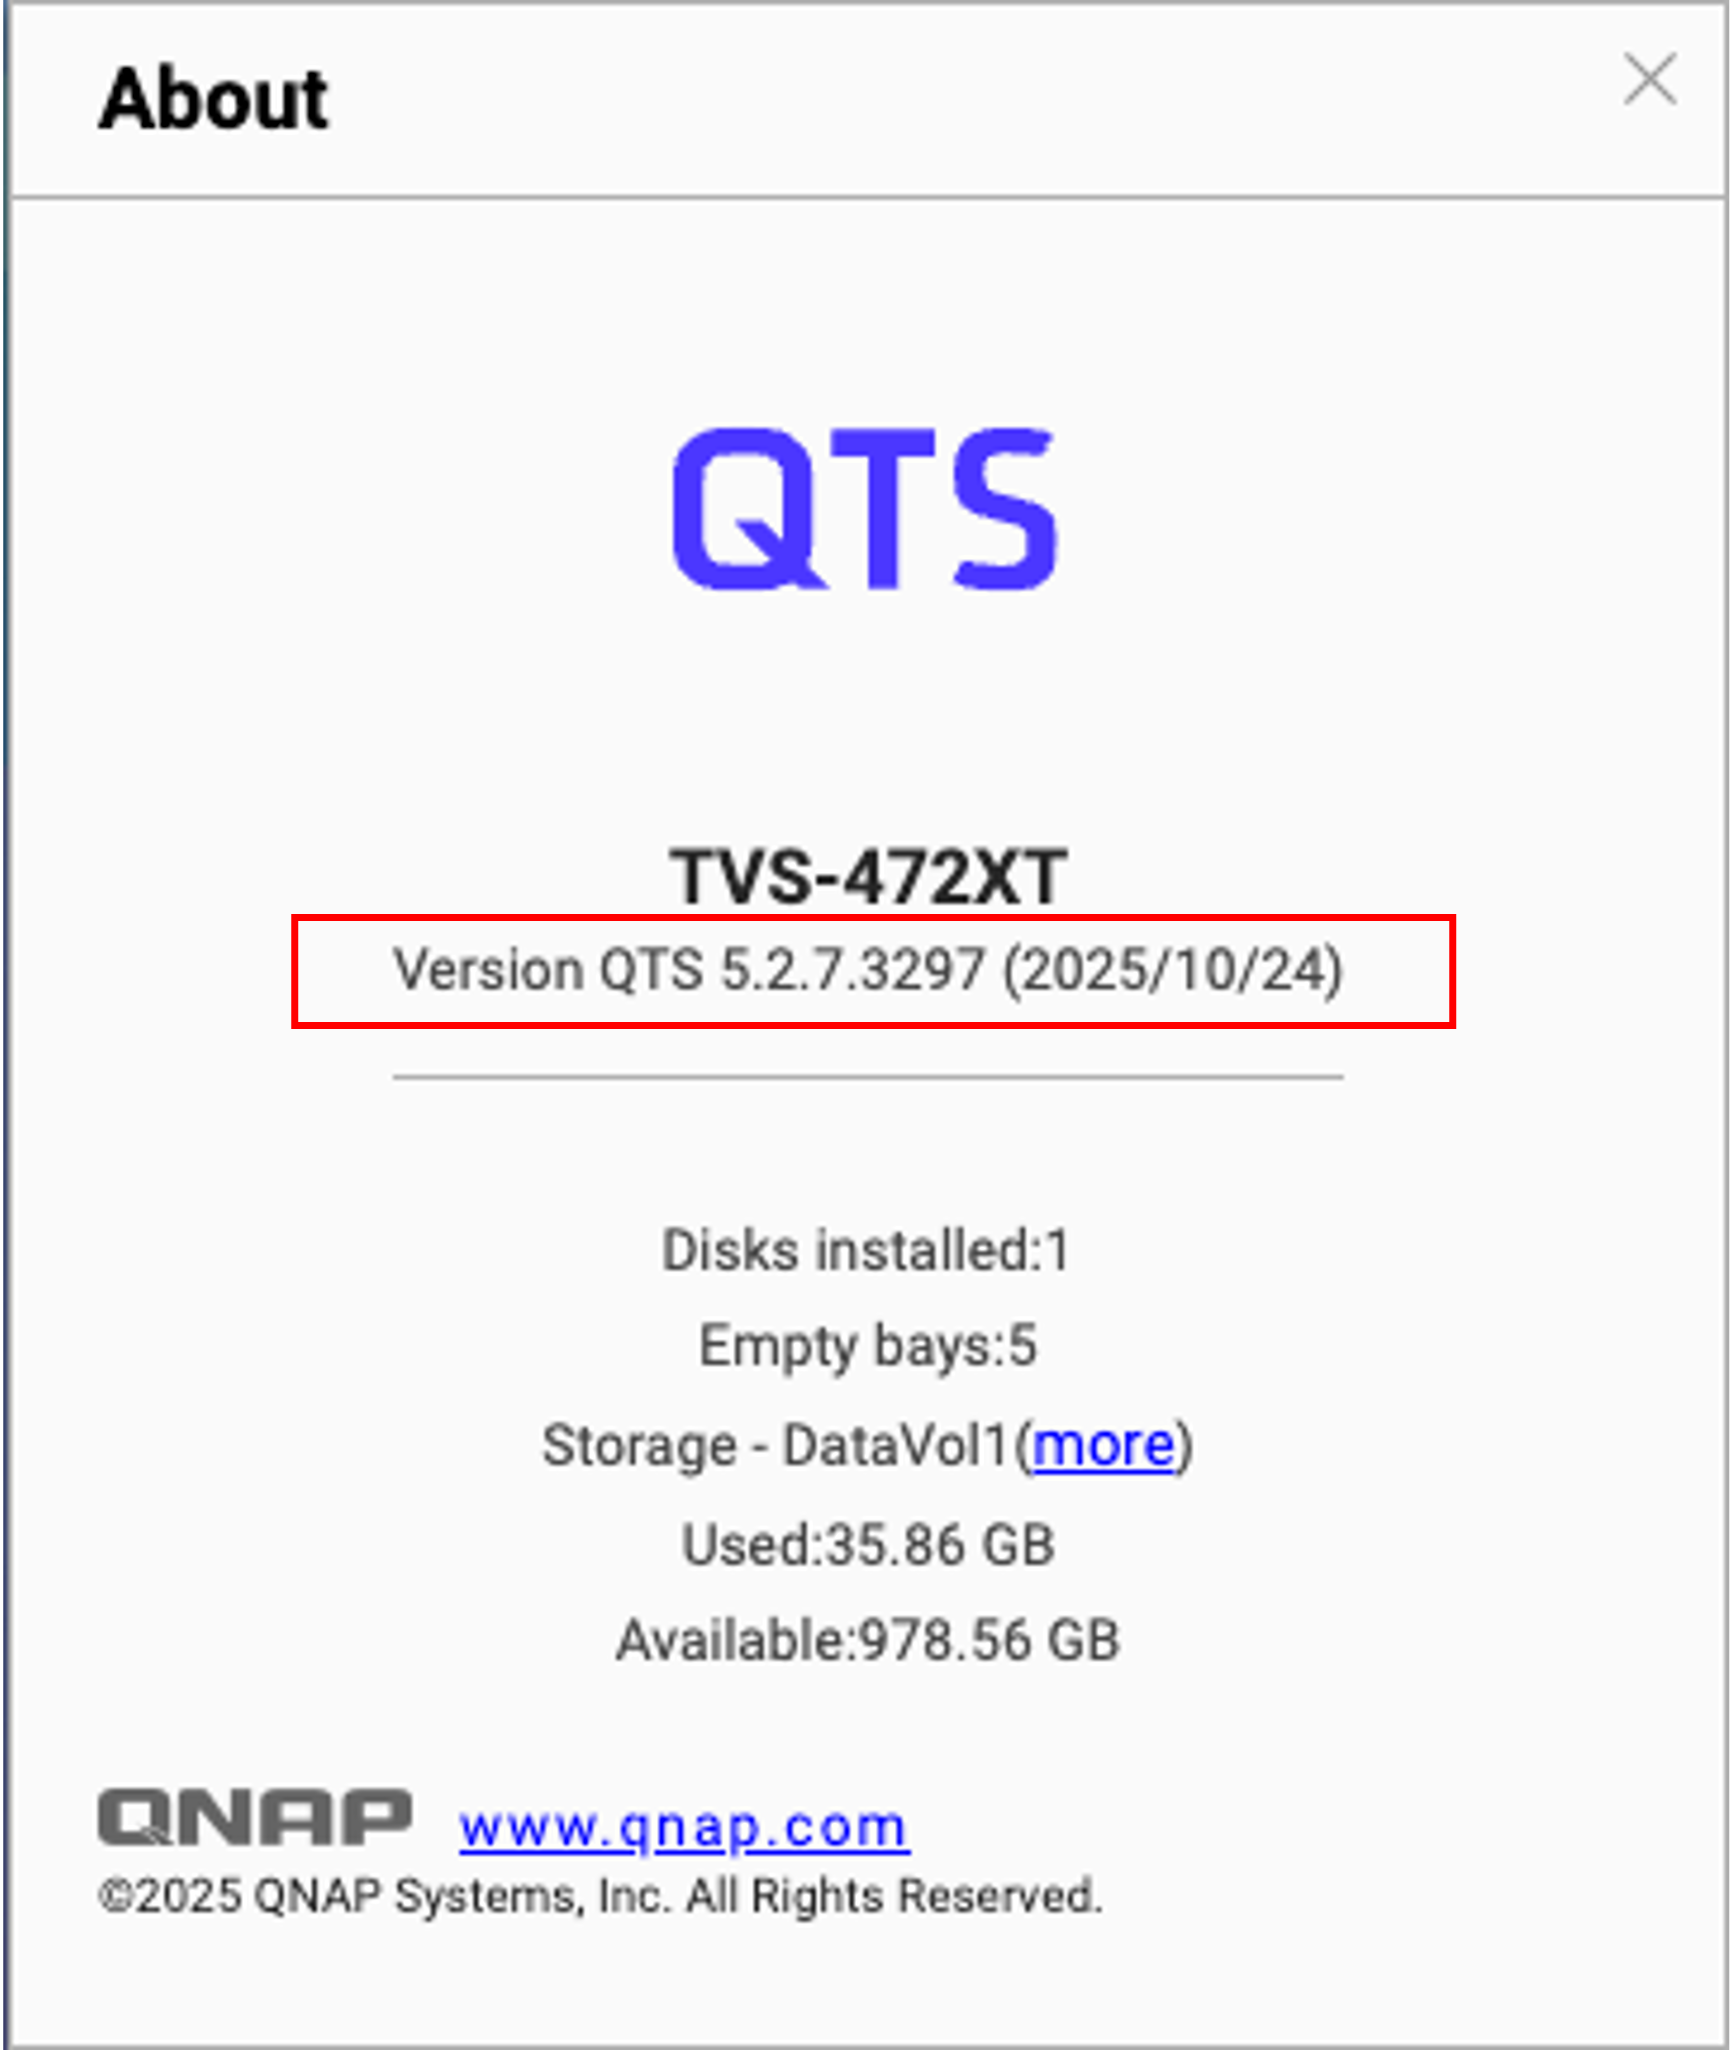
- Download the driver version that matches your NAS operating system (QTS or QuTS hero).
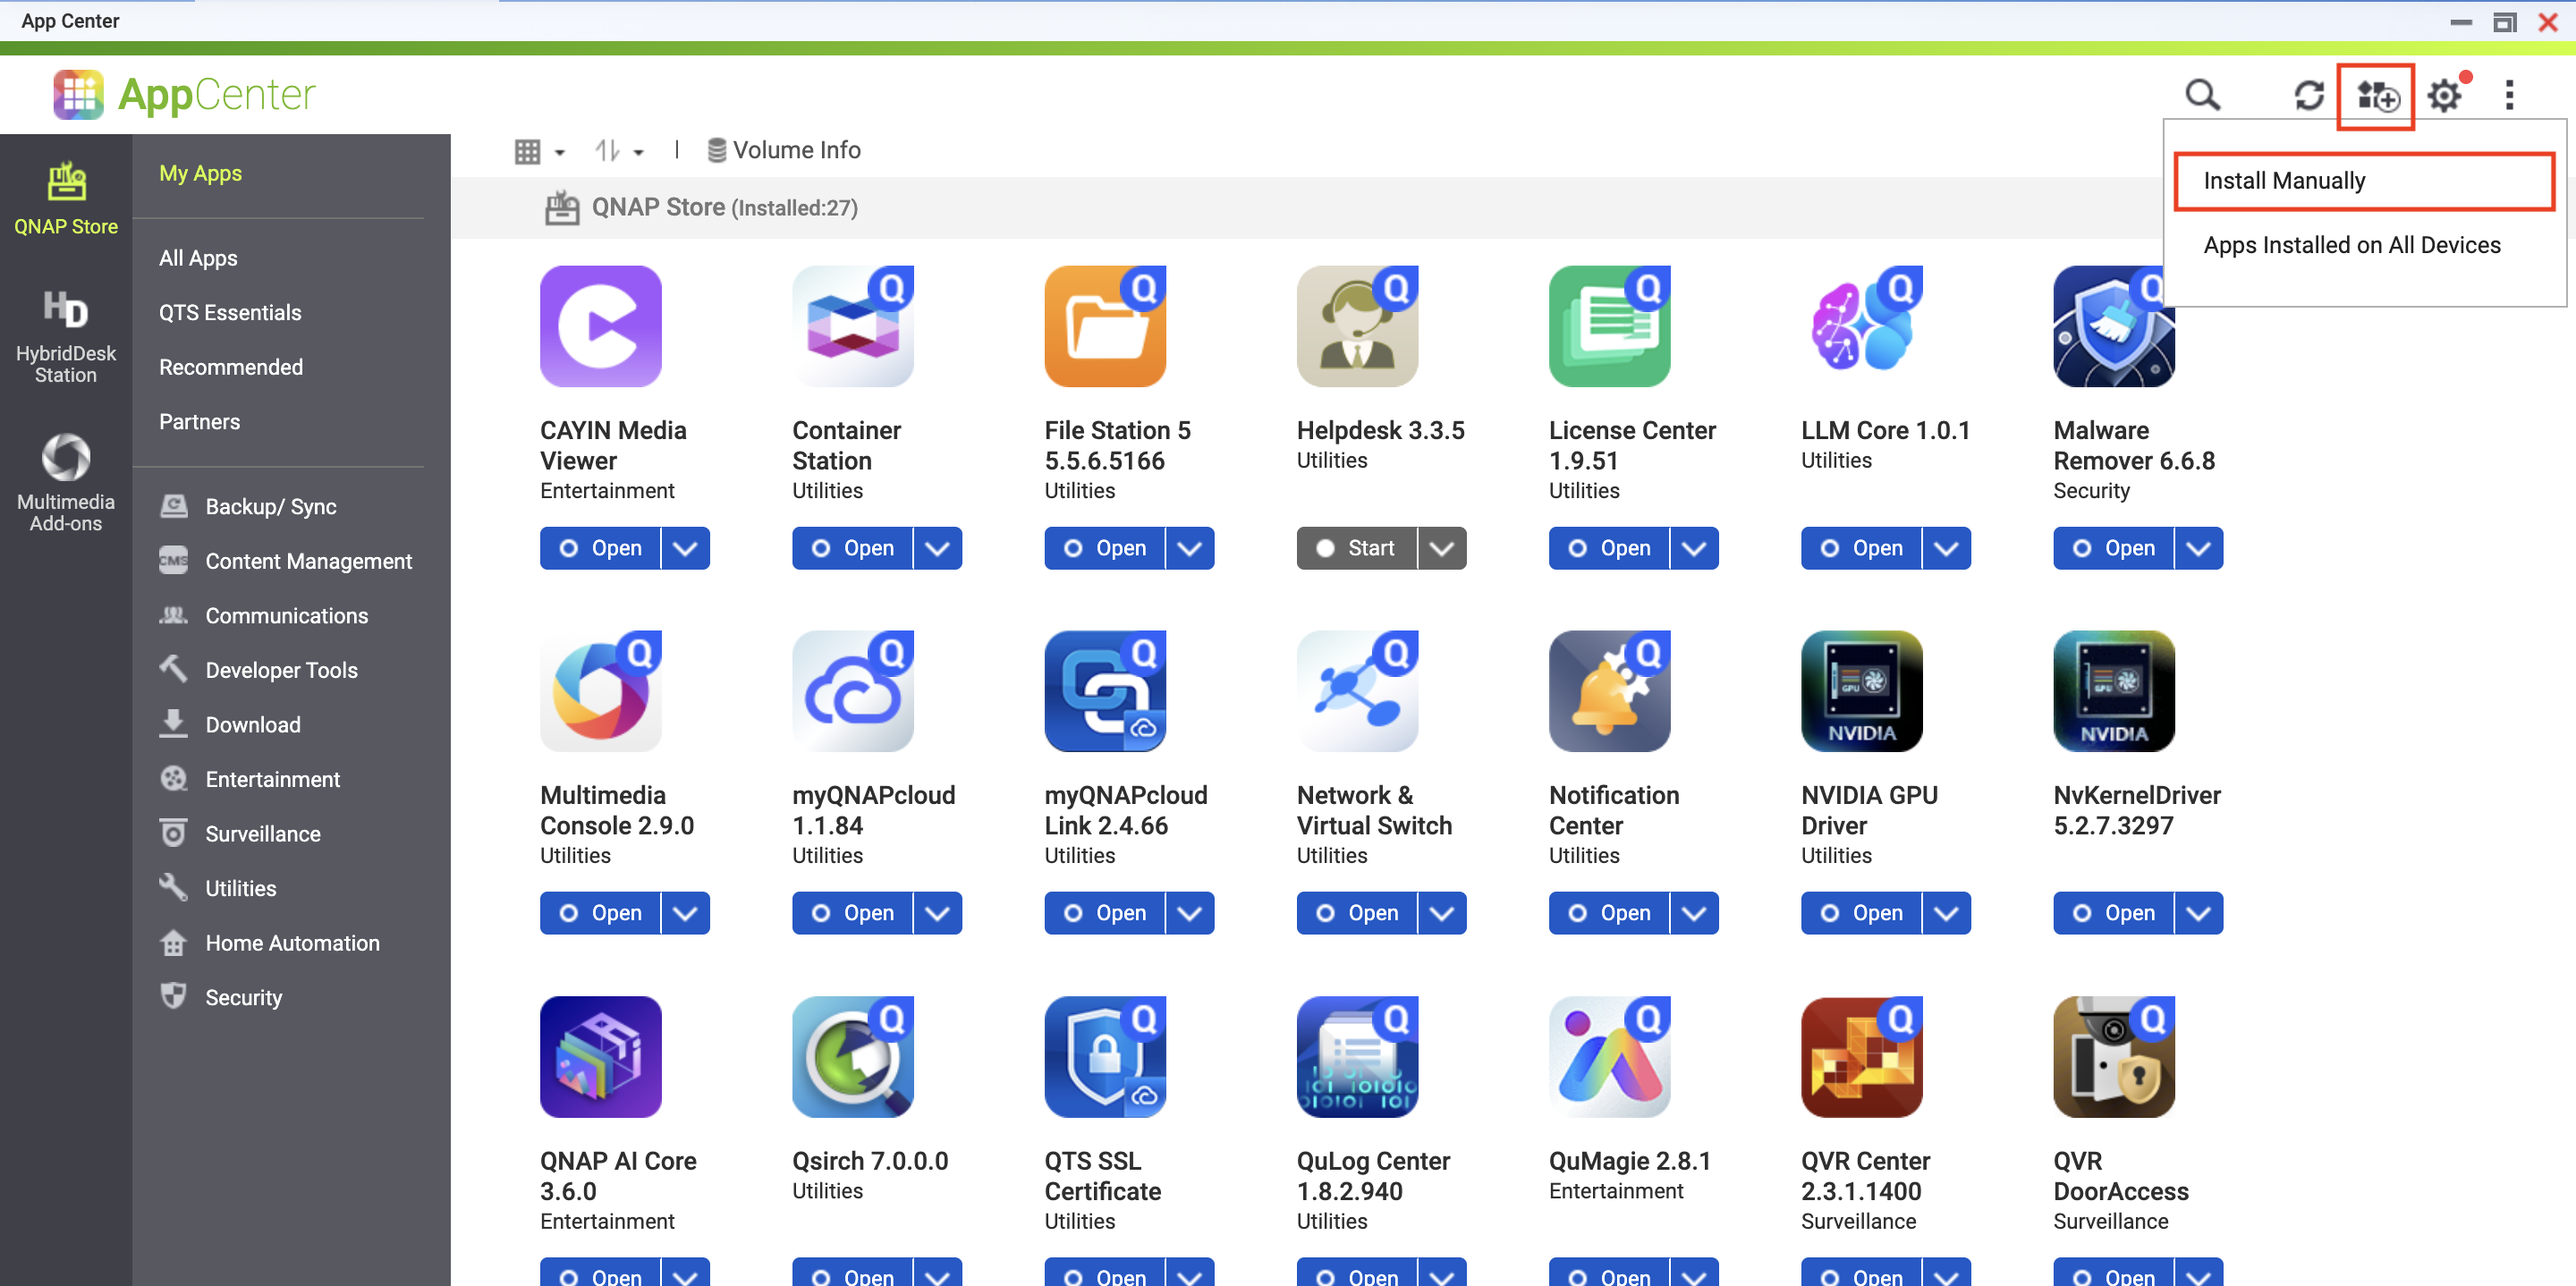
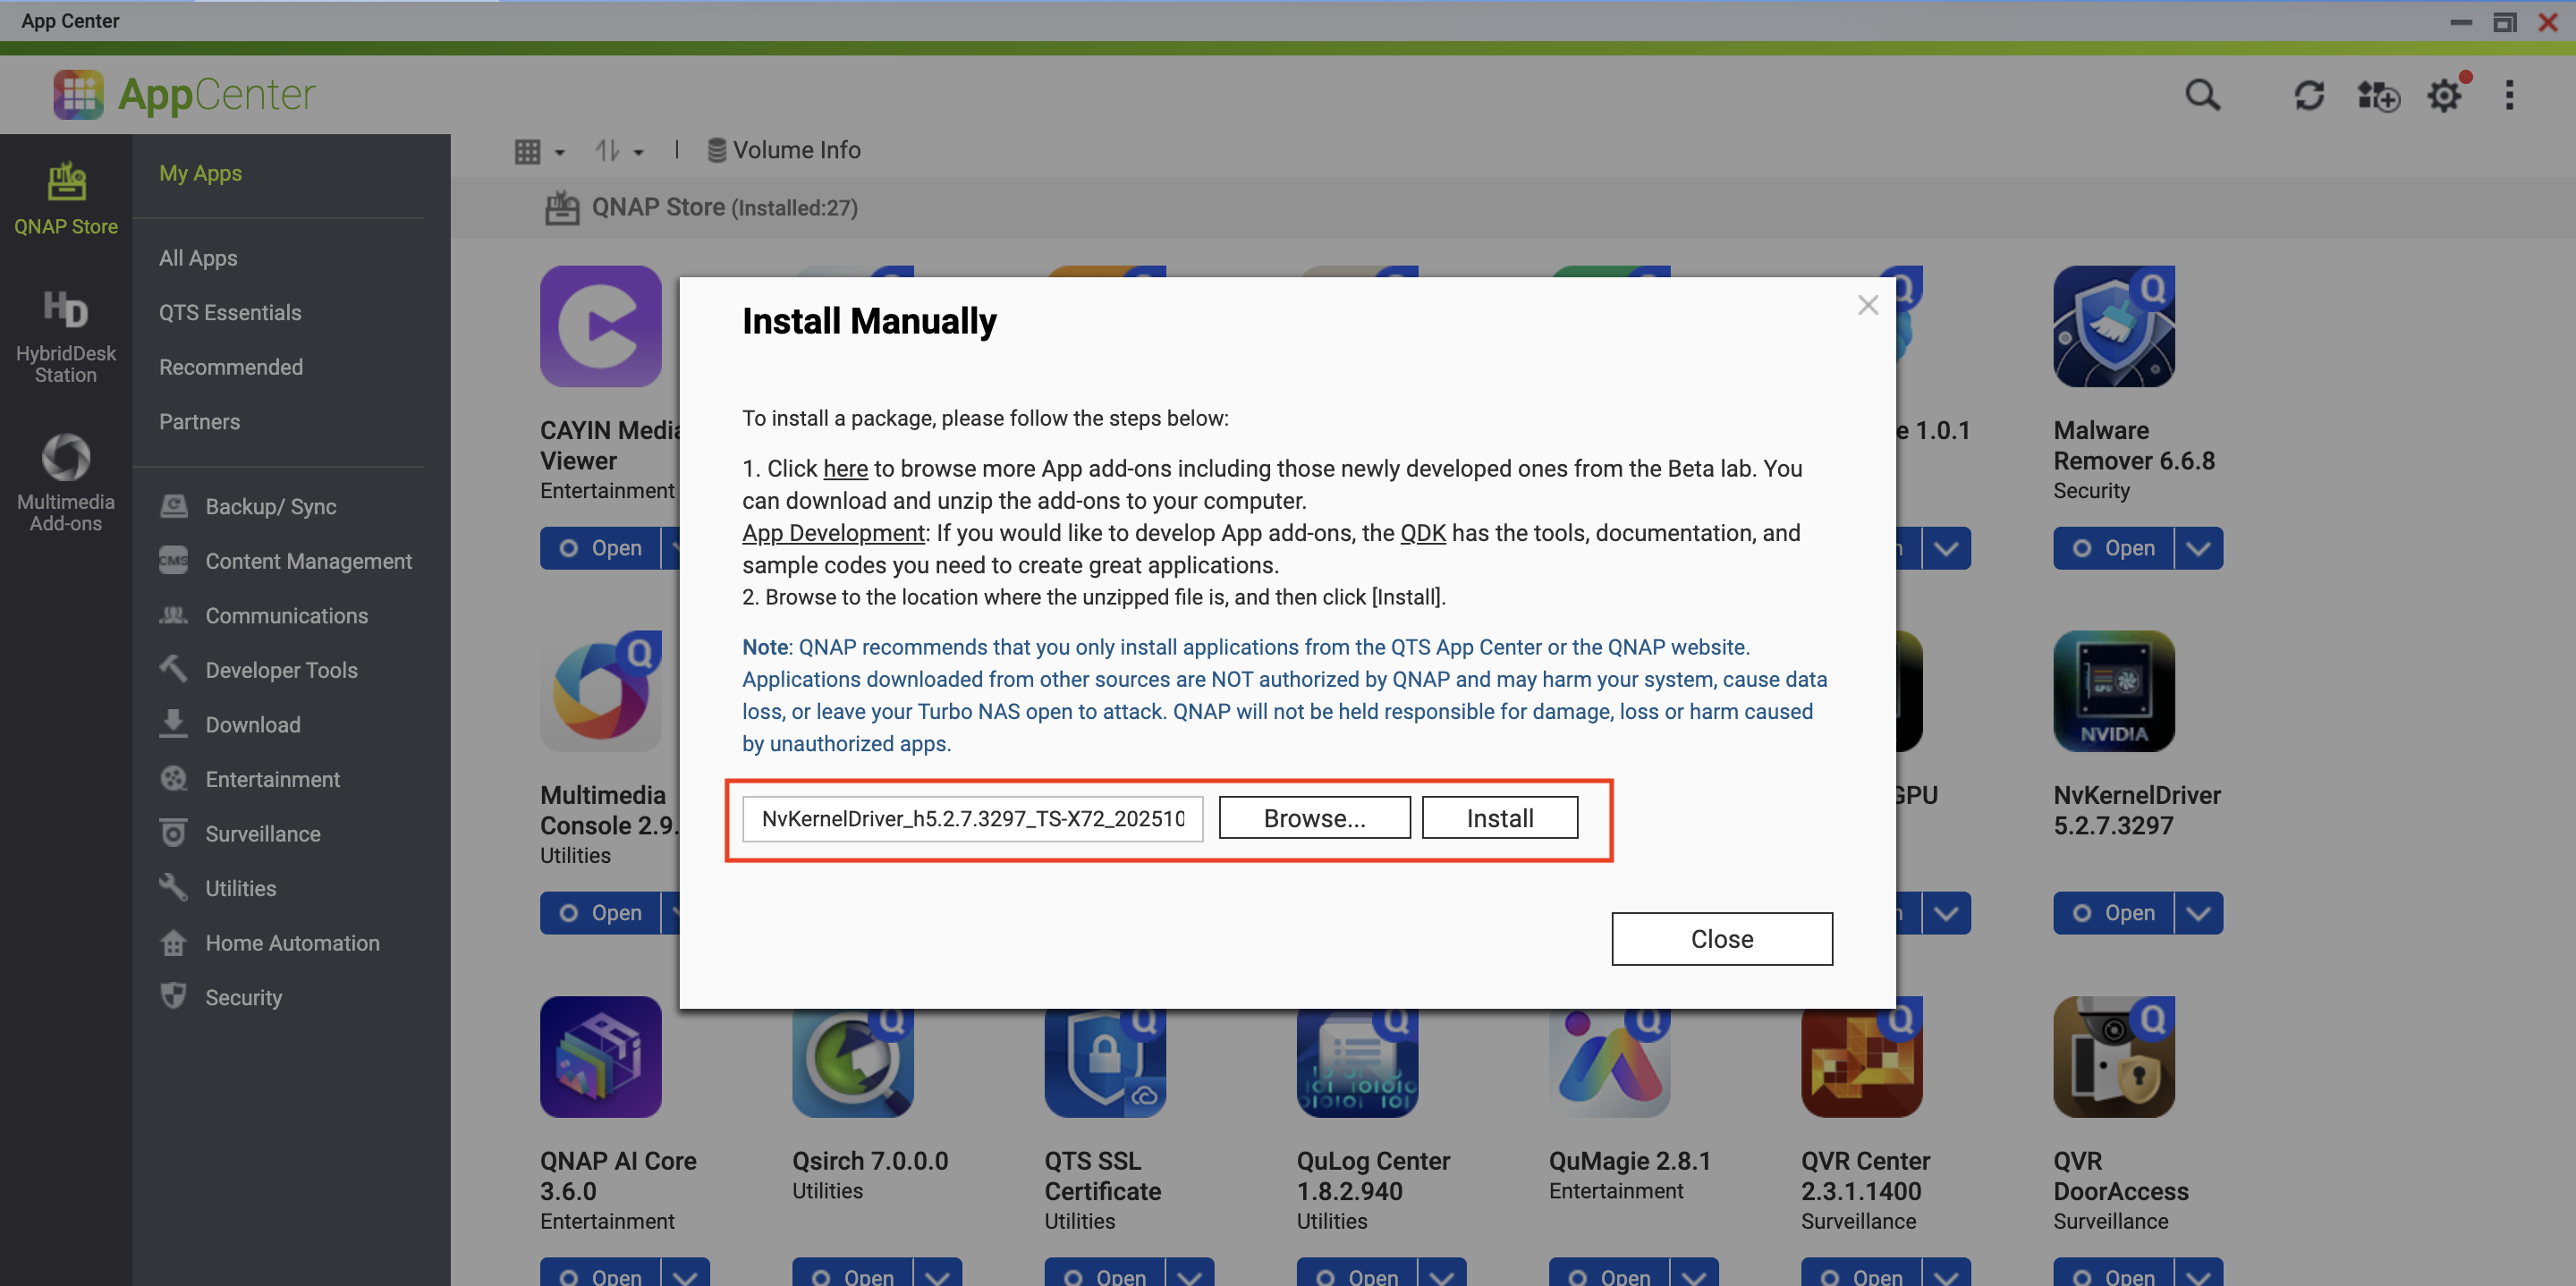
- Manually install the NVIDIA GPU Kernel Driver you just downloaded to your NAS.
Important
The driver version must match your OS version. The driver will automatically update with your OS system if your NAS can access the Internet. If not, you must manually update the NVIDIA GPU Kernel Driver to keep them synchronized.
Step 2. Download & install QVR AI Library and NVIDIA GPU Driver.
- Open App Center on your NAS.
- Download and install the following packages:
- QVR AI Library (formerly known as NVIDIA CUDA Library for QVR)
- NVIDIA GPU Driver
Step 3. Install & verify your NVIDIA GPU card.
- Shut down you NAS and install your NVIDIA GPU card.
- Go to Control Panel > System > Hardware > Hardware Resources.
- Check if the NVIDIA GPU is shown on the list.


