


Boot up the NAS without disks and insert the disks without initializing the NAS (Applied on QTS firmware prior to 4.4.1)
Procedure
1. Power off your NAS and remove all the disks. Then power it back on without any disks.
Important: Please make a note about the drive order, you will have to plug them back in in the same order.
2. Download Qfinder Pro and install it on your computer.
3. After the NAS has been powered on again you will hear a short beep and then a long beep.
4. Run Qfinder Pro and let it find your NAS, here we can know the IP of NAS is 10.5.10.118.
Important: If you have data on your disks you don’t want to lose, do not re-initialize the NAS when Qfinder Pro prompts you with this message.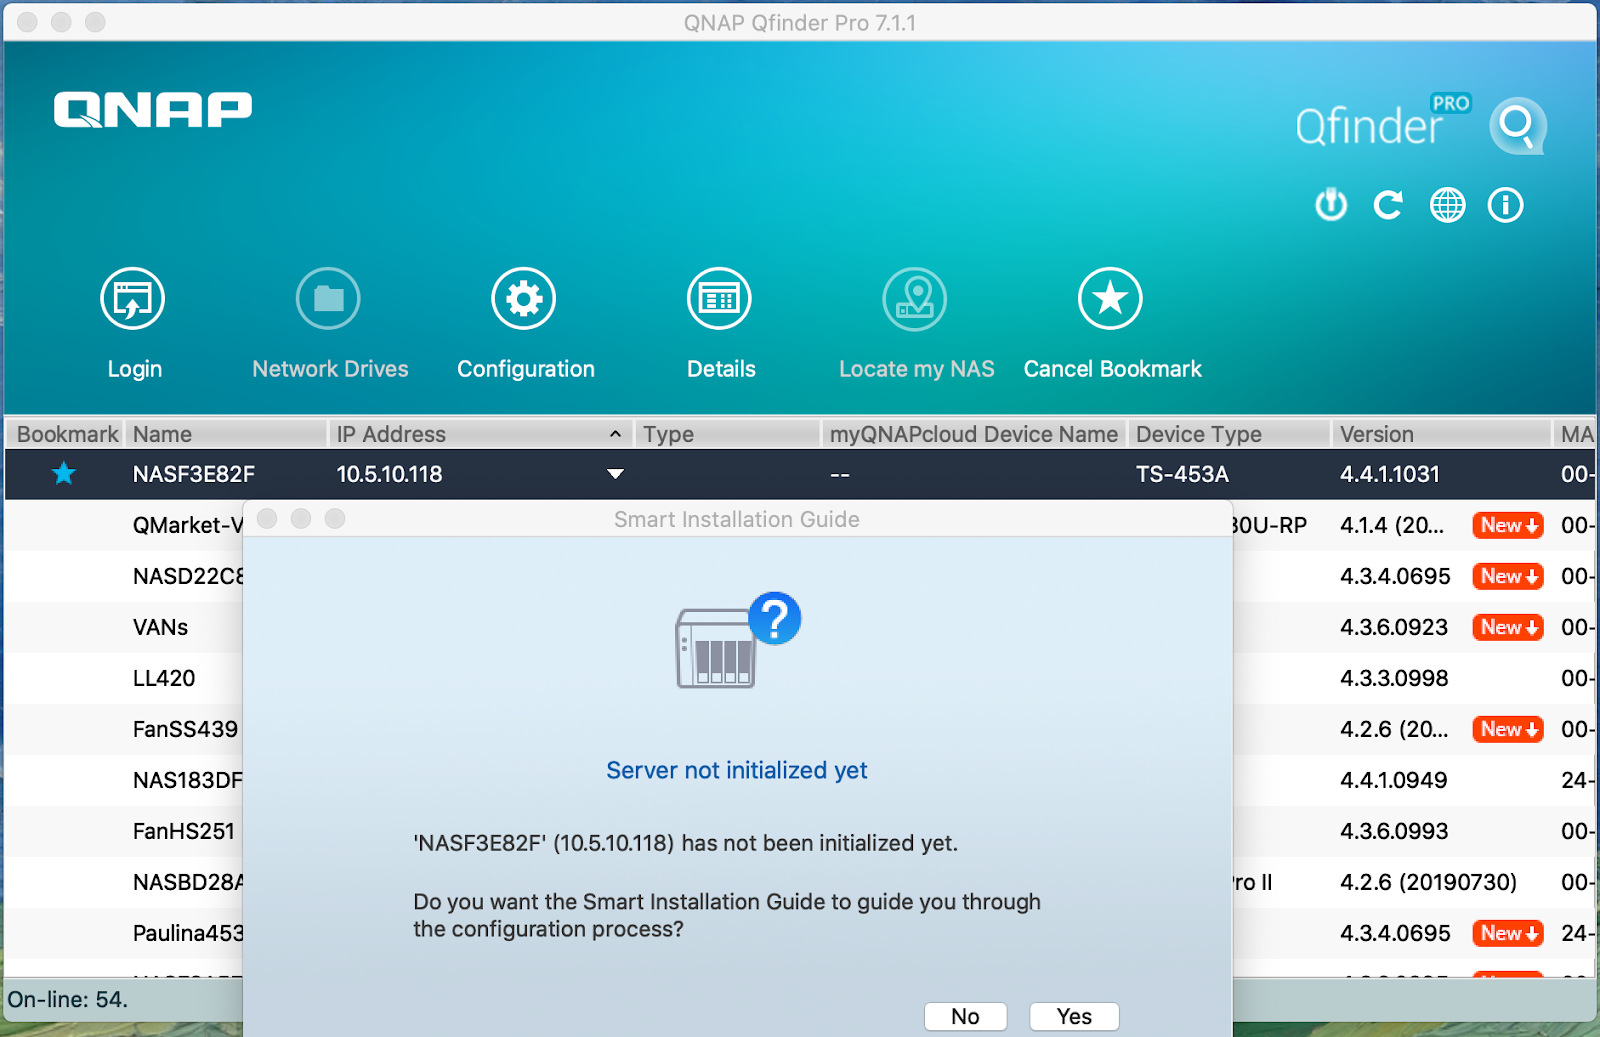
If you can’t find the NAS in Qfinder, this could be caused by there is no DHCP server in your network. Suggest referring to this link to set up a direct connection test.
5.SSH access to the NAS and use admin/admin to login

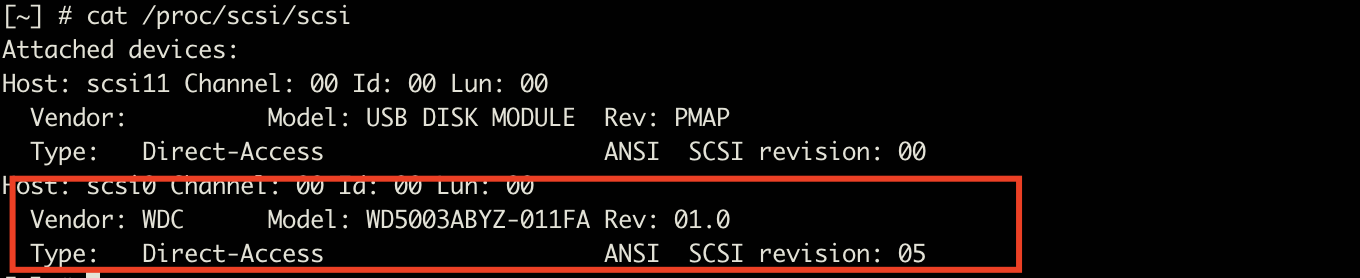
After login please run cat /proc/scsi/scsi
If the NAS is a legacy model, there should be no information after running the command.

If the NAS is a HAL model, USB DISK MODULE will show..

6. After running this command, please plug the disks back in the NAS one-by-one and in their original order. You will see the LED lights above each drive turn into a solid green colour.
需要進一步協助,歡迎前往官方社群發文,與其他用戶及 QNAP 專家交流。 前往 QNAP 官方社群


