


How do I run Roon Server in Container Station?
Applicable Products
- QTS / QuTS hero (x86_64 / amd64-based NAS models that support Container Station)
- Container Station
Overview
This FAQ describes how to deploy and run Roon Server on a QNAP NAS using Container Station and Docker. After completing the setup, you can connect to Roon Server from Roon or Roon Remote app on your phone, tablet, or computer.
System Requirements
- x86_64 (amd64) CPU architecture (ARM-based NAS models are not supported)
- At least 4 GB of memory
- SSD storage is recommended for the Roon Server database
- Container Station is installed on the NAS
- A Roon account and license
- A client device (phone, tablet, or computer) on the same local network as the NAS
Procedure
1. Install Container Station
- On the QTS or QuTS hero desktop, open App Center.
- Search and install Container Station.
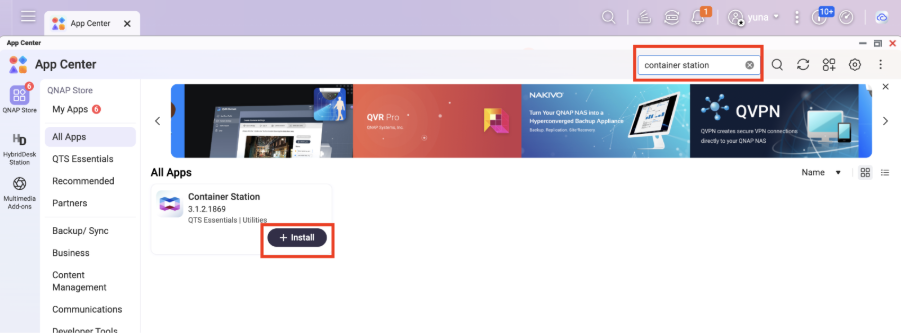
- After installation, open Container Station.
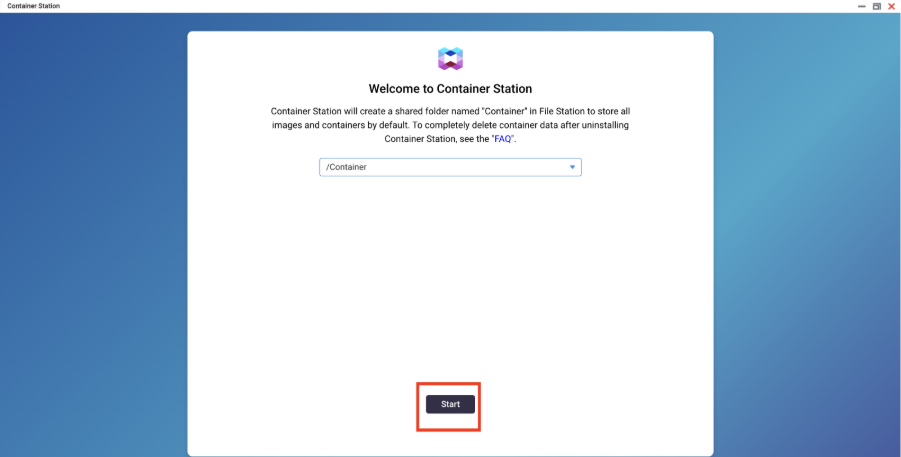
2. Create an application in Container Station
- In Container Station, click Explore on the top-right corner.
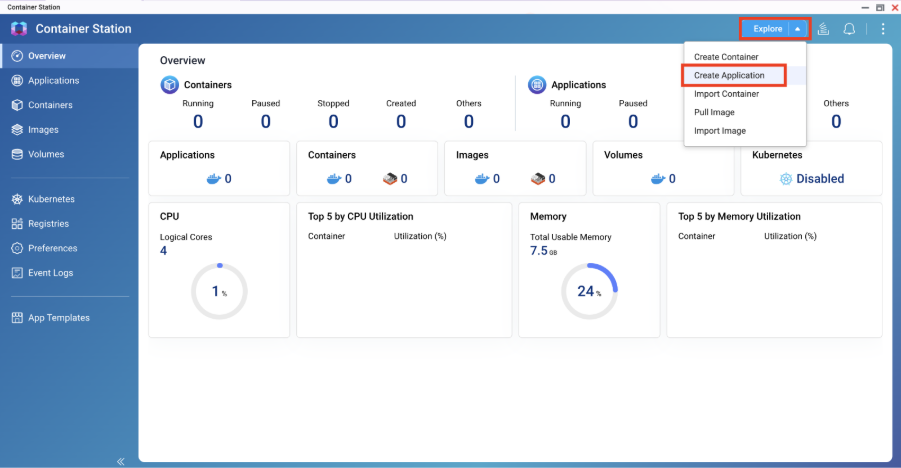
- On the drop-down list, select Create Application.
3. Generate the Docker Compose file for Roon Server
- In a web browser, go to RoonServer Docker Configuration Generator.
- In the platform list, choose QNAP.
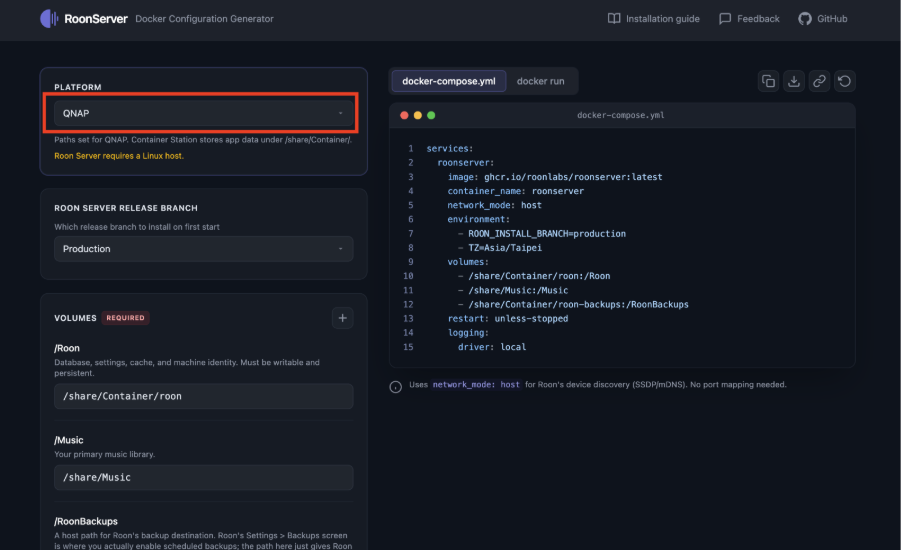
- Configure volume settings according to your needs.
If you do not have a music folder on the NAS
By default, Roon sets your music library to a folder called Music. If you want to follow this setup, create a corresponding shared folder on the NAS.
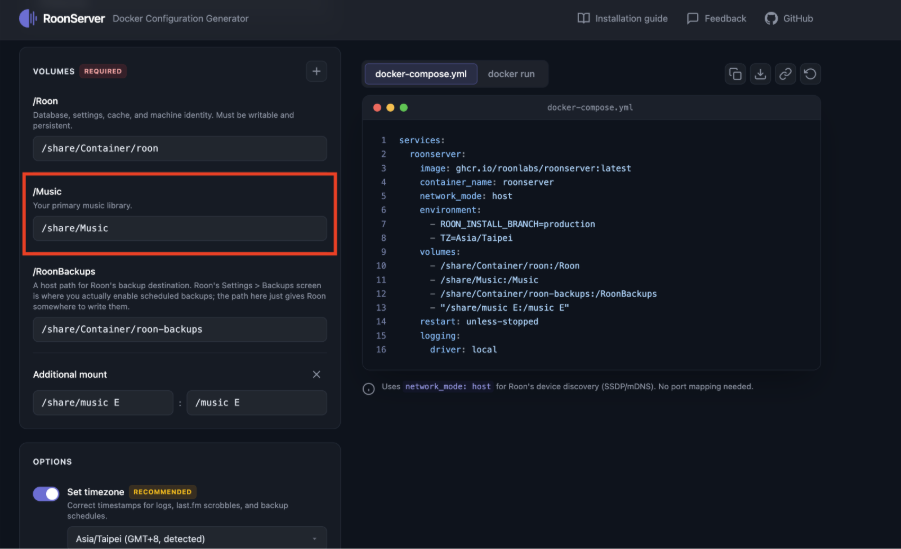
On the NAS, go to File Station and create a shared folder named Music. This will be the shared folder where you place music files.
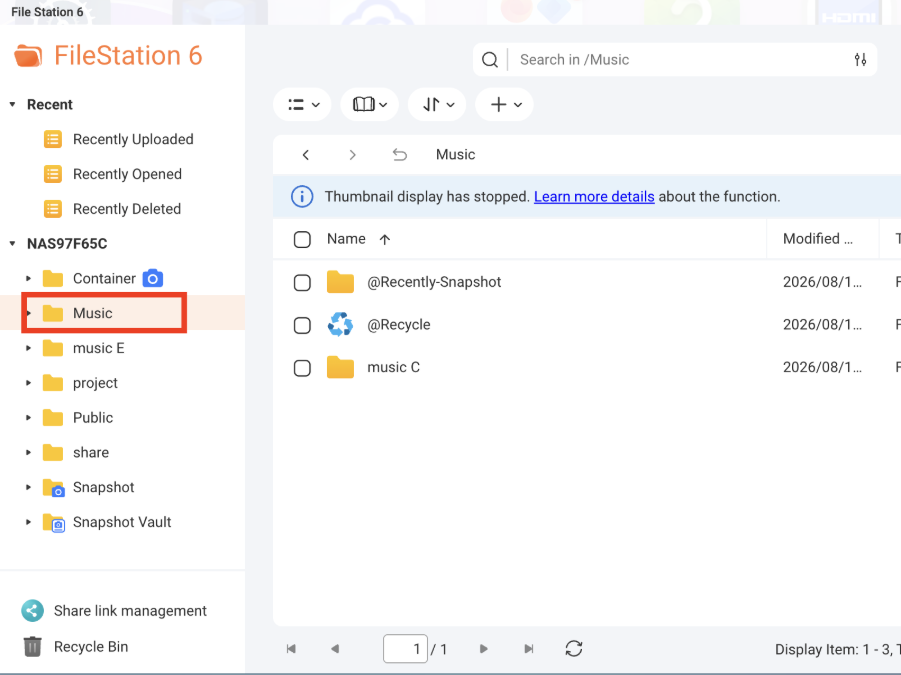 TipMake sure the folder path is consistent between the NAS and Roon Server. Please note that folder names are case-sensitive.
If you want to create an extra folder, click + to specify another path.
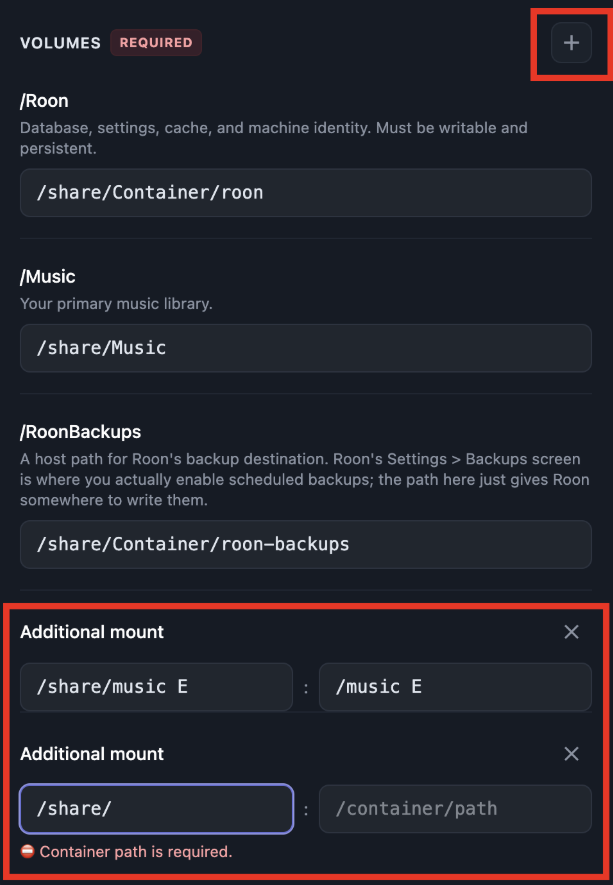
If you already have a music folder on the NAS
If you already have a music folder on the NAS, you can edit the following folder path on the Roon Server to match your folder name.
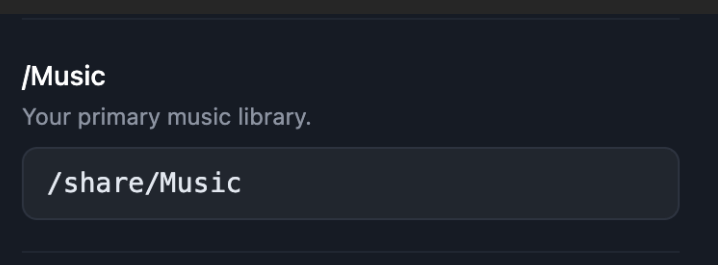 TipMake sure the folder path is consistent between the NAS and Roon Server. Please note that folder names are case-sensitive.
If you want to create an extra folder, click + to specify another path.
- Select the correct time zone for your location.
- Select the options you require. If you are not sure, use the recommended default options.
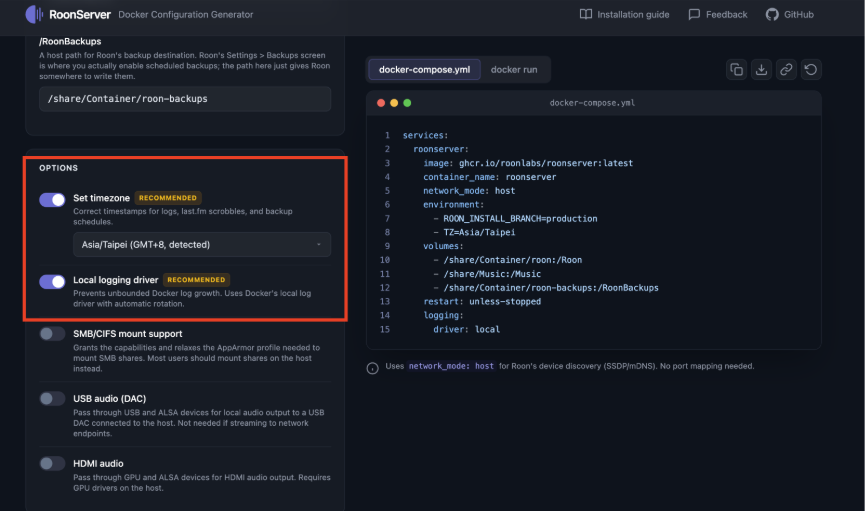
- Click the Copy button in the upper-right corner to copy the generated
docker-compose.ymlcontent.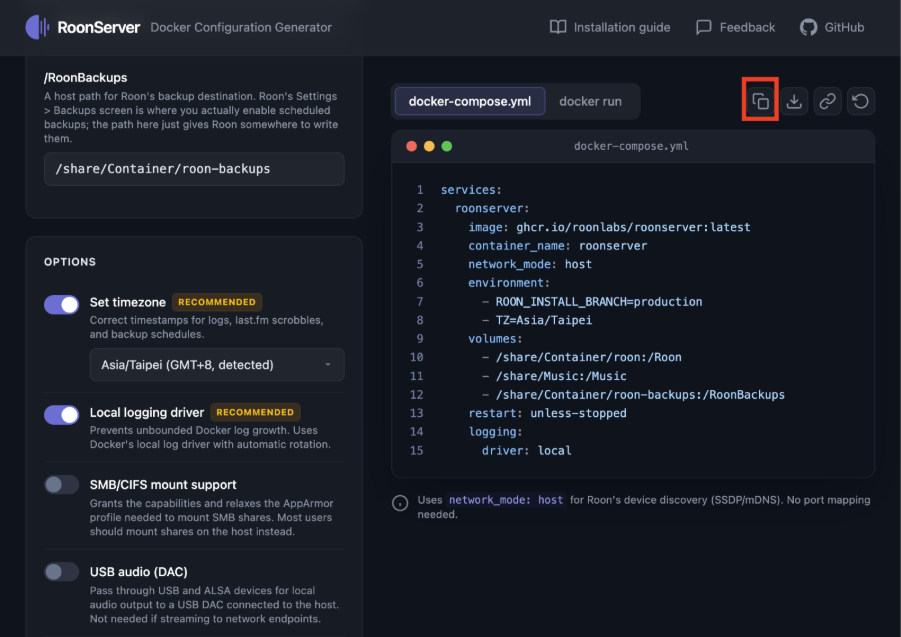
4. Configure the YAML file in Container Station
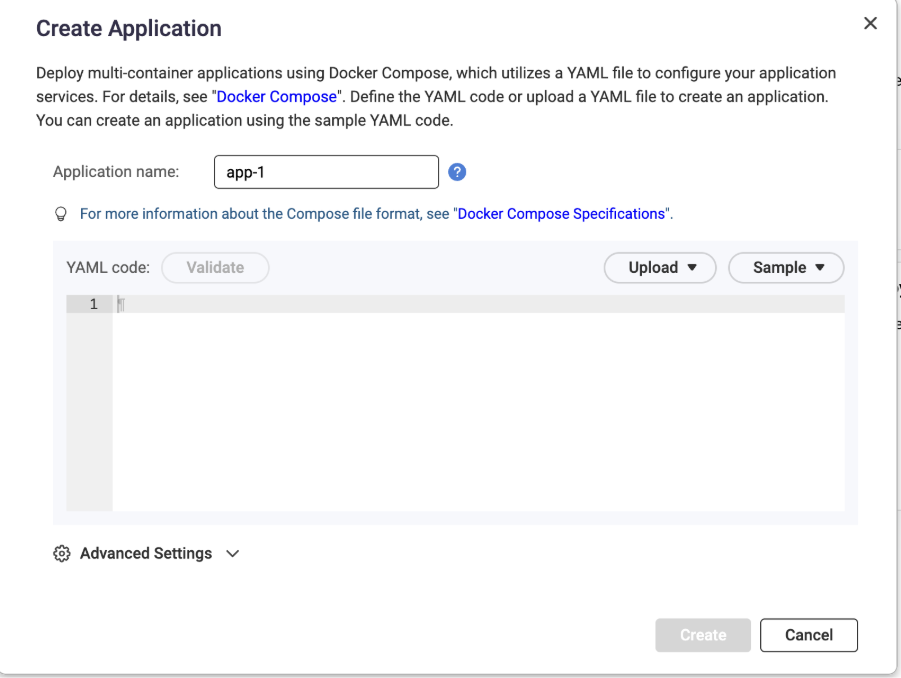
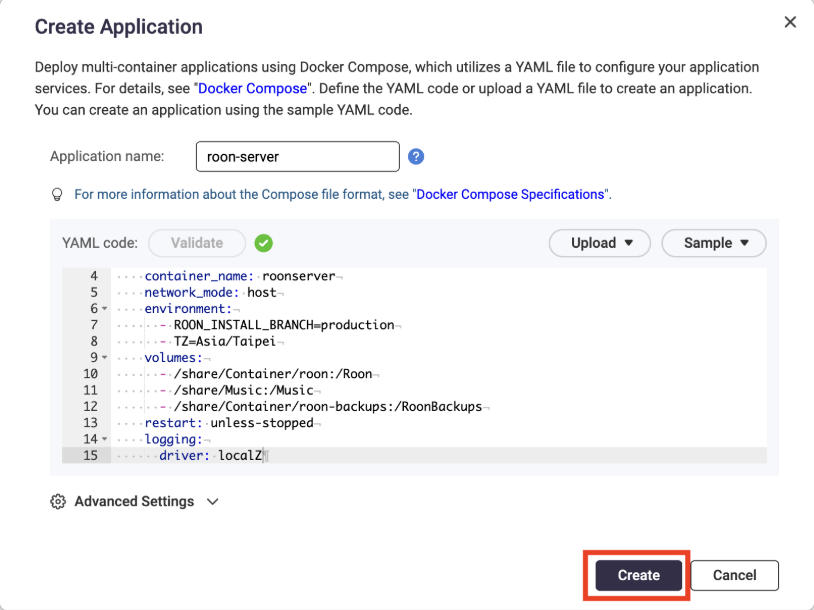
- Return to the Create Application page in Container Station.
- In the Application name field, enter a name for the application (such as
roon-server). - In the YAML code field, paste the copied
docker-compose.ymlcontent. - Click Validate.
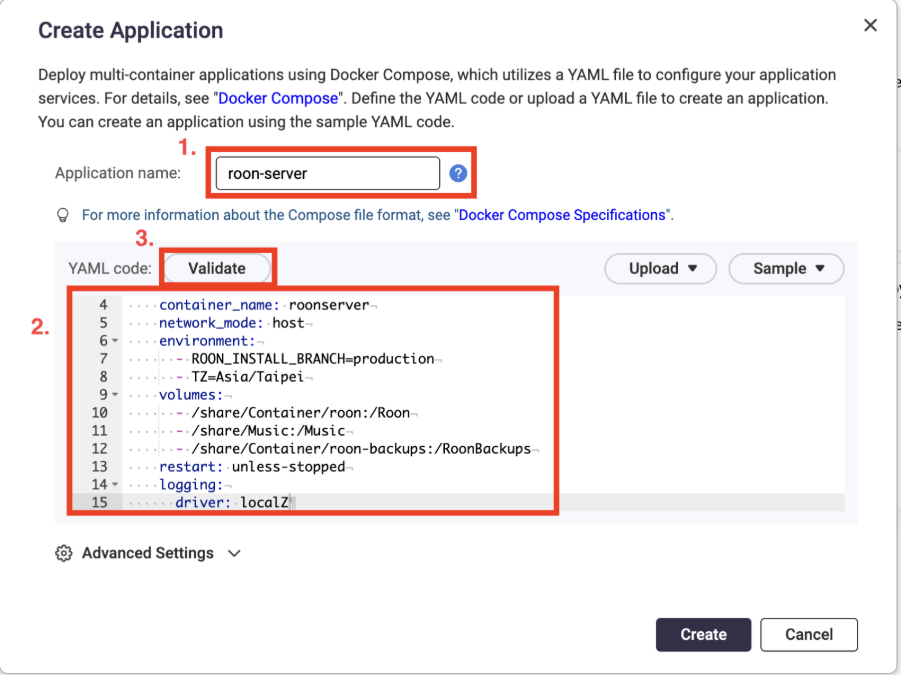
- A green check mark icon appears if validation is successful.
- Click Create to create the container.
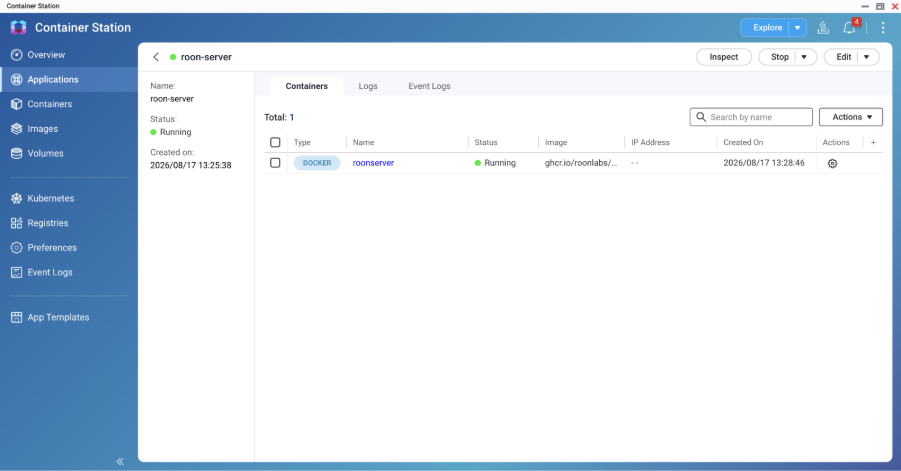
- Wait for the background task to complete. The Roon Server container will then show a status of Running.
5. Connect to Roon Server using Roon Remote
- On your phone, tablet, or computer, open the Roon or Roon Remote app.
- Make sure the device is on the same local network as
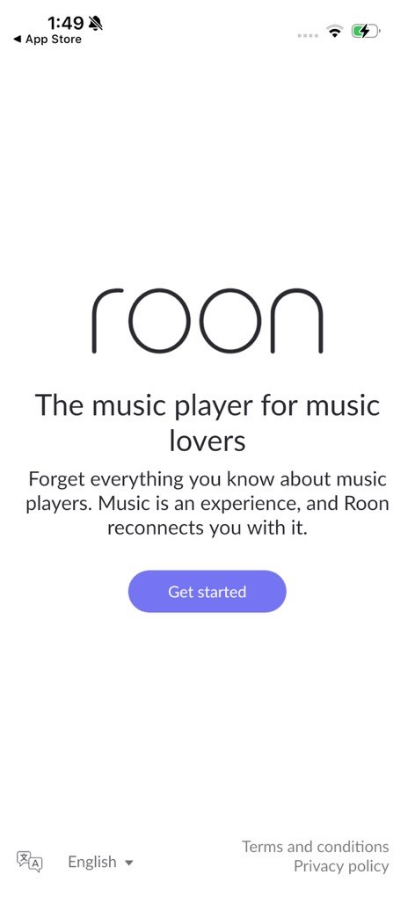
the QNAP NAS. - In the app, click Get Started.
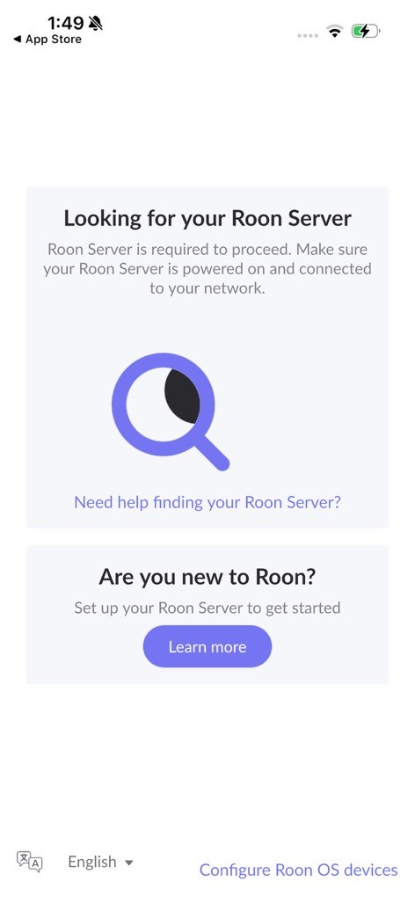
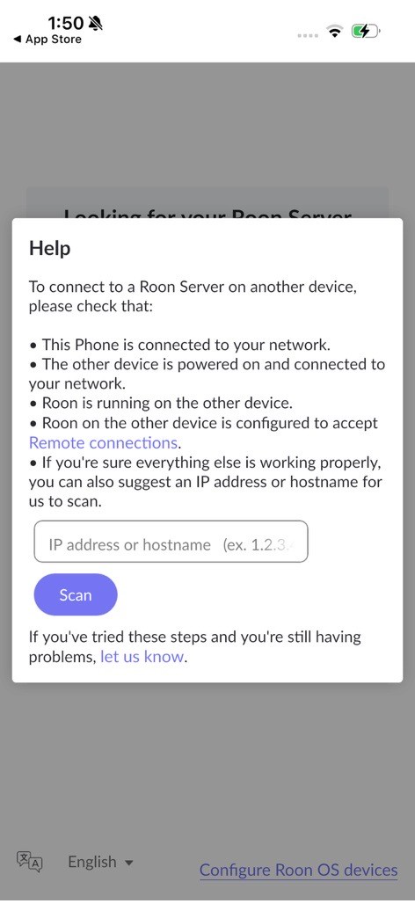
- Wait for the app to automatically discover the Roon Server, or click Need help finding your Roon Server?
- If needed, enter the NAS IP address and click Scan.
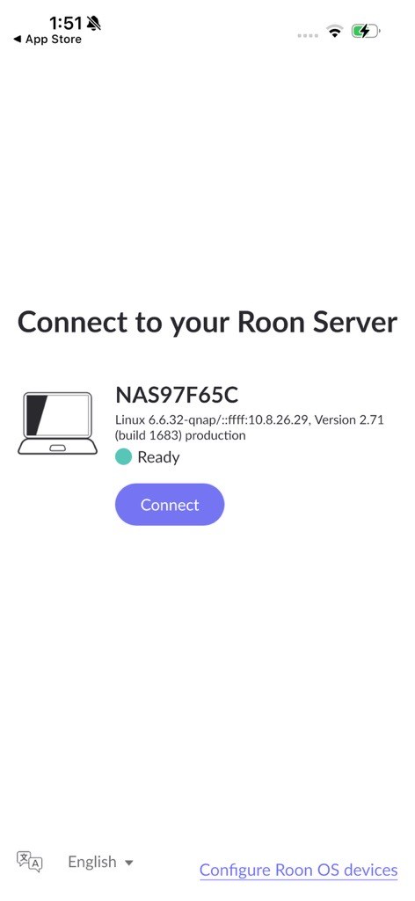
- Confirm the NAS / Roon Server in the list and click Connect.
- Sign in with your Roon account.
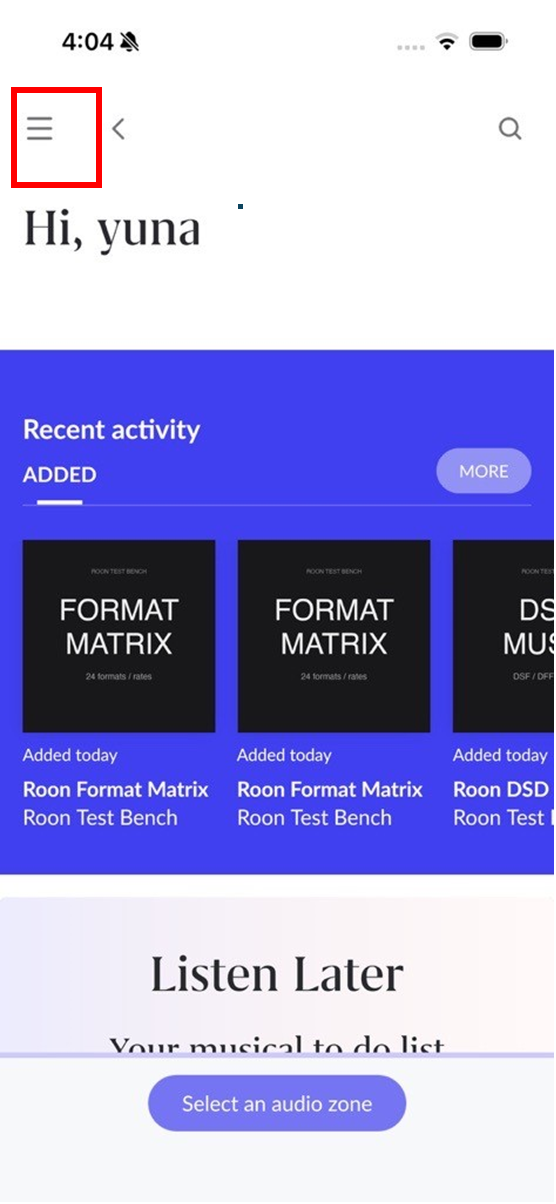
- After signing in, select the menu icon at the upper-left corner.
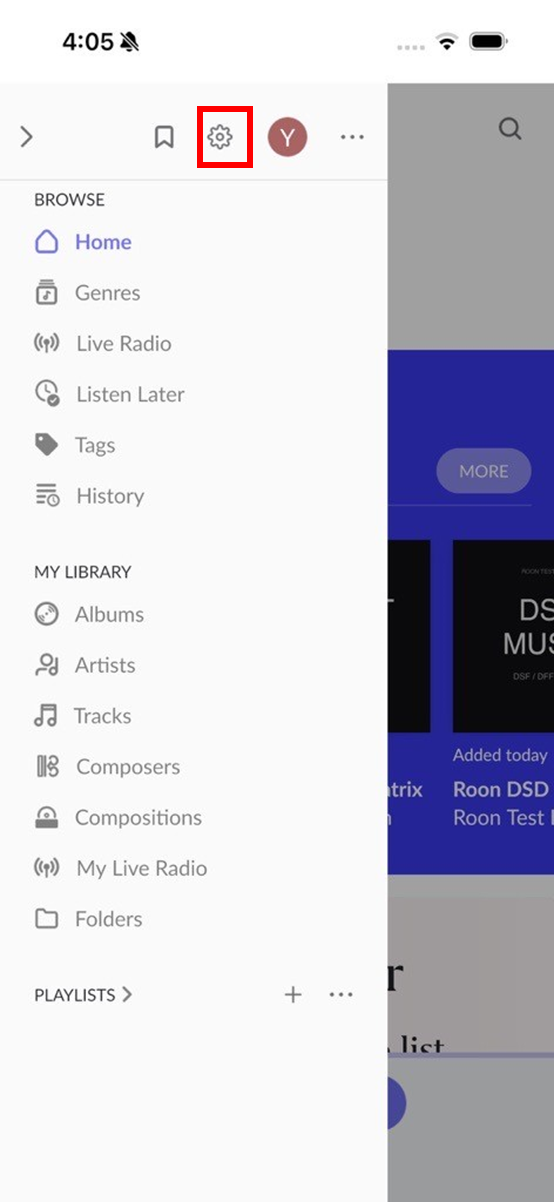
- Select the Settings (gear) icon.
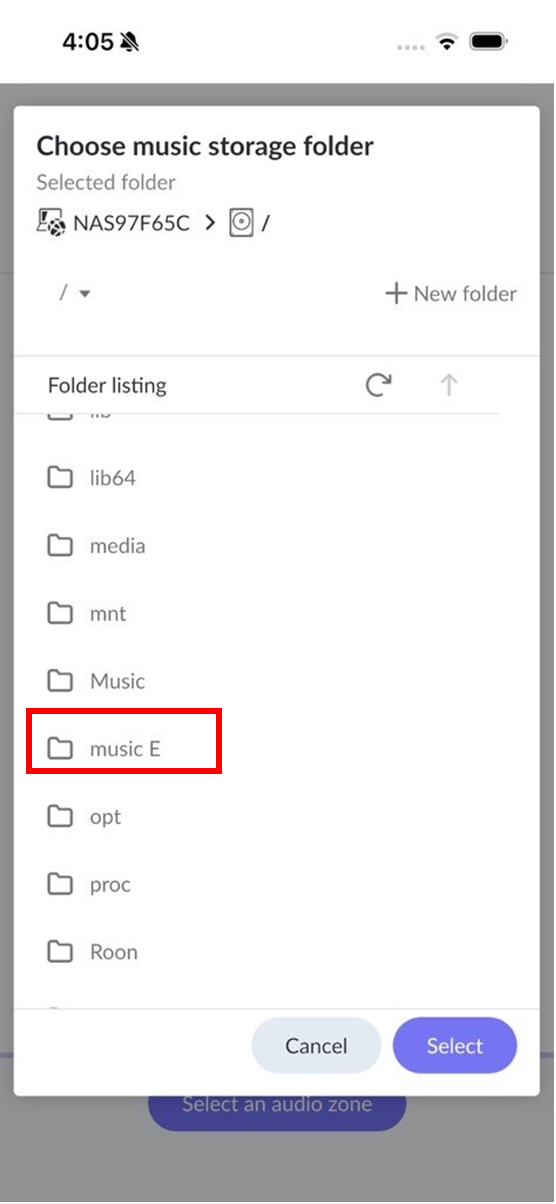
- Select the Storage tab and then select Add folder.
- You can then add the shared folder(s) that you have configured in the previous steps.
Further Reading
For further assistance, ask other users and QNAP experts in the community. Go to QNAP Community


