How to Back Up HDP for PC/VM Hypervisors to a Remote QNAP NAS
Last modified date:
2026-02-13
Applicable Products
- HDP for PC/VM
- HBS 3
Overview
This tutorial guides you through the process of backing up hypervisors in HDP for PC/VM to a remote QNAP NAS using HBS 3. The process requires 4 steps:
A. Adding a Hypervisor to the Inventory (HDP for PC/VM)
B. Creating a Repository (HDP for PC/VM)
C. Backing Up a Hypervisor to a Repository (HDP for PC/VM)
D. Backing Up or Syncing a Repository to a Remote NAS (HBS 3)
Important
When creating backup jobs in HDP for PC/VM (step C) and in HBS 3 (step D), ensure the two job schedules do not overlap.
Requirements
The following must be installed on both the local and remote NAS devices:
- HDP for PC/VM 1.3.0.0813 or later
- HBS 3 version 17.2.0726 or later
A. Adding a Hypervisor to the Inventory
- Open HDP for PC/VM.
- Go to Inventory > Virtual Machine.
- Click Add to choose the type of hypervisor to backup (VMware or Hyper-V).
- The Add/Edit Inventory window opens.
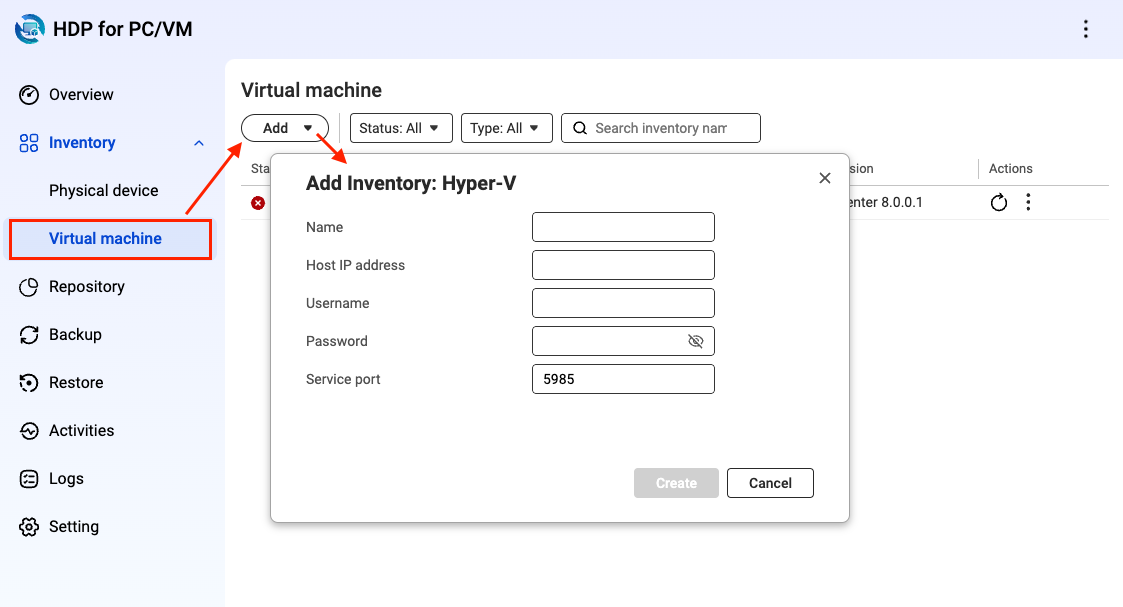
- Enter the details for the hypervisor.
- Enter the name.
- Enter the host IP address.
- Enter the username for the hypervisor account.
- Enter the password for the hypervisor account.
- Enter the service port.
- Click Create.
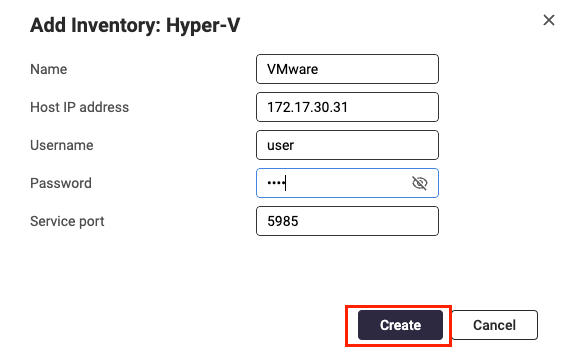
- Check that the hypervisor has been added to the list.
B. Creating a Repository
A repository is required to store the hypervisor data.
- Open HDP for PC/VM.
- Click Repository.
- Click Create.
The Create Repository window opens.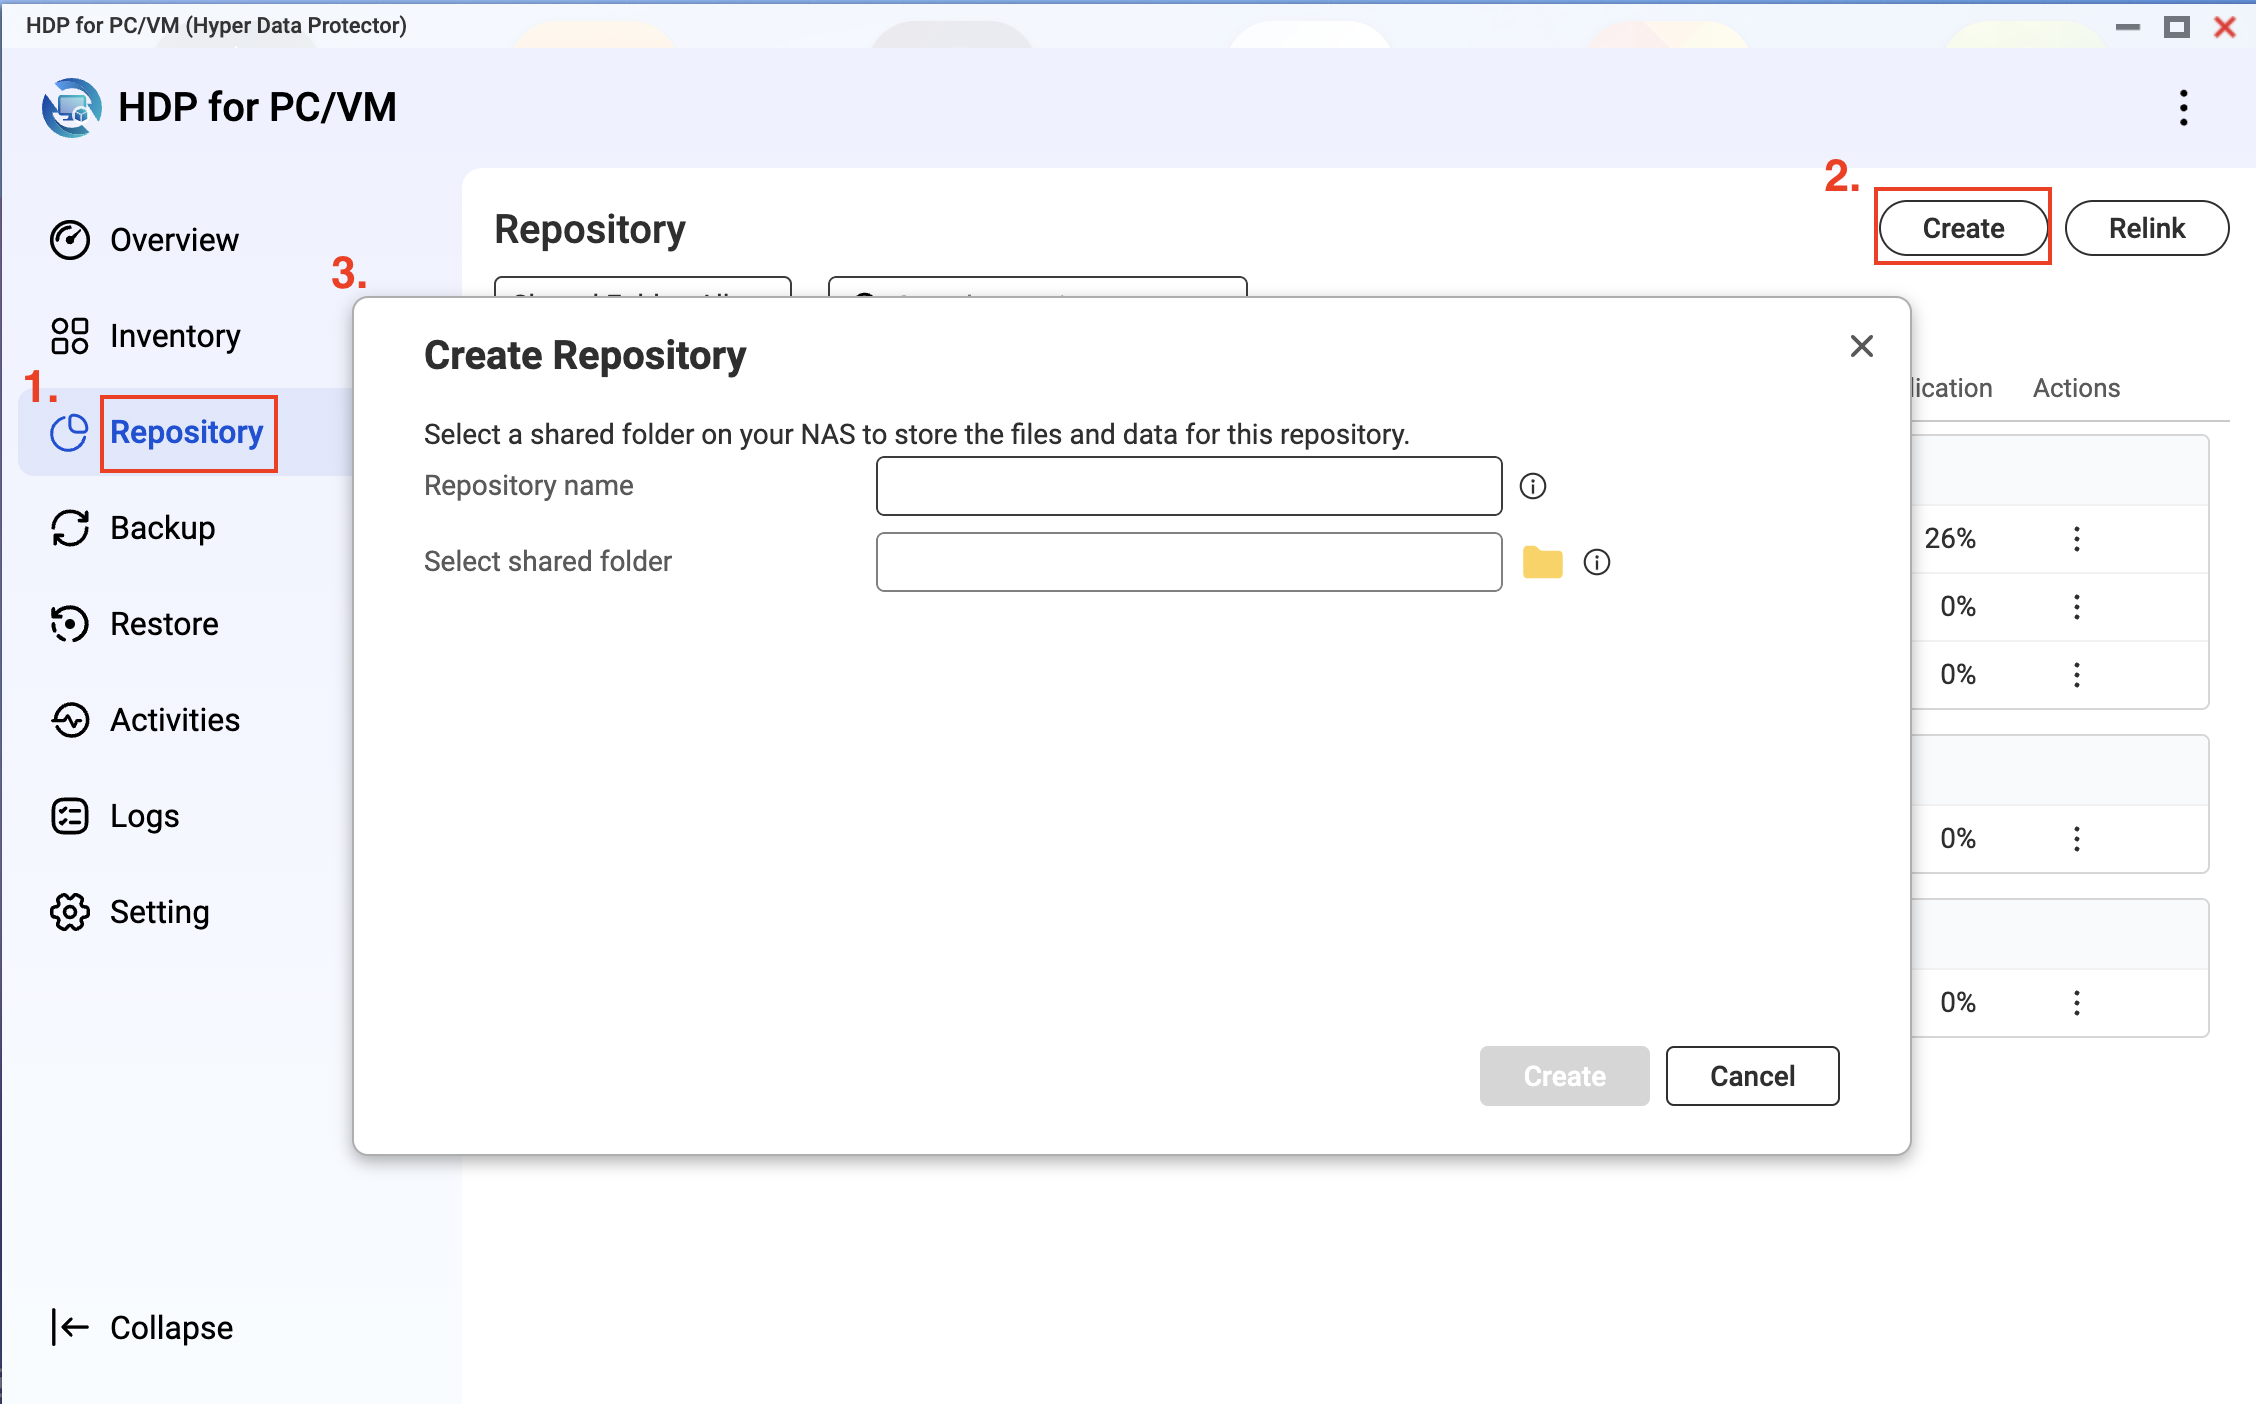
- Enter a repository name.
- Select one or more shared folders to store your backup data.
- Click Create.
C. Backing Up a VMware/Hyper-V Hypervisor to a Repository
To back up a hypervisor to a repository, you need to create a backup job in HDP for PC/VM.
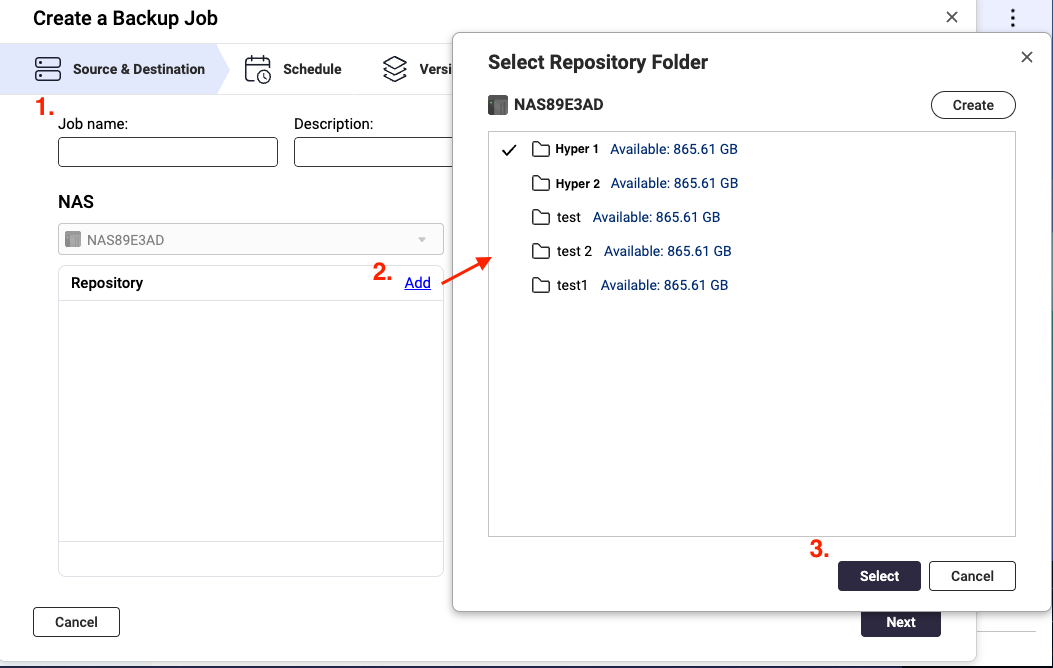
- In HDP for PC/VM, click Backup > Create Job.
The Create a Backup Job window opens. - Enter a job name.
- Optional: Enter a description.
- In the Repository section, click Add.
The Select Repository Folder window opens. - Select or create a folder to store backup data.
- Click Select.
- Under Inventory, select an existing inventory or add a new inventory.
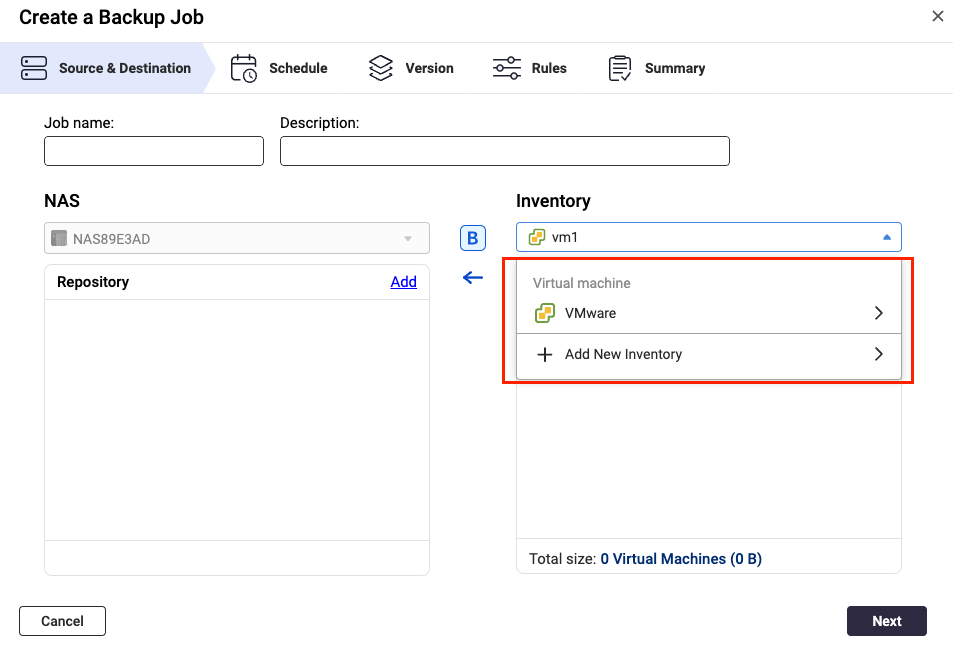
- Click Add.
The Select Source window opens.- Select a view.
- Select the virtual machines or disks to include.
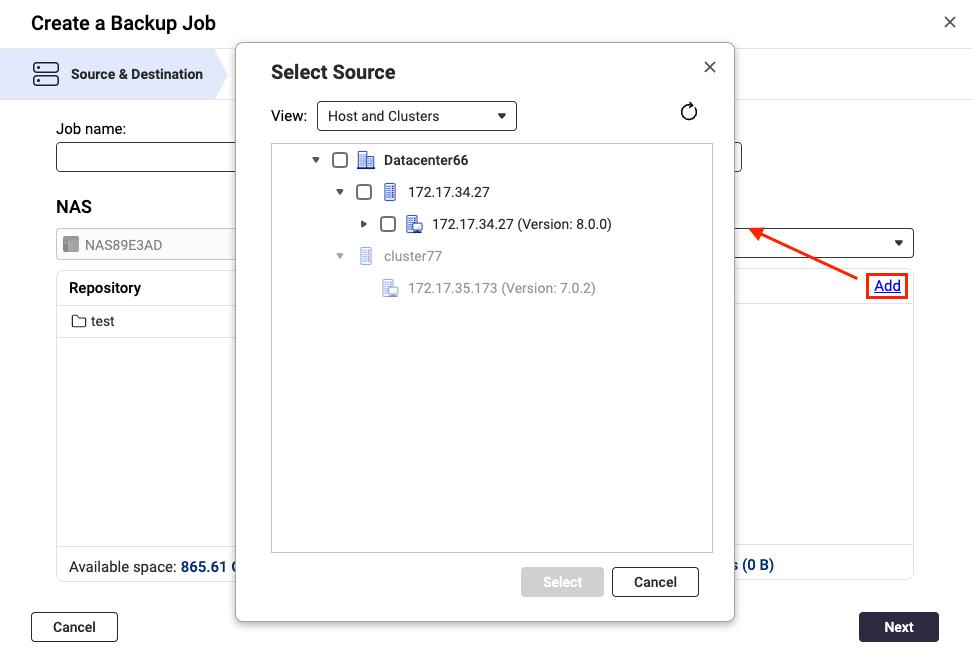
- Click Select.
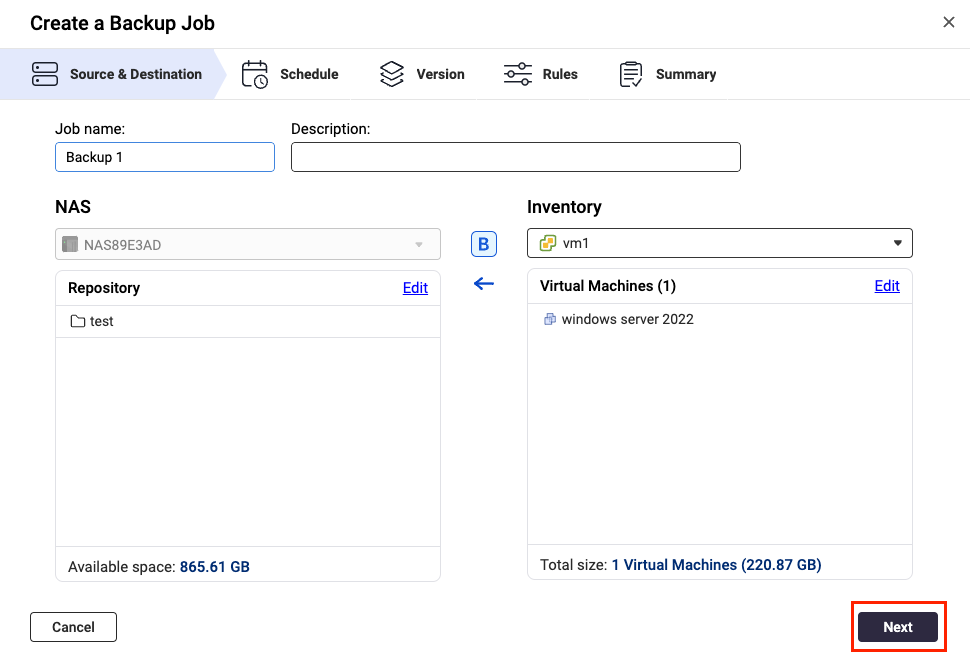
The Select Source window closes. - Review the total number of selected virtual machines and their total size.
- Click Next.
- Configure the backup schedule, then click Next.
- Configure the retention policy, then click Next.
- Configure the rules, then click Next.Tip
- Transfer encryption and compression: Enhances transfer security and optimizes file size for faster transmission.
- Enable VMware CBT for all VMs: Changed Block Tracking (CBT) is an incremental backup technology for VMware VMs. CBT only backs up blocks that have changed, rather than backing up every block of every VM in the infrastructure.
- Enable application-aware processing: Application awareness is based on Microsoft VSS and prevents data loss or application failures if the backup files include application data or system state information.
- Review the summary page, then click Finish.
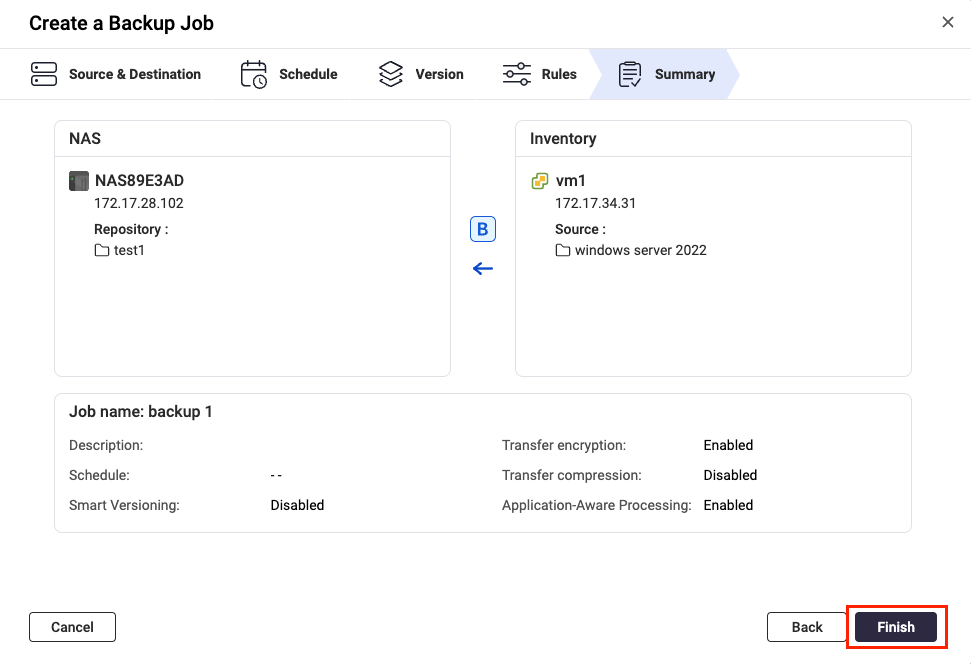 HDP for PC/VM executes the backup job according to the configured schedule.
D. Backing Up or Syncing a Repository to a Remote NAS
Note
The steps to create a backup job and to create a sync job are nearly identical. Below we demonstrate the steps needed to create a sync job.
- Configure the RTRR server on the remote NAS.ImportantThis step is required to allow the local and remote NAS devices to connect via HBS 3.
- Open HBS 3 on the remote NAS.
- Go to Services > RTRR Server and enable the RTRR server.
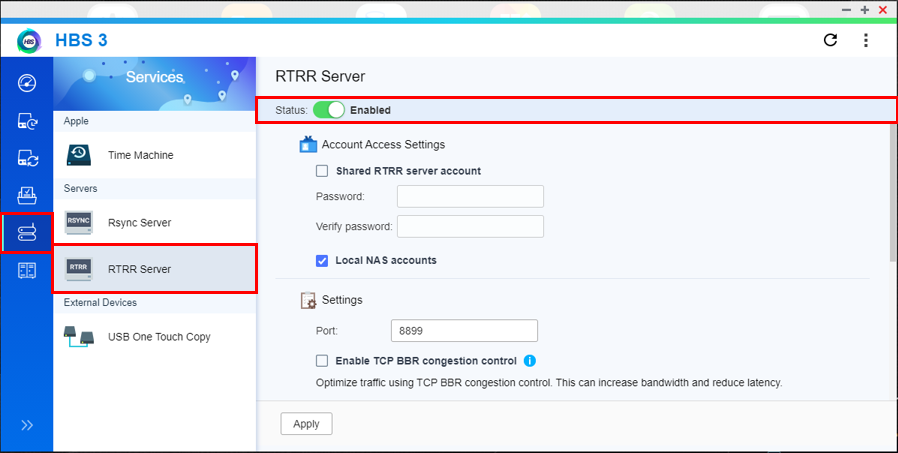
- Configure the account access settings.
- Shared RTRR server account: This option allows incoming connections to log in with a shared account.
- Local NAS accounts: This option allows incoming connections to log in with a local account of the remote NAS.NoteRemember which option you choose. You will need this information later when you set up the backup job on your source NAS.
- Configure the server settings.
- Port: Specifies the port number used to access the remote NAS.NoteRemember the port number. You will need this information later when you set up the backup job on your local NAS.
- Use TCP BBR congestion control: This option optimizes transmissions speeds allowing for higher bandwidth and lower latency.ImportantTo ensure data integrity, we recommend enabling this setting.
- Integrate with QuWAN: Allows QuWAN to manage and optimize network traffic for jobs using this service.ImportantTo ensure data integrity, we recommend disabling this setting.
- Upload limit: Sets the upload rate limit.
- Download limit: Sets the download rate limit.
- Port: Specifies the port number used to access the remote NAS.
- Click Apply.
- Open HBS 3 on the local NAS.
- Go to Sync > Create > One-way Sync Job.
- Select Remote NAS.
- Click Add new account.
The Create a Storage Space window opens.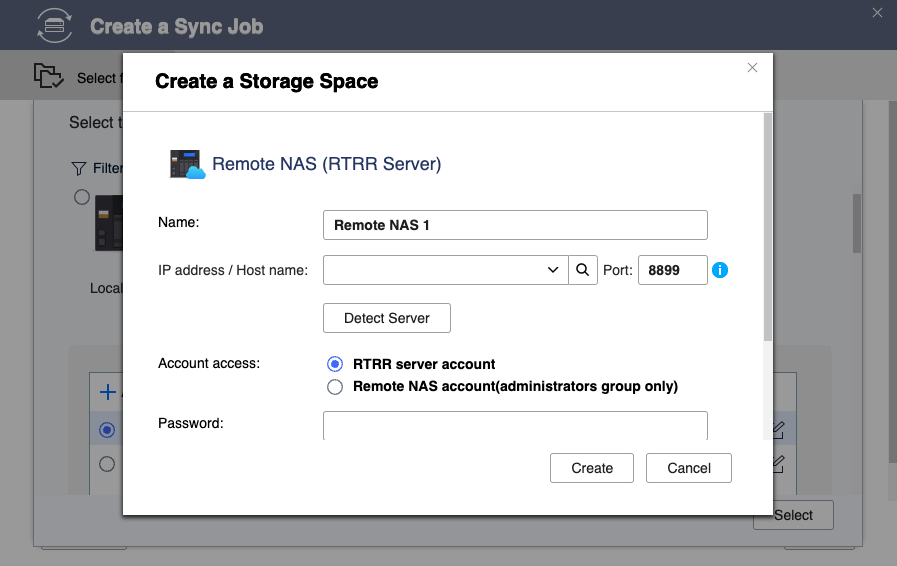
- Configure the storage space settings.
- Name: The name used to identify the storage space.
- IP address / Host name: The IP address or hostname used to access the storage space.
- Port: The port number used to access the storage space.
This value must be between 1 to 65535. - Account access: The account used to access the storage space.
Use the same settings you configured for the RTRR server on the remote NAS. - Username: The username used to access the storage space.
This field is only available if Remote NAS account is selected for account access. - Password: The password used to access the storage space.
- Use SSL connection: Requires SSL connection when accessing the remote NAS.
- Click Create.
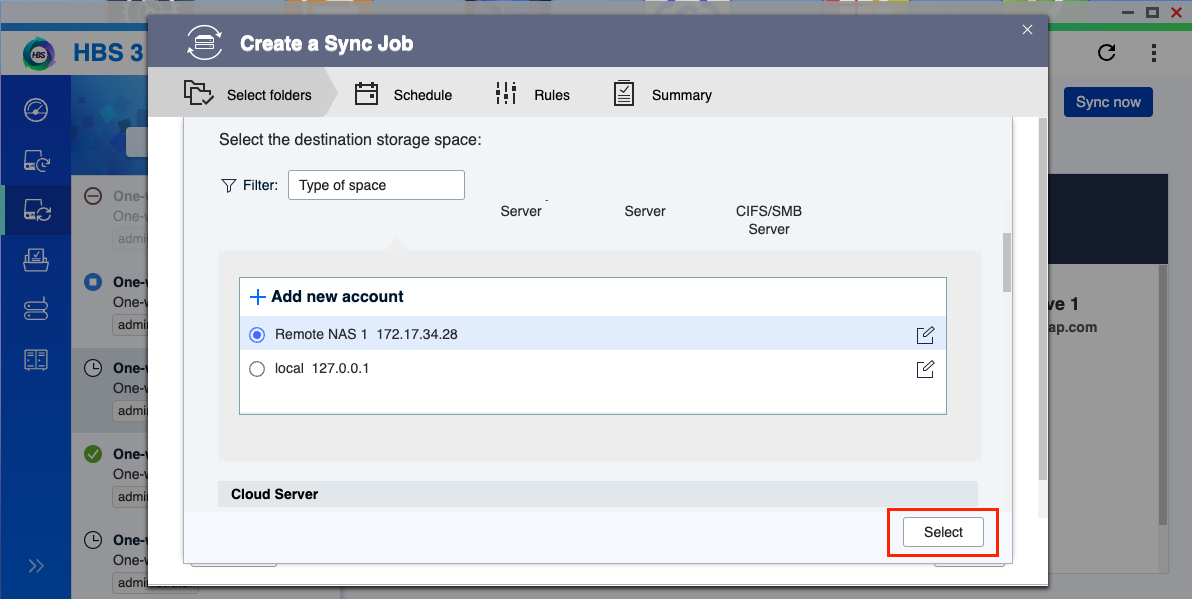
- Select the newly added destination NAS.
- Click Select.
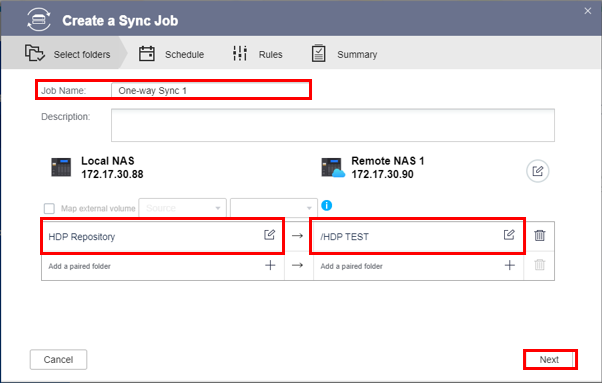
- Enter a name for the sync job.
- Select the previously backed up HDP for PC/VM repository.ImportantThe selected folder must be located in a shared folder or in an "HDP" folder in the shared folder.
- Select the destination folder on the remote NAS.ImportantEnsure the folder is not a destination for another one-way sync job. File corruption may occur if the same folder is used as a destination for two or more one-way sync jobs.
- Click Next.
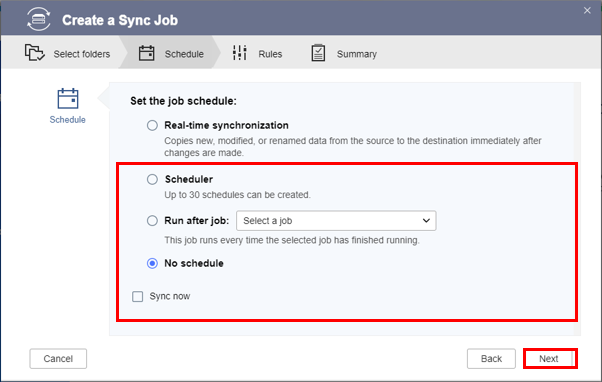
- Configure the job schedule, then click Next.ImportantDo not select Real-time synchronization. This option may cause data corruption in your backup.
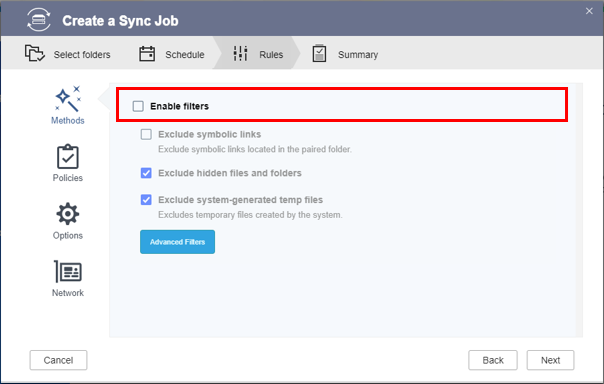
- Deselect Enable filters.
- Configure the job policies.ImportantTo avoid data corruption, please configure the following settings as recommended:
- Use rate limits: Disable
- Use TCP BBR congestion control: Enable
- Integrate with QuWAN: Disable
- Remove additional files in destination folder: Enable
- Replicate ACL and extended attributes: Enable
- Do not take a snapshot: Disable
- Optional: Configure the Options and Network settings.
- Click Next.
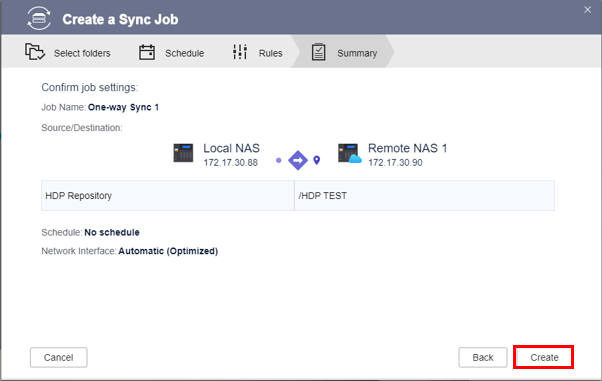
- Review the summary, then click Create.
- Click Sync now.
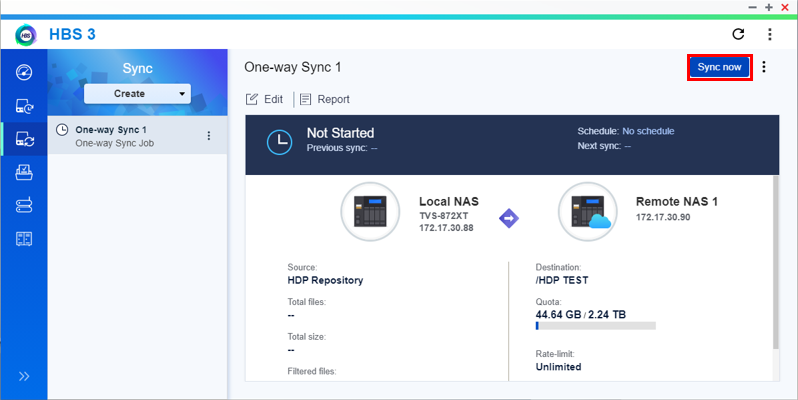
HBS 3 starts syncing your repository to the destination NAS.


