How to Back Up and Import HDP Repositories to a Remote QNAP NAS
- Overview
- Adding Hypervisors to the Hyper Data Protector Inventory
- Backing up VMware/Hyper-V Hypervisors
- Replicating Your HDP Repository to A Remote QNAP NAS Using HBS 3
- Importing the HDP Repository to Your Remote QNAP NAS
Overview
This tutorial guides you through the process of backing up and importing an HDP repository using HBS 3 and the new “Import Backup Repository” feature from HDP. With HBS 3, you can replicate an existing HDP repository to a remote QNAP NAS using “One-way Sync”.
If you are running a schedule, make sure the sync job is completed and is not overlapping the import process to successfully import the repository.
Important
Both your source and remote QNAP NAS must have HDP 1.3.0.0813 (or later). The source NAS must also have HBS 3 17.2.0726 (or later) installed.
Note
- The repository cannot be imported to the original QNAP NAS, since the original repository and backup job information are still stored in HDP.
- HDP supports repository importation between the QTS and QuTS hero systems.
Adding Hypervisors to the Hyper Data Protector Inventory
- Open Hyper Data Protector.
- Log in using your QNAP NAS account.

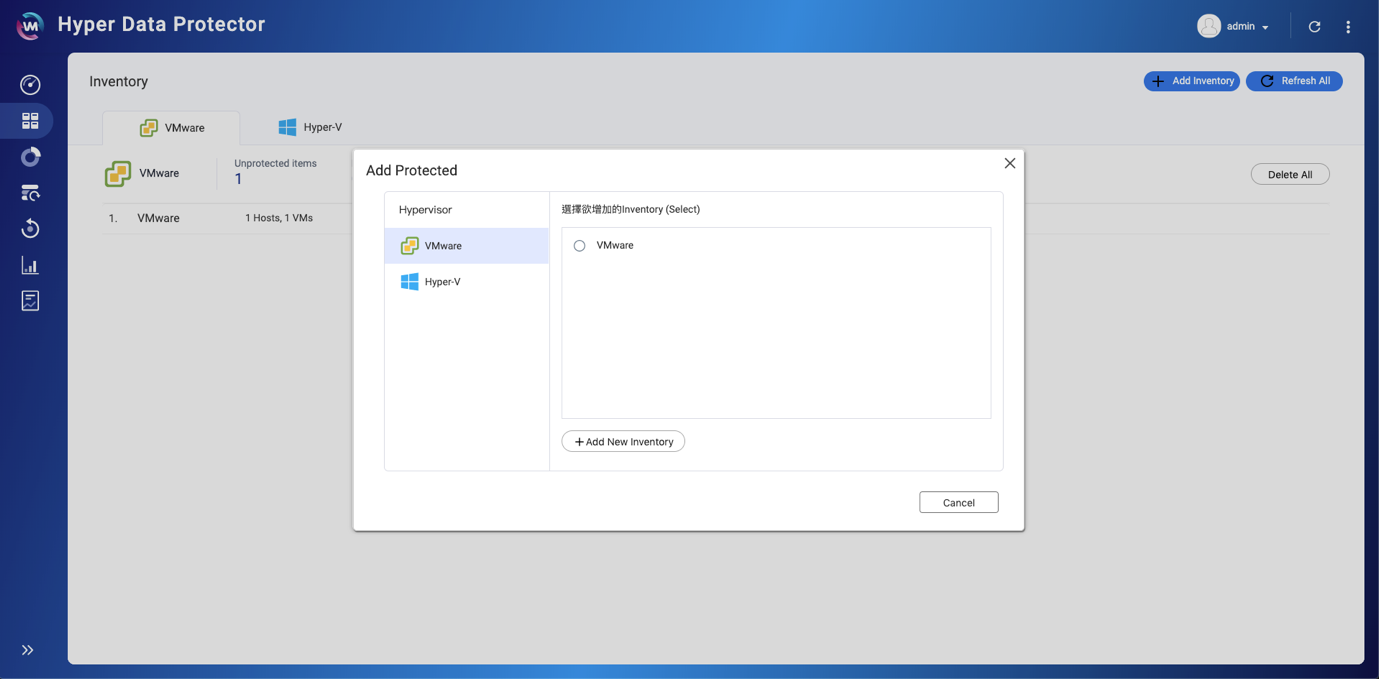
- Click Inventory.
- Click Add Inventory.

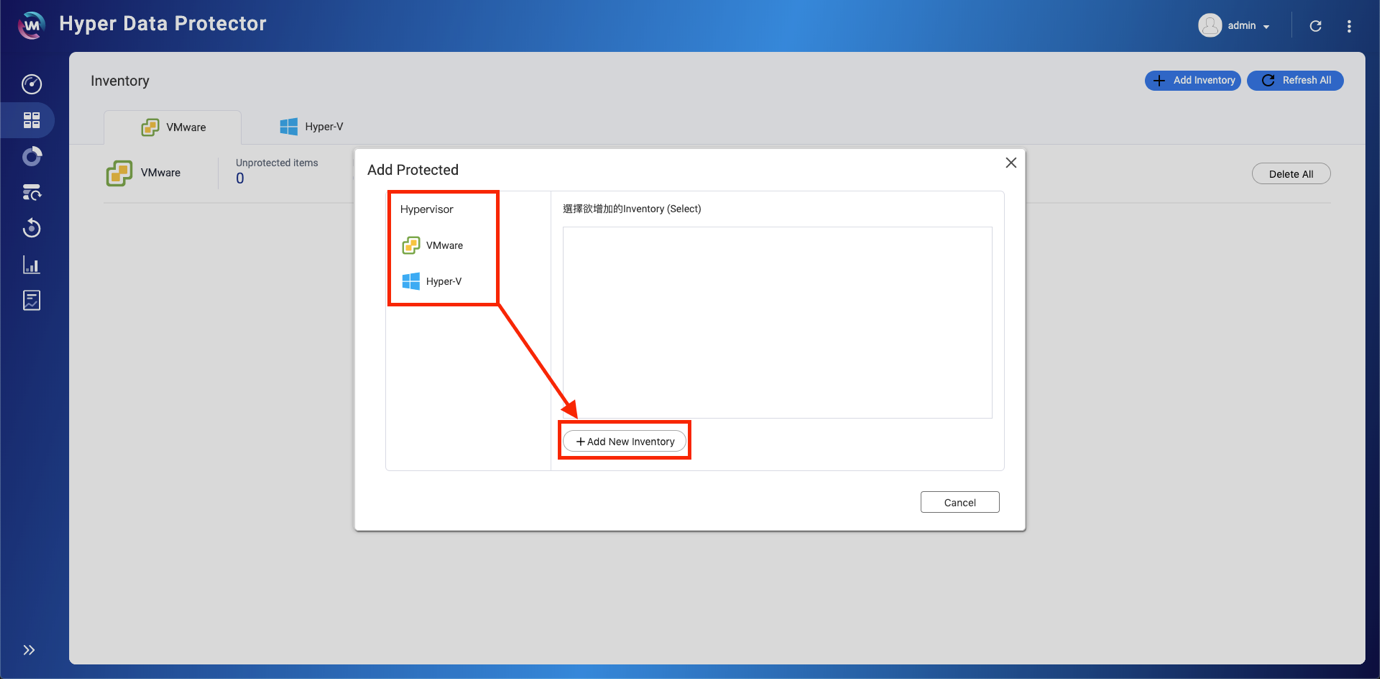
- Choose the type of Hypervisor to backup (VMware or Hyper-V).
- Click +Add New Inventory.

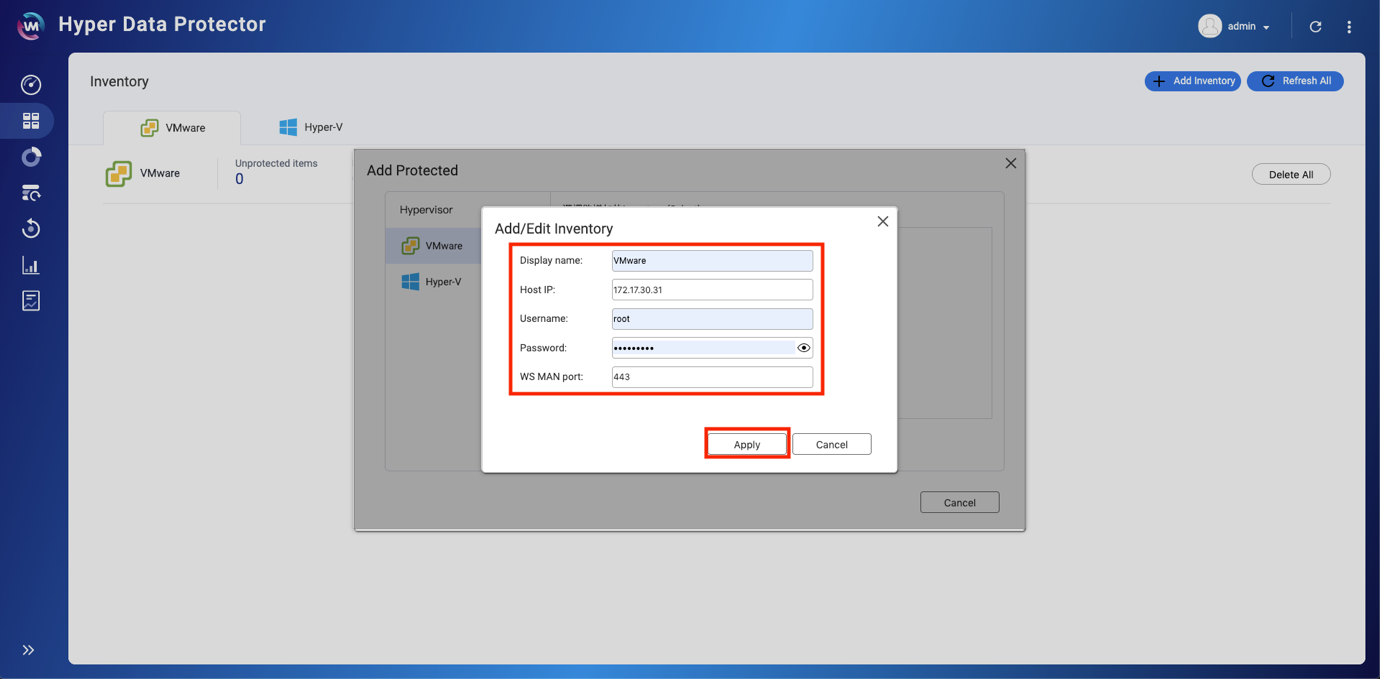
The Add/Edit Inventory window opens. - Enter the details for the Hypervisor.
- Enter a Display name.
- Enter the Hostname or IP of the Hypervisor.
- Enter the Username of the Hypervisor.
- Enter the Password of the Hypervisor.
- Click Apply
The Hypervisor is added to the Inventory.
Backing up VMware/Hyper-V Hypervisors
Create a New Backup Job
- Click Backup > Create New Job.

- Enter a Job Name.
- Click Select Source.
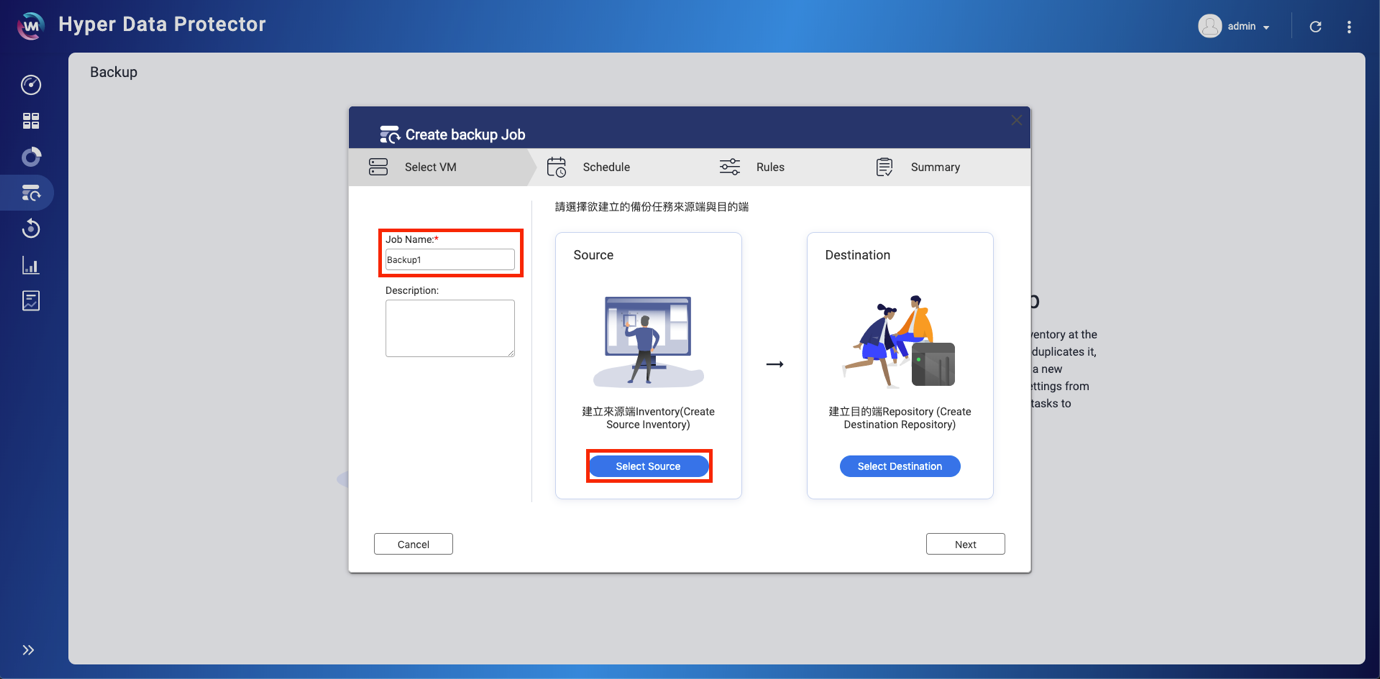
- Select the Hypervisor to backup.
- Click Next.
- Select the content of the Hypervisor to backup.
- Click Select.

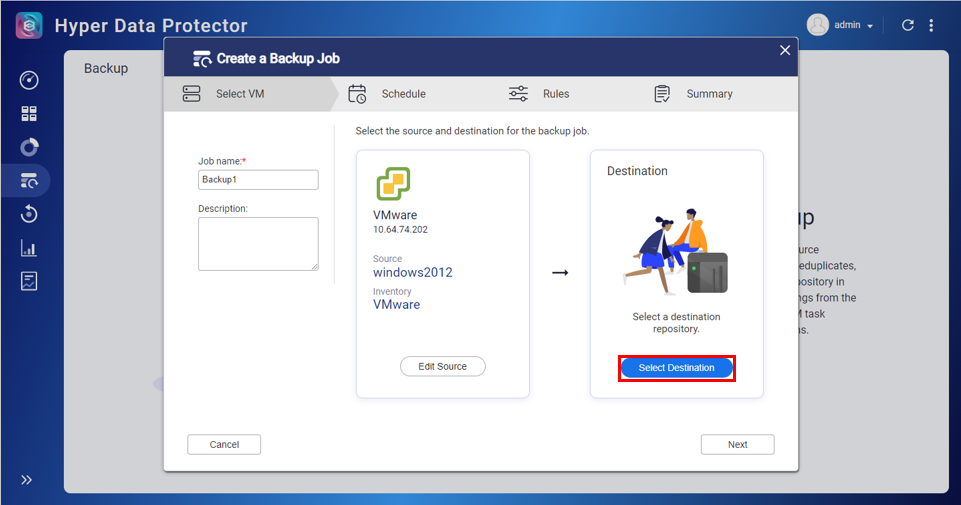
- Click Select Destination.
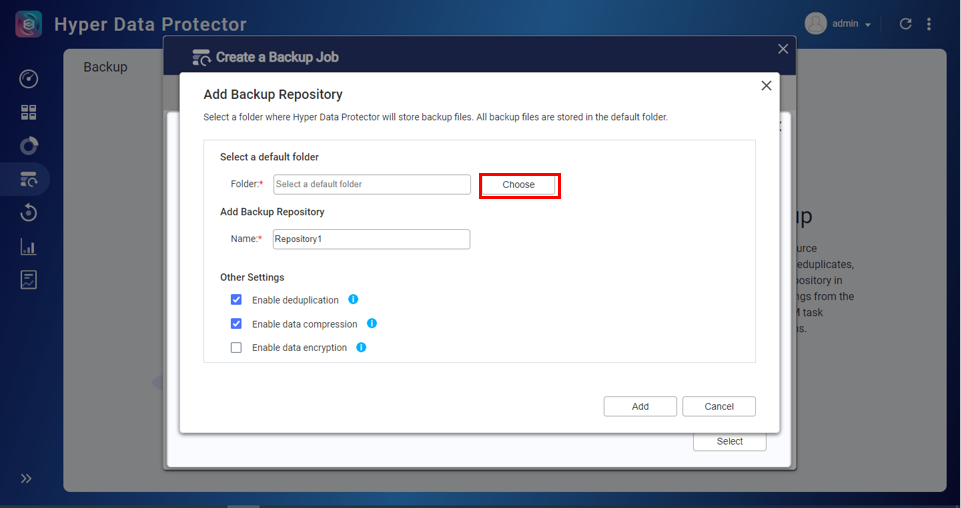
- Click Choose.
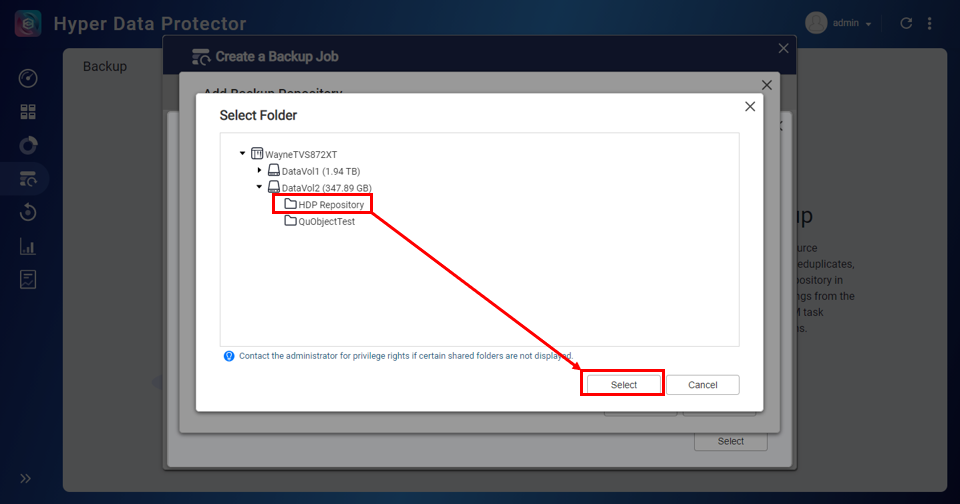
- Select the destination folder.
- Click Select.
- Enter a name for the Repository.
- (Optional) Select Enable Deduplication and/or Enable Data Compression based on your requirements.
- Click Apply.

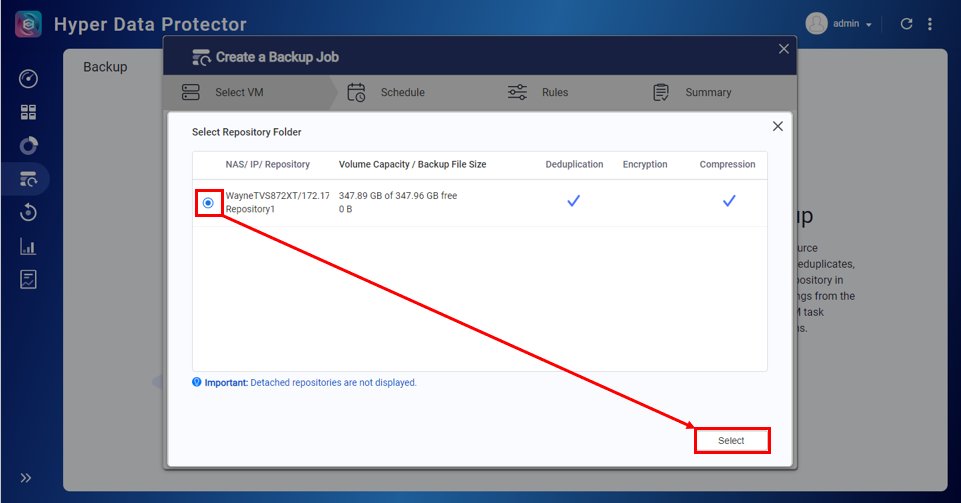
- Click
 > Select.
- Click Next.

- Configure schedule and rules settings.
- Schedule: Can be One Time, Periodic, Daily, Weekly, Monthly.
- Retention: Keep the following restore point for archival purposes.
- Transfer Encryption: Increases the security of files being transferred.
- Transfer Compression: Optimizes file sizes for faster data transmission.
- Enable VMware CBT for all the VMs: Changed Block Tracking (CBT) is an incremental backup technology for VMware virtual machines (VMs). CBT only backs up blocks that have changed, rather than backing up every block of every VM in the infrastructure.
- Enable Application Awareness Process: Application Awareness is based on Microsoft VSS and prevents data loss or application failures if these backup files include application data or system state information.
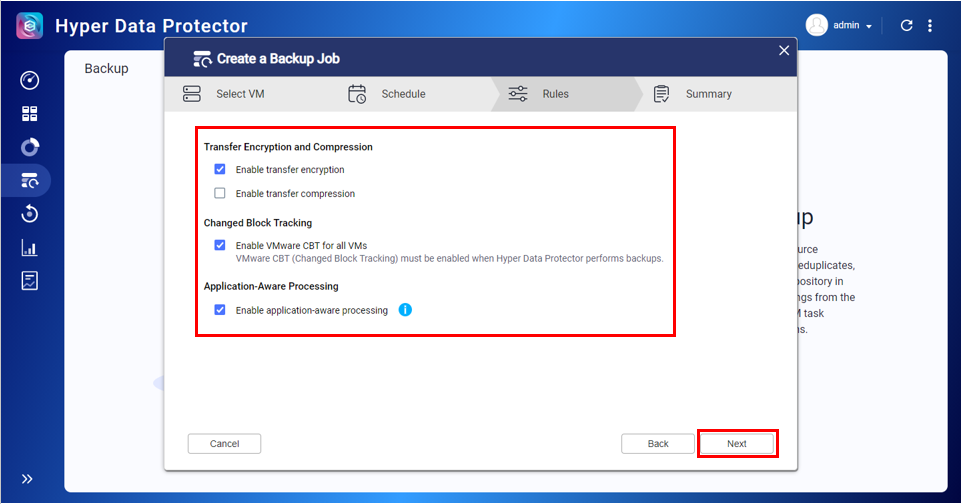
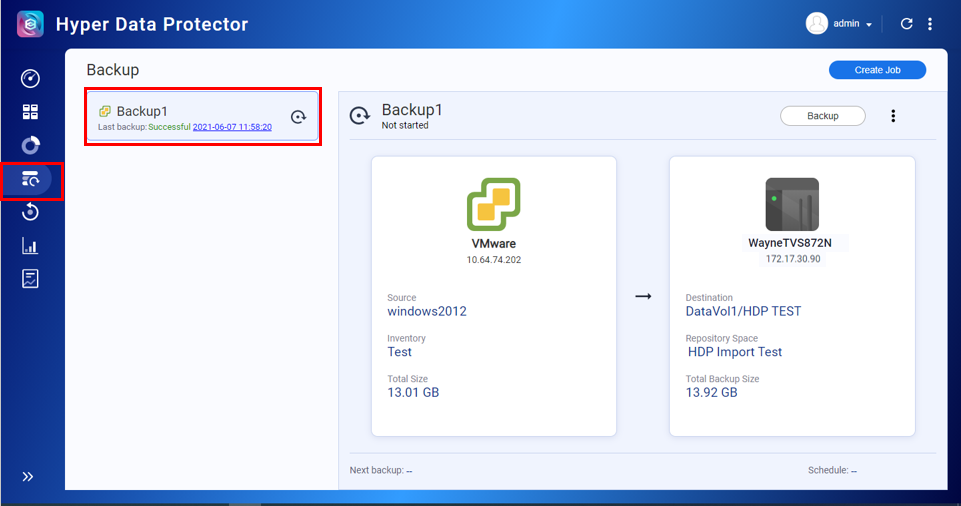
- Click Backup.

The backup job starts.
Replicating Your HDP Repository to a Remote QNAP NAS Using HBS 3
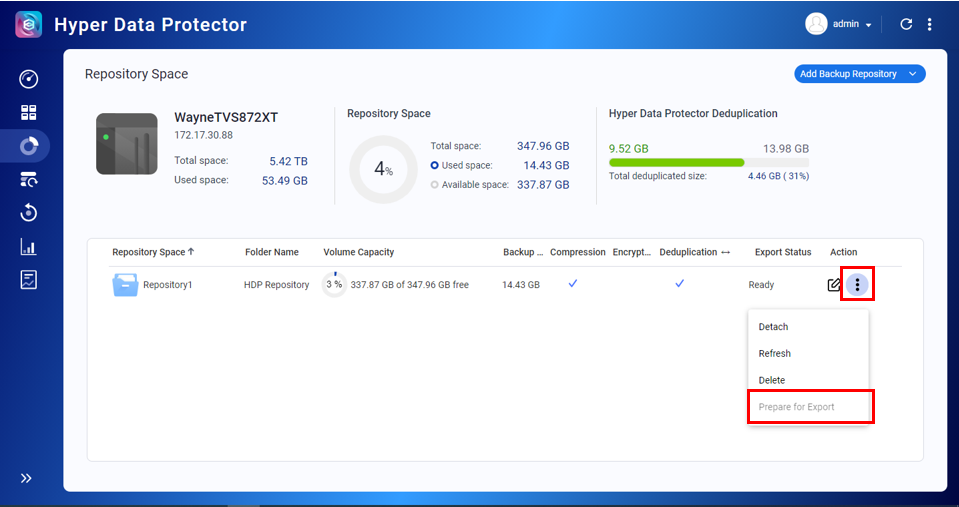
Important: Before replicating your HDP Repository, Export Status must be Ready.

Note: If the status is not Ready, click Action >  > Prepare for Export.
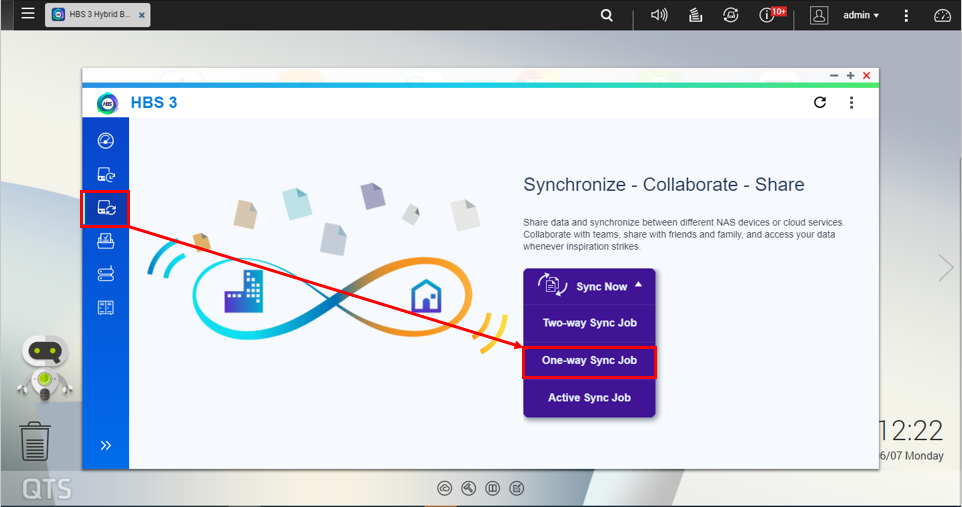
- Open HBS 3.
- Click One-way Sync Job.
- Select Remote NAS.
- Click + Add new account.
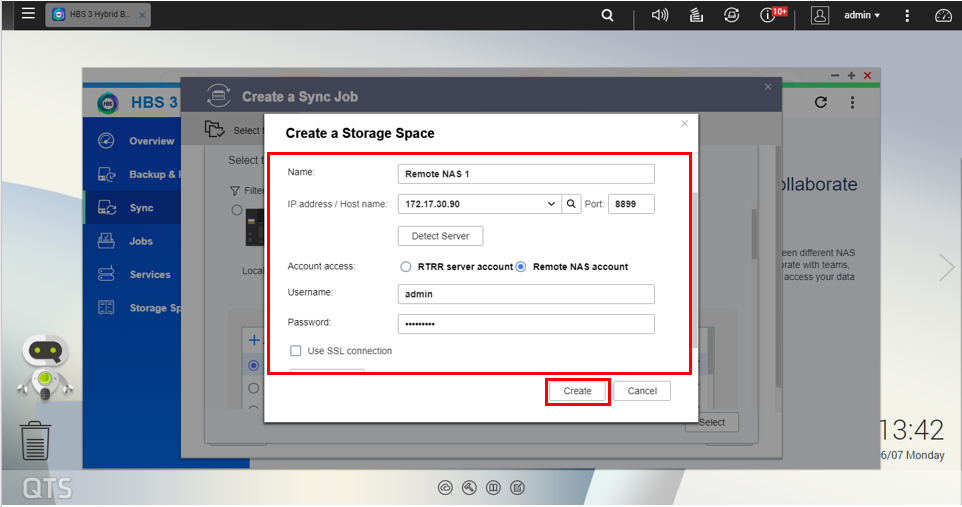
The Create a Storage Space window opens. - Configure the storage space.
- Enter a Name for the remote QNAP NAS.
- Enter the IP address or Host name of the remote NAS.
- Enter the port number of the remote NAS.
Tip: To test these settings, click Detect Server. - Choose your account access.
- Select whether to use an RTRR server account or Remote NAS account.
- Enter the username and password.
- (Optional) You can enable Use SSL connection based on your requirements.
- Click Create.
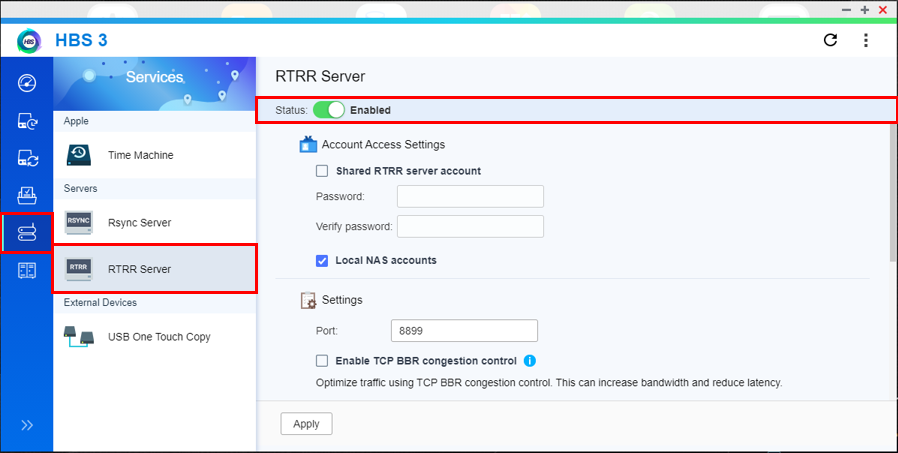
Note: The RTRR service must be enabled on the remote QNAP NAS. This service can be enabled in HBS 3 > Services > RTRR Server > Enabled. You can configure your account settings based on your requirements.
- Select the destination remote NAS.
- Click Select.

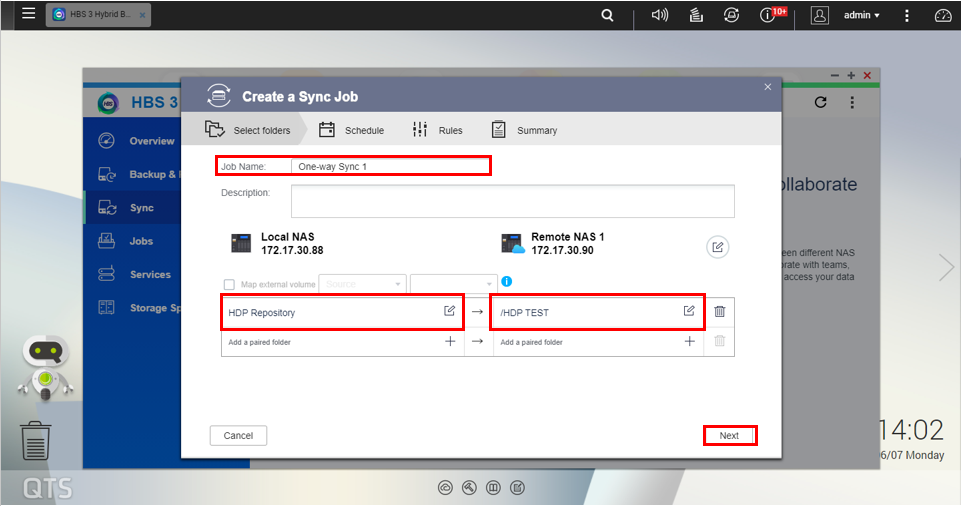
- Enter a name for the sync job.
- Select the previously backed up HDP folder (in this tutorial we use HDP Repository).
Important: The selected folder must be at the shared folder level. - Select the destination folder on the remote NAS.
Important: File corruption may occur if you create two (or more) one-way sync jobs with the same remote shared folder as the destination folder. - Click Next.
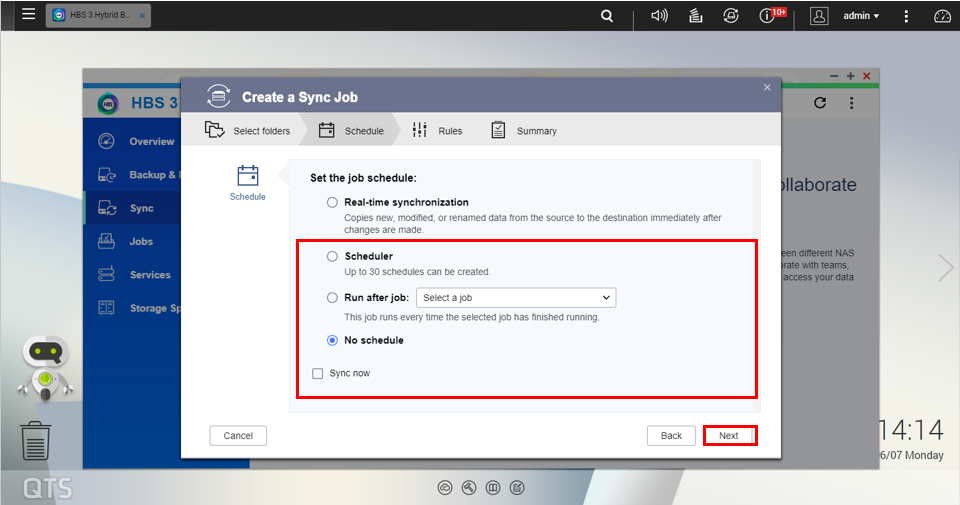
- Select a job schedule.
Important: Do not select Real-time synchronization as it might cause data corruption. - Click Next.
- Uncheck Enable filters.

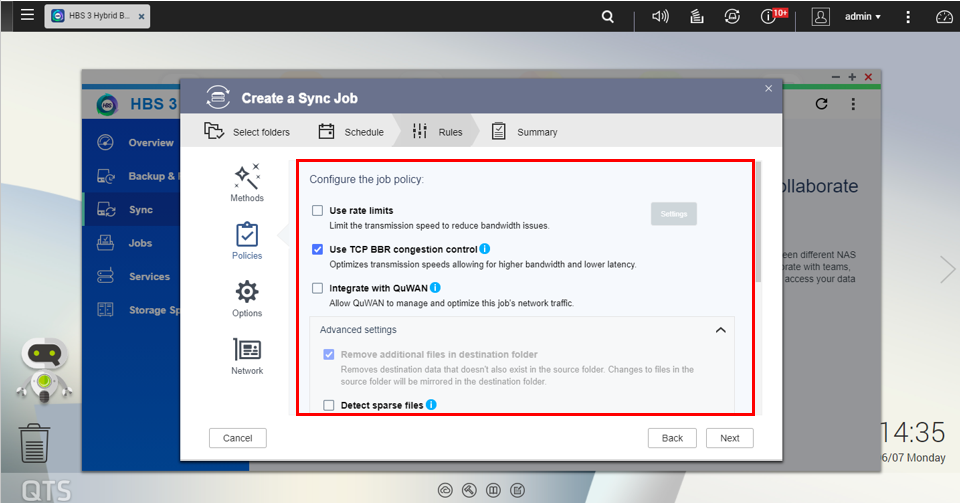
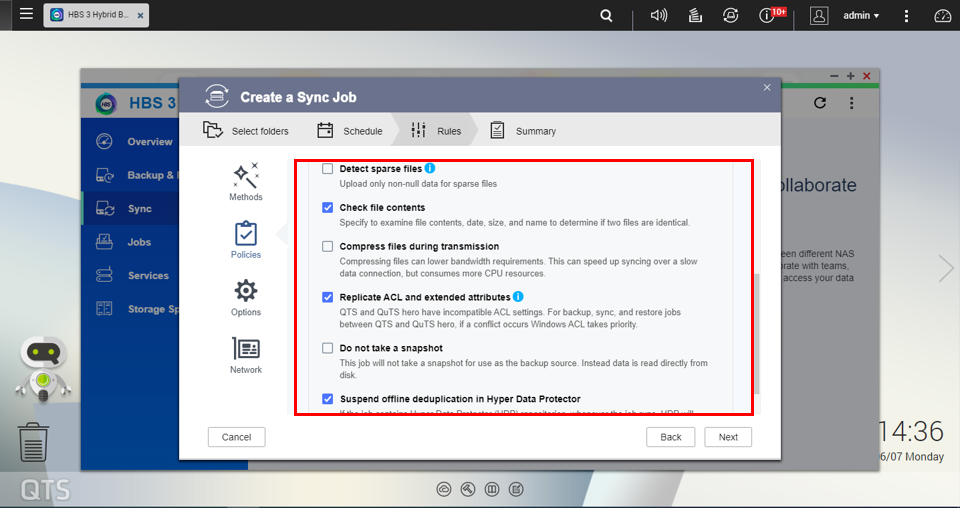
- Configure the job policy.
Important: Follow these settings to avoid data corruption.Rules
Value
Use rate limits
Disable
Use TCP BBR congestion control
Enable
Integrate with QuWAN
Disable
Advanced settings
Remove additional files in destination folder
Enable
Detect sparse files
Optional
Check file contents
Enable
Compress files during transmission
Optional
Replicate ACL and extended attributes
Enable
Do not take a snapshot
Disable
Suspend offline deduplication in Hyper Data Protector
Enable
- (Optional) Configure the Options and Network settings.
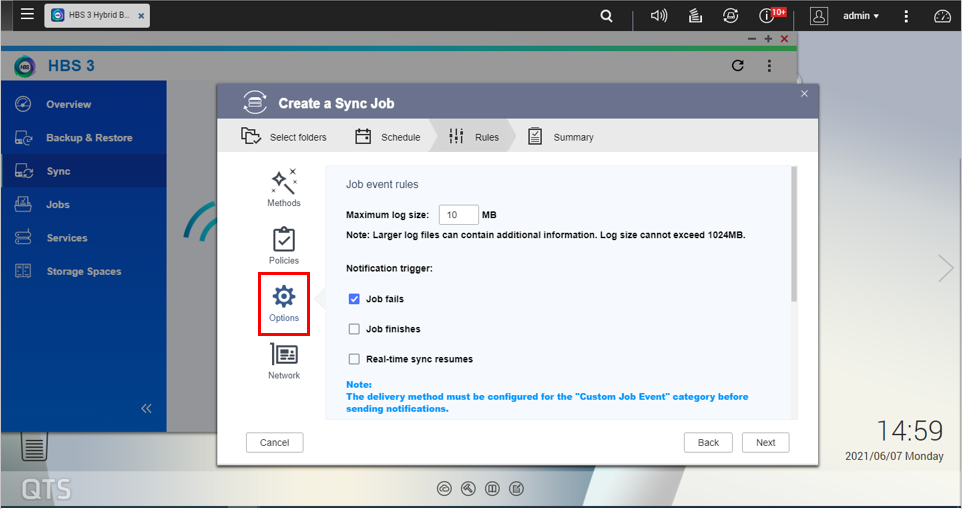
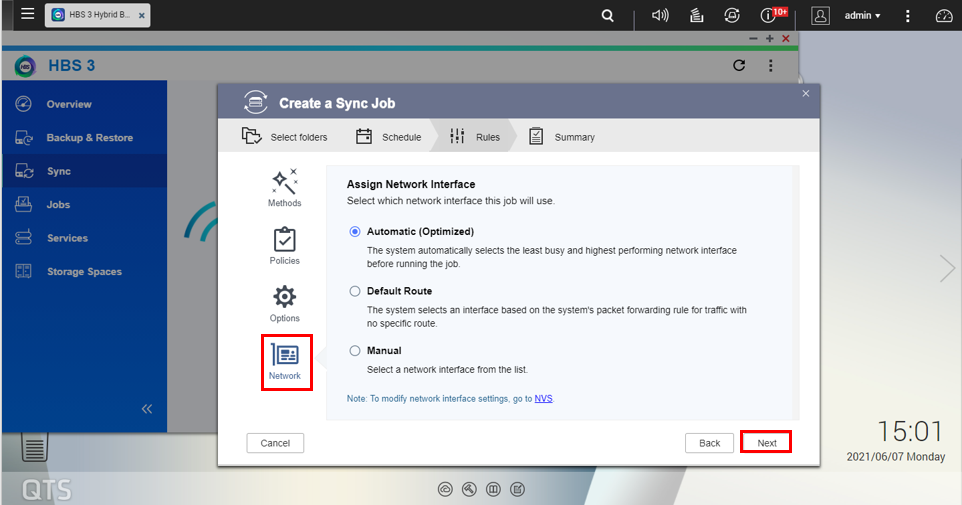
- Click Next.
- Click Create.

- Click Sync now.
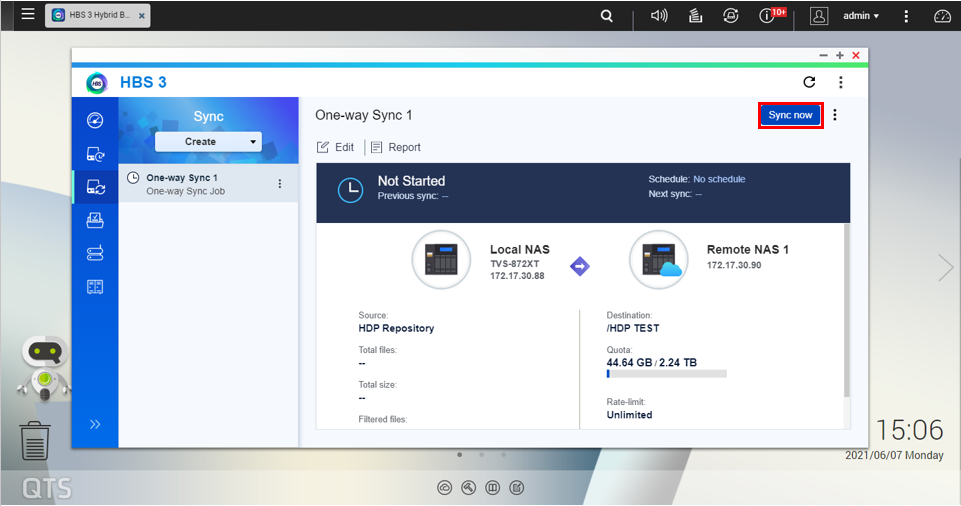
The sync job starts.
Importing the HDP Repository to Your Remote QNAP NAS
- Log in to the remote QNAP NAS.
- Open HDP.
Important: The HBS 3 sync job must be completed before starting the HDP import process. - Go to Repository Space.
- Click Add Backup Repository.
- Select Import Backup Repository.
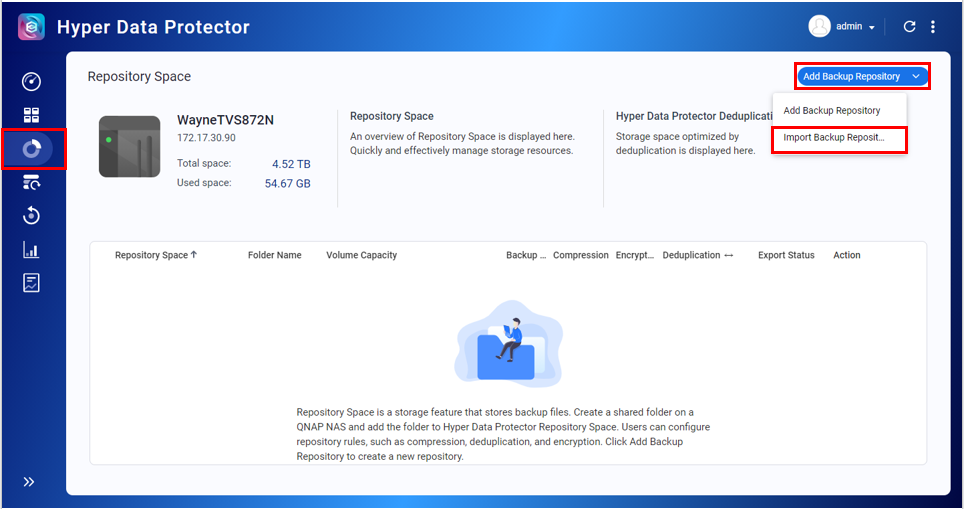
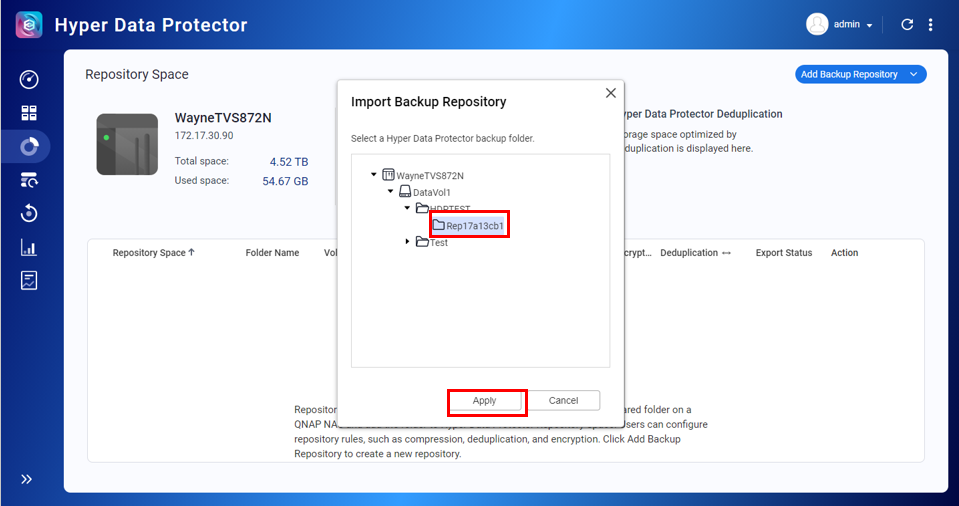
The Import Backup Repository window opens. - Select the destination folder from the HBS 3 sync job.
- Click Apply.
- Read the warning and click OK.

- Enter a name for the repository.
- Click Apply.

- Click OK.

The repository is imported.


