


How to obtain authorization from Google for using HDP for SaaS for Google Workspace?
Applicable Products
HDP for SaaS
Starting from version 2.4, the product previously known as Boxafe has been renamed to HDP for SaaS.
- Purpose
- Overview
- Configure Drive SDK API
- Create a service key for HDP for SaaS in Google Workspace
- Enable Domain-Wide-Delegation
- Add Google Workspace Domain in HDP for SaaS
Purpose
This document guides you through completing the required configurations in your Google Workspace and then adding it to HDP for SaaS for initiating backup.
Overview
HDP for SaaS for Google Workspace leverages Google OAuth 2.0 for authorization, ensuring security by letting users delegate authorities to their service accounts.
Before using HDP for SaaS for Google Workspace, you must create a service key for HDP for SaaS in Google Workspace and allow HDP for SaaS to access Google Drive with the Drive SDK API. This article guides you through enabling users to access Google Workspace service APIs with the Drive SDK API, and to generate a service key for the authorization of HDP for SaaS for Google Workspace.
Configure Drive SDK API
- Log in to Google admin console with the credentials of the domain admin which you wish to be backed up by HDP for SaaS.
- Go to Apps > Google Workspace > Drive and Docs >Features and Applications
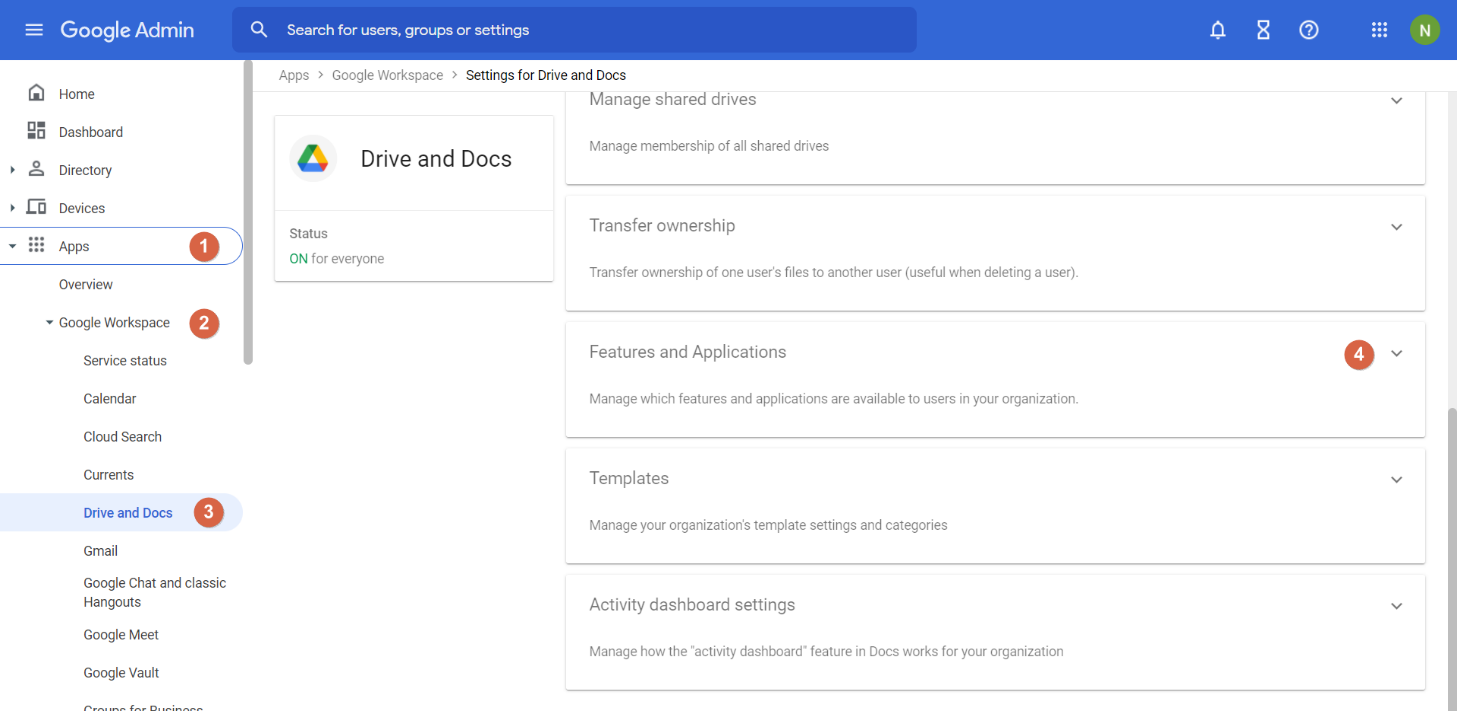
- Click Drive SDK.
- Check Allow users to access Google Drive with the Drive SDK API
- Click SAVE.

Create a service key for HDP for SaaS in Google Workspace
- Log in to https://console.cloud.google.com/apis/dashboard with the credentials of a domain super administrator.
- Click the project dropdown selector.
The Select a project window opens. - Click New Project.

The New Project page opens. - Enter a Project name, Organization and Location.
- Click Create.
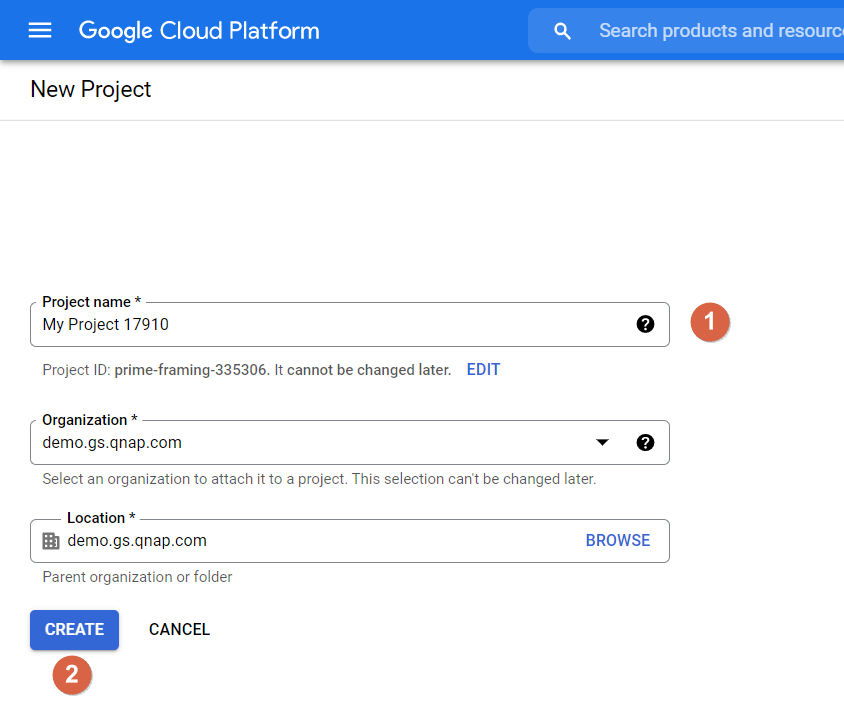
Note: We use the project name “BoxafeBackupSolution” in this tutorial.
Your project is created, you receive a notification and are taken to the Dashboard.
Important: If you are not automatically taken to the Dashboard, ensure that your new project is selected and go to > APIs & Services > Dashboard.
- Click + ENABLE APIS AND SERVICES.

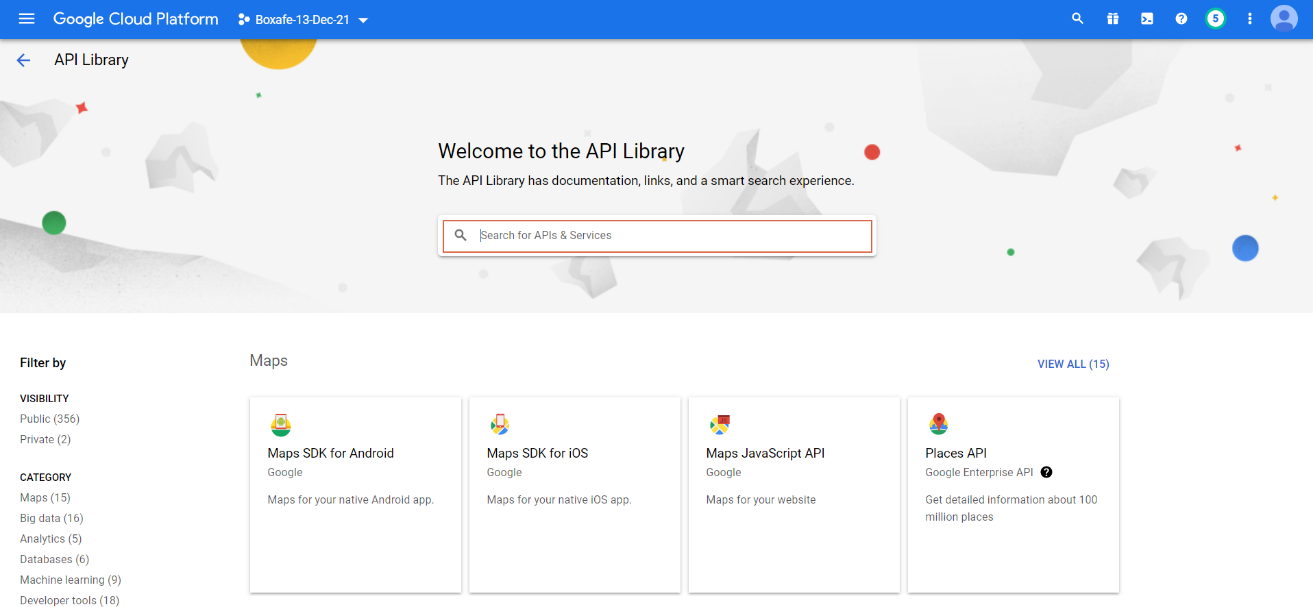
The Welcome to the API Library page opens - Search for, and enable the following APIs:
- Admin SDK API
- Google People API
- Gmail API
- Google Calendar API
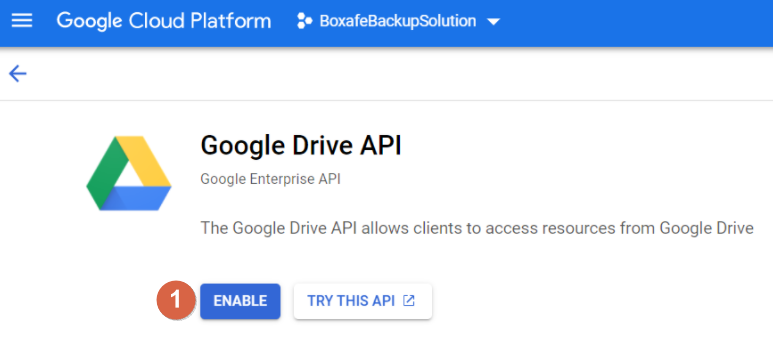
- Google Drive API
- Go to > IAM & Admin > Service Accounts.

- Click +CREATE SERVICE ACCOUNT.

- Enter the Service account name (in this example: “BoxafeBackupSolution”).
- Click CREATE AND CONTINUE.
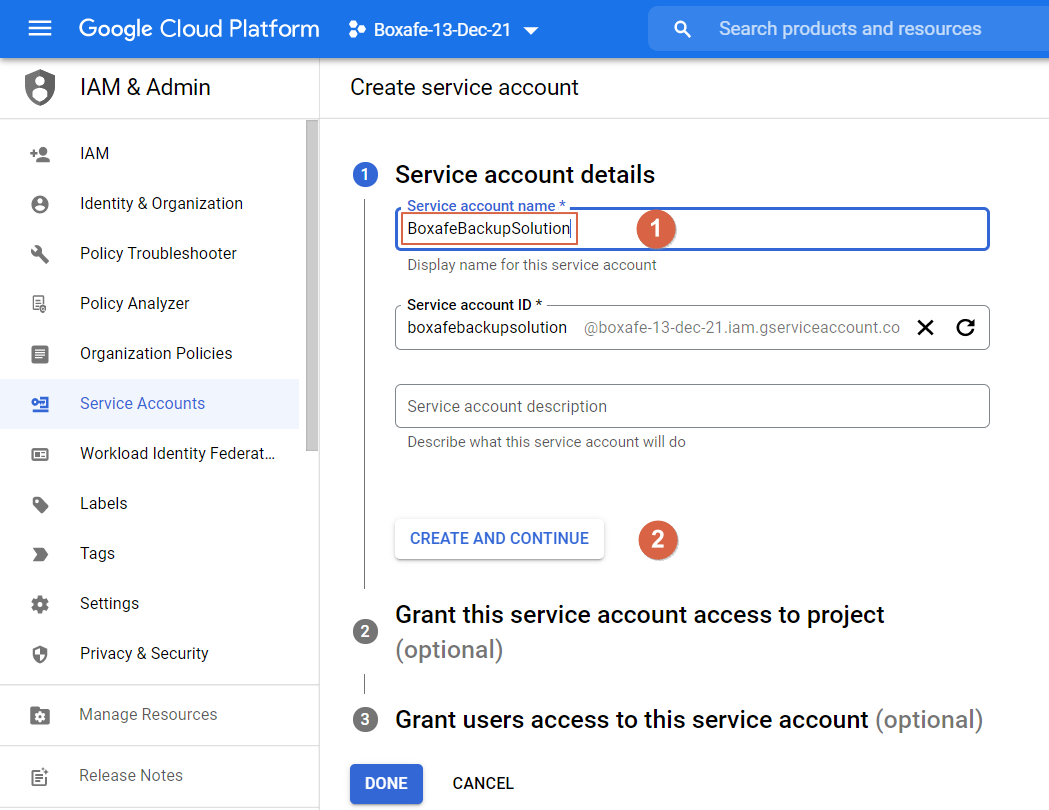
- Click Select a Role and select Basic > Owner.
- Click CONTINUE.
- Click DONE.

Enable Domain-Wide-Delegation
- Go to > IAM & Admin > Service Accounts.
- Find the Service account you created and click
 > Manage details.
- Go to the KEYS tab.
- Click ADD KEY > Create new key.
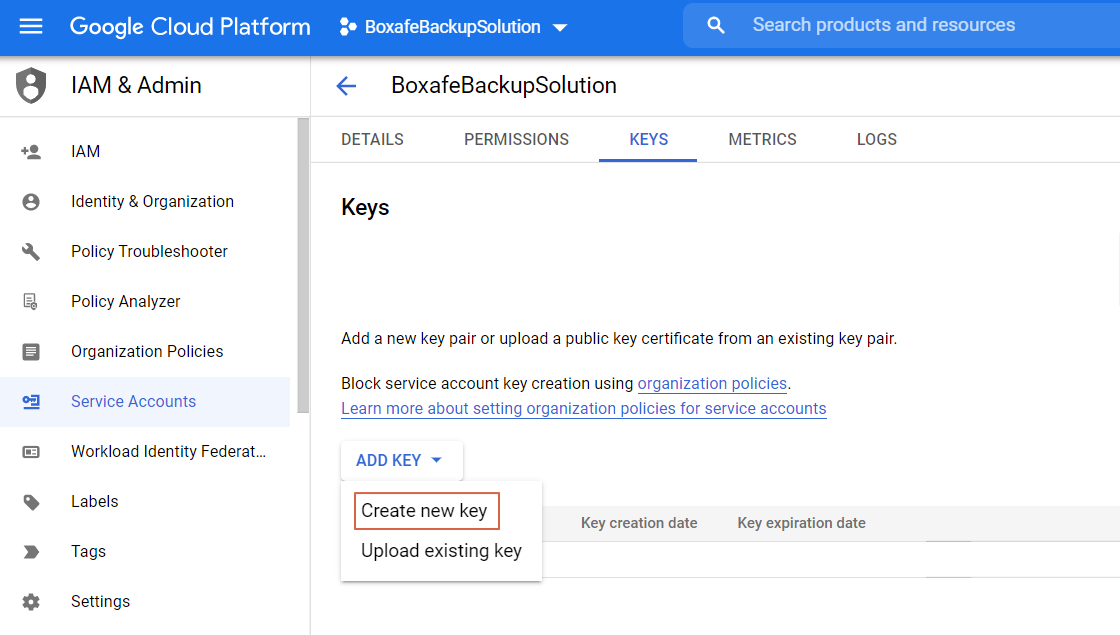
The Create private key window opens. - Choose JSON as the Key type.
- Click CREATE.

Your web browser will try to open/save the JSON file. Save it to your computer. - Click CLOSE.

- Go to > IAM & Admin > Service Accounts.
- Click
 to copy the OAuth2 Client ID of the Service account.
- Go to https://admin.google.com/
- Click Security
- Go to Access and data control > API controls

- Click MANAGE DOMAIN WIDE DELEGATION.

- Click Add new.
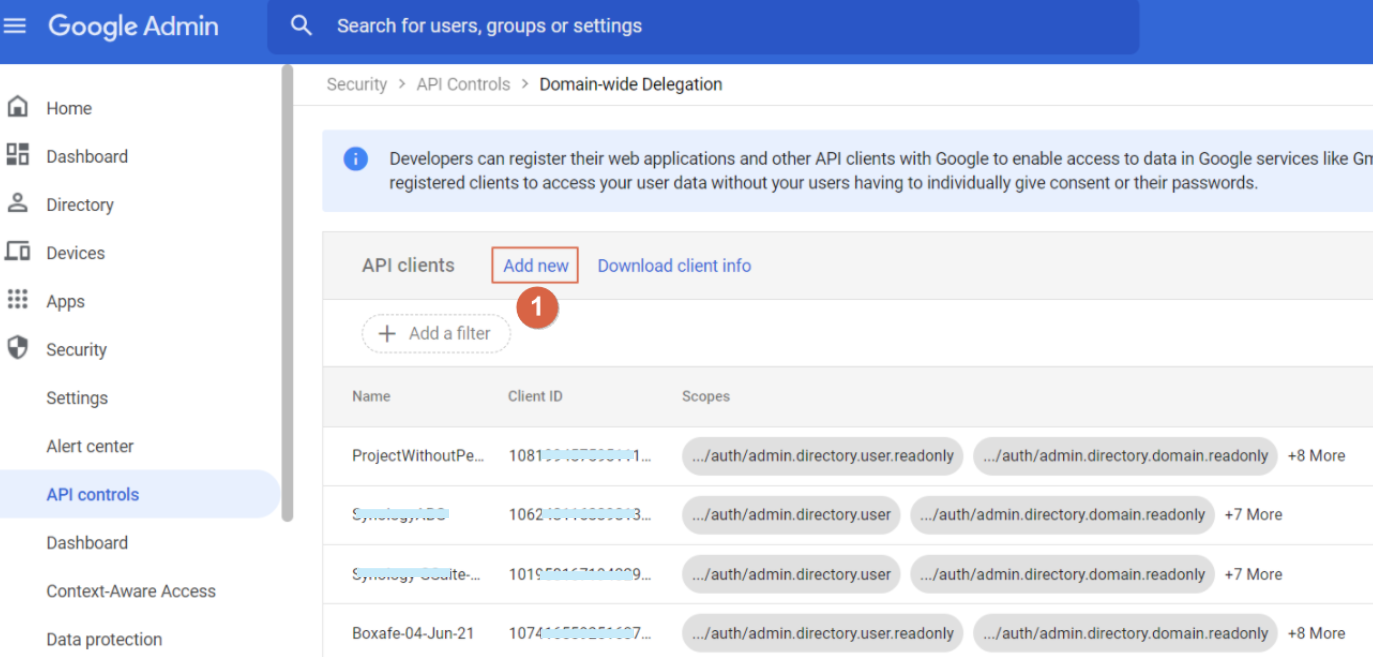
The Add a new client ID window opens.
- Configure the Client ID
- Client ID: Paste the OAuth2 Client ID
- Oauth scopes (comma-delimited): Copy and paste the following scopes:
https://www.googleapis.com/auth/admin.directory.user.readonly,
https://www.googleapis.com/auth/admin.directory.domain.readonly,
https://www.googleapis.com/auth/calendar,
https://www.googleapis.com/auth/calendar.events,
https://www.googleapis.com/auth/drive,
https://mail.google.com/, https://www.google.com/m8/feeds,
https://www.googleapis.com/auth/userinfo.email,
https://www.googleapis.com/auth/userinfo.profile,
https://www.googleapis.com/auth/plus.me
- Click AUTHORIZE
Add Google Workspace Domain in HDP for SaaS
- Open HDP for SaaS.
- Go to Domains.
- Click Add Domain > Google Workspace.
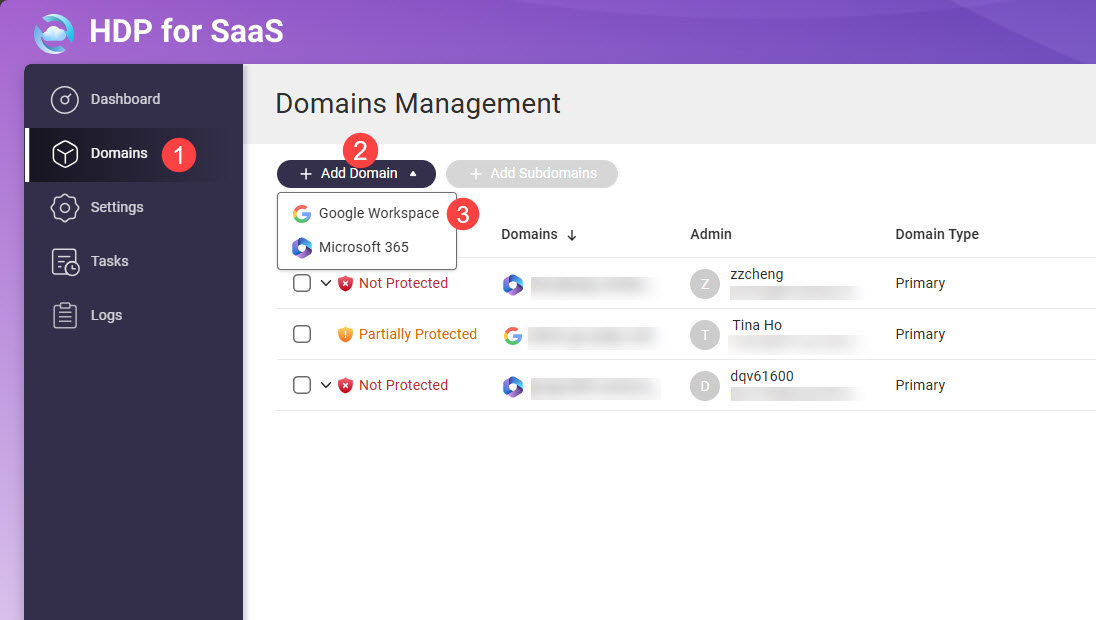 The Add Domain window opens.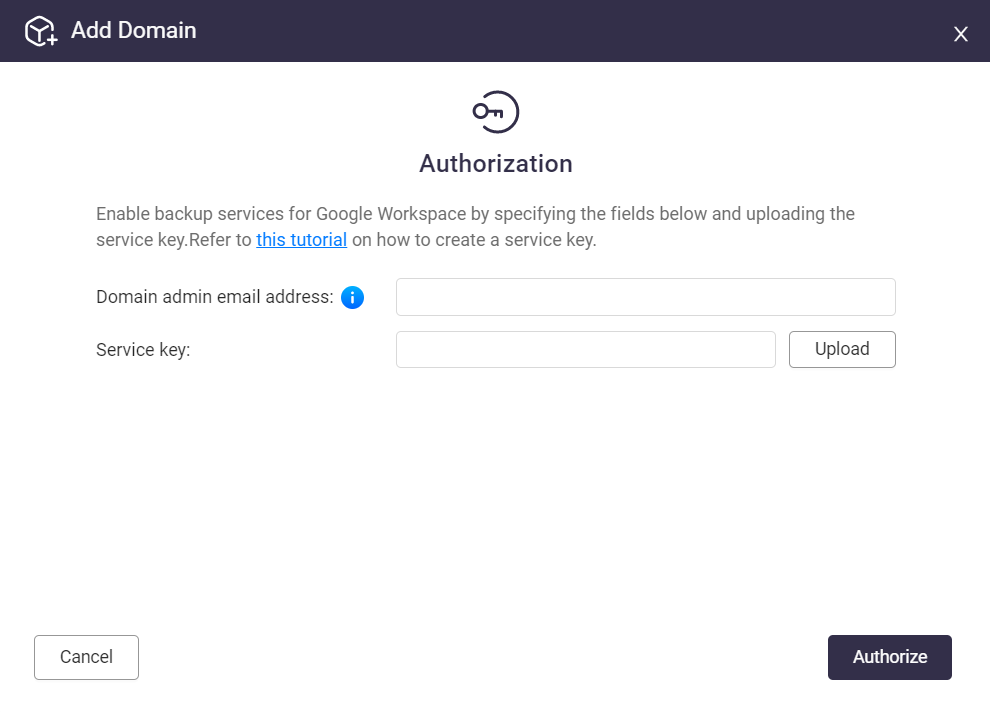
- Configure the Domain:
- Domain admin email address: Enter the Google Workspace administrator email address.
- Service Key: Upload the private key JSON file that was downloaded to your computer.
- Click Authorize
- Select the Domain Services to back up
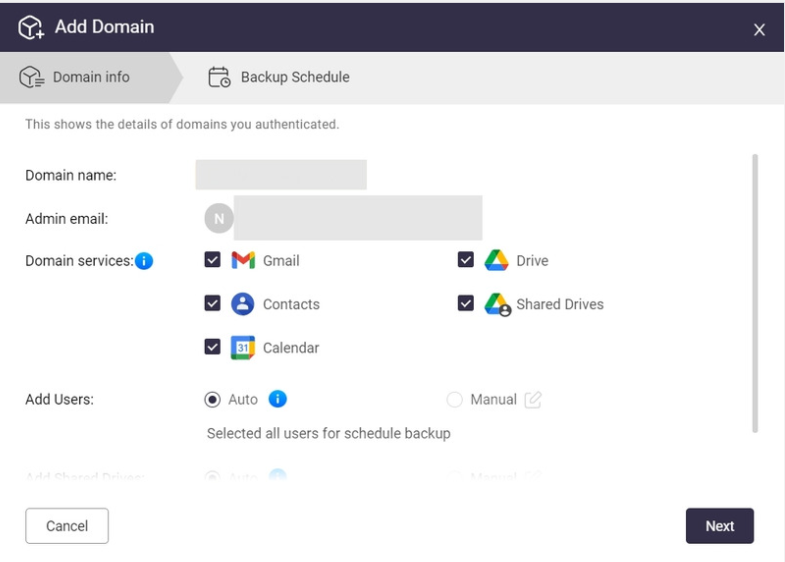
- Configure Add Users:
- Select Auto for HDP for SaaS to automatically add users that are added to the Google Workspace.
- Select Manual and you must click the Add Users button.
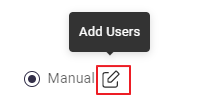
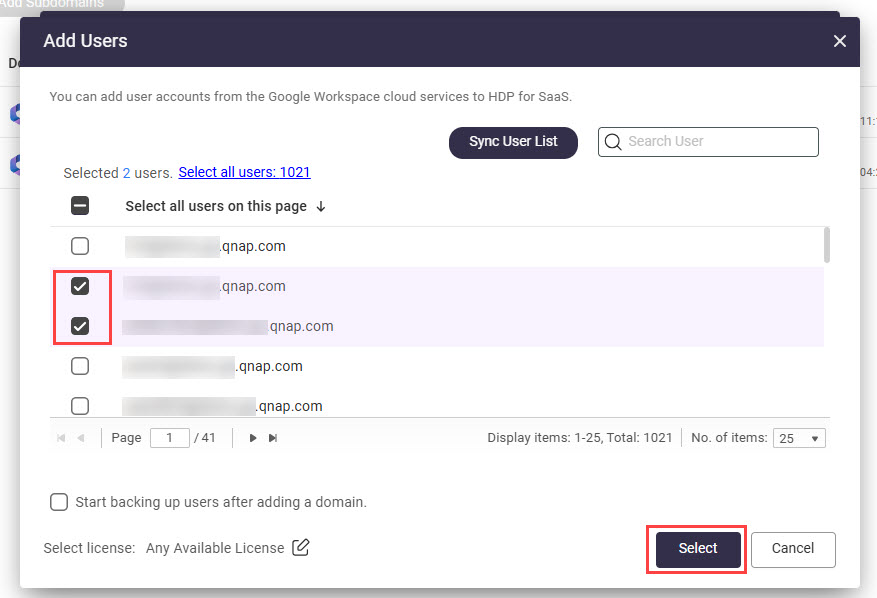
The Add Users window appears.- Click Sync User List to retrieve the users from the Google Workspace.
- Add or remove specific users using the checkbox next to their email address.
- Configure Add Shared Drives:
- Select Auto for HDP for SaaS to automatically add shared drives to HDP for SaaS.
- Select Manual and you must manually add new shared drives before they can be used by HDP for SaaS.
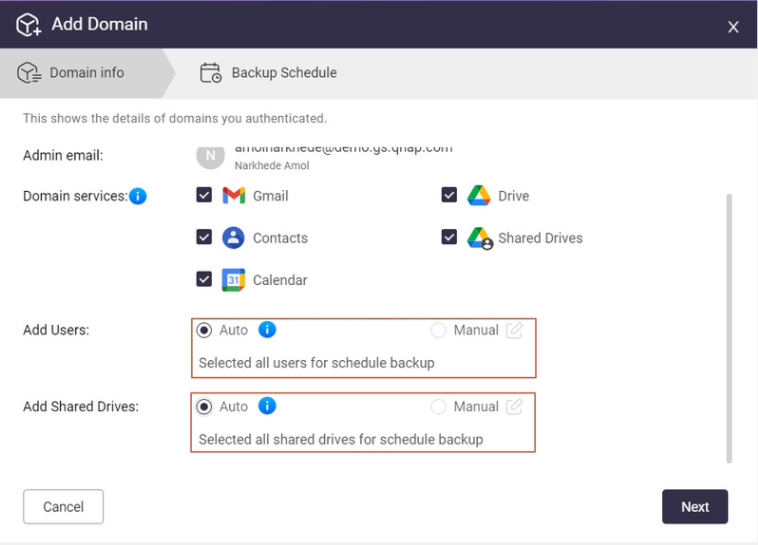
- Click Next.
- Define a backup schedule policy for All applications or Individual applications:
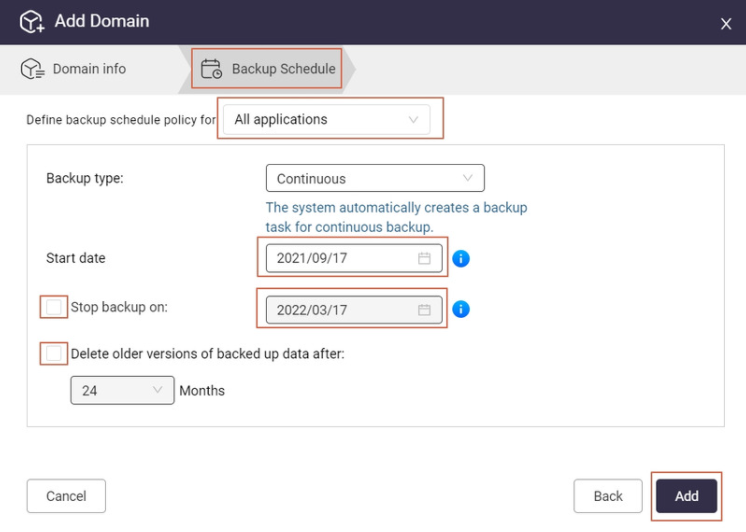
- All applications: Select the settings for backing up Gmail, Contacts, Calendar, Drive, and Shared Drives.
- Individual applications: Select the settings for the specific application.
- Backup type: Select Continuous, Manual, or Scheduled.
Note: Manual and Scheduled are not available for Gmail backup. - Start date: Enter a date the task should start.
- Optional: Enable Stop backup on: and select a date.
- Optional: Enable Delete older versions of backed up data after: and select a monthly frequency.
- Click Add.
The Google Workspace domain is added to HDP for SaaS and backup tasks are processed based on your settings.
For further assistance, ask other users and QNAP experts in the community. Go to QNAP Community


