Applicable product
- myQNAPcloud Surveillance
- QVR Surveillance 3.0.0 or later version
Details
There are two ways to start uploading recordings to myQNAPcloud Surveillance after assigning a license. This article will introduce how to select Backup Channels & Type before purchasing any myQNAPcloud Surveillance licenses. For the other method, see How to assign myQNAPcloud Surveillance license to the channels in QVR Surveillance?
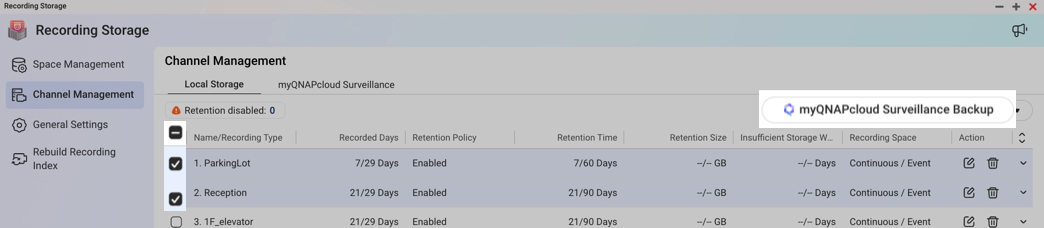
1. Go to Recording Storage > Channel Management.
2. Select one or more channels to back up recordings to myQNAPcloud Surveillance.
3. Click the [myQNAPcloud Surveillance Backup] button on the top right corner.

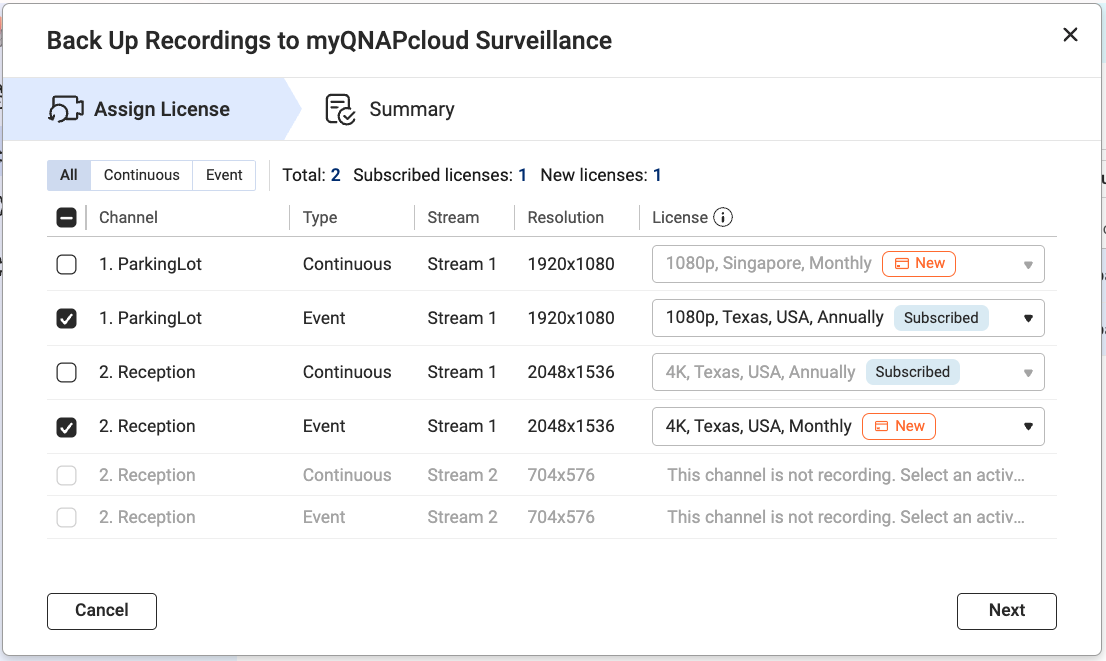
4. Confirm the stream, recording type, and then review the selected license, and click Next. 
Note- Subscribed:
- This means you have already purchased this license.
- If you cannot select your purchased license, the stream's resolution may not meet the license criteria. Adjust your stream's settings to match the license resolution in Camera Settings, then restart the process.
- For more details, visit What license should I prepare for myQNAPcloud Surveillance.
- New:
- This means you need to purchase the license after clicking Assign on the final step.
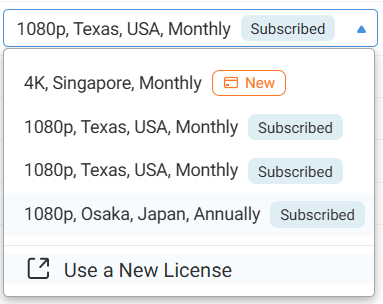
- You can change the resolution, region, or the subscription period of the pre-assigned license by selecting Use a New License from the drop-down menu.

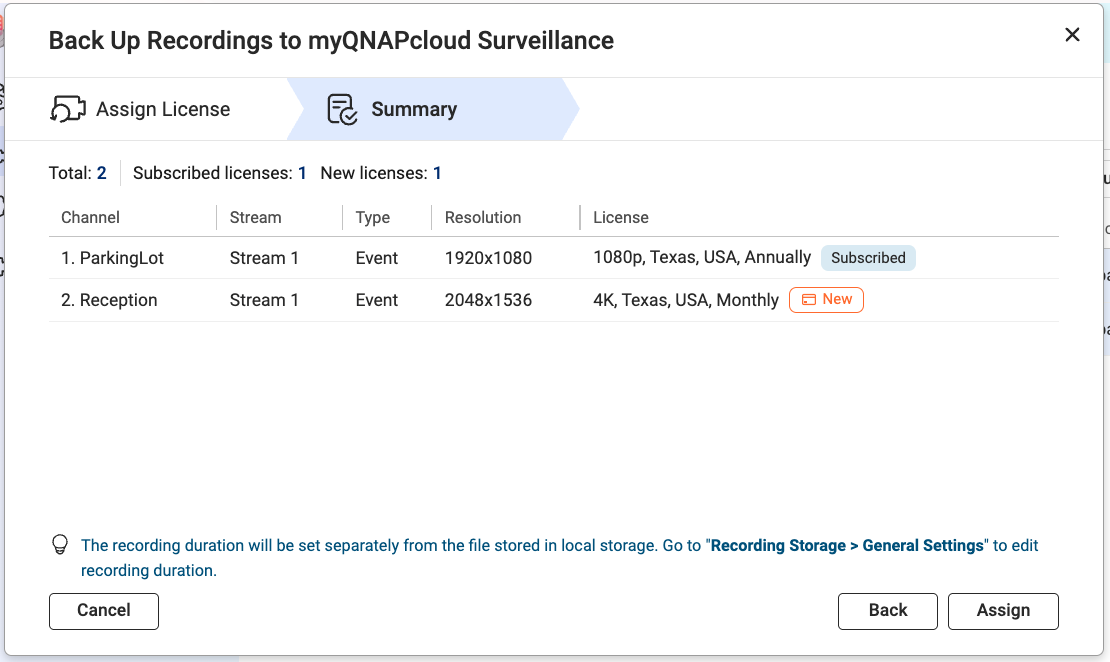
5. Review the summary, then click Assign.

Important
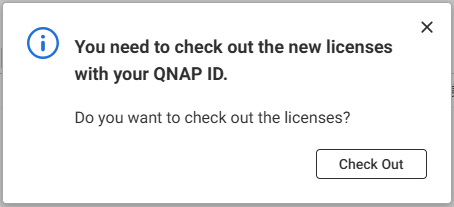
If you select a new license, you will be required to check out the license with your QNAP ID.
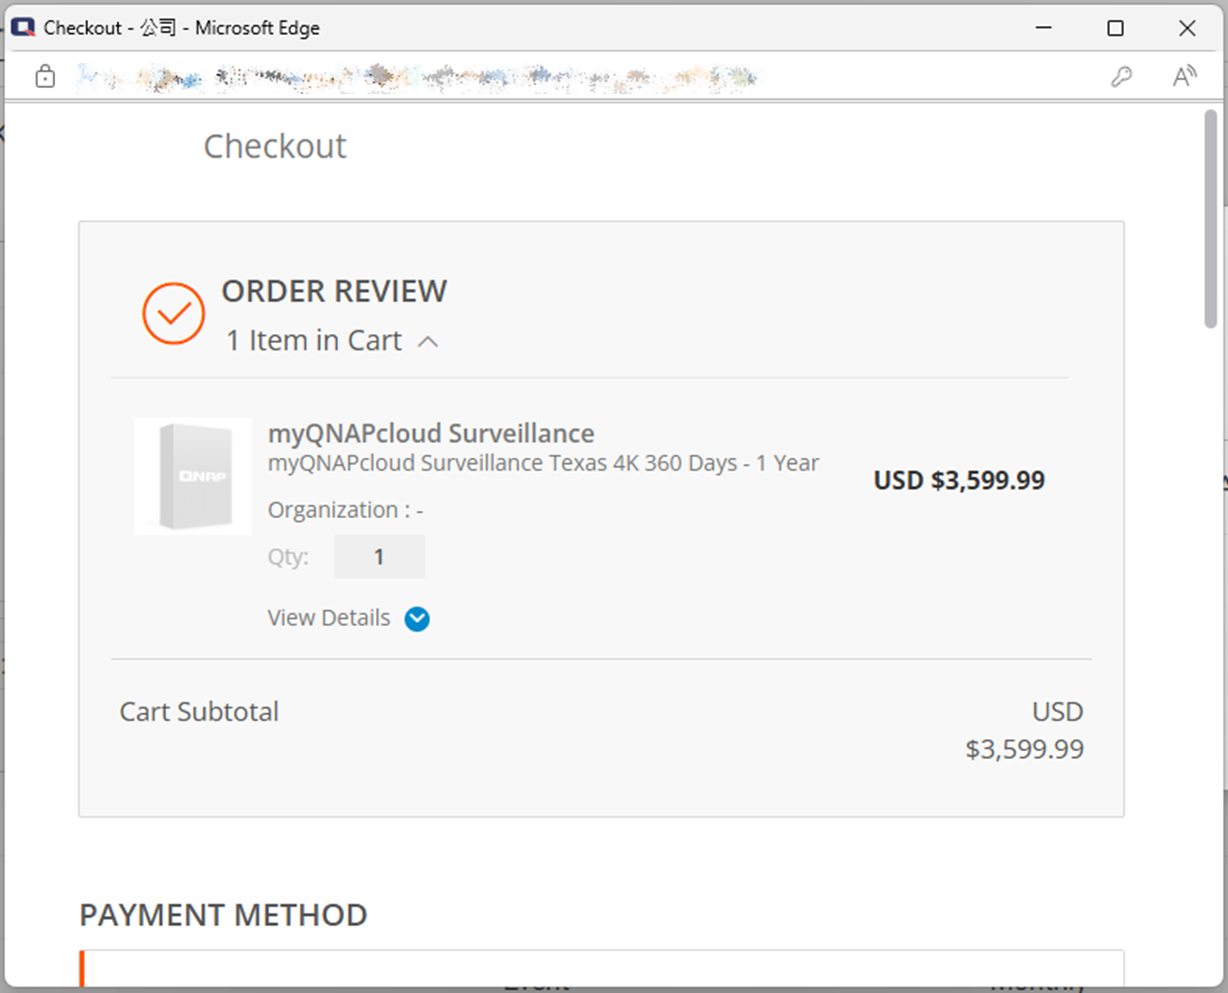
6. Click Check out to start the checkout process for the new licenses used in this assignment.


7. Confirm the assignment status.
Further reading
적용되는 제품
- myQNAPcloud Surveillance
- QVR Surveillance 3.0.0 이상 버전
상세 정보
라이선스를 할당한 후 myQNAPcloud Surveillance에 녹화를 업로드하는 두 가지 방법이 있습니다. 이 문서에서는 myQNAPcloud Surveillance 라이선스를 구매하기 전에 백업 채널 및 유형을 선택하는 방법을 소개합니다. 다른 방법은myQNAPcloud Surveillance 라이선스를 QVR Surveillance의 채널에 할당하는 방법은?를 참조하세요.
1. 이동합니다 녹화스토리지 > 채널 관리.
2. myQNAPcloud Surveillance에 녹화를 백업할 하나 이상의 채널을 선택합니다.
3. [myQNAPcloud Surveillance 백업] 버튼을 오른쪽 위 구석에서 클릭합니다.
4. 스트림, 녹화 유형을 확인한 후 선택한라이선스를 검토하고 다음을 클릭합니다. 
참고- 구독됨:
- 새로운:
- 이것은 당신이 구매해야 함을 의미합니다 라이선스을(를) 클릭한 후 할당 마지막 단계에서.
- 미리 할당된라이선스의 해상도, 지역 또는 구독 기간을 변경하려면 새라이선스사용 드롭다운 메뉴에서 선택합니다.
5. 요약을 검토한 다음 할당을 클릭합니다.
중요
새라이선스을(를) 선택하면 QNAP ID로라이선스을(를) 체크아웃해야 합니다.
6. 클릭 체크아웃 이 할당에 사용된 새라이선스의 체크아웃 프로세스를 시작합니다.
7. 할당 상태를 확인합니다.
중요
- 결과 창을 닫아도 체크아웃 또는 할당 프로세스가 취소되지 않습니다.
- 창을 닫은 후 Surveillance Logs > myQNAPcloud Logs에서 결과를 확인할 수 있습니다.
- 할당 프로세스가 계속 실패하면을(를) 참조하십시오.
추가 읽기