How to set up a WORM shared folder as an HBS backup destination?
Applicable Products
- QuTS hero
- HBS 3 Hybrid Backup Sync version 26 or later
- Storage Manager
Introduction
WORM (Write Once, Read Many) is a data protection solution that ensures data integrity by preventing files from being modified or deleted. Once data is written, it cannot be changed or removed within the configured retention period, protecting your data against ransomware attacks and unauthorized modifications.
In QuTS hero, you can enable WORM on a shared folder. You can then use HBS to back up files to the WORM shared folder, ensuring the backup data will be immutable, thereby preventing any accidental or malicious modifications.
This tutorial provides a step-by-step guide on how to set up a WORM shared folder and then create a backup job in HBS to back up files to the WORM shared folder.
Instructions
Because WORM cannot be enabled, disabled, or modified on an existing shared folder, you must create a new shared folder and enable WORM during creation. After the WORM shared folder is created, you can create a backup job in HBS using the WORM shared folder as destination, and then monitor the job status after it runs for the first time. If you run out of space on the WORM shared folder, you can expand the folder capacity as needed.
A. Create a WORM shared folder.
For details on other shared folder settings, see "Creating a shared folder" in the QuTS hero User Guide.
- Log in to your NAS as an administrator.
- Open Control Panel.
- Go to System > Shared Folders > Shared Folder.
- Click Create > Shared Folder.
The Create Shared Folder Wizard opens.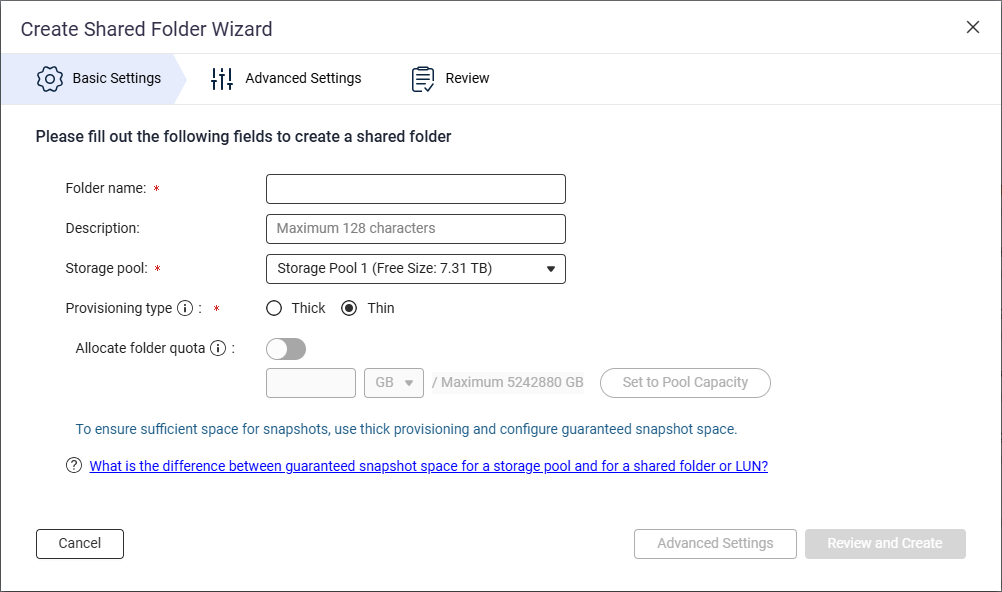
- Next to Folder name, specify the shared folder name.
- Next to Storage pool, select the storage pool in which to create the shared folder.
- Next to Provisioning type, select a provisioning type.
- Click Advanced Settings.
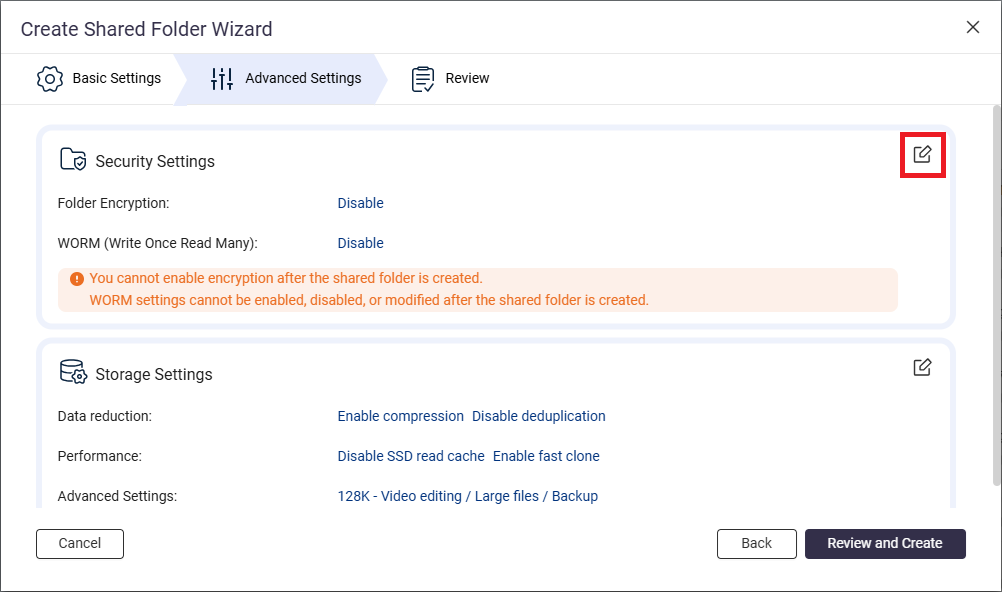
- Configure WORM.
- Next to Security Settings, click
 .
.
- Go to the WORM (Write Once Read Many) section.
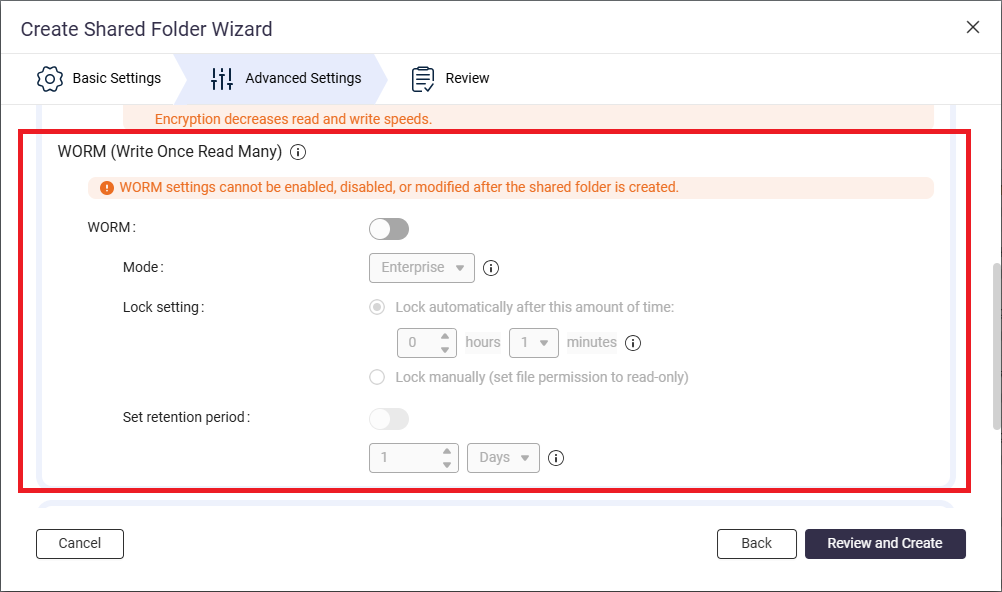
- Next to WORM, click
 .
. - Next to Mode, select one of the following WORM modes:
- Enterprise: Users can delete the shared folder.
- Compliance: Users cannot delete the shared folder. An administrator must delete the parent storage pool in order to delete the shared folder.
- Next to Lock setting, select Lock manually (set file permission to read-only).
This option requires a user with the appropriate privileges to manually set the file permission to read-only in order to lock the file.NoteTo use a WORM shared folder as a destination in HBS, you must select the Lock manually option. - Enable the retention period.
The retention period limits how long WORM applies to each file and folder in the shared folder. Files and folders can be deleted after the specified retention period.NoteTo use a WORM shared folder as a destination in HBS, you must enable the retention period on the shared folder.- Next to Set retention period, click .
- Specify the number of days, months, or years.
- Next to Set retention period, click
- Next to Security Settings, click
- Click Review and Create.
- Review the settings, and then click Create.
The system creates the WORM shared folder.
B. Create a backup job in HBS with the WORM shared folder as destination.
For illustration purposes, we'll create a local backup job where the source and destination folders are on the same NAS device.
For details on other job settings, see Creating a backup job.
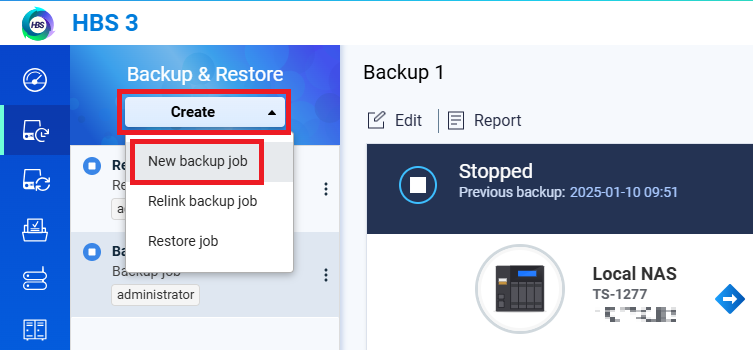
- Open HBS 3 Hybrid Backup Sync.
- Go to Backup & Restore.
- Click Create, and then click New backup Job.
 The Create a Backup Job wizard opens.
 - Select the source folder, and then click Next.
- Select Local NAS for the destination NAS, and then click Select.
- Select the WORM shared folder you created as the destination folder, and then click OK.NoteTo select a WORM shared folder for the destination folder, the folder's WORM lock setting must be set to Lock manually and the retention period must be enabled.
For details, see earlier instructions in this tutorial.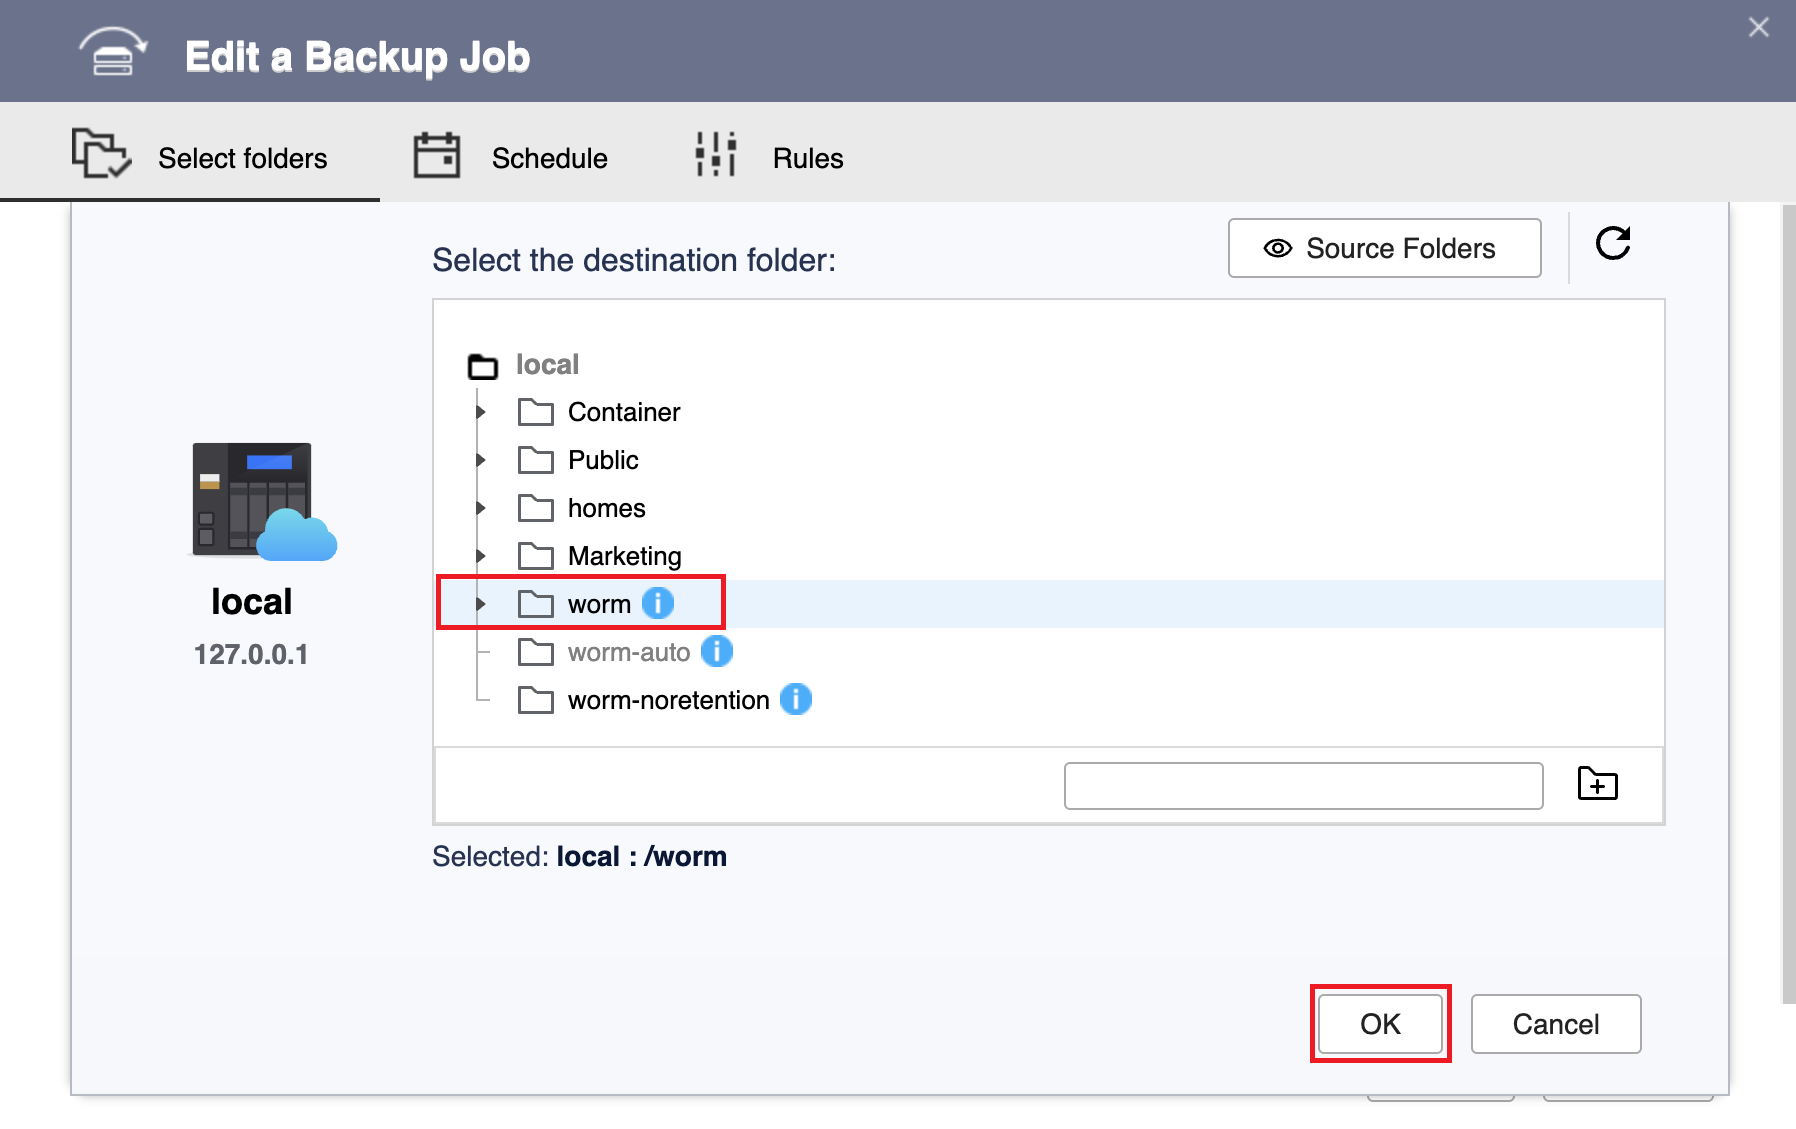
- Click Next.
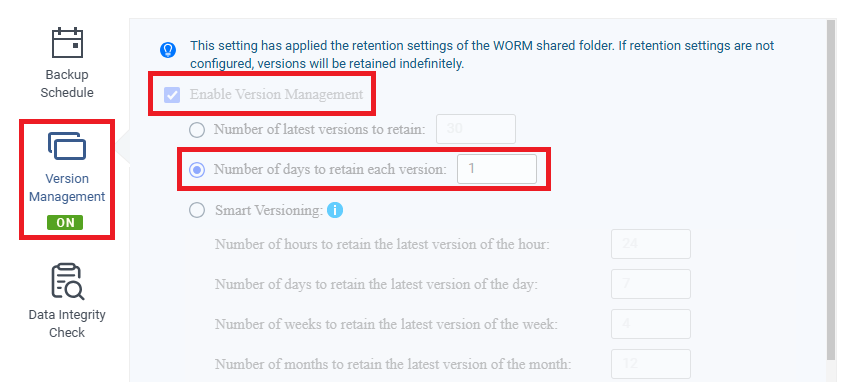
- Check that version management is enabled.Note
- HBS automatically enables and configures the version management setting to match the retention period of the destination WORM shared folder.
- You cannot change this setting.
- Click Version Management.
- Check that Enable Version Management is selected.
- Check that Number of days to retain each version is selected and matches the retention period of the WORM shared folder.
- Click Next.
- Optional: Configure job rules.
- Click Next.
- Review the summary, and then click Create.
HBS creates the backup job.
C. Run and monitor the backup job in HBS.
- Manually run the backup job.NoteYou can skip this step if you configured the job to run immediately after creation or if you want the job to run according to the schedule you configured.
- Go to HBS > Backup & Restore.
- Select the backup job you created.
- Click Back Up Now.
- After the job runs for the first time, check the job report to ensure the job ran smoothly.
- Go to HBS > Backup & Restore.
- Select the backup job.
- Click Report.
 The Report window opens.
 - Go to the Logs tab.
- Check for a message that mentions the job name and includes the words "Finished Backup job".
For example: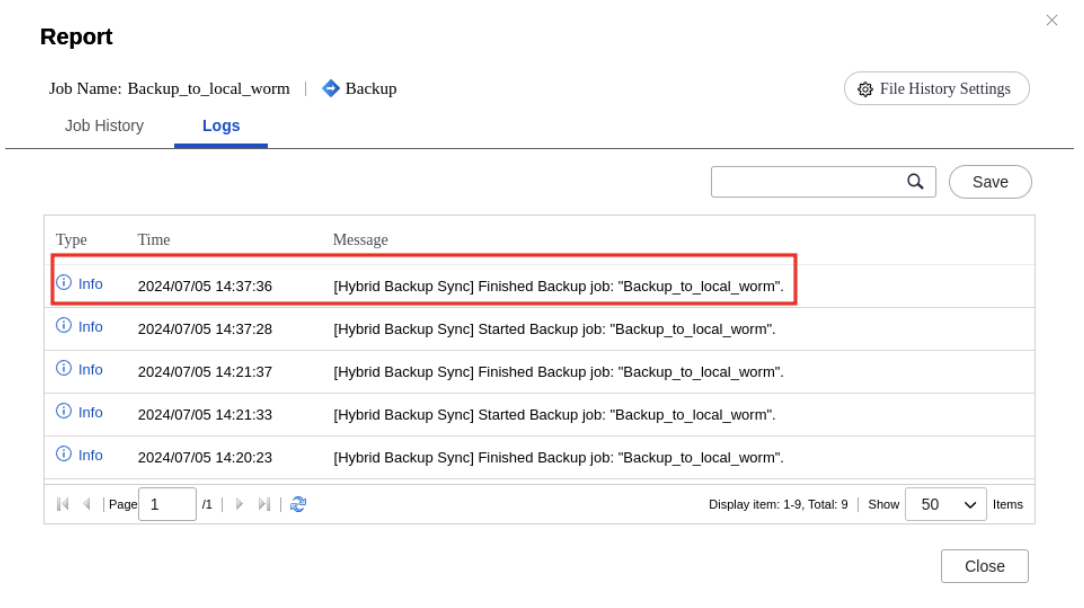
D. Expand the WORM shared folder if you run out of space.
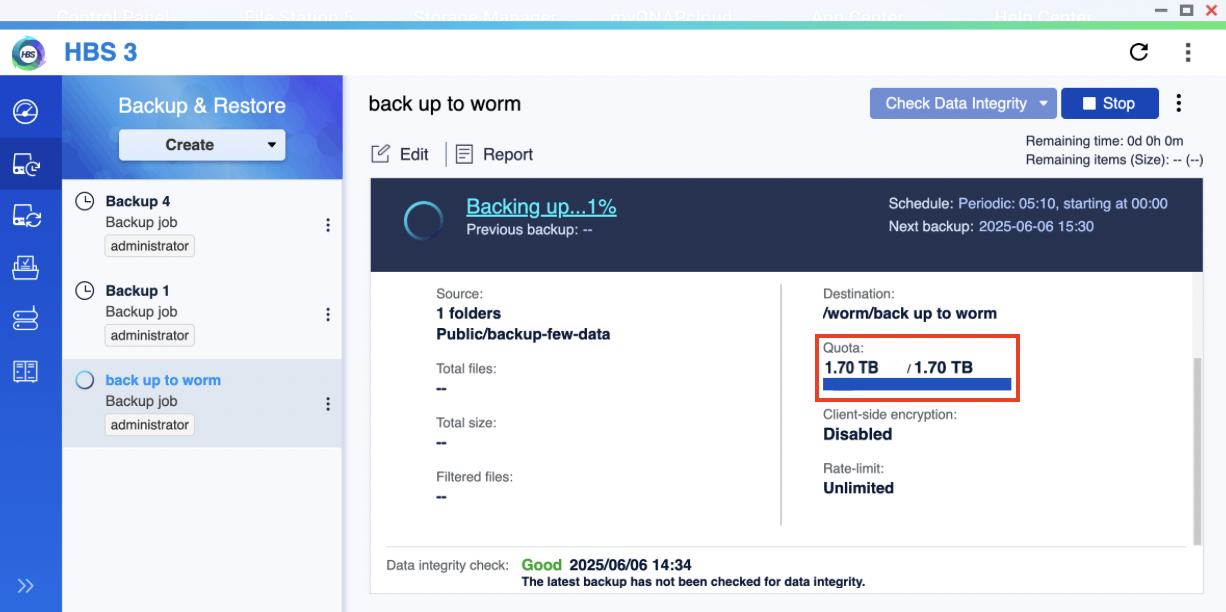
If your backup job fails due to the destination shared folder running out of space, and the folder's parent storage pool still has free space, you can increase the capacity of the shared folder.
You can see that the destination shared folder is full by checking the Quota field of your job in HBS > Backup & Restore:
 > Manage under Action.
To expand your WORM shared folder, follow these instructions:
- Go to Storage Manager > Storage Space.
- Locate the shared folder.
- Under Action, click > Resize Shared Folder.
The Resize Shared Folder window opens. - Next to New capacity, specify a greater size for the shared folder.
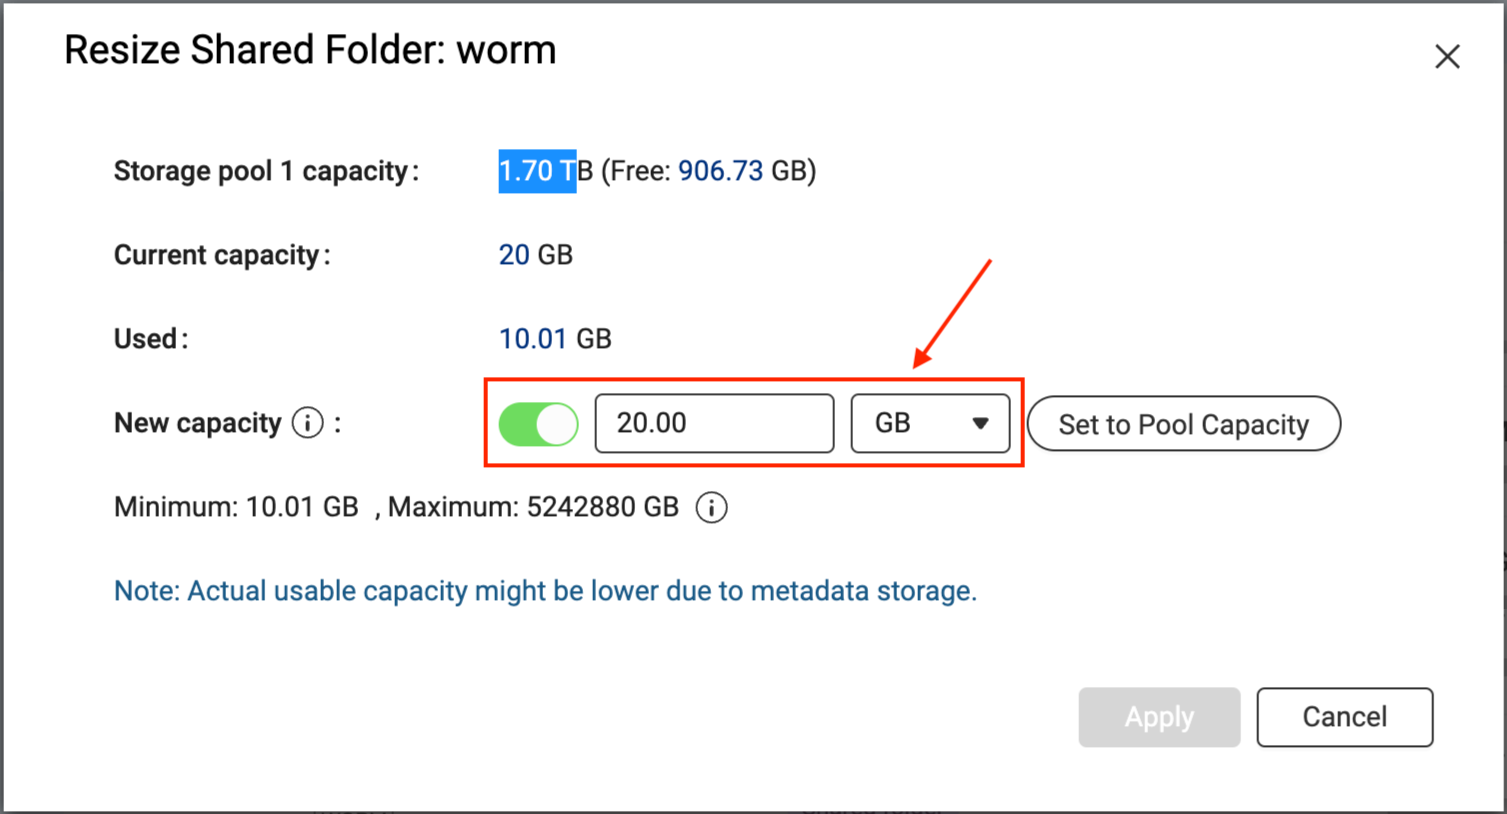
- Click Apply.
The system expands the shared folder. This process may take a while.
After the shared folder has been expanded, you can go to HBS and run the backup job again.


