Using Hyper Data Protector to Back Up Hypervisors to a QNAP NAS
Last modified date:
2020-04-13
QNAP Hyper Data Protector allows you to easily back up VMware and Hyper-V hypervisors to a QNAP NAS. Compression and deduplication can also be used to optimize storage and network utilization. This tutorial explains the process of operating Hyper Data Protector.
Installing Hyper Data Protector
- Log in to QTS.
- Open App Center.
- Search for Hyper Data Protector.
- Click Install.

Adding Hypervisors to the Hyper Data Protector Inventory
- Log in to Hyper Date Protector using your QNAP NAS account.

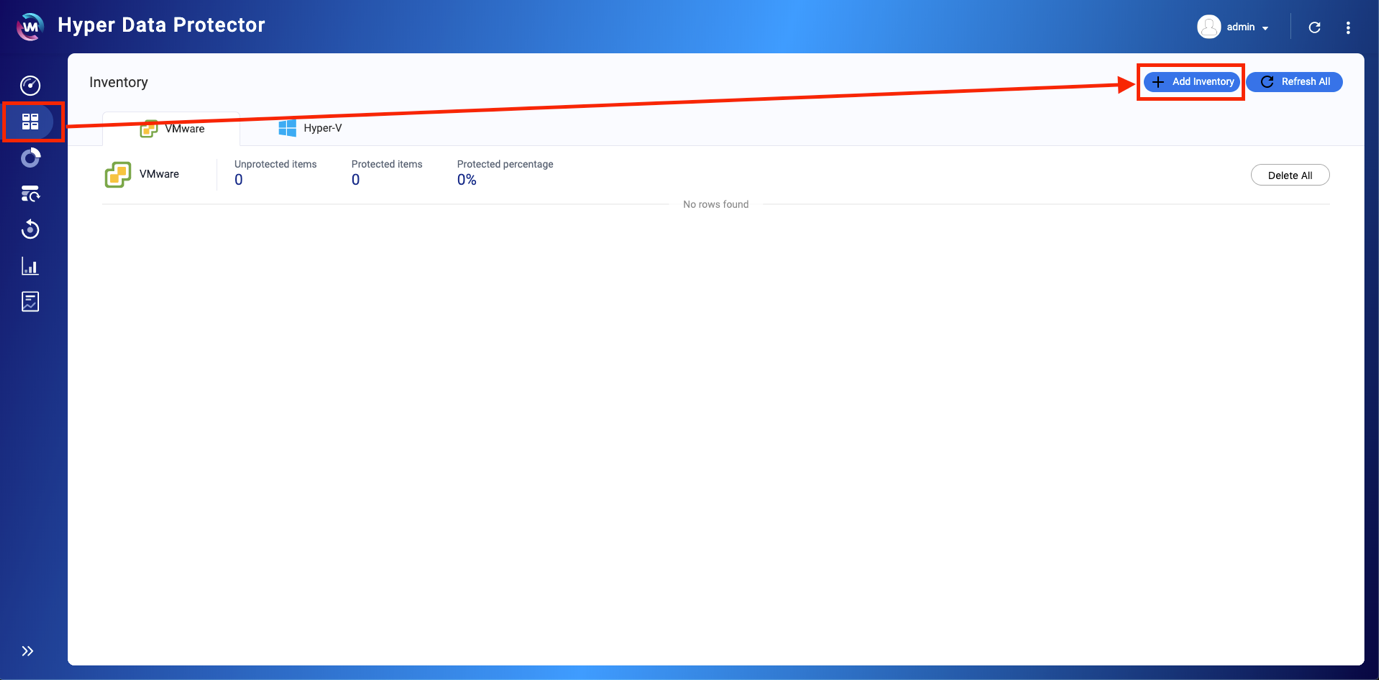
- Click Inventory.
- Click Add Inventory.

- Choose the type of Hypervisor to backup (VMware or Hyper-V).
- Click +Add New Inventory.

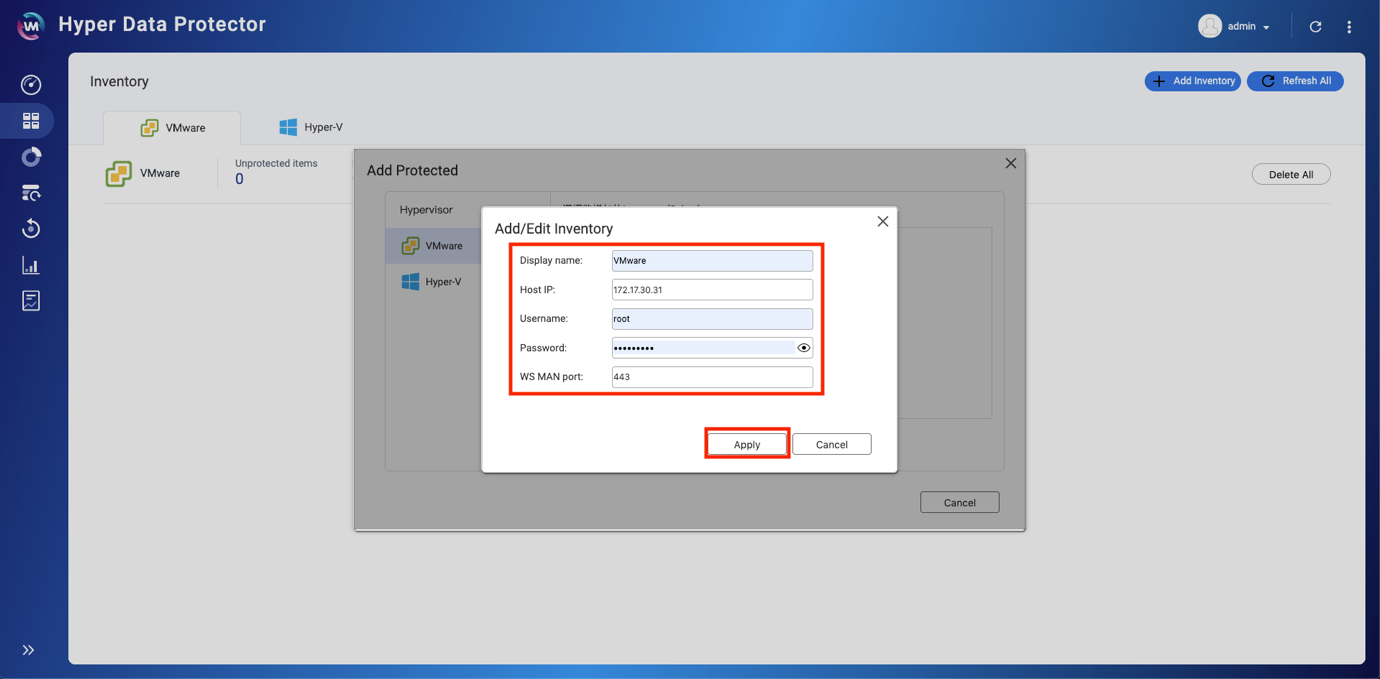
The Add/Edit Inventory window opens. - Enter the details for the Hypervisor.
- Enter a Display name.
- Enter the Hostname or IP of the Hypervisor.
- Enter the Username of the Hypervisor.
- Enter the Password of the Hypervisor.
- Click Apply

The Hypervisor is added to the Inventory.

Backing up VMware/Hyper-V Hypervisors
Create New Backup Job
- Click Backup > Create New Job.

- Enter a Job Name.
- Click Select Source.

- Select the Hypervisor to backup.
- Click Next.

- Select the content of the Hypervisor to backup.
- Click Select.

- Click Select Destination.

- Click + Add Repository.

- Click Choose.

- Enter a name for the Repository.
- (Optional) Select Enable Deduplication and/or Enable Data Compression based on your requirements.
- Click Apply.

- Click
 > Select.

- Click Next.

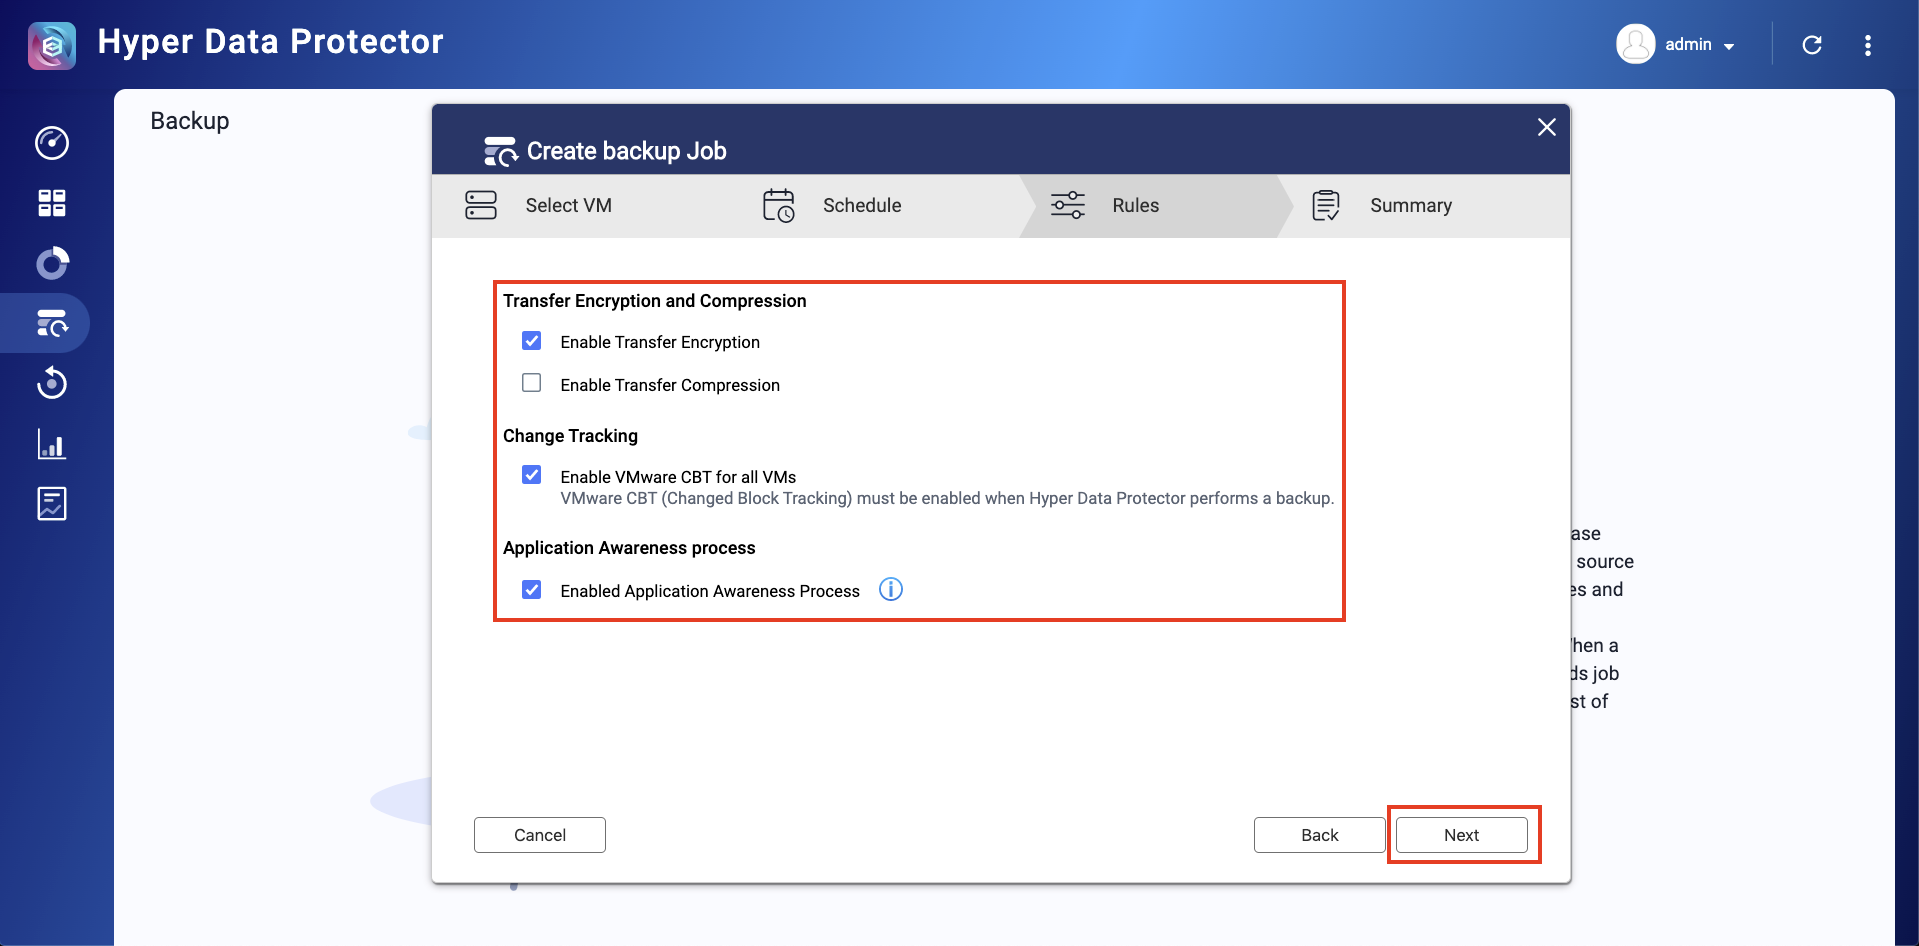
- Configure schedule and rules settings.
- Schedule: Can be One Time, Periodic, Daily, Weekly, Monthly.
- Retention: Keep the following restore point for archival purposes.
- Transfer Encryption: Increases the security of files being transferred.
- Compression: Optimizes file sizes for faster data transmission.
- Agree VMware CBT for all the VMs: Changed Block Tracking (CBT) is an incremental backup technology for VMware virtual machines (VMs). CBT only backs up changed blocks, rather than backing up every block of every VM in the infrastructure.
- Enable Application Awareness Process: Application Awareness is based on Microsoft VSS and prevents data loss or application failures if these backup files include application data or system state information.

- Click Backup Now.

The backup job is started.
Restoring VMware/Hyper-V Hypervisors
- Click Restore.
- Click Create New Job.

- Enter a Job Name.
- Click Select Source from Backup Job or Repository.

- Select the source.
- Click Next.

- Choose the timeline to restore.
- Click Next.

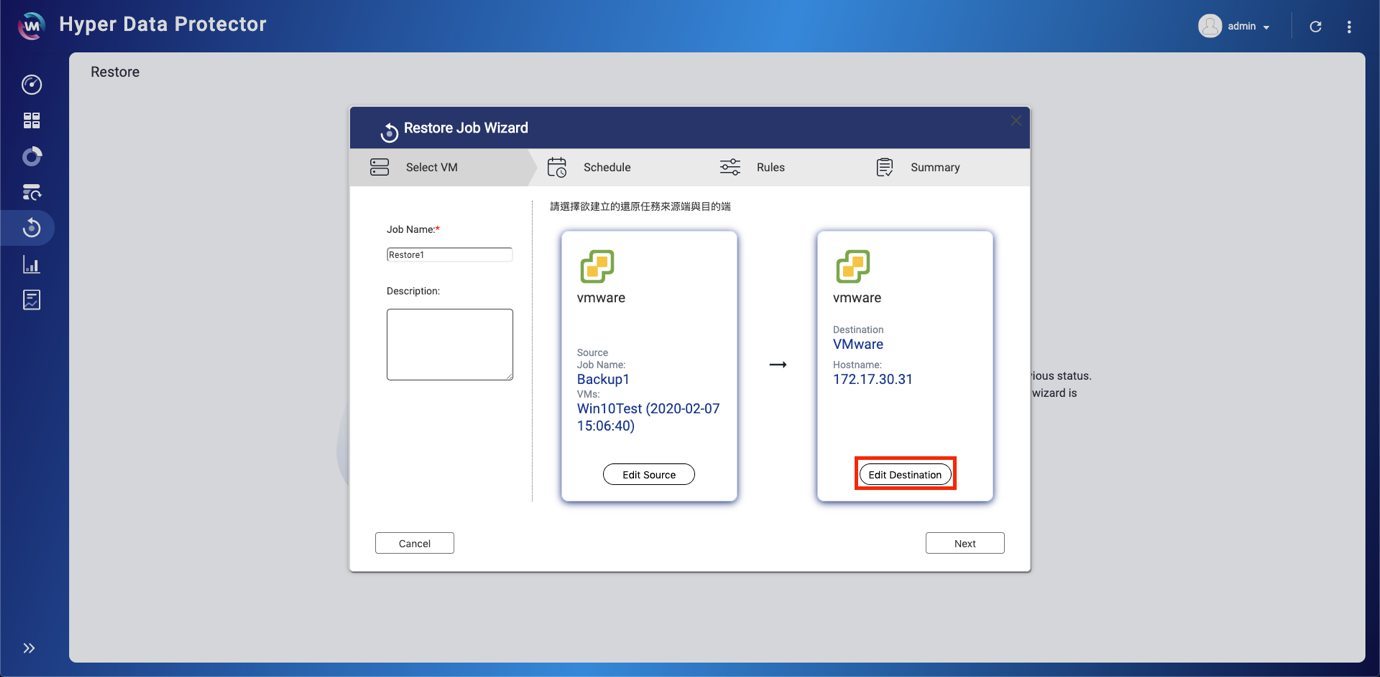
- (Optional) To change the destination, click Destination > Next.


- Click Next
- Configure schedule and rules settings.
- Schedule: Can be One Time, Periodic, Daily, Weekly, Monthly.
- Restore to existing VMs: This option will overwrite the original source VM.
- Generate new VMs: This option will add “-recovered” to the recovered VM’s name if an existing VM exists.
- Transfer Encryption: Increases the security of files being transferred.
- Compression: Optimizes file sizes for faster data transmission.
- Power on recovered VMs: This option will power on a VM once it has been recovered.
- Click Next.

- Click OK.

- Click Restore Now.


