How to connect QTS Wireguard server on Windows 10?
Applicable Products:
- An x86 NAS model running QTS 5.0 or later
- QVPN Service 3
To be able to use Wireguard we will need QVPN Service 3 and a Wireguard client for our computer or client device. During this guide we will explain the process with Wireguard client and Windows 10 computer but in the “Wireguard” site you can find the instructions to install the client in the different Operative System.
- We download and install the the client application from Wireguard
- In the NAS side we need to install and open QVPN 3 and enable WireGuard.

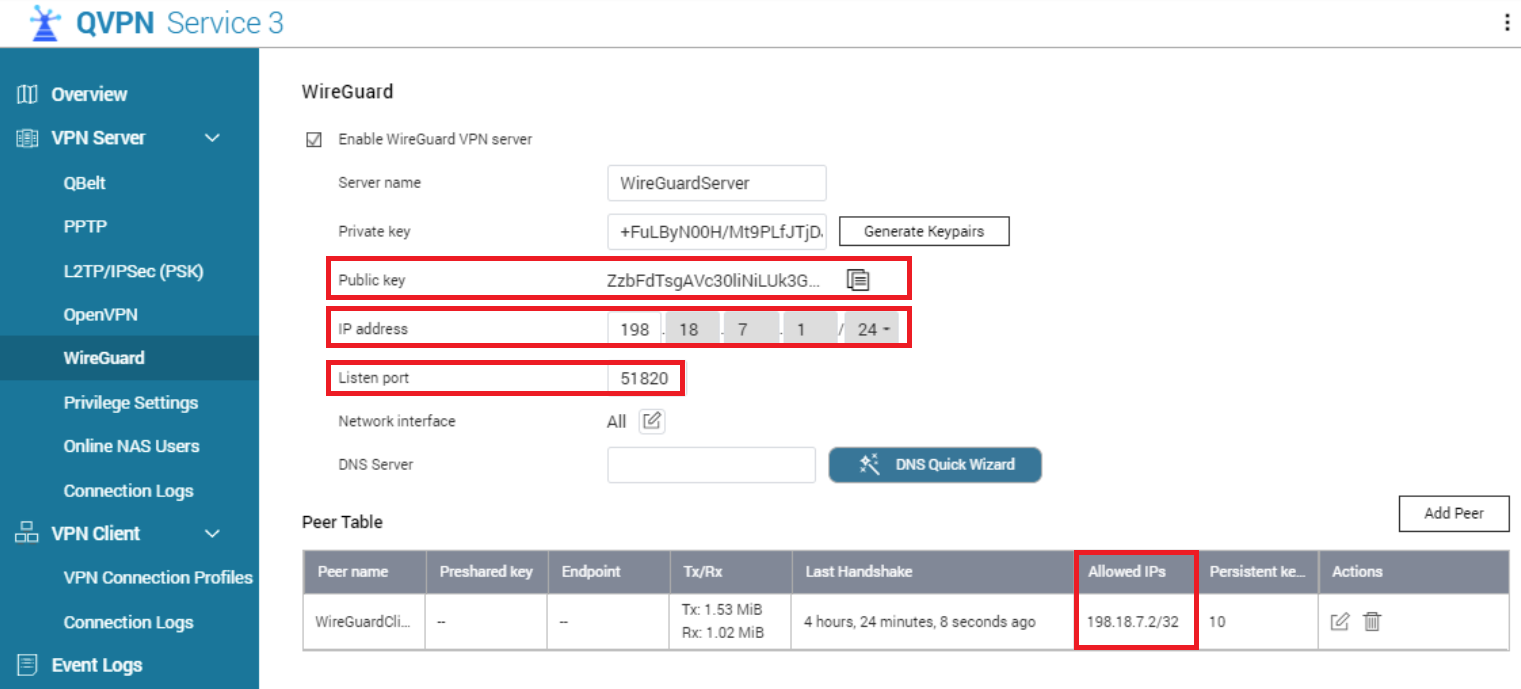
- The next step is to Assign “Server Name”, click on “Generate Keypairs”, allocate an “IP addresses” for the VPN subnet, and click “Apply”.

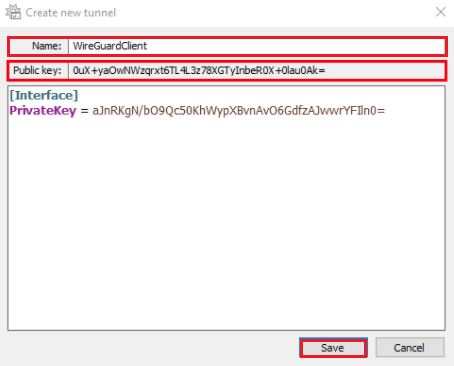
- Now we need to go to the computer Client app to get client details to finally add them in QVPN. We need to create an empty tunnel first by clicking on the Add Tunnel dropdown menu and selecting “Add empty channel”.

- In the next screen we need to assign a Name to the client and Copy the “Public Key” to create the peer in QVPN 3, and click “Save.

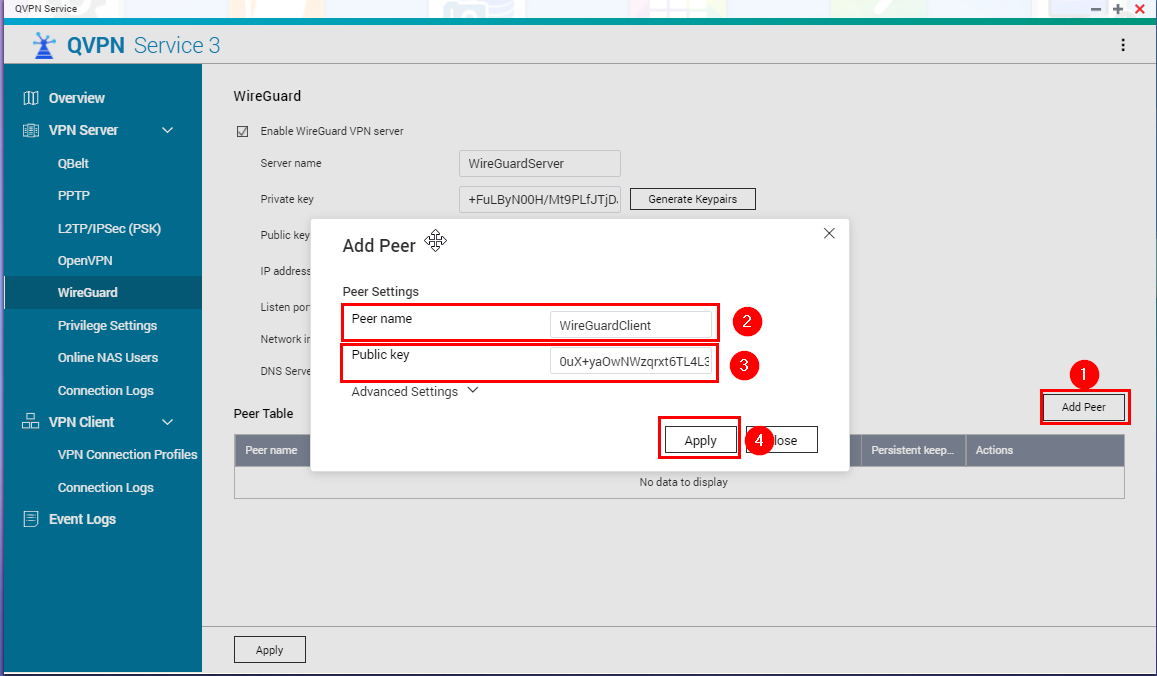
- Back on QVPN 3, click “Add Peer“ and we fill the form with the Name and Public Key from step 5 and click “Apply”. After applying, QVPN will generate an IP for the client.

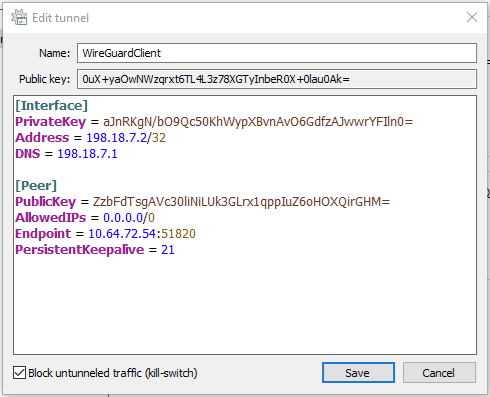
- Now we go back to the client side and hit the button “Edit”.

- In the Next step we need to edit the WireGuard Tunnel details with the details in the server. So in my case I will use the following details:
PrivateKey = aJnRKgN/bO9Qc50KhWypXBvnAvO6GdfzAJwwrYFIln0=
Address = 198.18.7.2/32
DNS = 198.18.7.1
[Peer]
PublicKey = ZzbFdTsgAVc30liNiLUk3GLrx1qppIuZ6oHOXQirGHM=
AllowedIPs = 0.0.0.0/0
Endpoint = 10.64.72.54:51820
Persistentkeepalive = 21

A - Address: Client IP obtained after add it as peer in Wireguard server (QVPN).
B - DNS: IP for the Wireguard Server in the tunnel.
C - Public Key: is the Server Public Key.
D - AllowedIPs = I used 0.0.0.0/0 to allow all Ips, You can configure the network range Free according to your needs. Please Note that setting AllowedIPs to 0.0.0.0/0, ::/0 will forward all traffic over the WireGuard VPN connection. If you want to only use. WireGuard for specific destinations, set their IP address ranges in the list separated by a comma.
E - Endpoint: NAS IP, in this case I have used local IP, you can use Public IP or DDNS then “:'' and the port selected in the server. (I am using the default port 51820, so finally I get this: 10.64.72.54:51820). Please remember to open it in your router and forward it to the NAS.
F - Persistentkeepalive = mean keep alive send seconds. According to the official documentation, putting 25 seconds is enough for most firewalls and NAT systems, but you can try with 21.

- After saving this setting you just need to hit the button “Activate” to start the connection.

- After activating it we will be able to access the VPN IP address (the first in the VPN IP range, in our example we used 198.18.7.1:8080).


