How to connect to a QTS WireGuard server on Windows 10?
Last modified date:
2023-05-19
Applicable Products
An x86 NAS model
QTS 5.0 (or later)
QVPN Service 3
Overview
In QVPN Service 3 you can set up a WireGuard VPN. WireGuard clients and Windows 10 computers can connect using WireGuard VPN with our QTS Wireguard server, you can follow the instructions in this article to resolve.
Procedure
- Log in to your NAS as an administrator and open QVPN Service 3.
- Go to VPN Server > WireGuard and check Enable WireGuard VPN Server.

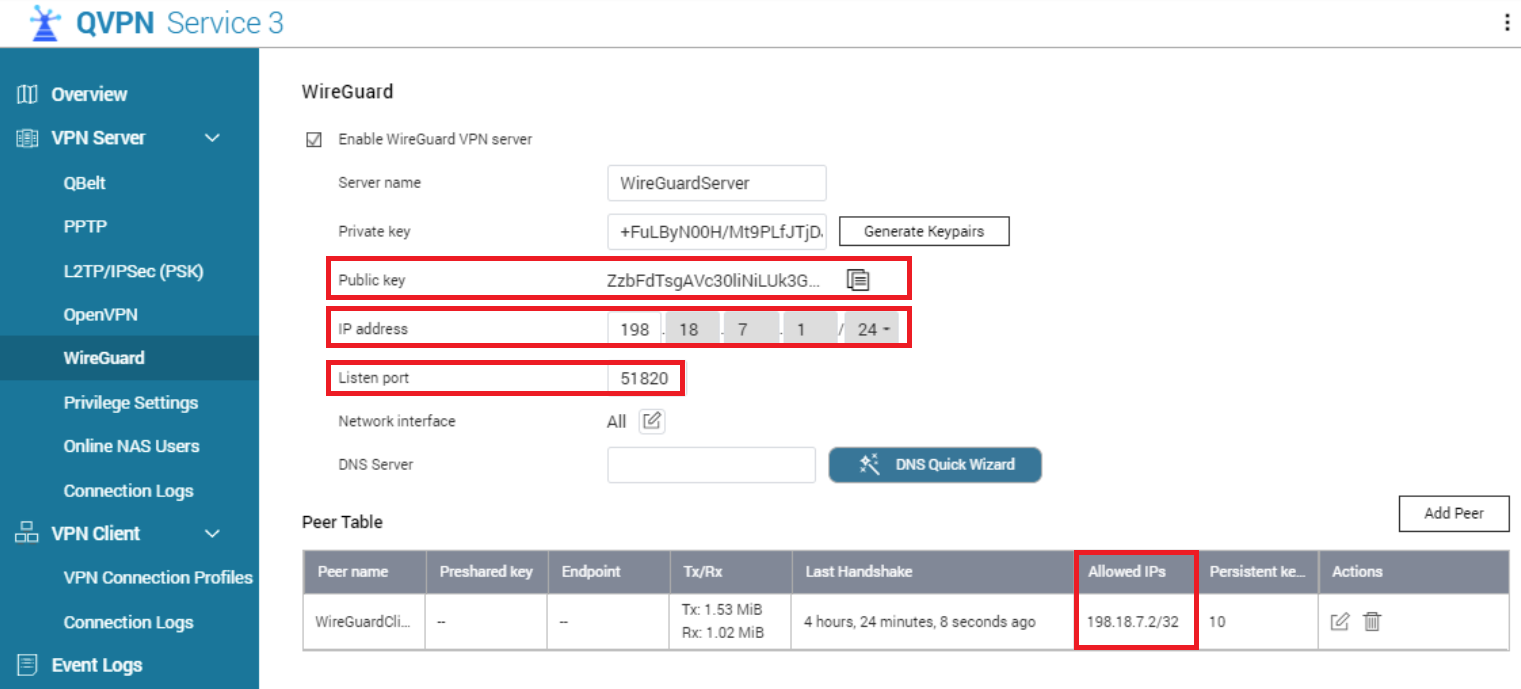
- Configure the WireGuard VPN Server.
- Enter a Server name.
- Click Generate Keypairs.
- Allocate an IP address for the VPN subnet.
- Click Apply.

- Install and open the WireGuard client application on your Windows 10 computer.
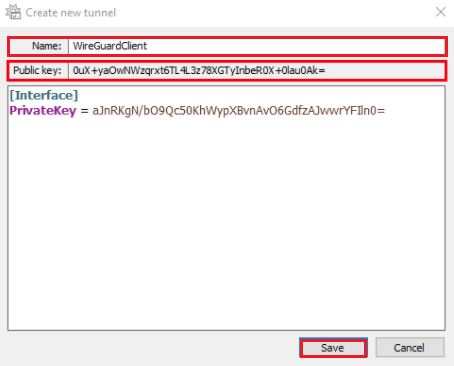
- Open the Add Tunnel dropdown menu and select Add empty channel...

- Enter a Name and copy the Public key. Click Save.

- Add a peer to QVPN Service 3.
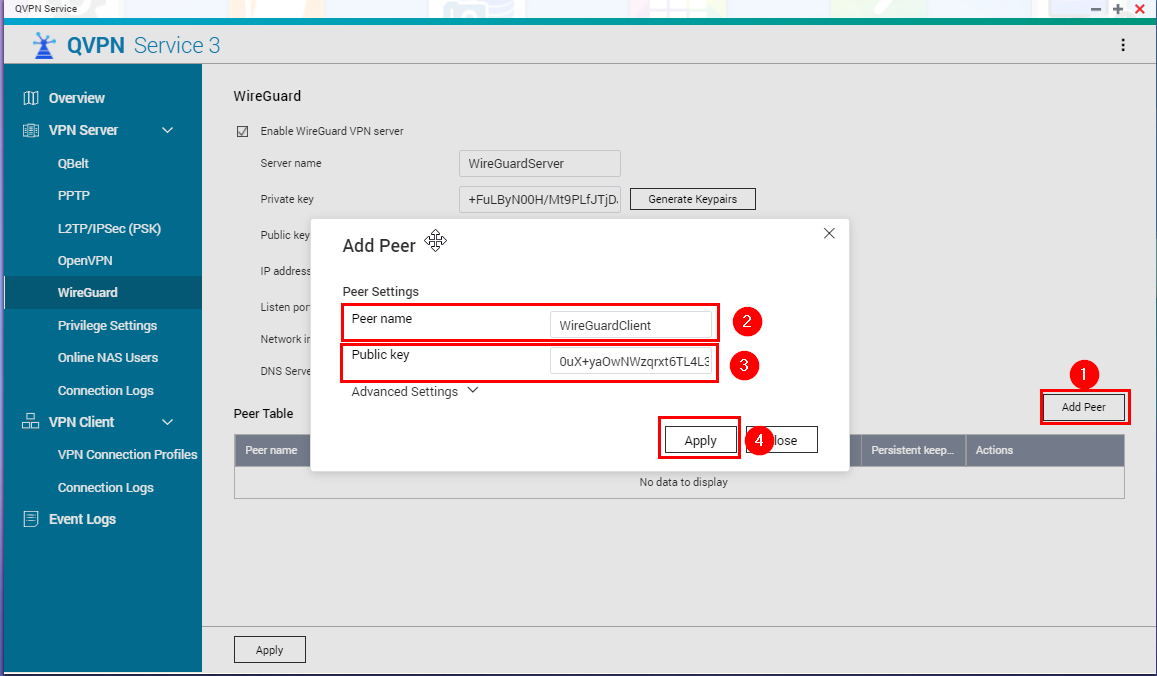
- Return to QVPN Service 3 and click Add Peer.
- Enter the Name and Public key from your WireGuard tunnel.
- Click Apply.
- QVPN generates an IP address for the client.

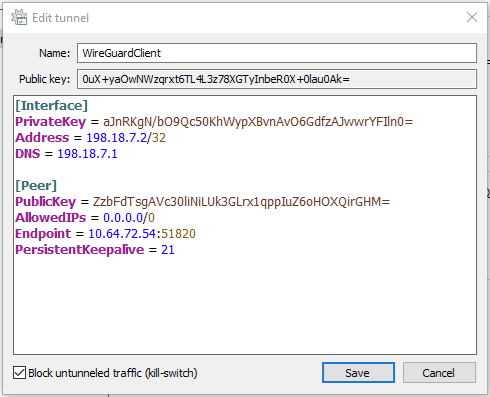
- Return to the WireGuard Client Application and click Edit.

- Add the settings from the WireGuard VPN Server to the tunnel. An example of the settings are below:Text
[Interface] PrivateKey = aJnRKgN/bO9Qc50KhWypXBvnAvO6GdfzAJwwrYFIln0= Address = 198.18.7.2/32 DNS = 198.18.7.1 [Peer] PublicKey = ZzbFdTsgAVc30liNiLUk3GLrx1qppIuZ6oHOXQirGHM= AllowedIPs = 0.0.0.0/0 Endpoint = 10.64.72.54:51820 Persistentkeepalive = 21 - Settings information:
- Address: The IP generated by QVPN when a Peer is created.
- DNS: IP address for the WireGuard Server in the tunnel.
- PublicKey: The Server Public Key.
- AllowedIPs: Configure the network range based on your needs. 0.0.0.0/0 allows any IP address. Multiple IP addresses can be separated by a comma.
- Endpoint: The NAS IP address and port. The port should be opened and forwarded to the NAS.
- PersistentKeepAlive = Value in seconds. 25 is recommended.
- Click Save.

- Click Activate.

- The Peer is now listed in QVPN 3

- You can now access the VPN IP address (the first in the VPN IP range, in our example we used 198.18.7.1:8080).


