


How do I add new disk to the RAID group to migrate the RAID type?
Applicable Products:
- Storage & Snapshots
- QTS
Important: This article explains how to migrate the RAID type by adding the disks. Before continuing, make sure the replacement hard disks are listed on the harddisk compatibility list for your NAS model,the final capacity would be based on the smallest capacity drive in the RAID. Your data is still accessible while running the RAID migration. For details, see here.
Go to "Storage & Snapshots" > "Storage Space". Select the storage pool that will be upgraded and click "Manage". The "Storage Pool Management" window will launch.

Insert the new disk into the NAS.
In the "Storage Pool Management" window, click "Manage" > "Migrate".

Select an available hard drive to add to the array. The RAID migration type and drive capacity after migration will be shown. Click "Apply" to continue.
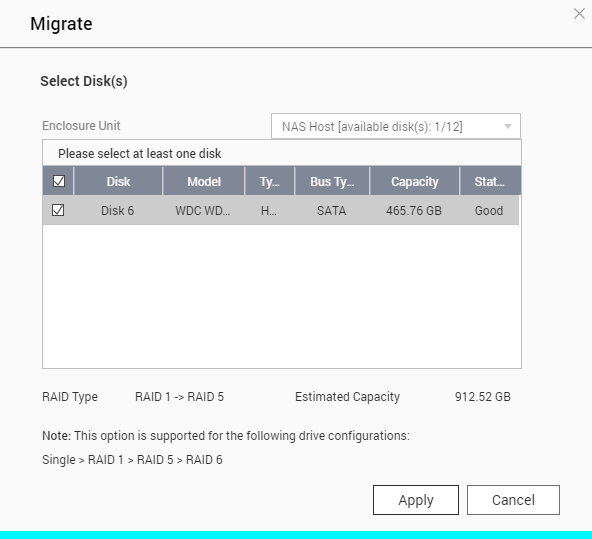
Note: The RAID migration sequence must be Single > RAID 1 > RAID 5 > RAID 6
All the data on the selected drive will be cleared. Click "OK" to confirm.

The migration progress is shown under "Status".

After migration completes, the new drive configuration will be RAID 5 and the status will be "Ready". You can now start to use the new drive configuration.

Depending on the drive sizes, the process may take anywhere from a few hours to tens of hours to complete. Please wait patiently for the process to finish. DO NOT turn off the NAS.
Para obter mais ajuda, pergunte a outros usuários e aos especialistas da QNAP na comunidade. Ir para a Comunidade QNAP


