


How do I enter BIOS and Console with 3.5mm Console port?
Applicable Products:
-
The NAS with 3.5mm console port
Note:
-
The procedure only apply on Microsoft Windows
-
The following hardware and software are required.
-
Hardware
- D-SUB 9P female to 3.5mm stereo plug cable
- A USB-to-RS232 cable (Optional, if there is no RS-232 serial port on your PC/laptop)
- A USB keyborard
-
Software
- Putty (Terminal software, Click here to download)
-
Enter the console
-
Login QTS as administrators to make sure the NAS is running and accessible.
-
Connect the cables
- Find the console port on the back of the NAS.
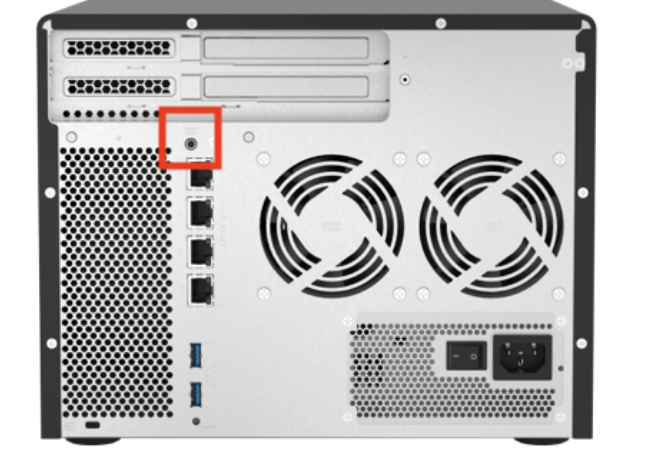
-
Connect the cable between the NAS console port and your PC.
- D-SUB 9P female to 3.5mm stereo plug cable
- A USB-to-RS232 cable (optional)
-
In Windows
-
Right click on Start button then open Device Manager
-
In Device Manager
- Expand Ports (COM & LPT)
- Note the COM port that the cable connets to the NAS.
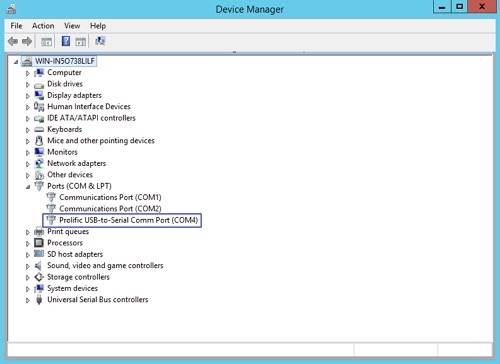
COM4 connects to the NAS
-
Open Putty
-
Set up the following items
- Connection type : Serial
- Serial line: COM4 (the COM port number we get from previous step.)
- Speed: 115200
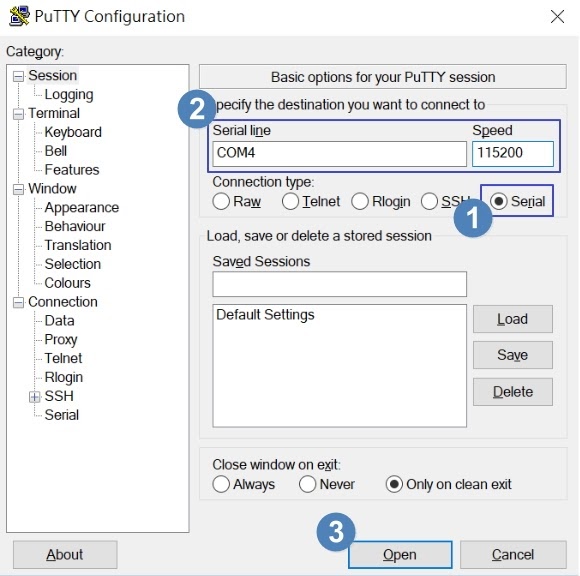
-
Press Open
-
Press Enter on keyboard again to bring up login prompt
-
Login Console by admin credential
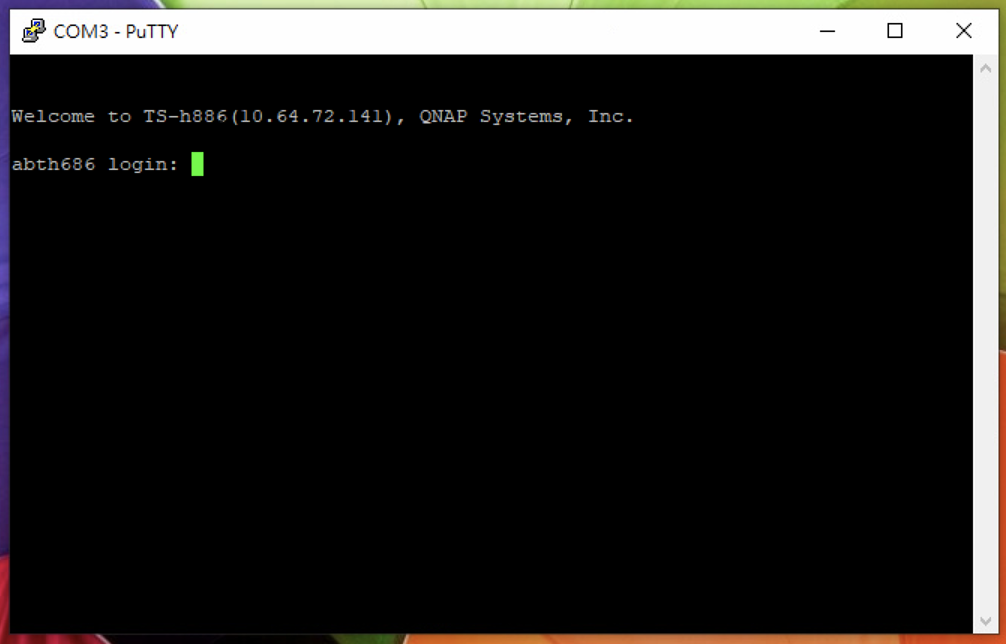 *
*
-
-
Enter the BIOS
-
Follow the procedures to enter the console and keep the putty session opened
-
Connect USB keyboard to the NAS
-
Login QTS as administrators, and turn off the NAS.
-
Press power button to boot up the NAS
The BIOS Date and Version should be displayed. This shows the BIOS can startup correctly.
-
Press Ctrl+F1 on the external USB keyboard to enter Advanced BIOS settings.
Per ulteriore assistenza, chiedi ad altri utenti e agli esperti QNAP nella community. Vai alla community QNAP


