


How do I enter BIOS and Console with 3.5mm Console port?
Applicable Products:
-
The NAS with 3.5mm console port
Note:
-
The procedure only apply on Microsoft Windows
-
The following hardware and software are required.
-
Hardware
- D-SUB 9P female to 3.5mm stereo plug cable
- A USB-to-RS232 cable (Optional, if there is no RS-232 serial port on your PC/laptop)
- A USB keyborard
-
Software
- Putty (Terminal software, Click here to download)
-
Enter the console
-
Login QTS as administrators to make sure the NAS is running and accessible.
-
Connect the cables
- Find the console port on the back of the NAS.
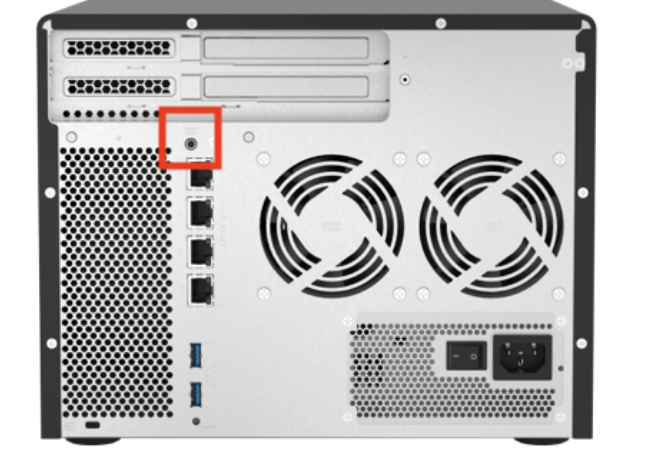
-
Connect the cable between the NAS console port and your PC.
- D-SUB 9P female to 3.5mm stereo plug cable
- A USB-to-RS232 cable (optional)
-
In Windows
-
Right click on Start button then open Device Manager
-
In Device Manager
- Expand Ports (COM & LPT)
- Note the COM port that the cable connets to the NAS.
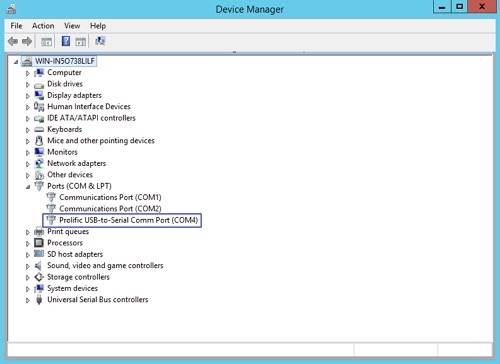
COM4 connects to the NAS
-
Open Putty
-
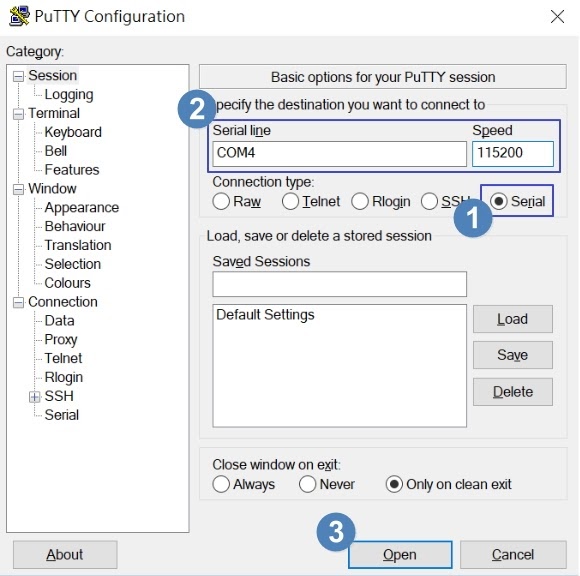
Set up the following items
- Connection type : Serial
- Serial line: COM4 (the COM port number we get from previous step.)
- Speed: 115200
-
Press Open
-
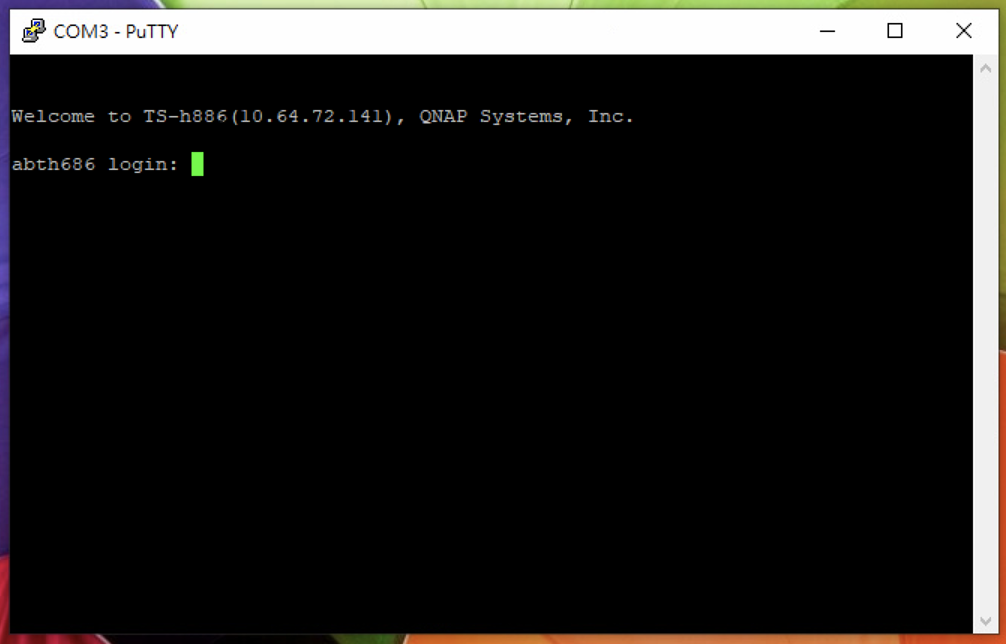
Press Enter on keyboard again to bring up login prompt
-
Login Console by admin credential
 *
*
-
-
Enter the BIOS
-
Follow the procedures to enter the console and keep the putty session opened
-
Connect USB keyboard to the NAS
-
Login QTS as administrators, and turn off the NAS.
-
Press power button to boot up the NAS
The BIOS Date and Version should be displayed. This shows the BIOS can startup correctly.
-
Press Ctrl+F1 on the external USB keyboard to enter Advanced BIOS settings.
Để được hỗ trợ thêm, hãy hỏi những người dùng khác và chuyên gia QNAP trong cộng đồng. Đến Cộng đồng QNAP


