How to host a multi-user collaborative environment for DaVinci Resolve 15 Studio
This article instructs how to create a multi-user collaborative online editing environment for Blackmagic Design's DaVinci Resolve 15 Studio on QNAP NAS. The following diagram depicts the configuration of this article, using a Windows PC and Mac to use QNAP NAS for collaborative online editing.
- QNAP NAS set up
- Set up DaVinci Resolve 15 Studio on macOS
- Set up DaVinci Resolve 15 Studio in Windows
*Collaboration features are not supported by the free version of DaVinci Resolve 15.

| Item | Description |
|---|---|
| 1 | A QNAP NAS TVS-1282T3 running QTS 4.3.4. |
| 2 | 10Gbps Cat 6 connection from NAS adapter 7 to the QNAP switch |
| 3 | 10Gbps Cat 6 connection from NAS adapter 8 to the QNAP switch |
| 4 | QNAP QSW-1208-8C switch |
| 5 | 10Gbps Cat 6 connection from the switch to the Mac |
| 6 | 10Gbps Cat 6 connection from the switch to the Windows workstation |
| 7 | Mac with a 10GbE network adapter |
| 8 | Windows workstation with a 10GbE network adapter |
QNAP NAS set up
As DaVinci Resolve Studio uses a PostgresSQL database to store projects, you must install the "PostgresSQL" app from the QTS App Center.

By default, the Postgres database can only be accessed from the QNAP NAS itself. To access the database from DaVinci Resolve workstations you must change two parameters in Postgres:
- Modify the pg_hba.conf file to allow external TCP/IP connections.
- Modify the listening address in postgresql.conf so that it will listen to an external IP address, not just the localhost IP address.
- First modify the pg_hba.conf file to allow external TCP/IP connections.
- Establish an SSH connection with the QNAP NAS through the terminal, open the Mac terminal and enter:
ssh admin@172.17.22.37
The IP address 172.17.22.37 must be replaced with the IP address of your QNAP NAS.
Then enter the password of the QNAP NAS admin account and complete the SSH connection. - To find the path to the pg_hba.conf file on your QNAP NAS, enter: find / -name pg_hba.conf
In this example, the path is /share/CACHEDEV1_DATA/.qpkg/PostgreSQL/postgresDB/ - To view the file content enter:
- cat /share/CACHEDEV1_DATA/.qpkg/PostgreSQL/postgresDB/pg_hba.conf
Tip:
To back up the file before modifying it, use the following command:
cp /share/CACHEDEV1_DATA/.qpkg/PostgreSQL/postgresDB/pg_hba.conf /share/CACHEDEV1_DATA/.qpkg/PostgreSQL/postgresDB/pg_hba.conf.backup - Next, we add the necessary changes to the pg_hba.conf file.
echo "host all all 172.17.22.37/16 trust" >> /share/CACHEDEV1_DATA/.qpkg/PostgreSQL/postgresDB/pg_hba.conf
In this example, our QNAP NAS and computer are on the network segment of 172.17.x.x. Replace this with the network segment you are using.
* The option to use an md5 or password for security currently does not work with DaVinci Resolve Studio, so the only protection is to mask with IP numbers and network range. If you have a private network, this is probably not an issue.
To check if the modification is complete, enter:
cat /share/CACHEDEV1_DATA/.qpkg/PostgreSQL/postgresDB/pg_hba.conf
- Establish an SSH connection with the QNAP NAS through the terminal, open the Mac terminal and enter:
- Modify the listening address in postgresql.conf
- To locate the file enter: find / -name postgresql.conf
In this example, the path is: /share/CACHEDEV1_DATA/.qpkg/PostgreSQL/postgresDB/postgresql.conf - To view the file content, enter:
cat /share/CACHEDEV1_DATA/.qpkg/PostgreSQL/postgresDB/postgresql.confTip:
To back up the file before modifying it, use the following command:
cp /share/CACHEDEV1_DATA/.qpkg/PostgreSQL/postgresDB/postgresql.conf /share/CACHEDEV1_DATA/.qpkg/PostgreSQL/postgresDB/postgresql.conf.backup - Modify the file to enable external access to the database:
echo "listen_addresses = '*' " >> /share/CACHEDEV1_DATA/.qpkg/PostgreSQL/postgresDB/postgresql.conf
To check if the modifications are correct, enter:
cat /share/CACHEDEV1_DATA/.qpkg/PostgreSQL/postgresDB/postgresql.conf
- To locate the file enter: find / -name postgresql.conf
- You must restart your QNAP NAS to enable both modifications.
Set up DaVinci Resolve 15 Studio on macOS
- Create a new database

- Name : Enter a name for the project
- Location : The QNAP NAS IP address
- Username : postgres (DaVinci Resolve Studio default value)
- Password: DaVinci (DaVinci Resolve Studio default value)
*To view the DaVinci Resolve Studio project name on the Postgres database, log in to the NAS, launch the PostgresSQL app and log in with the account "postgres" without a password.
- Project settings
After opening the project, go to "Project Settings" > "Master Settings" > "Working Folders". Assign the "Cache files" and "Gallery stills" file locations to the NAS folder.

*For more information on mounting shared folders, refer to this article - How can I mount shared folders from my Thunderbolt-compatible NAS into Final Cut Pro X?
To enable collaboration, click "File" > "Enable Collaboration".

To enable Windows and Mac devices to work together, go "DaVinci Resolve" > "Preferences" > "Media Storage" and adjust "Mapped Mount" (ignore this step if collaboration is only required for Mac devices). As the file path of Windows and Mac is different (Mac is: /Volumes/Public and Windows is: Y:\) Mapped Mount helps in ensuring both devices can reach the shared folder.

Set up DaVinci Resolve 15 Studio in Windows
- Connect database
When the project and the Mac have been set up, Windows can connect to the database for collaborative editing.
After opening Windows DaVinci Resolve 15 Studio, click "New database" > "Connect" > "PostgreSQL" and enter the following information.

- Name : Enter a name for the project
- Location : The QNAP NAS IP address
- Username : postgres (DaVinci Resolve Studio default value)
- Password: DaVinci (DaVinci Resolve Studio default value)

- Project settings
To enable Windows and Mac devices to work together, go "DaVinci Resolve" > "Preferences" > "Media Storage" and adjust "Mapped Mount" (ignore this step if collaboration is only required for Mac devices). As the file path of Windows and Mac is different (Mac is: /Volumes/Public and Windows is: Y:\) Mapped Mount helps in ensuring both devices can reach the shared folder.

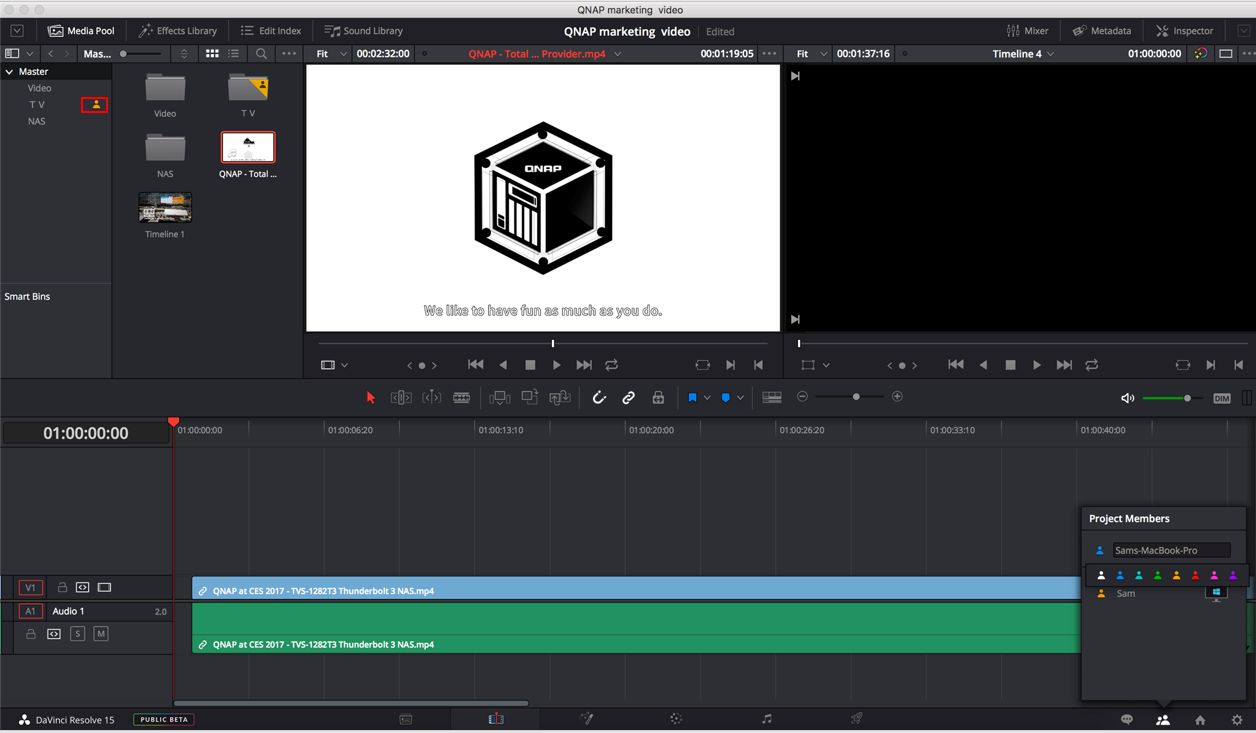
Tip 1: When the Bin is editing, there will be a personal pattern displayed above. You can click on the mouse to know who is editing the Bin. In addition, the DaVinci Resolve Studio setting is that when a user edits the Bin, other users are in read-only mode, only one user can edit Bin in the same time.
Tip 2: When you enter Bin with editing rights, your timeline will be red. If you have edited in Bin, your timeline will be gray when you are in read-only mode.


