How do I migrate HBS to an SSD volume or storage pool for higher IOPS when using QuDedup?
Applicable Products
Hybrid Backup Sync
Background
Hybrid Backup Sync (HSB) has a built-in deduplication feature called QuDedup, which allows you to deduplicate backup data to save space and network bandwidth.
When QuDedup is enabled in a backup job, HBS creates a local database containing a file index which it must constantly query. As more data is deduplicated, the database grows larger, resulting in lower IOPS performance. In other words, read/write performance decreases.
Solution
If you use QuDedup in any backup jobs, and HBS is currently installed on an HDD volume or storage pool, QNAP recommends migrating the HBS application to an SSD volume or SDD storage pool for higher IOPS.
To migrate your HBS application, complete the following steps. Depending on your NAS operating system and whether you already have an SSD volume or storage pool, you may be able to skip steps B, C, and/or D.
- In QTS, applications are installed on a volume, which is a storage unit in a storage pool.
- In QuTS hero, volumes do not exist. Applications are installed directly on a storage pool.
A. Verify that HBS is currently installed on an HDD volume or storage pool.
- Log in to QTS or QuTS hero.
- Find out which volume or storage pool the HBS application is installed in.
- Open App Center.
- Click
 and enter "HBS 3 Hybrid Backup Sync".
The HBS application appears in the search results. - Click the application icon.
The application information window opens. - Next to Installed, note the name of the volume (QTS) or storage pool (QuTS hero) in which the application is installed.

- Close the application information window.
- Determine if the disks in the volume or storage pool are HDDs.
- Open Storage & Snapshots.
- Go to Storage > Storage/Snapshots.
- Locate the volume (QTS) or storage pool (QuTS hero) on the list.
 (QTS example)
 - Click the volume's parent storage pool (QTS) or the storage pool (QuTS hero).
- Click Manage.

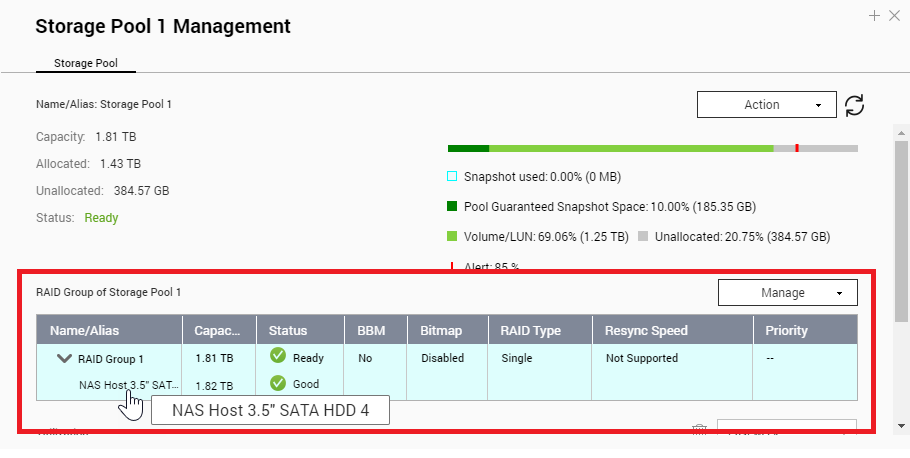
The storage pool management window opens. - Under RAID Group of [storage pool name], check that the disks are HDDs.

If the disks are SDDs, you can stop here. HBS is already installed on an SSD volume or storage pool.
If the disks are HDDs, continue to step B. If you already have an SSD volume (QTS) or SSD storage pool (QuTS hero), you can skip steps B-D and go to step E.
B. Install one or more compatible SSDs on the NAS.
For the list of compatible SSDs for your NAS model, see https://www.qnap.com/compatibility.
- Install an SSD in an empty drive bay.
For details on installing SSDs on your NAS, download your NAS model's hardware user guide at https://www.qnap.com/download/. - Wait for the NAS to issue an audio alert, indicating that the disk has been detected.
- Repeat the above steps for each SSD.TipIf an SSD is not detected after being inserted into the drive bay, restart the NAS.
C. Create a new SSD storage pool.
- Open Storage & Snapshots.
- Go to Storage > Storage/Snapshots.
- Click Create and select New Storage Pool.

The Create Storage Pool Wizard window opens. - Follow the wizard and make sure to select only SSDs on the Select Disk(s) page.
For configuration details in creating a storage pool, please see "Creating a Storage Pool" in the QTS User Guide or the QuTS hero User Guide. - When you reach the Summary page, review the information and then click Create.
QTS or QuTS hero creates the storage pool.
The SSD storage pool appears in Storage > Storage/Snapshots.
D. Create a new volume on the SSD storage pool. (QTS only)
- Open Storage & Snapshots.
- Go to Storage > Storage/Snapshots.
- Select the newly created SSD storage pool.
- Click Create and select New Volume.
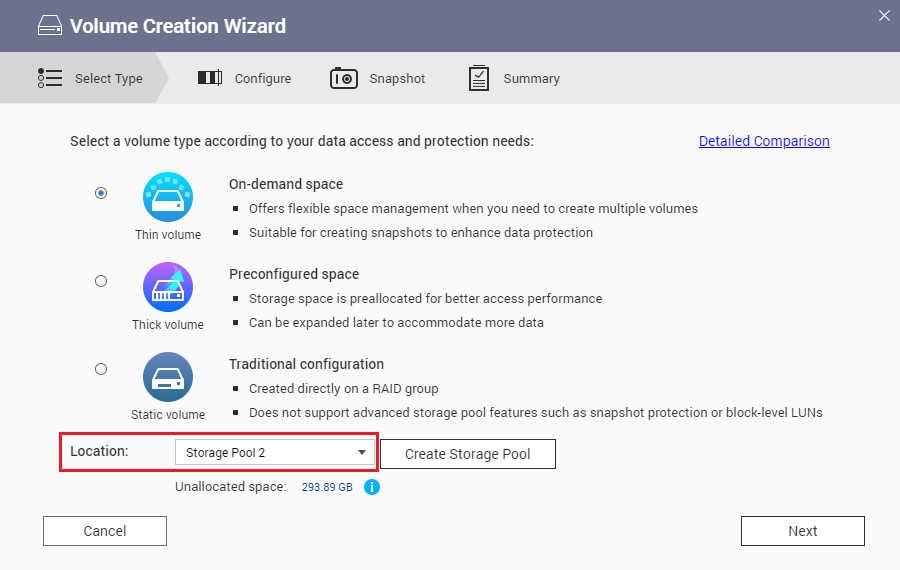
The Volume Creation Wizard window opens. - Next to Location, ensure the SSD storage pool is selected.

- Follow the wizard to configure the volume settings.
For configuration details in creating a volume, please see "Volume Creation" in the QTS User Guide. - When you reach the Summary page, review the information and then click Finish.
QTS creates the SSD volume.
The SSD volume appears in Storage > Storage/Snapshots.
E. Migrate the HBS application to an SSD volume or storage pool.
- Open App Center.
- Click
 and enter "HBS 3 Hybrid Backup Sync".
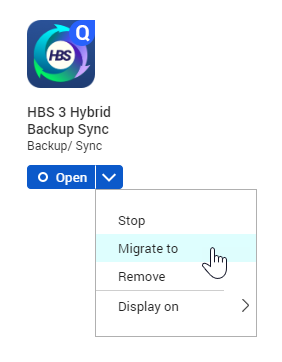
The HBS application appears in the search results. - Click the arrow and select Migrate to.

The App Migration window opens. - Select an SSD volume (QTS) or SSD storage pool (QuTS hero).
- Click Migrate.
A confirmation window opens. - Click OK.
The system migrates the HBS application to the selected volume or storage pool.
The application status changes to "Migrating...", and then returns to normal once migration is complete.
F. Verify that HBS has been migrated to the SSD volume or storage pool.
- Open App Center.
- Click
 and enter "HBS 3 Hybrid Backup Sync".
The HBS application appears in the search results. - Click the application icon.
The application information window opens. - Next to Installed, check the volume (QTS) or storage pool (QuTS hero) name.


