


How do I back up files to QNAP NAS using File History in Windows?
Applicable Products:
- Windows
- File History
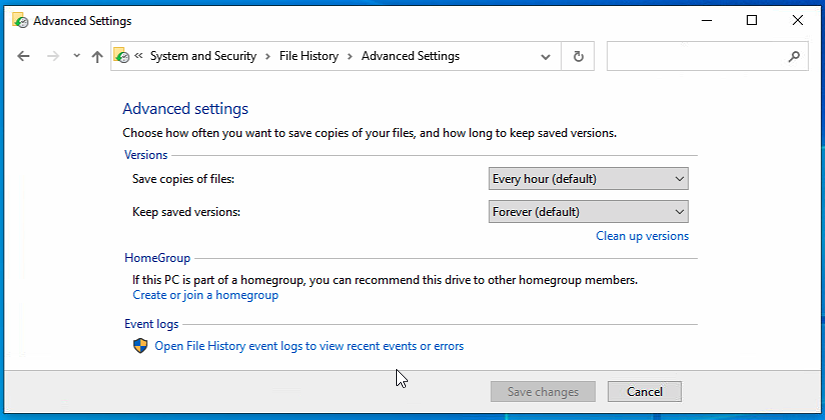
You can use File History to back up your Windows Libraries, Desktop, Contacts and Favorites to QNAP NAS. In Advanced setting, you can choose how often you want to save the copies and how long to keep saved versions. Follow the procedures below to use File History backup files to QNAP NAS.
-
Click Search in Windows bar and Input Backup Settings to open Backup window
-
Find More options in Back up using File History

-
Click on More options
-
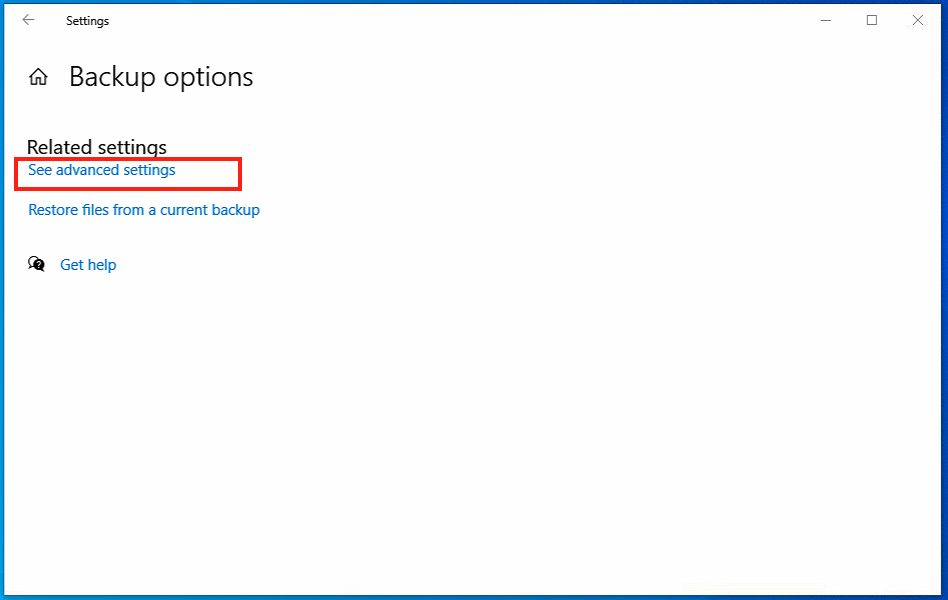
Click on See advanced settings under Backup Options > Related Settings, File History Window opens
-
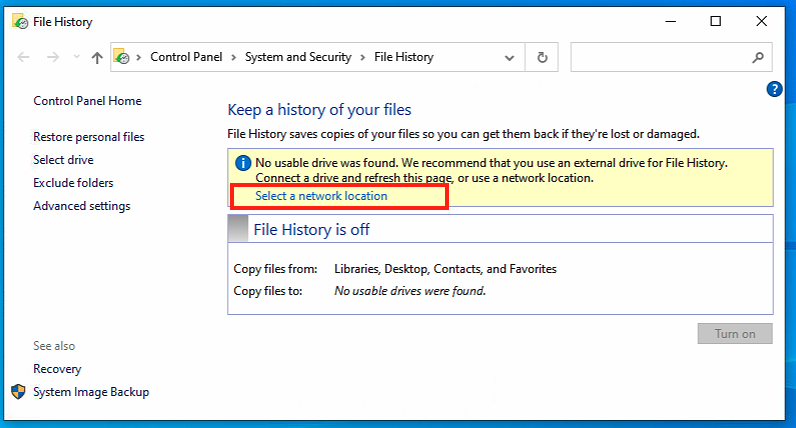
Click on Select a network location
-
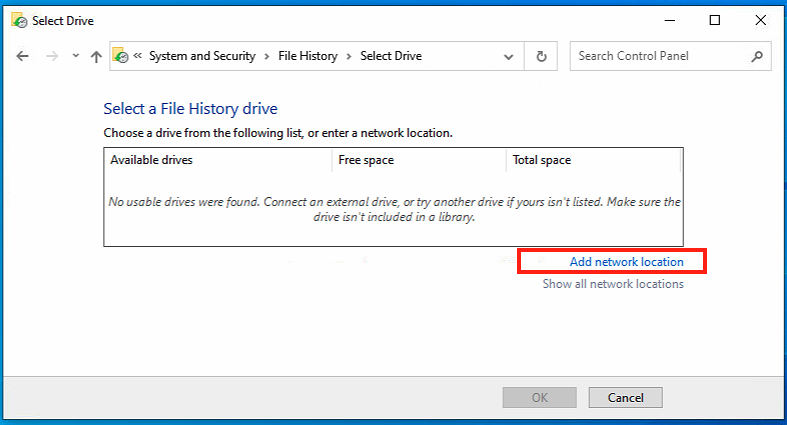
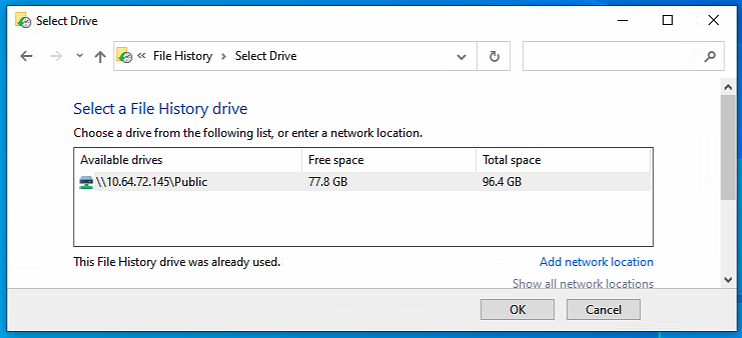
Clikc on Add network location under Select a File History drive, Select folder window opens
-
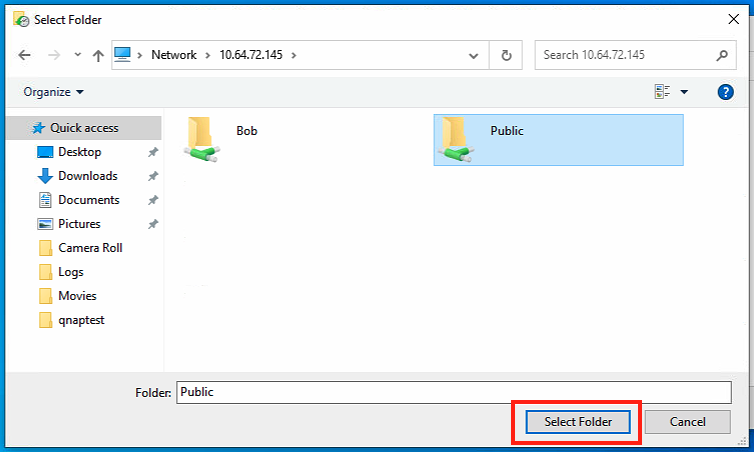
Input NAS_IP into address bar and press Enter, shared folder on NAS appears.
-
Choose one of shared folders then Click on Select Folder
-
Full network path of shared folder, Free space and Total Space appears in Available drives, Click Ok to bring back File History window
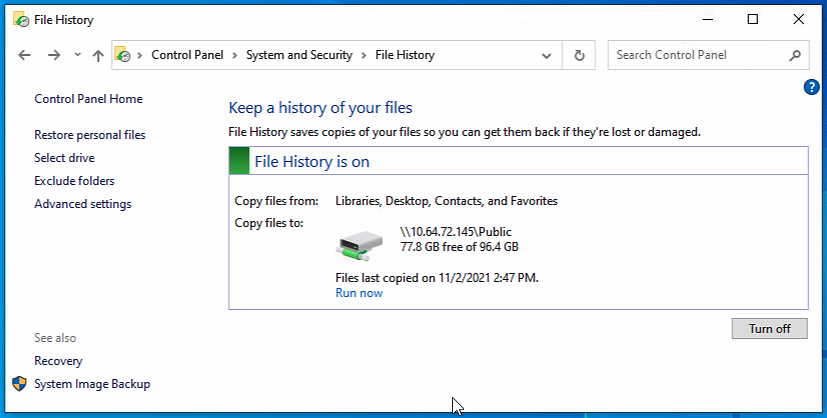
- File History is turn on
-
In Advanced settings, you can choose how you want to save the copies.
Per ulteriore assistenza, chiedi ad altri utenti e agli esperti QNAP nella community. Vai alla community QNAP


