How do I create and install a Windows 11 VM in Virtualization Station?
Date de la dernière modification :
2025-10-26
Applicable Products
- Virtualization Station
Overview
Virtualization Station enables you to create and manage virtual machines (VMs) on your QNAP device. You can install Windows 11 by setting up a new VM and attaching the Windows 11 installation ISO file. This FAQ provides step-by-step instructions for the entire process.
Procedure
- Open Virtualization Station on your QNAP device.
- Select Overview in the left panel.
- Click Create Virtual Machine to start the VM creation wizard.
- Configure General Settings:
- VM Name: Enter a name for your Windows 11 VM (1–32 characters; do not start with a space or use special characters such as:
` * = + [ ] \ | ; : ' " , < > / ? %). - Description: (Optional) Enter a description for the VM.
- File location: Select a NAS shared folder to store the VM files.
- OS Type: Select Windows.
- OS Version: Select Windows 11 or the closest available option.
- Click Next.

- VM Name: Enter a name for your Windows 11 VM (1–32 characters; do not start with a space or use special characters such as:
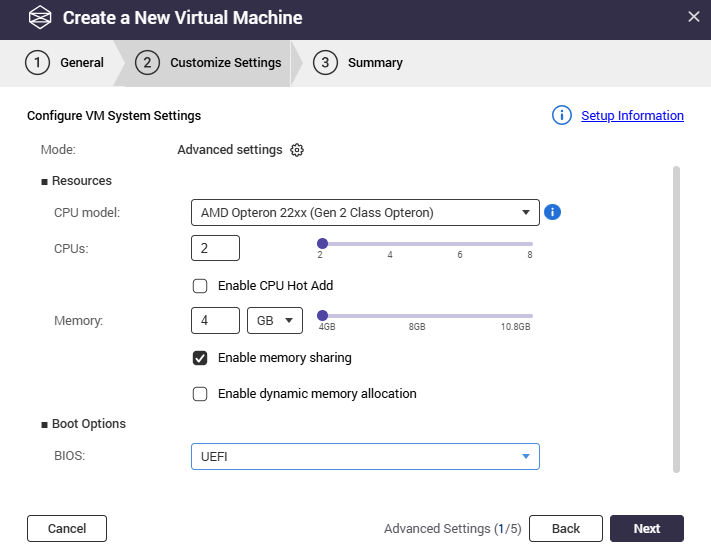
- Configure System Settings:
- CPU Model: Select a supported virtual CPU model.
- CPUs: Specify the number of CPU cores (at least 2 recommended).
- Memory: Assign at least 4 GB (4096 MB) RAM for Windows 11.
- Boot Option: Select UEFI (recommended for Windows 11 compatibility).
- Click Next.
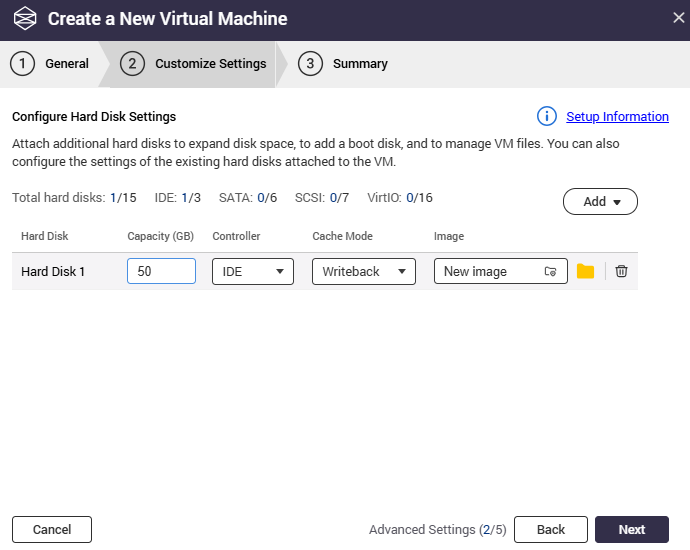
- Configure Hard Disk:
- Specify the hard disk capacity.
- Select the device controller.
- Select the cache mode if required.
- If required, upload or select an existing disk image.
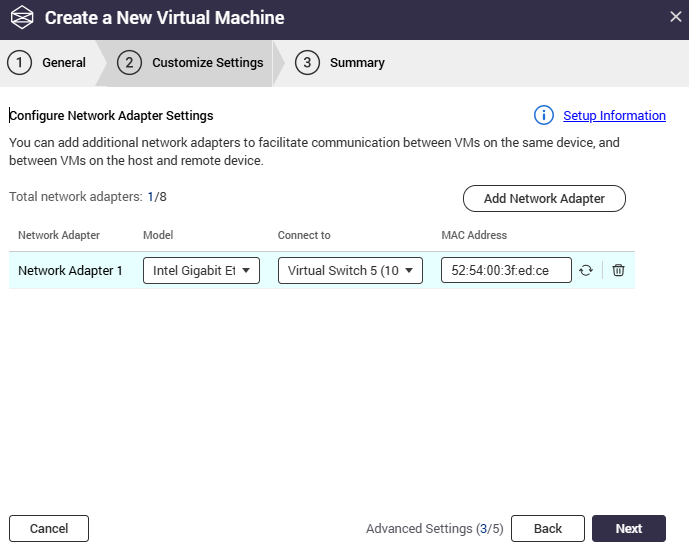
- Configure Network:
- Select a network adapter model.
- Choose the network interface to connect to the VM.
- Specify the MAC address or click the
 button to generate one.
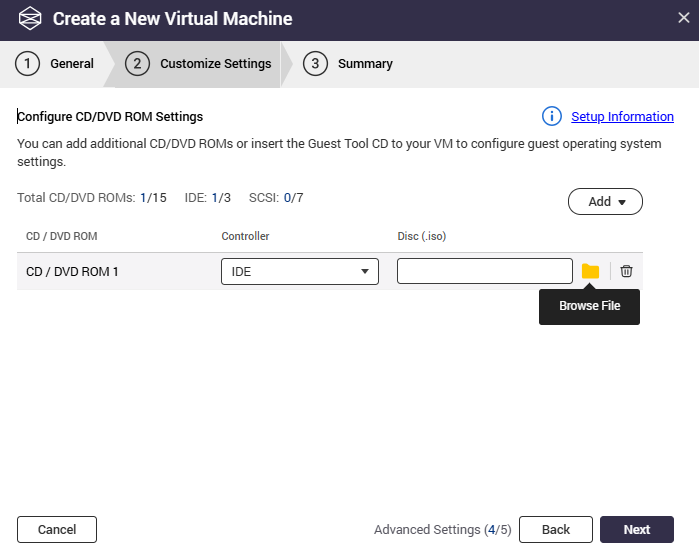
- Configure CD/DVD ROM:
- Select the device controller.
- Click
 to select your Windows 11 ISO file (download from Microsoft’s official website if you do not already have it).
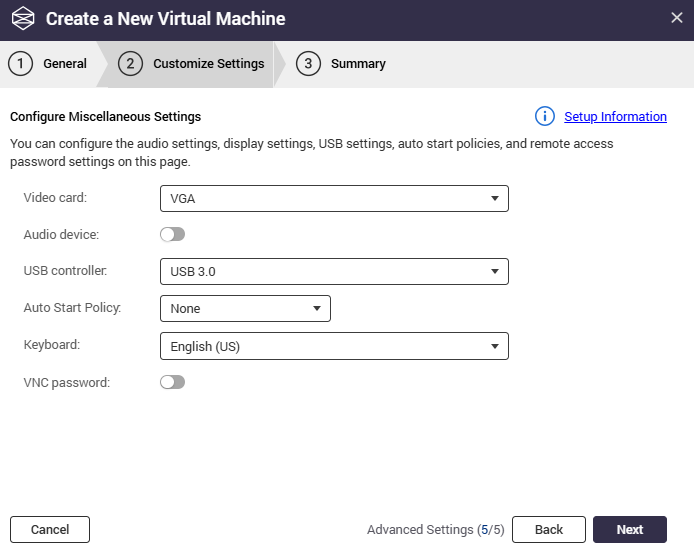
- Configure Miscellaneous Settings:
- Video card: Choose your preferred video type.
- Audio device: (Optional) Add an emulated Intel High Definition Audio device for sound.
- USB controller: Select the desired USB version (optional).
- Auto-start policy: Configure the auto-start behavior as needed.
- Keyboard: Select the keyboard layout for VM mapping.
- VNC password: (Optional) Set a password to secure VNC access to your VM.
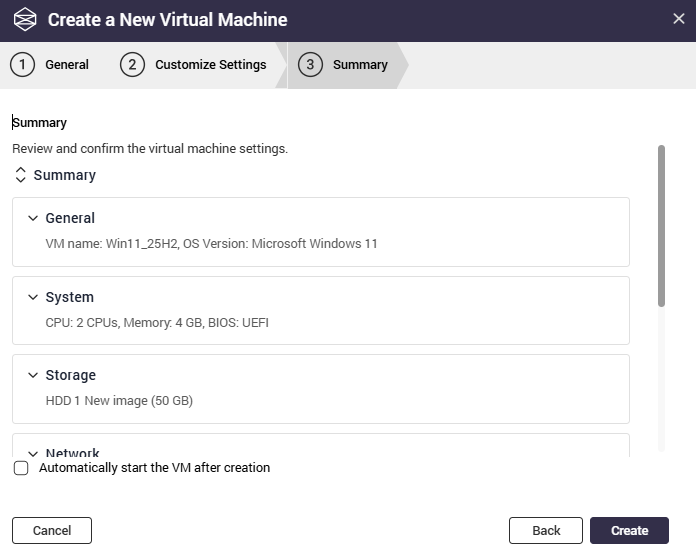
- Review and finalize:
- Review all settings in the summary screen.
- Click Create to finish the VM setup.
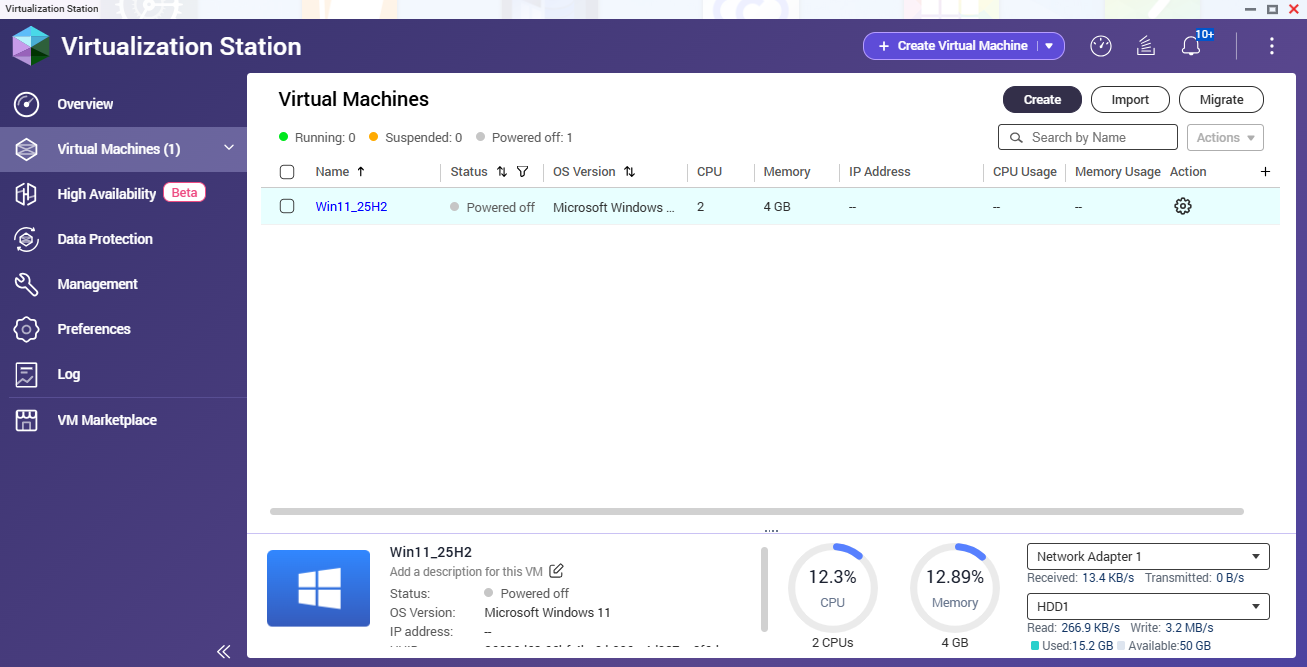
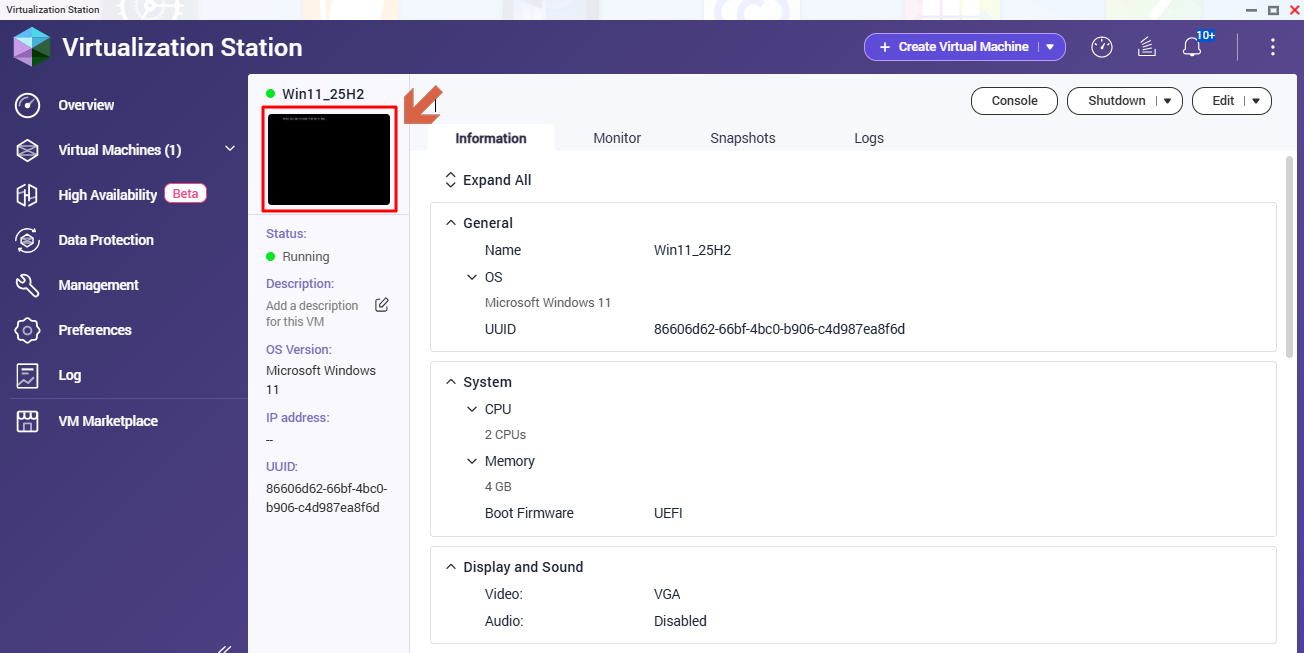
- Go to Virtual Machines, select your new VM, and click on it.
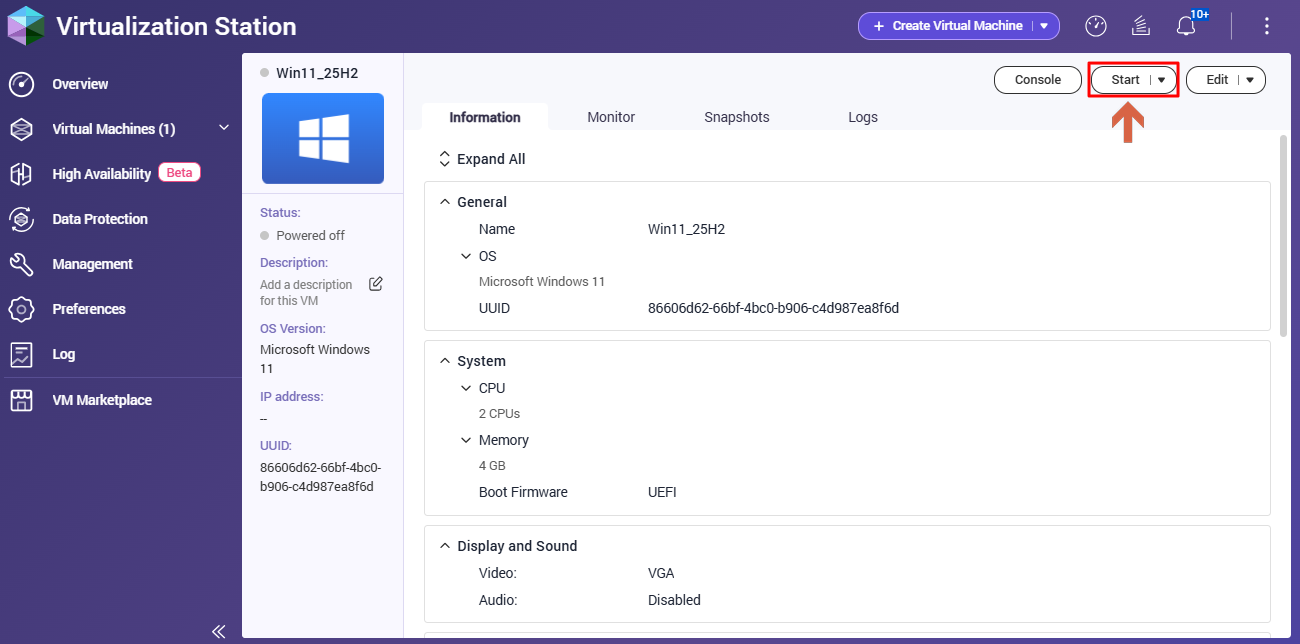
- Click Start to power on your VM.
- Click the VNC screen icon to launch the console and begin Windows 11 installation.
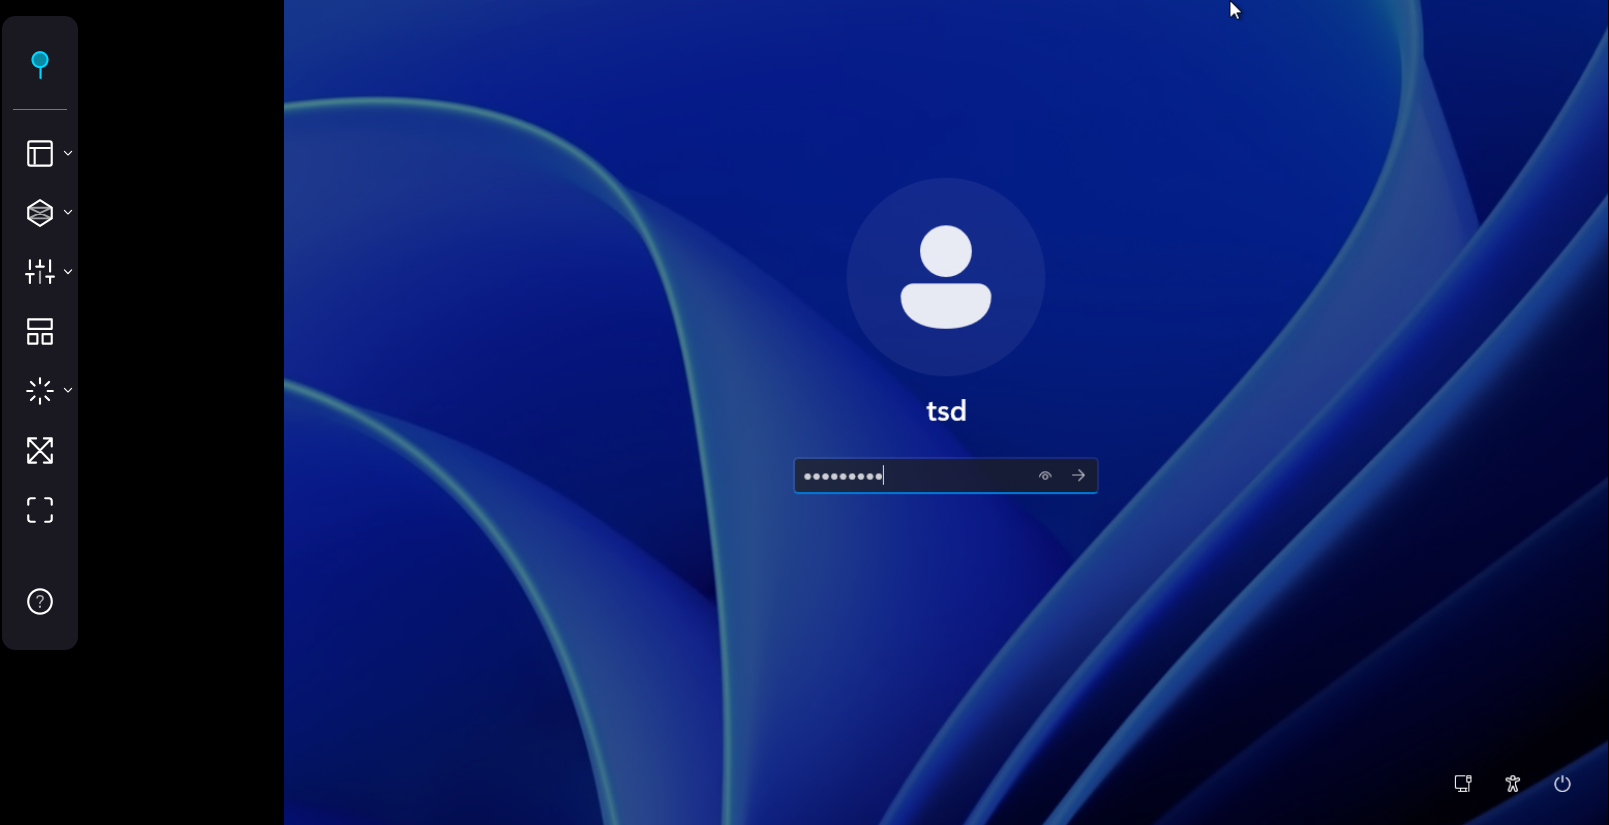
- Follow the Windows 11 setup wizard to complete installation on your new VM.

- After Windows 11 installation completes, sign in and begin using your virtual machine.
Important: Windows 11 is subject to Microsoft licensing terms. You must own a valid Windows 11 license key to install and use the operating system on your VM.


