How to Use Ubuntu Linux Station
Ubuntu Linux Station
About Ubuntu Linux Station
Ubuntu Linux Station is an Ubuntu Linux operating system installation tool for your QNAP device. Integrated with Linux containers, it helps you to easily download and install lightweight fully-virtualized Linux OS images.
The application also allows you to configure the system settings of the installed OS and provides access to the built-in Virtual Network Computing (VNC) remote desktop feature.
Installation and Configuration
Installing an Ubuntu Operating System
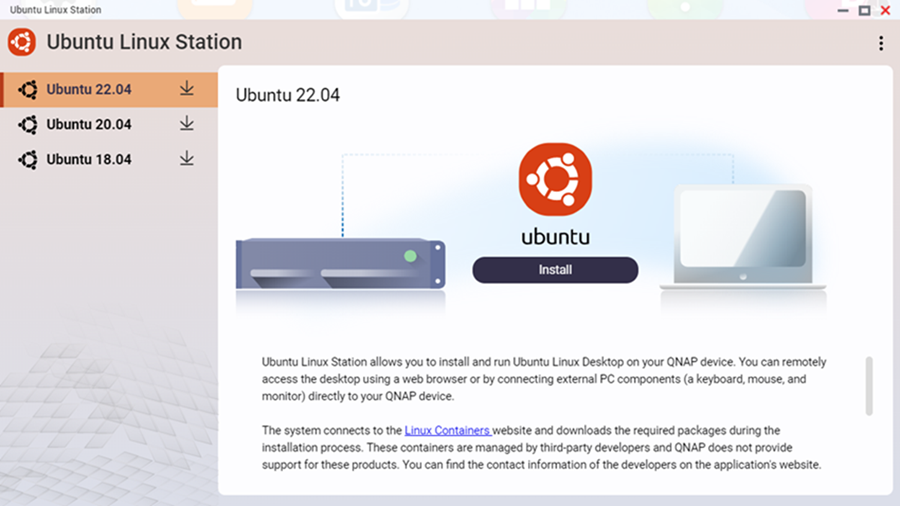
Ubuntu Linux Station allows you to download an OS image from the Linux Containers website and install it on your QNAP device.
You can install one of the following operating systems:
-
Ubuntu 22.04 (Jammy Jellyfish)
-
Ubuntu 20.04 (Focal Fossa)
-
Ubuntu 18.04 (Bionic Beaver)
- On the side menu, select the operating system version.
Configuring an Ubuntu Operating System
You can configure a variety of settings after installing the Ubuntu OS. These settings allow you to manage the resources available to the installed OS.
Configuring CPU and Memory Resources
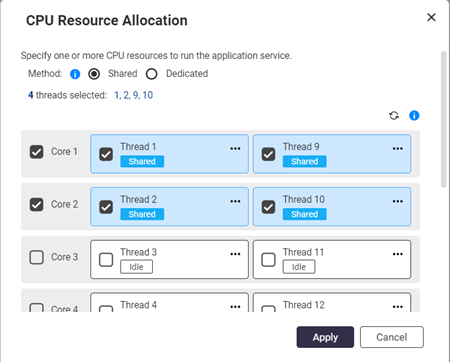
- Configure the CPU resources. Important:
You can configure shared and dedicated CPU resources only on a QNE platform utilizing four or more CPU cores.
Operating System
User Action
-
QTS
-
QNE (less than four CPU cores)
Under Resources, select the number of CPUs.
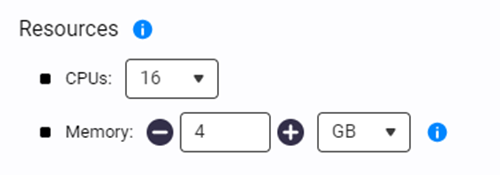
QNE (four or more CPU cores)
-
Under Resources, click
 .
.The CPU Resource Allocation window appears.
-
Configure the CPU allocation method.
-
Shared: Shares the specified CPU resources with other applications.
-
Dedicated: Assigns CPU resources specifically for this OS.
-
-
Select a processor.
Note:This setting is available only if your device supports more than one processor.
-
Select the number of cores and threads.
Tip:Click
 to view the assigned application services.
 -
Click Apply.
The CPU Resource Allocation window appears.
-
Ubuntu Linux Station saves the CPU and memory resources.
Configuring Network Adapter Settings
Ubuntu Linux Station saves network settings.
Adding an Optical Disc Drive
You can add optical disc drives to the Ubuntu operating system only on the QTS platform.
Ubuntu Linux Station saves network settings.
Synchronizing User Credentials
You can synchronize the login credentials of the Ubuntu Linux operating system with the user credentials of the current administrator account.
- Under Overview, click
 .
. The Synchronize credentials window appears.
Ubuntu Linux Station synchronizes the user credentials.
Performing Actions on an Ubuntu OS
- Perform an action on the OS.
Task
Description
Action
Enable the OS
Use to enable the Ubuntu OS.
On the Overview screen, click
 .
.Disable the OS
Use to disable the Ubuntu OS.
On the Overview screen, click
 .
.Restart the OS
Use to restart the OS.
Use this feature if the OS becomes unresponsive.
On the main screen, click Restart.
Reinstall the OS
Use to reinstall the OS.
Use this feature if the OS is corrupt or if a feature is missing.
On the main screen, click Reinstall.
Uninstall the OS
Use to uninstall the OS.
On the main screen, click Uninstall.
Ubuntu Remote Desktop
Ubuntu Linux Station is equipped with the Virtual Network Computing (VNC) to share a graphical desktop over the network. The desktop allows remote users to access and manage the installed Ubuntu operating system.
Accessing the Ubuntu Remote Desktop
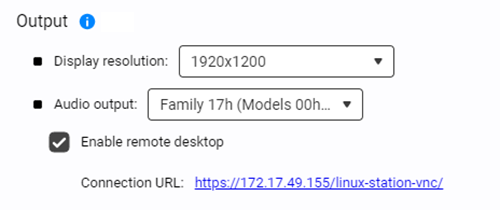
- Select the audio output.
 Important:
You can configure audio settings for the remote desktop only on the QTS platform.
- Select a method to view the remote desktop.
-
Click the connection URL
-
Beside the title, click
 .
.
The Ubuntu remote desktop login page appears.
-
- On the side menu, perform the following actions.
Setting
User Action

Restart the Ubuntu operating system.

Click to view the desktop in high resolution.

Click to view the desktop in medium resolution.

Click to view the desktop in low resolution.

Enter the remote desktop full-screen mode.

Exit the remote desktop full-screen mode.
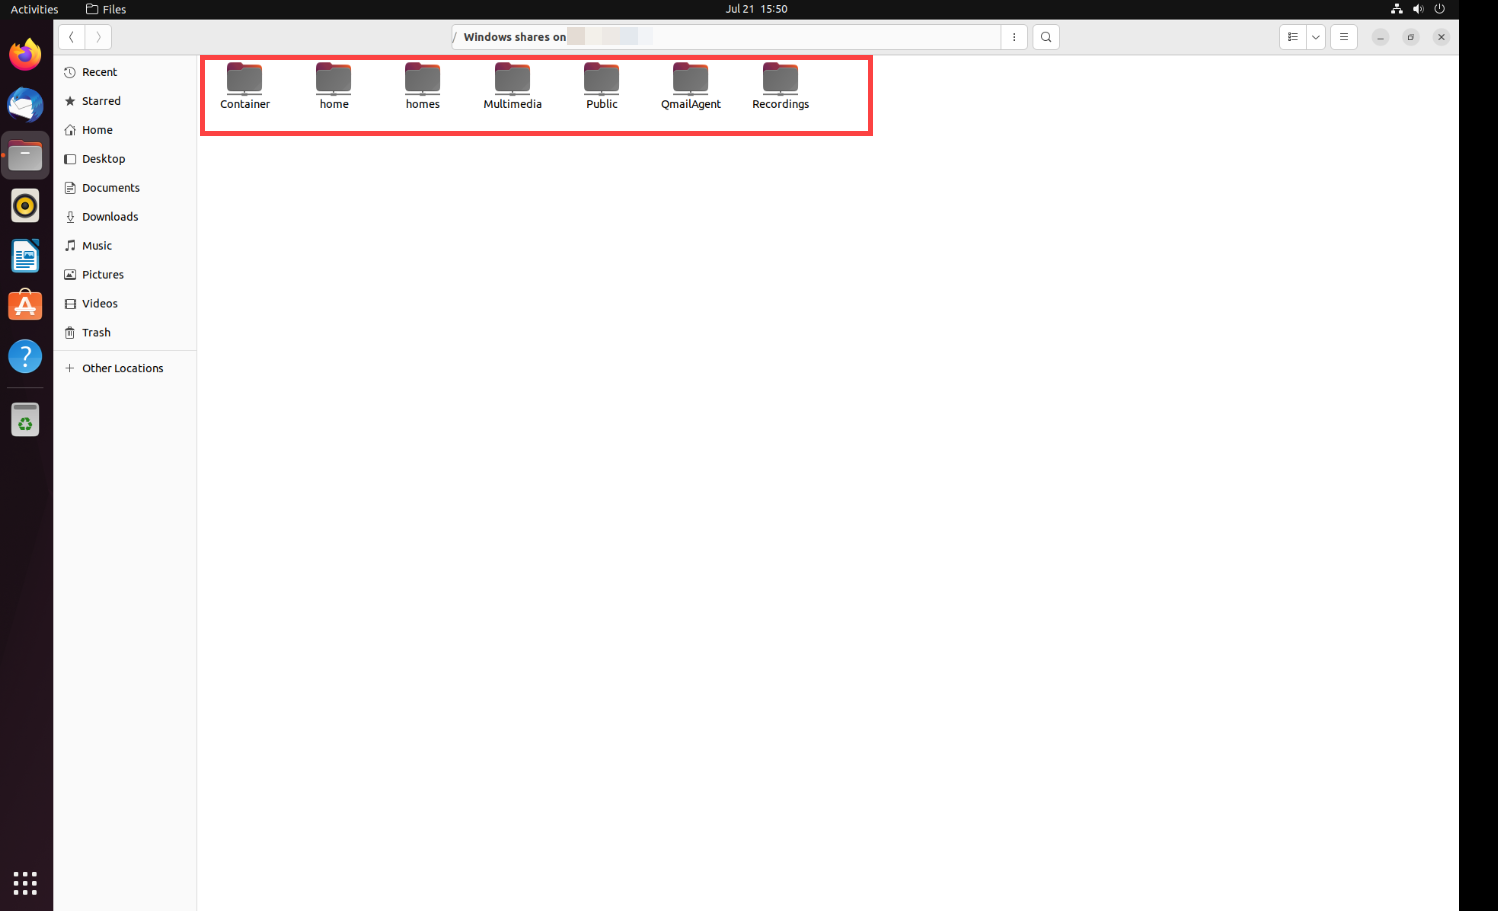
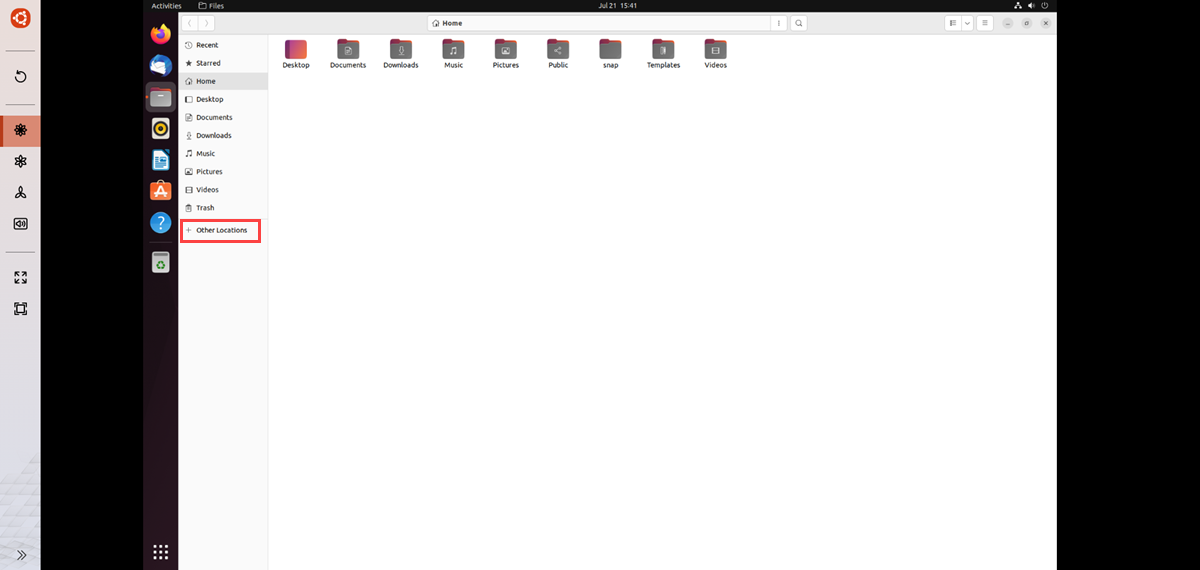
Accessing Shared Folders on a Local QNAP Device from Ubuntu Remote Desktop
Ubuntu remote desktop allows you to connect to a local QNAP device to browse and access files on shared folders. With shared folder access you can edit, upload, download, and share files with other users on your local network.
This section demonstrates how to access shared folders on your local device from an Ubuntu operating system installed using Ubuntu Linux Station.
- Click the remote desktop URL. Note:
Enable remote desktop is enabled by default.
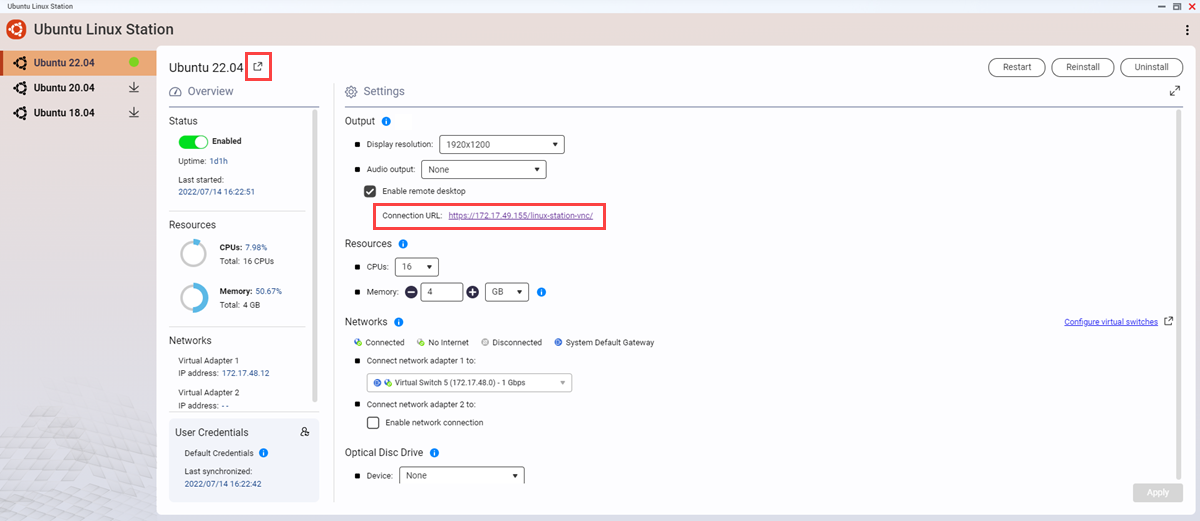
The remote desktop login page appears.
- Enter the password. Tip:
Click
 to make the password visible.
 - On the left panel, click Other Locations.
- Click Connect.
The login window appears.
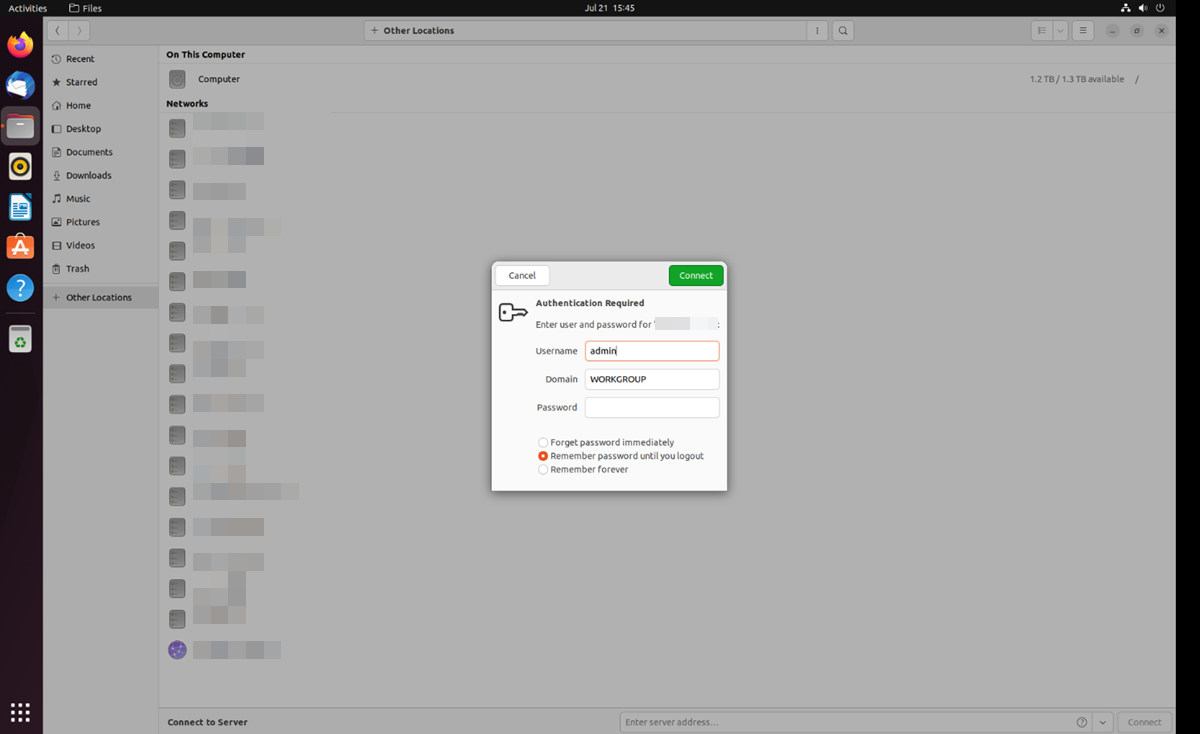
The remote desktop displays the list of shared folders on the local device.