How to join a Windows 10 PC to a QNAP NAS domain controller?
Last modified date:
2023-05-19
Applicable Products
QTS, QuTS hero
Overview
You can configure your QNAP NAS as a domain controller for Microsoft Windows environments. By configuring the NAS as a domain controller, you can store user account information, manage user authentication, and enforce security for a Windows domain. To add a Windows 10 PC to a QNAP NAS domain controller, follow the steps below.
Procedure
- Set the DNS server IP address of your Windows PC to your QNAP NAS IP address.
For details, see Windows DNS Configuration. - Ensure that your Windows PC and QNAP NAS have the same time.
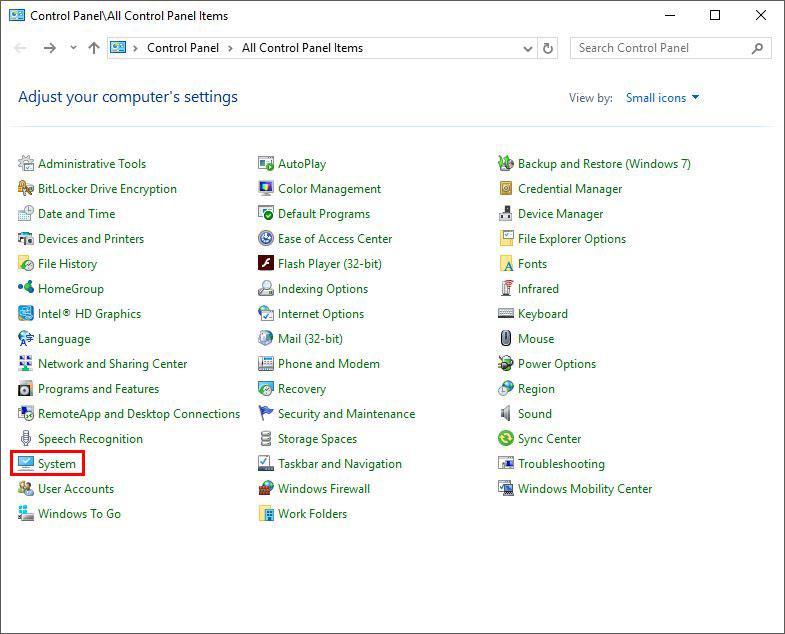
For details, see Joining a Windows Client or Server to a Domain. - On your Windows PC go to Control Panel > System.

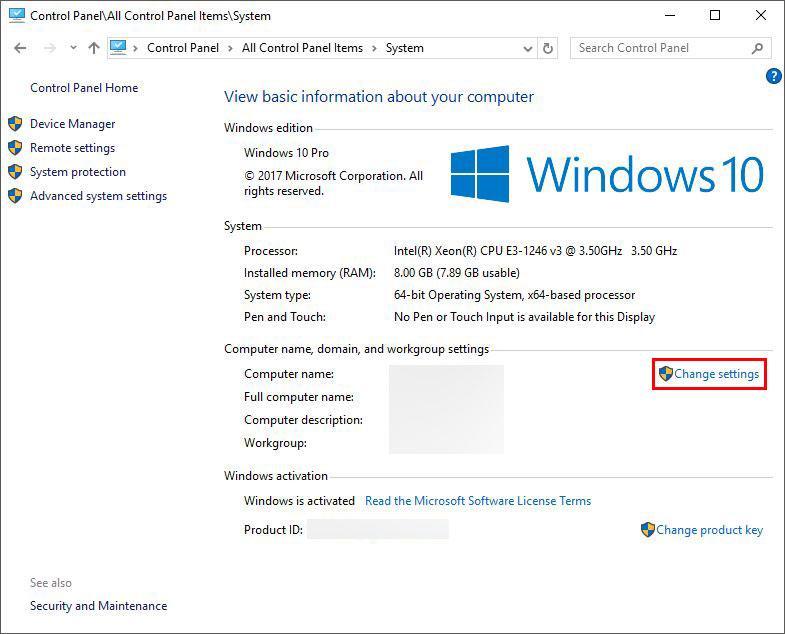
The System screen appears. - Under Computer name, domain, and workgroup settings, click Change settings.

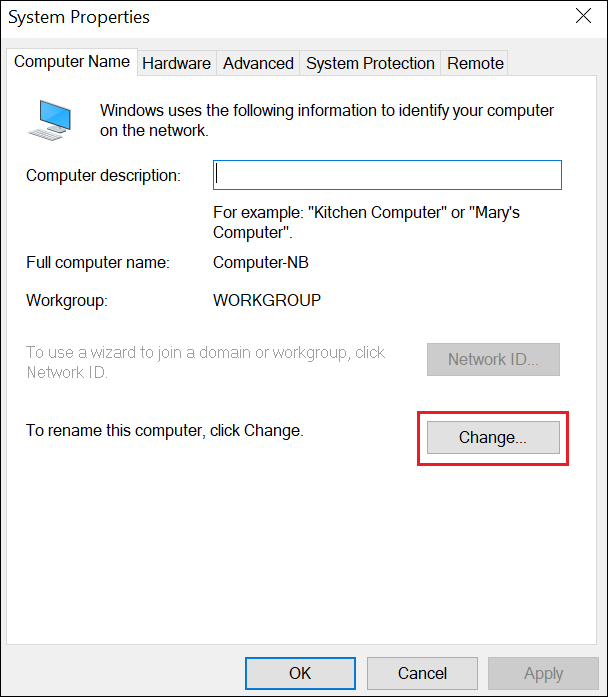
The System Properties window opens. - On the Computer Name tab, click Change...

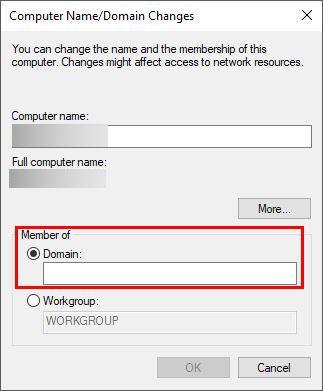
- Under Member of, enter the domain name of your AD server in the Domain field.
For details, see Joining a Windows Client or Server to a Domain.
- Click OK.
Further Reading
- Joining a Windows Client or Server to a Domain
- How to join QNAP NAS to Microsoft Active Directory (AD)?
- Why does enabling the domain controller service on my QNAP NAS fail when using a one-word domain name (e.g. qnap)?
- What to do if Domain Controller error ''Setting Domain Controller failed'' after downgrading from QTS5.0 to QTS4.5.4?


