Applicable Products
HBS 3 (Hybrid Backup Sync)
Scenario
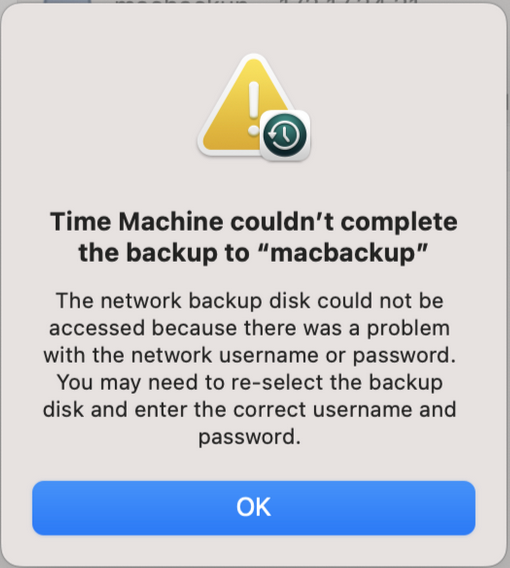
After adding the NAS to an Active Directory domain (AD domain), when attempting to perform a Time Machine backup task on a Mac as a domain user, you may encounter some issues, such as being unable to log in or receiving an error message: Time Machine couldn’t complete the backup, as shown in the following screenshot.
Solution
You can add a Time Machine destination using the tmutil command with a domain user account. To perform this task, ensure that you have administrator privileges on your Mac.
- Configure access settings.
- Go to System Settings > Privacy and Security.
- On the left-hand side, click Full Disk Access.
- On the right-hand side, click + and search for Terminal.
- Select Terminal.app and click Open.
- Select Quit & Reopen if you are prompted to quit Terminal.
- Search for Terminal using Spotlight and then launch the Terminal application.
- In the Terminal window, enter the following command to configure Time Machine with the desired credentials:
sudo tmutil setdestination -p "smb://DOMAIN\\DOMAIN_USER@IP/FOLDER"
- DOMAIN: Domain name
- DOMAIN_USER: Domain user
- IP: IP address of NAS
- FOLDER: Backup folder
- Enter the password of the Mac administrator when you are prompted for a password.
- Enter the password of the user that you will be using for Time Machine when you are prompted for a destination password.
- Open System Settings, go to General, click Time Machine, and then check whether Back up automatically is enabled.
Before performing a backup task as a domain user, ensure that this domain user has permission to access the shared folder. If you have not yet configured permission settings, you can follow these steps.
- Log in to the NAS
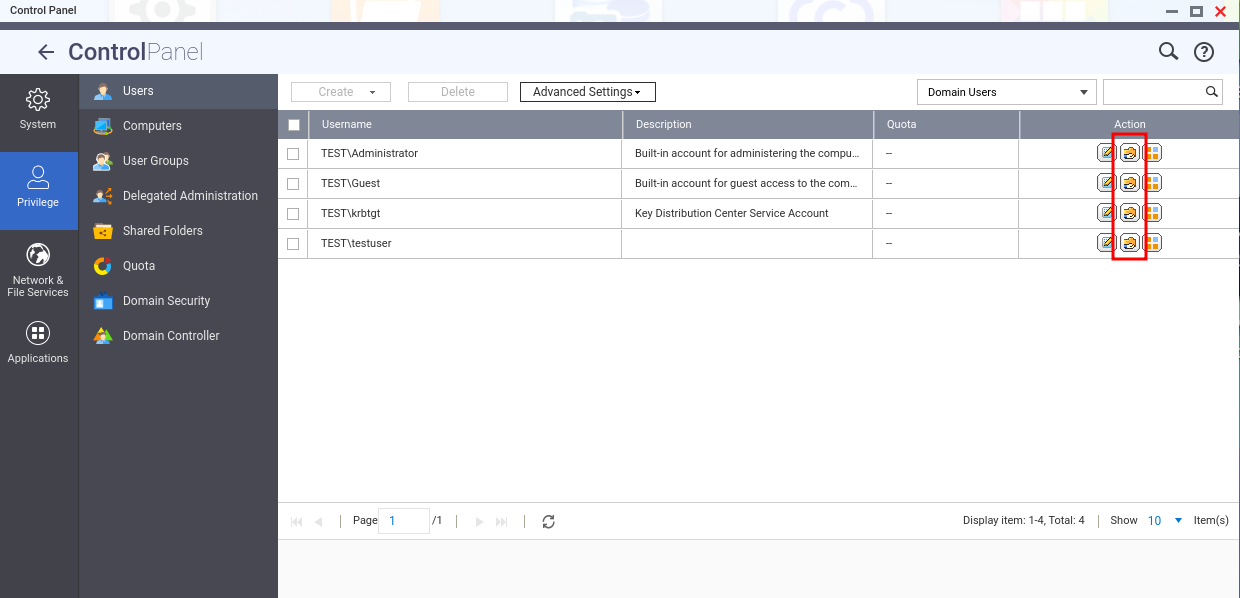
- Go to Control Panel > Privilege > Users.
- From the drop-down list on the top-right corner, select Domain Users.
- Click Edit Shared Folder Permission in the Action column.
Tip
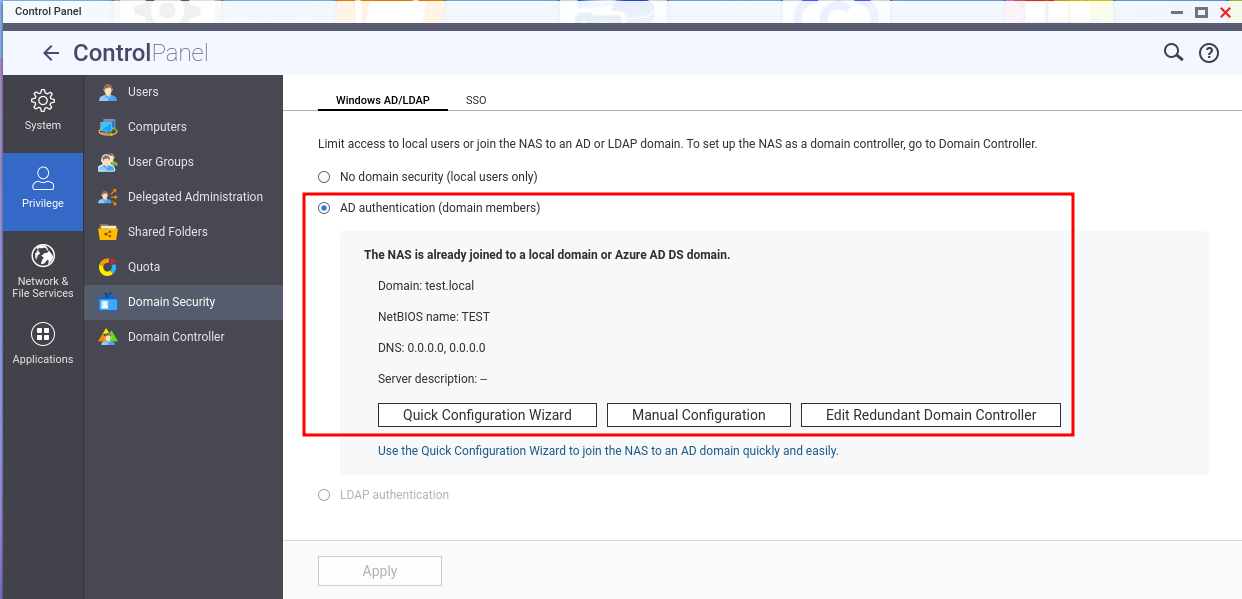
If you want to view the AD domain that NAS has joined, you can go to Control Panel > Privilege > Domain Security.

適用產品
HBS 3 (Hybrid Backup Sync)
情境
將 NAS 加入 Active Directory 網域 (AD 網域) 後,當您嘗試以網域使用者身份在 Mac 上執行 Time Machine 備份任務時,可能會遇到一些問題,例如無法登入或收到錯誤訊息:Time Machine 無法完成備份,如下圖所示。
解決方案
您可以使用tmutil命令並使用網域使用者帳戶來新增 Time Machine 目的地。要執行此任務,請確保您在 Mac 上具有系統管理員權限。
配置訪問設定。
前往系統設定 > 隱私與安全性。
在左側,點選完整磁碟訪問。
在右側,點選 + 並搜尋終端機。
選擇 Terminal.app並點擊開啟。
如果系統提示您退出終端機,請選擇退出並重新開啟。
使用 Spotlight 搜尋終端機,然後啟動終端機應用程式。
在終端機視窗中,輸入以下命令以使用所需的憑證配置 Time Machine: sudo tmutil setdestination -p "smb://DOMAIN\\DOMAIN_USER@IP/FOLDER"
DOMAIN: 網域名稱
DOMAIN_USER: 網域使用者
IP: NAS 的 IP 地址
FOLDER: 備份資料夾
當系統提示您輸入密碼時,請輸入 Mac系統管理員的密碼。
當系統提示您輸入目的地密碼時,請輸入您將用於 Time Machine 的使用者的密碼。
開啟系統設定,前往一般,點選 Time Machine,然後檢查是否啟用了自動備份。
在以網域使用者身份執行備份任務之前,請確保該網域使用者具有訪問共享資料夾的許可權。如果您尚未配置許可權設定,可以按照以下步驟進行。
登入 NAS
前往控制台> 權限 > 使用者。
從右上角的下拉列表中選擇網域使用者。
在操作欄中點選編輯共享資料夾許可權。
如果您想查看 NAS 已加入的 AD 網域,可以前往控制台> 權限 > 網域安全性。


