Applicable Products
HBS 3 (Hybrid Backup Sync)
Scenario
After adding the NAS to an Active Directory domain (AD domain), when attempting to perform a Time Machine backup task on a Mac as a domain user, you may encounter some issues, such as being unable to log in or receiving an error message: Time Machine couldn’t complete the backup, as shown in the following screenshot.
Solution
You can add a Time Machine destination using the tmutil command with a domain user account. To perform this task, ensure that you have administrator privileges on your Mac.
- Configure access settings.
- Go to System Settings > Privacy and Security.
- On the left-hand side, click Full Disk Access.
- On the right-hand side, click + and search for Terminal.
- Select Terminal.app and click Open.
- Select Quit & Reopen if you are prompted to quit Terminal.
- Search for Terminal using Spotlight and then launch the Terminal application.
- In the Terminal window, enter the following command to configure Time Machine with the desired credentials:
sudo tmutil setdestination -p "smb://DOMAIN\\DOMAIN_USER@IP/FOLDER"
- DOMAIN: Domain name
- DOMAIN_USER: Domain user
- IP: IP address of NAS
- FOLDER: Backup folder
- Enter the password of the Mac administrator when you are prompted for a password.
- Enter the password of the user that you will be using for Time Machine when you are prompted for a destination password.
- Open System Settings, go to General, click Time Machine, and then check whether Back up automatically is enabled.
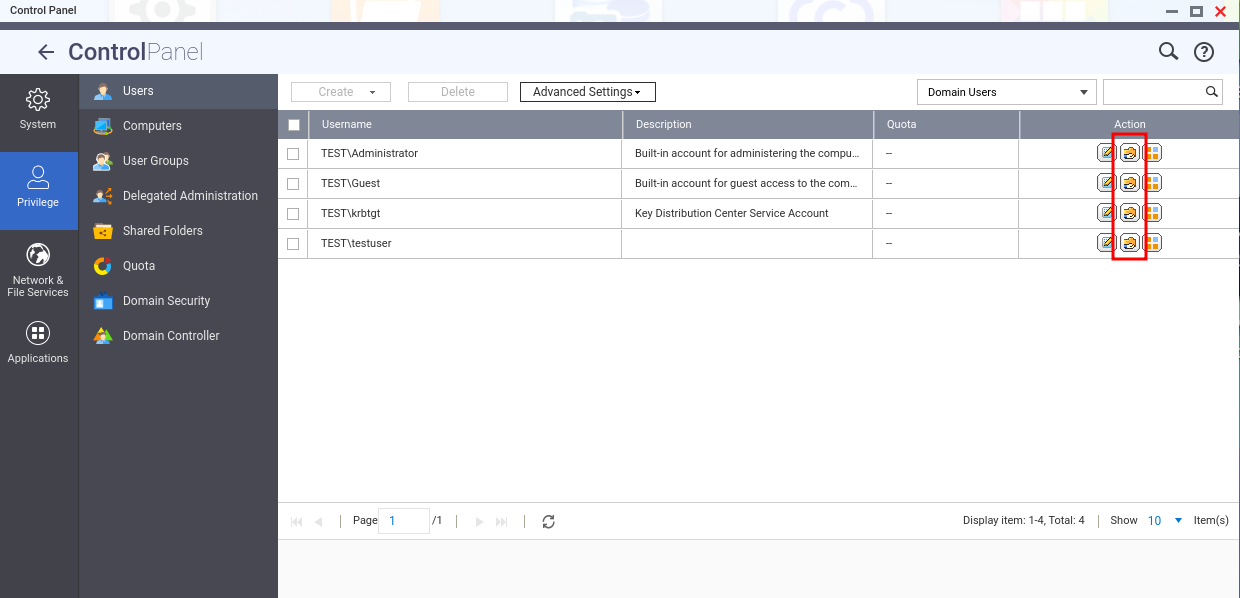
Before performing a backup task as a domain user, ensure that this domain user has permission to access the shared folder. If you have not yet configured permission settings, you can follow these steps.
- Log in to the NAS
- Go to Control Panel > Privilege > Users.
- From the drop-down list on the top-right corner, select Domain Users.
- Click Edit Shared Folder Permission in the Action column.
Tip
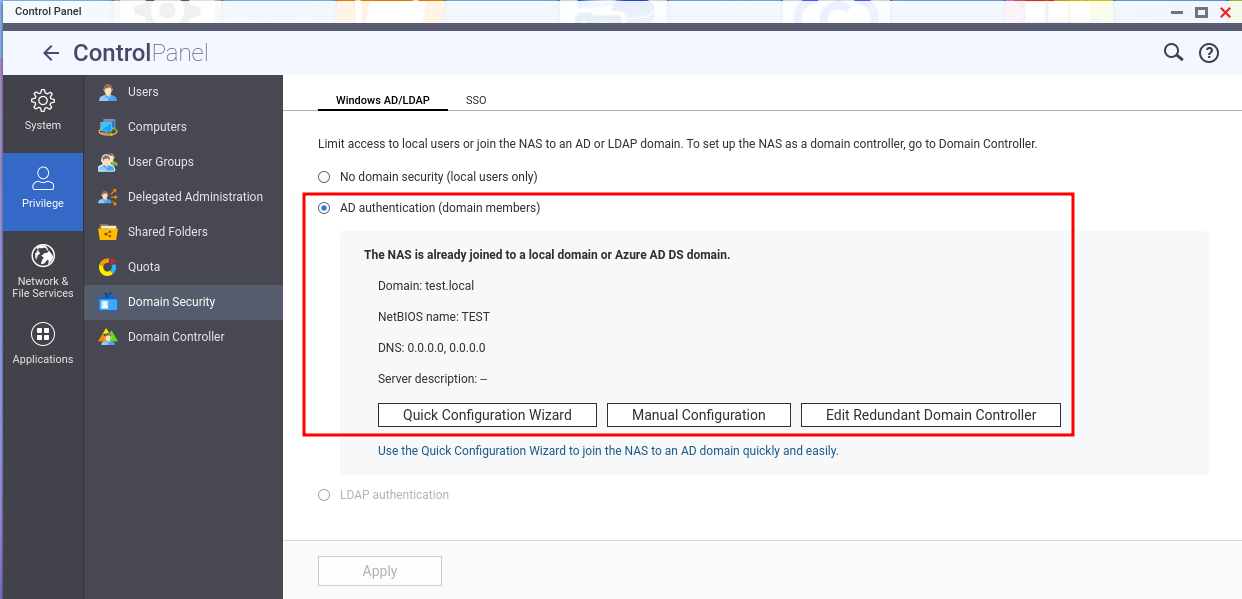
If you want to view the AD domain that NAS has joined, you can go to Control Panel > Privilege > Domain Security.
적용 가능한 제품
HBS 3 (Hybrid Backup Sync)
시나리오
NAS를 Active Directory 도메인(AD 도메인)에 추가한 후, 도메인 사용자로서 Mac에서 Time Machine 백업 작업을 시도할 때 로그인할 수 없거나 오류 메시지를 받는 등의 문제가 발생할 수 있습니다: Time Machine이 백업을 완료할 수 없습니다, 다음 스크린샷과 같이.
해결책
도메인 사용자 계정을 사용하여tmutil명령어를 사용하여 Time Machine 목적지를 추가할 수 있습니다. 이 작업을 수행하려면 Mac에서관리자권한이 있는지 확인하십시오.
액세스 설정을 구성하십시오.
시스템 설정 > 개인정보 보호 및 보안으로 이동하십시오.
왼쪽에서 전체 디스크 접근을 클릭하십시오.
오른쪽에서 +를 클릭하고 터미널을 검색하십시오.
Terminal.app을 선택하고 열기를 클릭하십시오.
터미널을 종료하라는 메시지가 표시되면 종료 및 다시 열기를 선택하십시오.
Spotlight을 사용하여 터미널을 검색한 다음 터미널 애플리케이션을 실행하십시오.
터미널 창에서 다음 명령어를 입력하여 원하는 자격 증명으로 Time Machine을 구성하십시오: sudo tmutil setdestination -p "smb://DOMAIN\\DOMAIN_USER@IP/FOLDER"
DOMAIN: 도메인 이름
DOMAIN_USER: 도메인 사용자
IP: NAS의 IP 주소
FOLDER: 백업 폴더
비밀번호를 입력하라는 메시지가 표시되면 Mac관리자의 비밀번호를 입력하십시오.
목적지 비밀번호를 입력하라는 메시지가 표시되면 Time Machine에 사용할 사용자의 비밀번호를 입력하십시오.
시스템 설정을 열고 일반으로 이동하여 Time Machine을 클릭한 다음 자동으로 백업이 활성화되어 있는지 확인하십시오.
도메인 사용자로서 백업 작업을 수행하기 전에 이 도메인 사용자가 공유 폴더에 접근할 수 있는 권한이 있는지 확인하십시오. 아직 권한 설정을 구성하지 않은 경우 다음 단계를 따를 수 있습니다.
NAS에 로그인하십시오.
제어판> 권한 > 사용자로 이동하십시오.
오른쪽 상단의 드롭다운 목록에서 도메인 사용자를 선택하십시오.
작업 열에서 공유 폴더 권한 편집을 클릭하십시오.
NAS가 가입한 AD 도메인을 보려면제어판> 권한 > 도메인 보안으로 이동할 수 있습니다.