Applicable Products
HBS 3 (Hybrid Backup Sync)
Scenario
After adding the NAS to an Active Directory domain (AD domain), when attempting to perform a Time Machine backup task on a Mac as a domain user, you may encounter some issues, such as being unable to log in or receiving an error message: Time Machine couldn’t complete the backup, as shown in the following screenshot.
Solution
You can add a Time Machine destination using the tmutil command with a domain user account. To perform this task, ensure that you have administrator privileges on your Mac.
- Configure access settings.
- Go to System Settings > Privacy and Security.
- On the left-hand side, click Full Disk Access.
- On the right-hand side, click + and search for Terminal.
- Select Terminal.app and click Open.
- Select Quit & Reopen if you are prompted to quit Terminal.
- Search for Terminal using Spotlight and then launch the Terminal application.
- In the Terminal window, enter the following command to configure Time Machine with the desired credentials:
sudo tmutil setdestination -p "smb://DOMAIN\\DOMAIN_USER@IP/FOLDER"
- DOMAIN: Domain name
- DOMAIN_USER: Domain user
- IP: IP address of NAS
- FOLDER: Backup folder
- Enter the password of the Mac administrator when you are prompted for a password.
- Enter the password of the user that you will be using for Time Machine when you are prompted for a destination password.
- Open System Settings, go to General, click Time Machine, and then check whether Back up automatically is enabled.
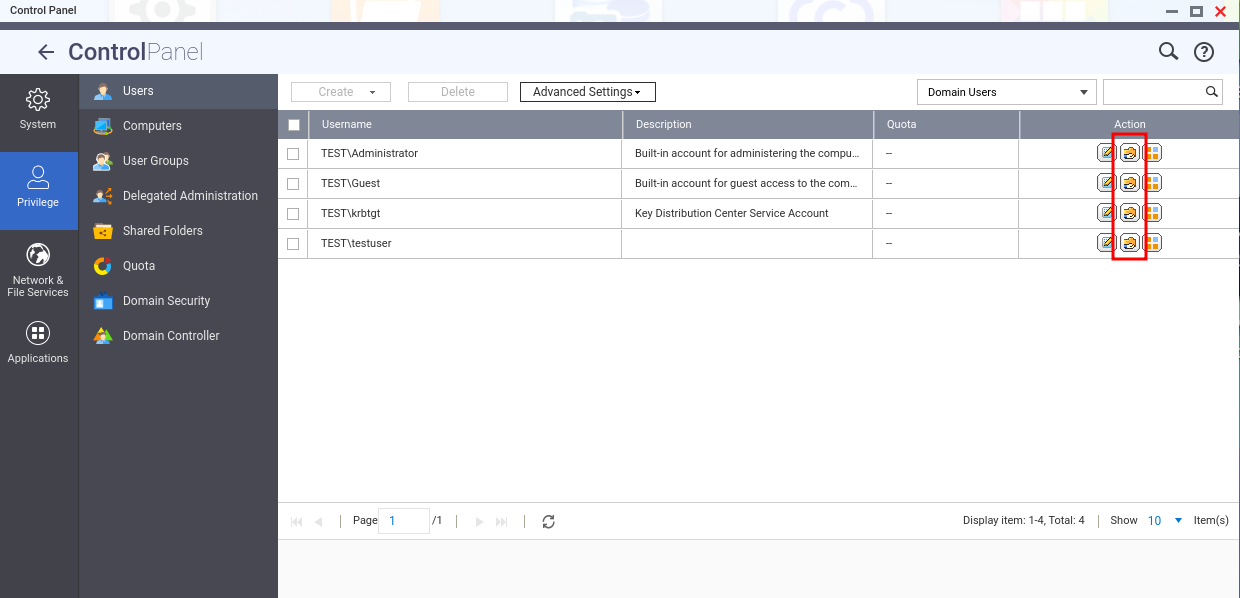
Before performing a backup task as a domain user, ensure that this domain user has permission to access the shared folder. If you have not yet configured permission settings, you can follow these steps.
- Log in to the NAS
- Go to Control Panel > Privilege > Users.
- From the drop-down list on the top-right corner, select Domain Users.
- Click Edit Shared Folder Permission in the Action column.
Tip
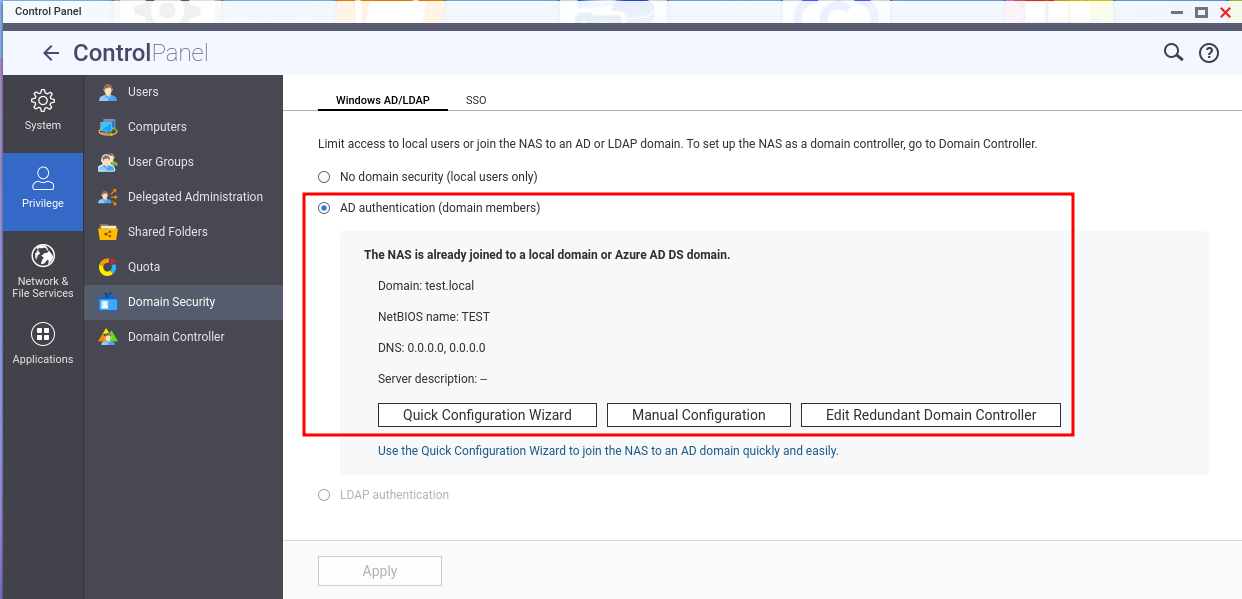
If you want to view the AD domain that NAS has joined, you can go to Control Panel > Privilege > Domain Security.
適用製品
HBS 3 (Hybrid Backup Sync)
シナリオ
NASをActive Directoryドメイン(ADドメイン)に追加した後、ドメインユーザーとしてMacでTime Machineバックアップタスクを実行しようとすると、ログインできない、またはエラーメッセージが表示されるなどの問題が発生することがあります。以下のスクリーンショットに示されているように、Time Machineはバックアップを完了できませんでした。
解決策
ドメインユーザーアカウントを使用してtmutilコマンドを使用してTime Machineの宛先を追加できます。このタスクを実行するには、Macで管理者権限を持っていることを確認してください。
アクセス設定を構成します。
システム設定 > プライバシーとセキュリティに移動します。
左側のメニューでフルディスクアクセスをクリックします。
右側の+をクリックして、ターミナルを検索します。
Terminal.appを選択して、開くをクリックします。
ターミナルを終了するように求められた場合は、終了して再度開くを選択します。
Spotlightを使用してターミナルを検索し、ターミナルアプリケーションを起動します。
ターミナルウィンドウで、次のコマンドを入力して、希望の資格情報でTime Machineを構成します: sudo tmutil setdestination -p "smb://DOMAIN\\DOMAIN_USER@IP/FOLDER"
DOMAIN: ドメイン名
DOMAIN_USER: ドメインユーザー
IP: NASのIPアドレス
FOLDER: バックアップフォルダー
パスワードを求められたら、Macの管理者のパスワードを入力します。
宛先のパスワードを求められたら、Time Machineに使用するユーザーのパスワードを入力します。
システム設定を開き、一般に移動し、Time Machineをクリックして、自動的にバックアップが有効になっているか確認します。
ドメインユーザーとしてバックアップタスクを実行する前に、このドメインユーザーが共有フォルダーにアクセスする権限を持っていることを確認してください。権限設定をまだ構成していない場合は、次の手順に従ってください。
NASにログインします。
コントロールパネル> 権限 > ユーザーに移動します。
右上のドロップダウンリストからドメインユーザーを選択します。
アクション列の共有フォルダー権限を編集をクリックします。
NASが参加しているADドメインを確認したい場合は、コントロールパネル> 権限 > ドメインセキュリティに移動できます。