


Using Qutil to set Windows Registries on a Windows host
Last modified date:
2026-02-25
- Overview
- Configure iSCSI initiator MPIO
- Install the Mutipath I/O feature
- Enable Qutil and set the MPIO policy to RRWS (Round-Robin with Subset)
Overview
Qutil is a configuration utility that helps Windows hosts support and optimize the MPIO (Multipath I/O) functionality of QNAP NAS devices. It provides PowerShell scripts to configure the necessary registry settings and allows users to specify which QNAP iSCSI LUNs should apply the RRWS (Round-Robin with Subset) load-balancing policy.
Basic specifications:
Item Description QNAP firmware - QTS 4.2.x and later
- QuTS hero (All versions)
- QES (All versions)
Third-party operating systems Windows Server 2008 and later Supported languages English only Configure iSCSI initiator MPIO
- Click Start, type "iSCSI" in Start Search, and then under Programs, click iSCSI Initiator.
If this is the first time that you are launching Microsoft iSCSI Initiator, you will receive a prompt that says the Microsoft iSCSI service is not running. You must start the service for Microsoft iSCSI Initiator to run correctly.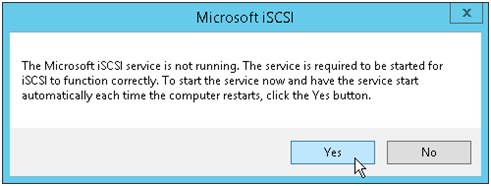
- Click Yes to start the Microsoft iSCSI service.
The iSCSI Initiator Properties window opens. - Go to the Discovery tab.
- Add iSCSI targets.
- Click Discover Portal.
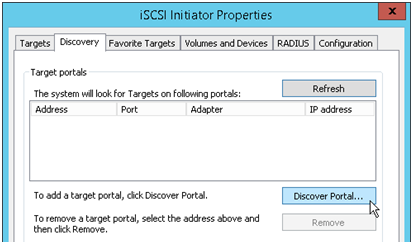 The Discover Target Portal dialog box appears.
 - Enter the IP address or DNS name of the target portal.
- Keep the default TCP port number 3260.
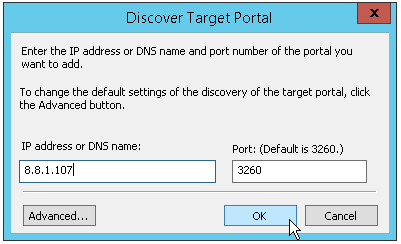
- Click OK.
- Repeat the above substeps to add an additional iSCSI target.
We enter the data port (instead of administration port) IP addresses, which are in the same subnet.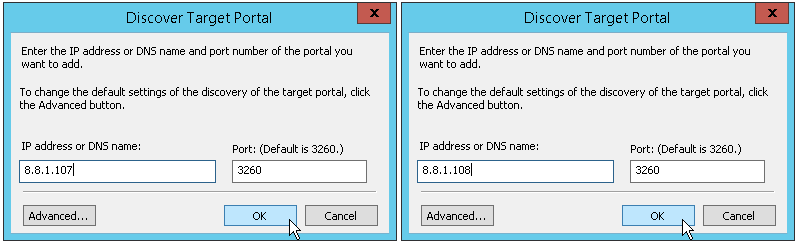
- Click Discover Portal.
- Connect to an iSCSI target.
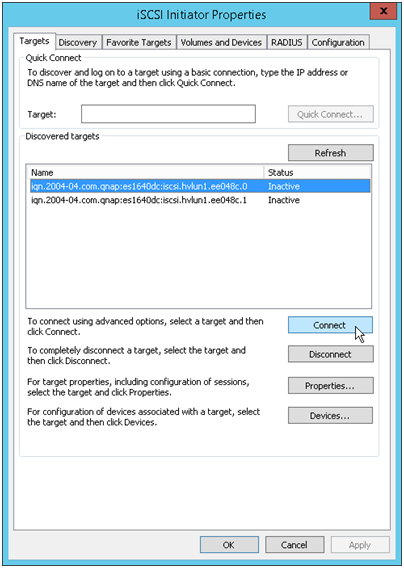
- Select the target you wish to connect to and click Connect.
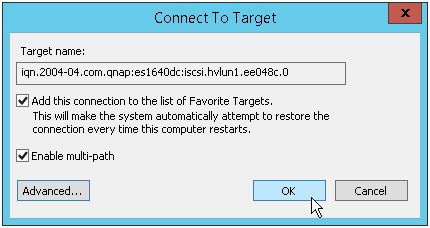
The Connect To Target window opens.
- Select Enable multi-path.
- Click Advanced.
The Advanced Settings window opens.
- Next to Local adapter, select Microsoft iSCSI Initiator.
- Next to Initiator IP and Target portal IP, select the appropriate IP addresses.
Ensure the two IP addresses are in the same subnet. - Click OK to close the Advanced Settings window.
- Click OK to close the Connect To Target window.
Once successfully connected, the iSCSI target status displays "Connected" in the Targets tab in the iSCSI Initiator Properties window.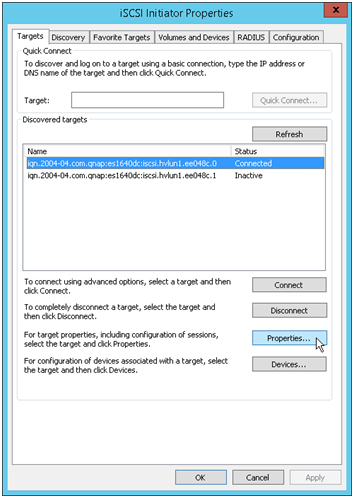
- Click Properties.
The Properties window opens. - In the Sessions tab, click Add session.

The Connect To Target window opens.
- Select Enable multi-path.
- Click Advanced.
The Advanced Settings window opens. - Select the IP addresses of the other data port that belong to a different subnet.
Ensure the initiator IP and target portal IP are in the same subnet.
- Click OK to close the Advanced Settings window.
- Click OK to close the Connect to Target window.
The newly added session is displayed in the Sessions tab of the Properties window.
- Click OK to close the Properties window.
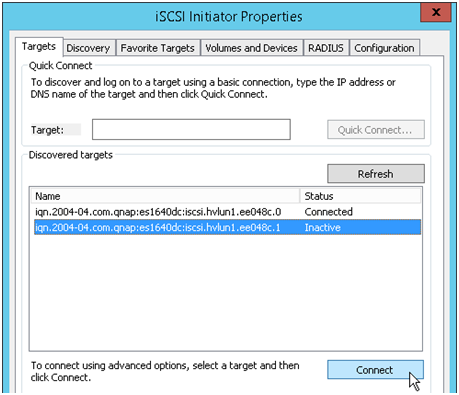
- Select the target you wish to connect to and click Connect.
- Repeat steps 5a to 5o to set up the other iSCSI target with MPIO.
- After configuring both targets with MPIO, add the iSCSI volume and/or device to be persistently bound to the iSCSI service.
This ensures that the iSCSI Initiator service will not complete initialization until all persistently bound volumes and devices are available to the computer.- Go to the Volumes and Devices tab in the iSCSI Initiator Properties window.

- Click Auto Configure to automatically configure all available devices.
Under Volume List, you should see a new volume name starting with "mpio#disk...". - Click OK to close the iSCSI Initiator Properties window.
- Go to the Volumes and Devices tab in the iSCSI Initiator Properties window.
Install the Mutipath I/O feature
- In the Windows Server Start menu, type "Server Manager" in the search box, and then press Enter.
Server Manager opens. - In Server Manager, click Manage > Add Roles and Features.
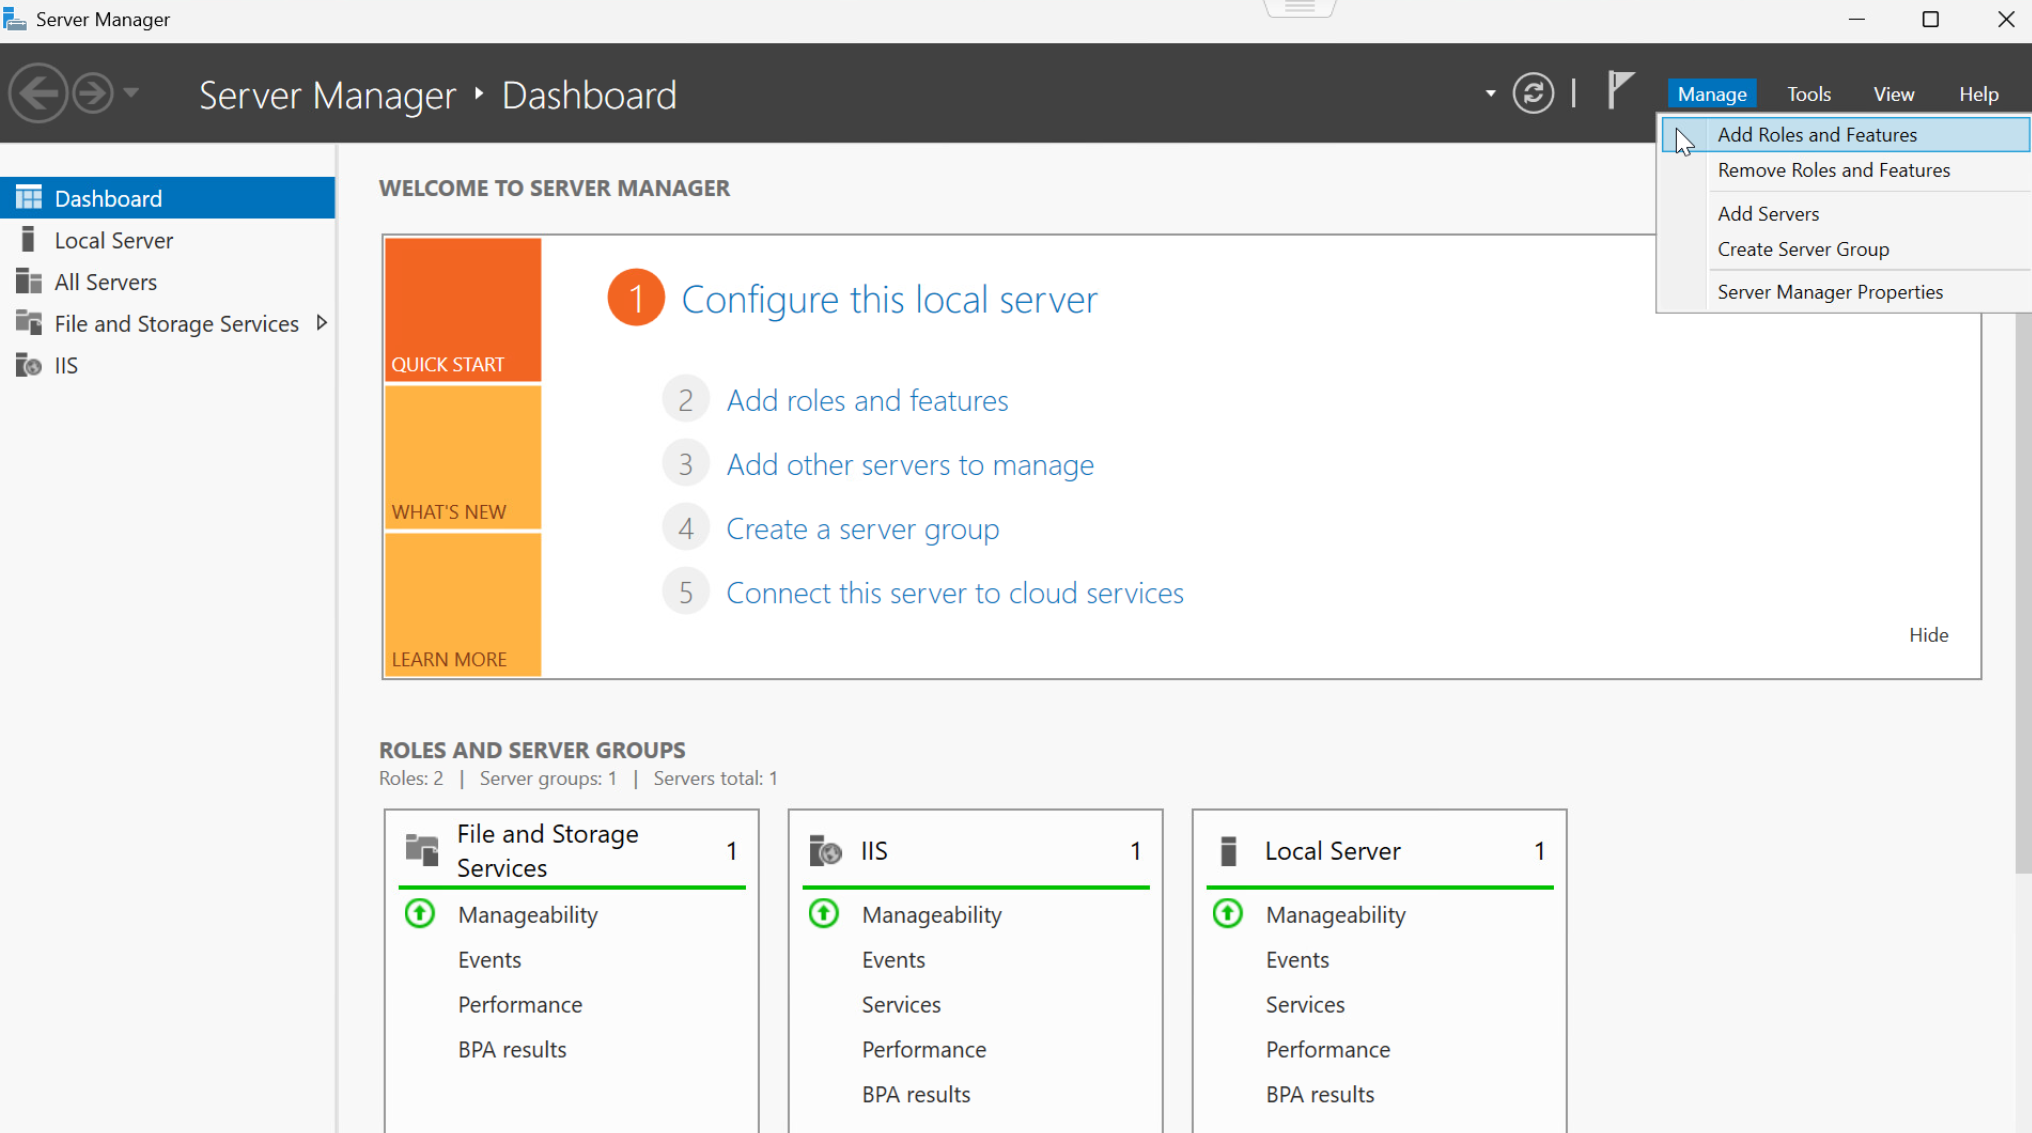
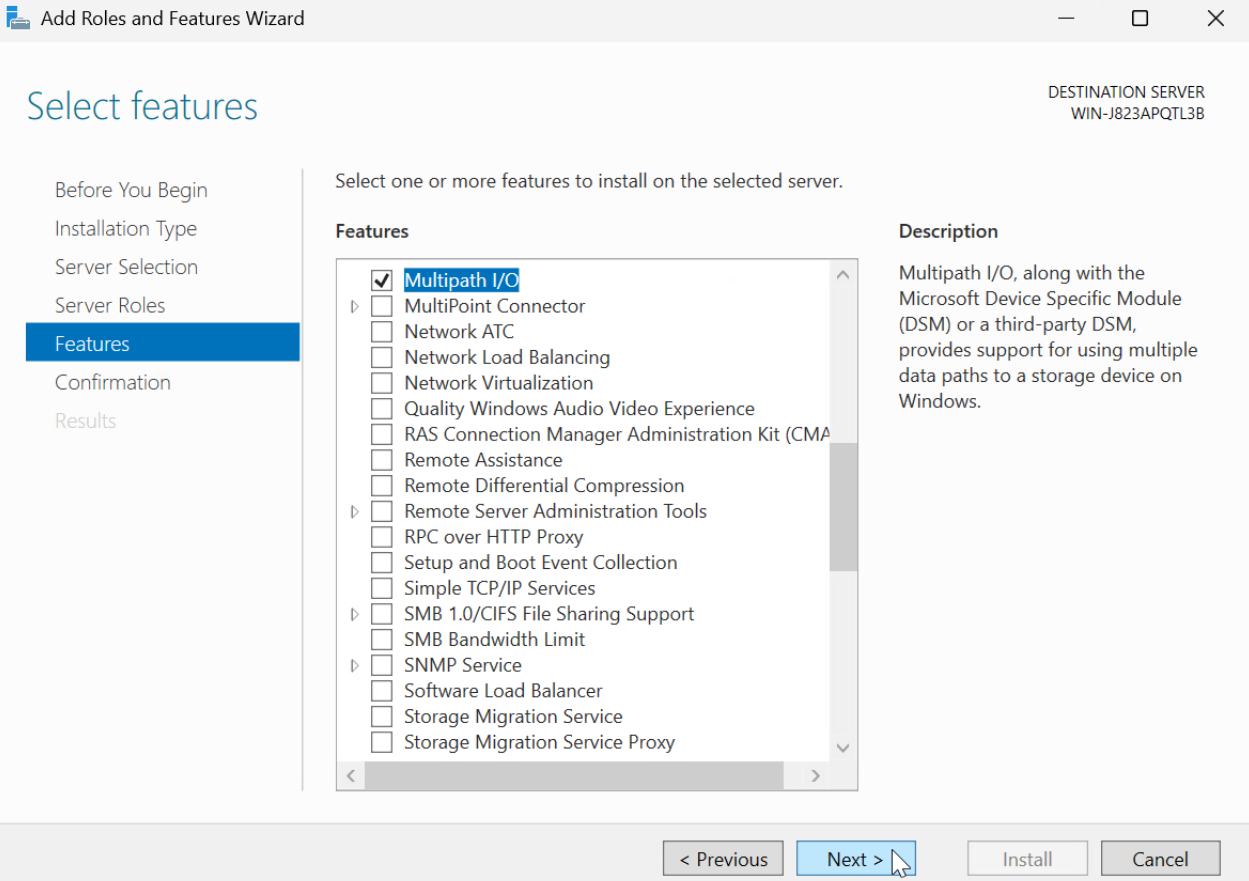
The Add Roles and Features Wizard opens. - In the left pane, click Features.
- Select Multipath I/O, click Next, and then click Install.
Enable Qutil and set the MPIO policy to RRWS (Round-Robin with Subset)
- Extract the Qutil ZIP folder.
You can download the latest Qutil from https://www.qnap.com/download. - Locate the file "setup.cmd", right-click, then select Run as administrator.
Windows Server starts the setup process.
The Qutil registry key configuration page appears.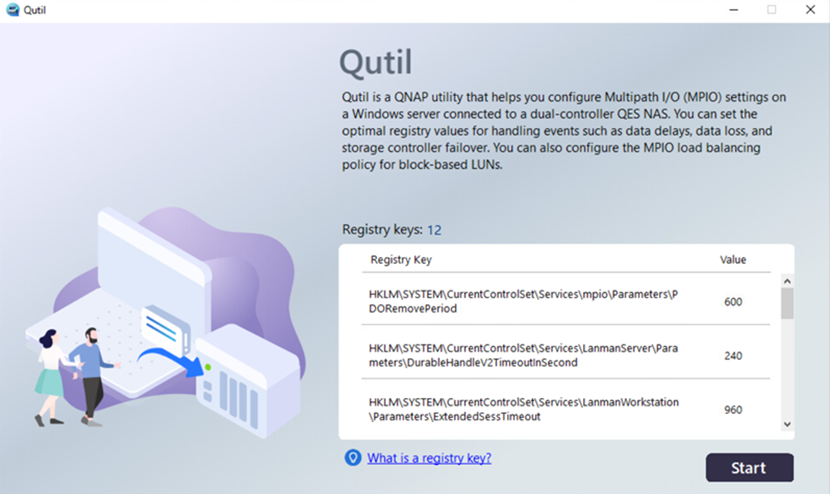
- Click Start, and then select Restart Now to immediately restart the system.
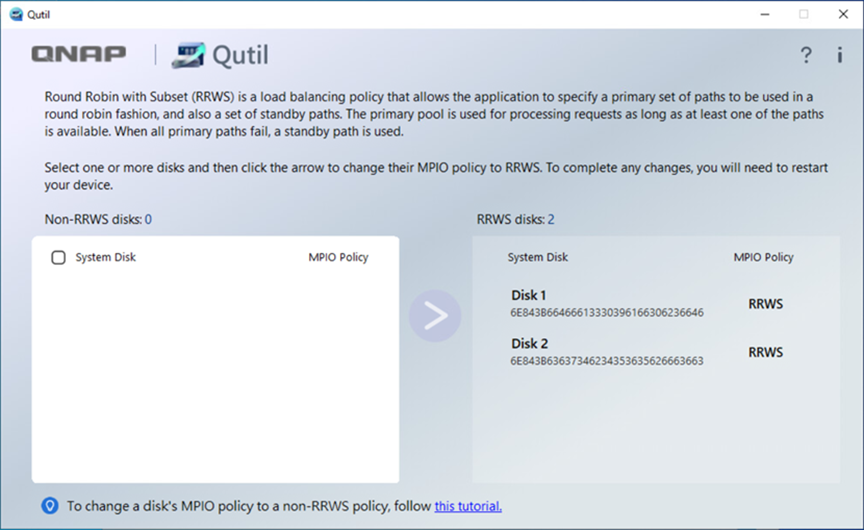
This action configures the Windows registry values so that the host can properly enable and use MPIO functionality when connecting to iSCSI LUNs on your QNAP NAS. - After the restart, open Qutil from the Windows Server desktop.
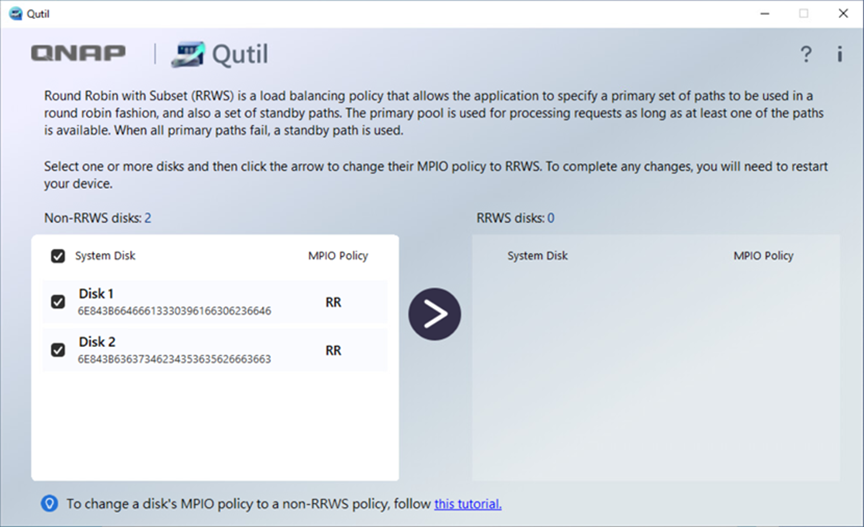
- Select the disks for which you want to change the load‑balancing policy, and then click the center arrow to set the MPIO policy to RRWS (Round‑Robin with Subset).
 NoteTo change to another load-balancing policy, see How do I configure the MPIO policy for iSCSI LUNs on Windows Server?
For further assistance, ask other users and QNAP experts in the community. Go to QNAP Community


