How to set up MCP Assistant for Claude to operate my NAS with natural language commands?
In response to recent Claude Desktop updates, we are greatly streamlining the current workflow of MCP installation to enhance your experience. You will soon be able to complete the MCP setup with just a few clicks. We plan to add this enhancement in the next release of MCP Assistant. Please stay tuned.
Applicable Products
- QNAP NAS devices running QTS 5.2, QuTS hero h5.2, or later versions
- MCP Assistant
Introduction
This tutorial guides you through the process of setting up QNAP's MCP Assistant to work with Claude Desktop, which enables seamless integration between your QNAP NAS and Claude's AI capabilities. You can then use natural language commands to operate your NAS.
Prerequisites
Before your start, ensure that you have the following setup:
- QNAP NAS device with QTS 5.2, QuTS hero h5.2, or later versions
- Computer with internet connection (Windows or macOS; Claude Desktop is not available for Linux)
- Administrator access to your QNAP NAS
- Default MCP Assistant ports: 8442 and 8443
Procedure
- Install MCP Assistant (beta) from App Center.
- If your NAS runs QTS/QuTS hero 5.2.1 or later versions:
- Log in to your QNAP NAS.
- Go to the App Center.
- On the top-right corner, click

- Select Join the QNAP App Beta Program and click Apply.
- In the search bar, search for MCP Assistant.
- Click Install.
- If your NAS runs QTS/QuTS hero 5.2.0:
- Go to the webpage of App Center.
- Search for MCP Assistant.
- Click MCP Assistant from the search result.
- Select your NAS model.
- Download the installation file.
- Log in to your QNAP NAS.
- Go to App Center.
- On the right-top corner, click

- Select Install Manually.
- Click Browse and upload the installation file that you just downloaded from the QNAP website.
- Click Install.
- If your NAS runs QTS/QuTS hero 5.2.1 or later versions:
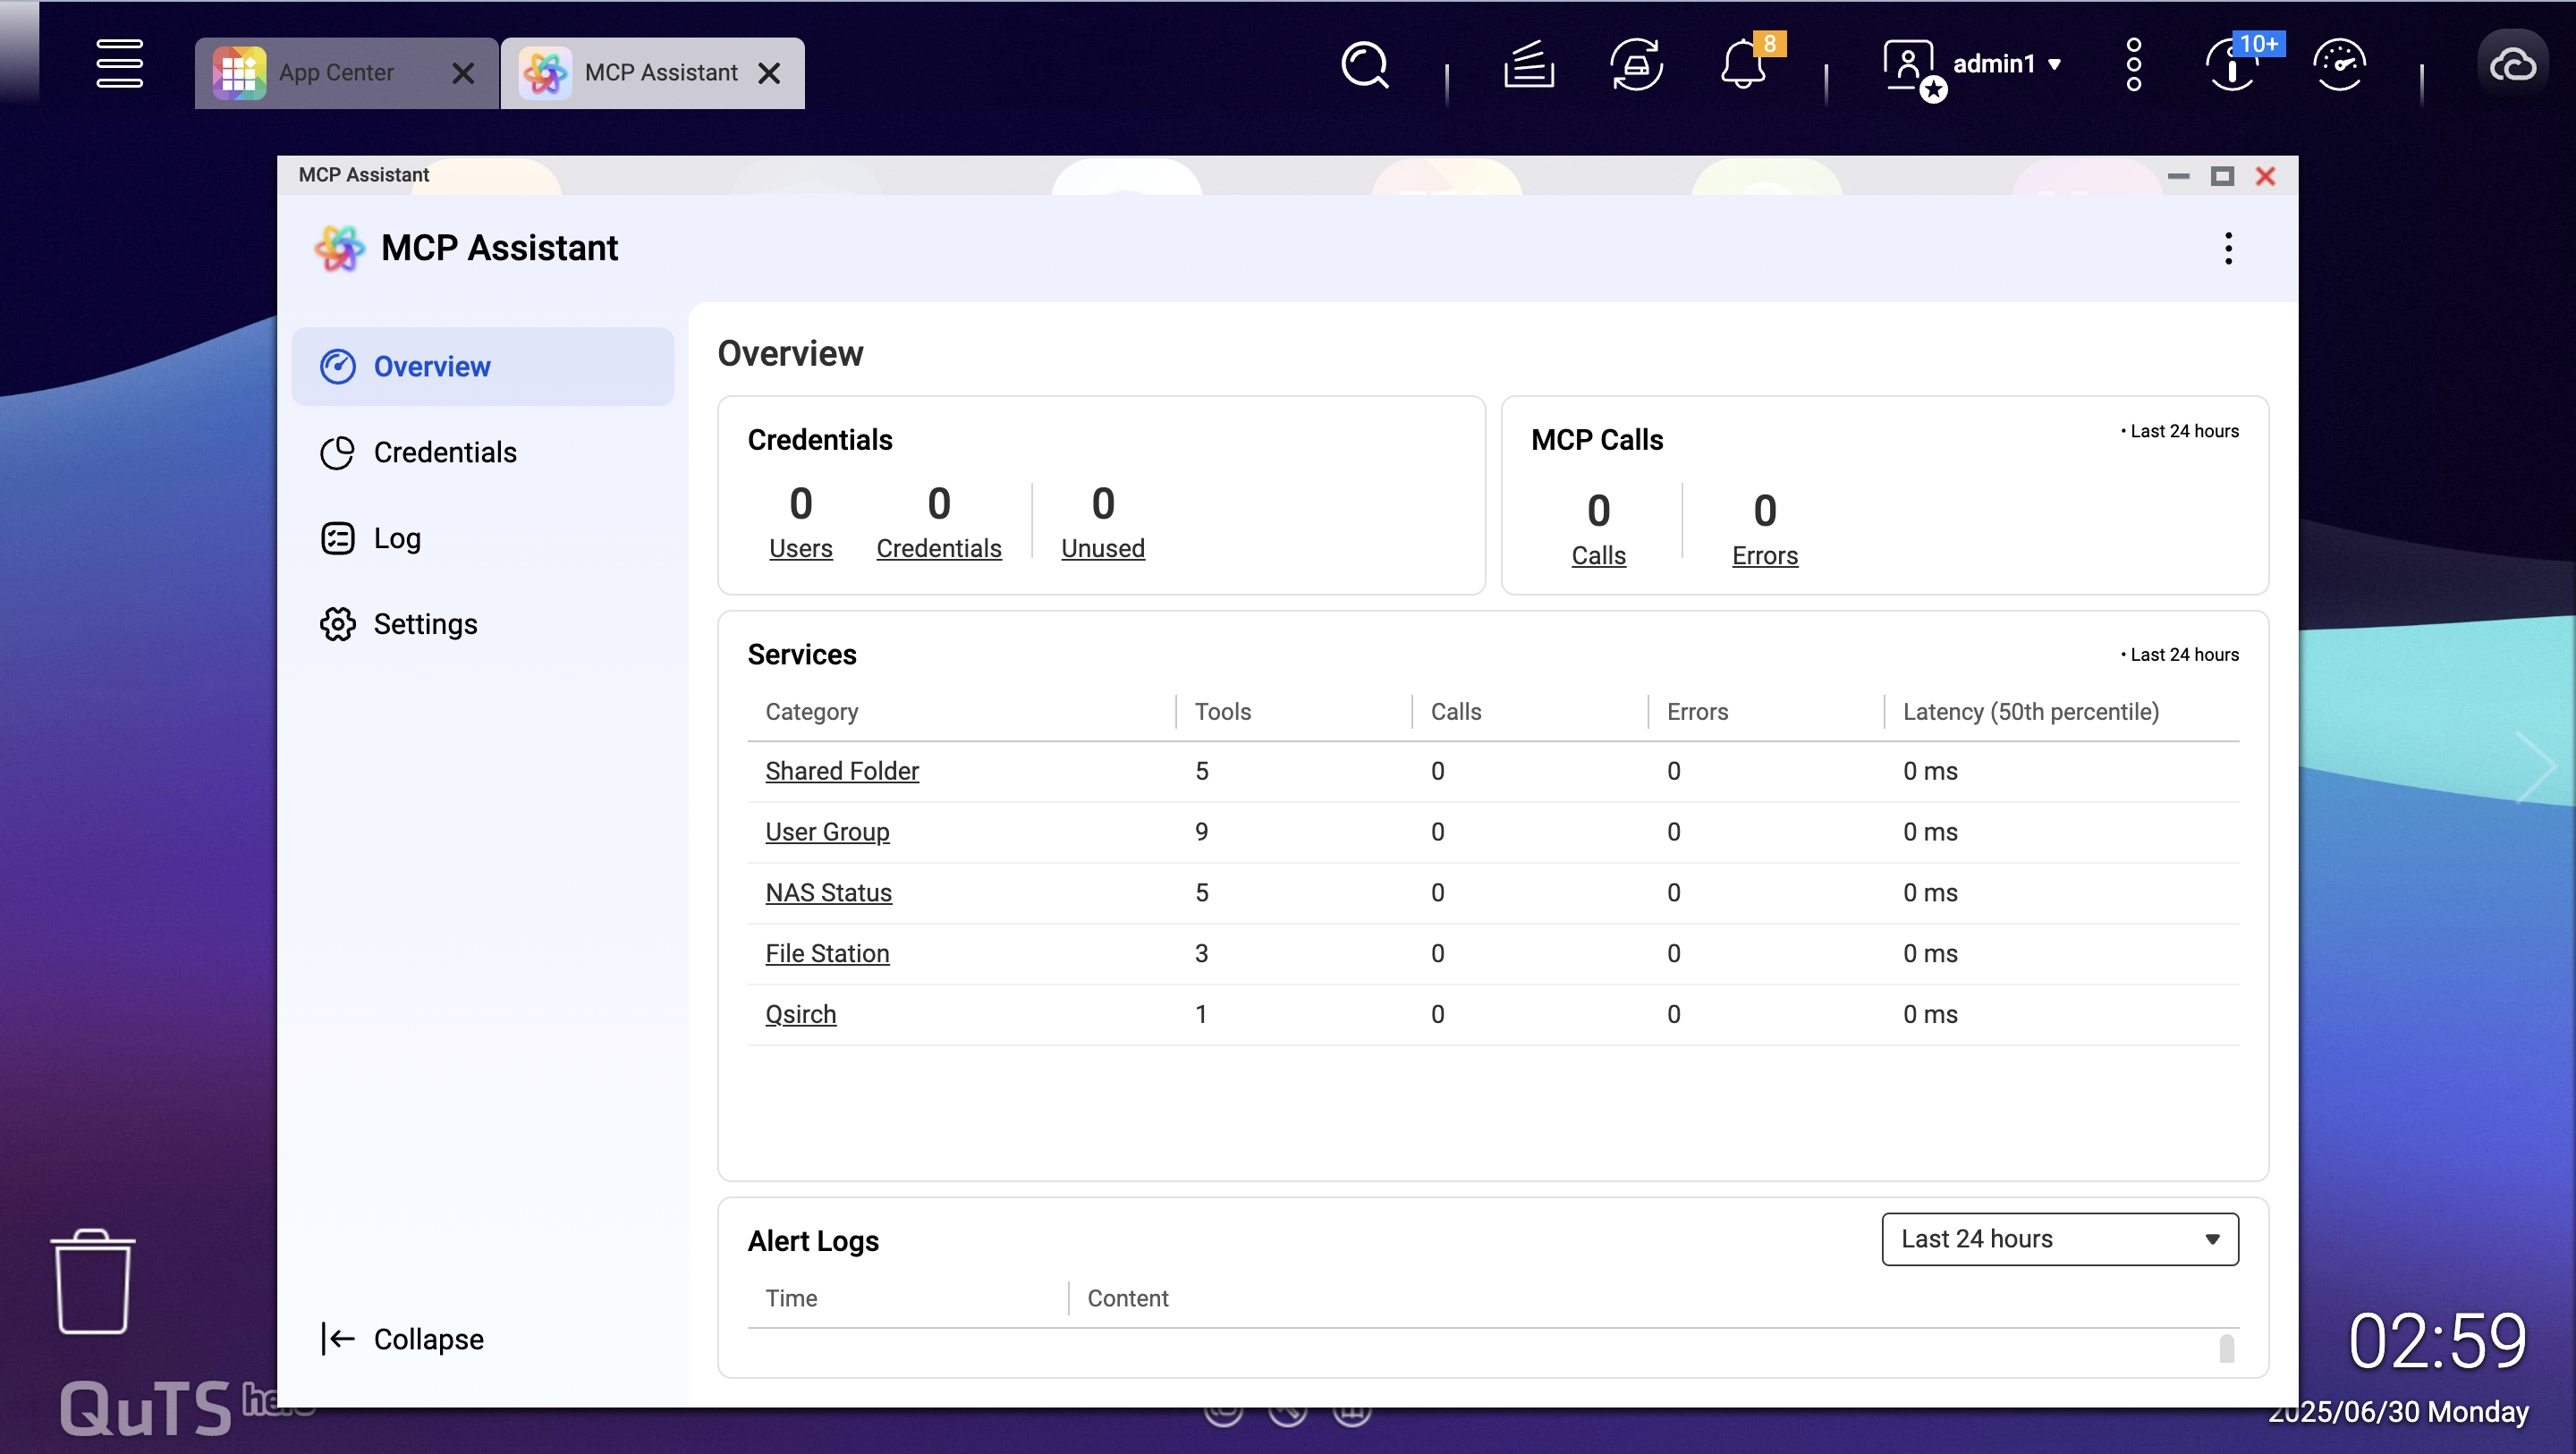
- Open MCP Assistant.
- Locate the MCP Assistant from the Main Menu.
- Launch MCP Assistant.
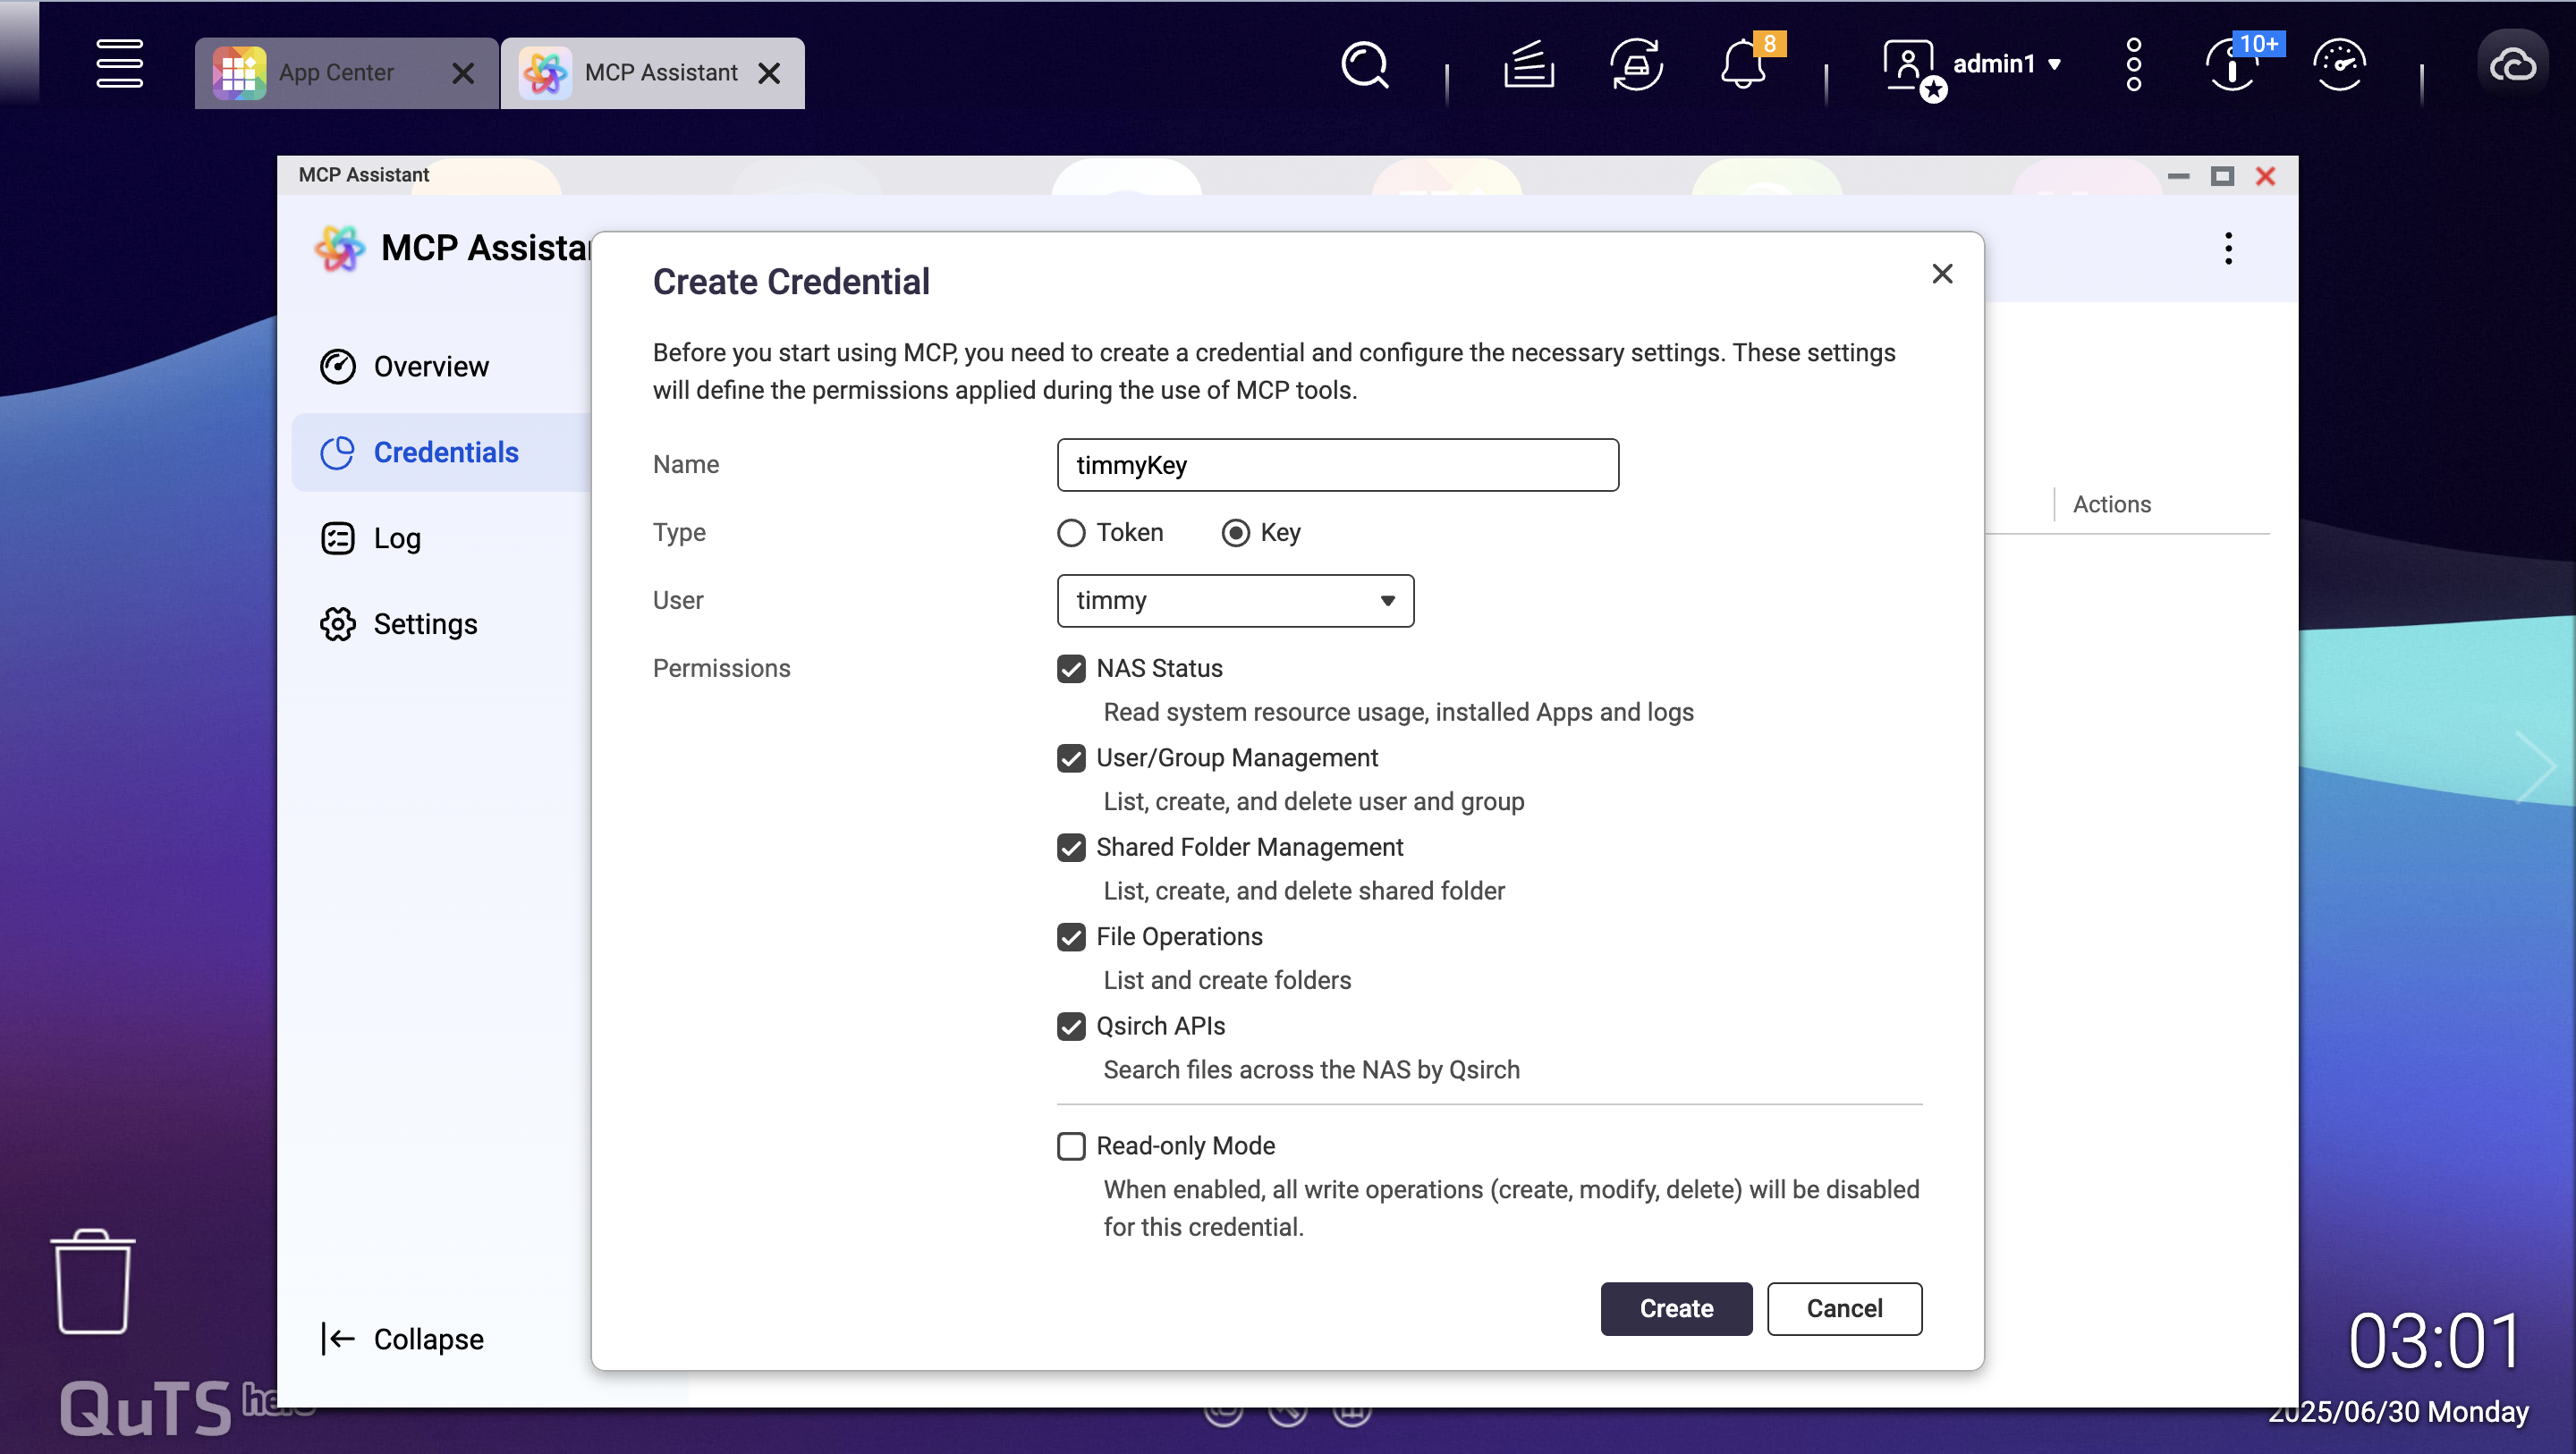
- Create credentials and download MCP Server.
- In the MCP Assistant, go to the Credentials tab.
- Click Create to generate a new key.
- Enter a descriptive name for the key, select the key type, and choose the user account to associate with this key.TipBy default, Read-only Mode is enabled. To grant more privileges to a trusted user, you may uncheck this option.
- Specify which MCP tools the user can access.
- Click Create to complete key creation.
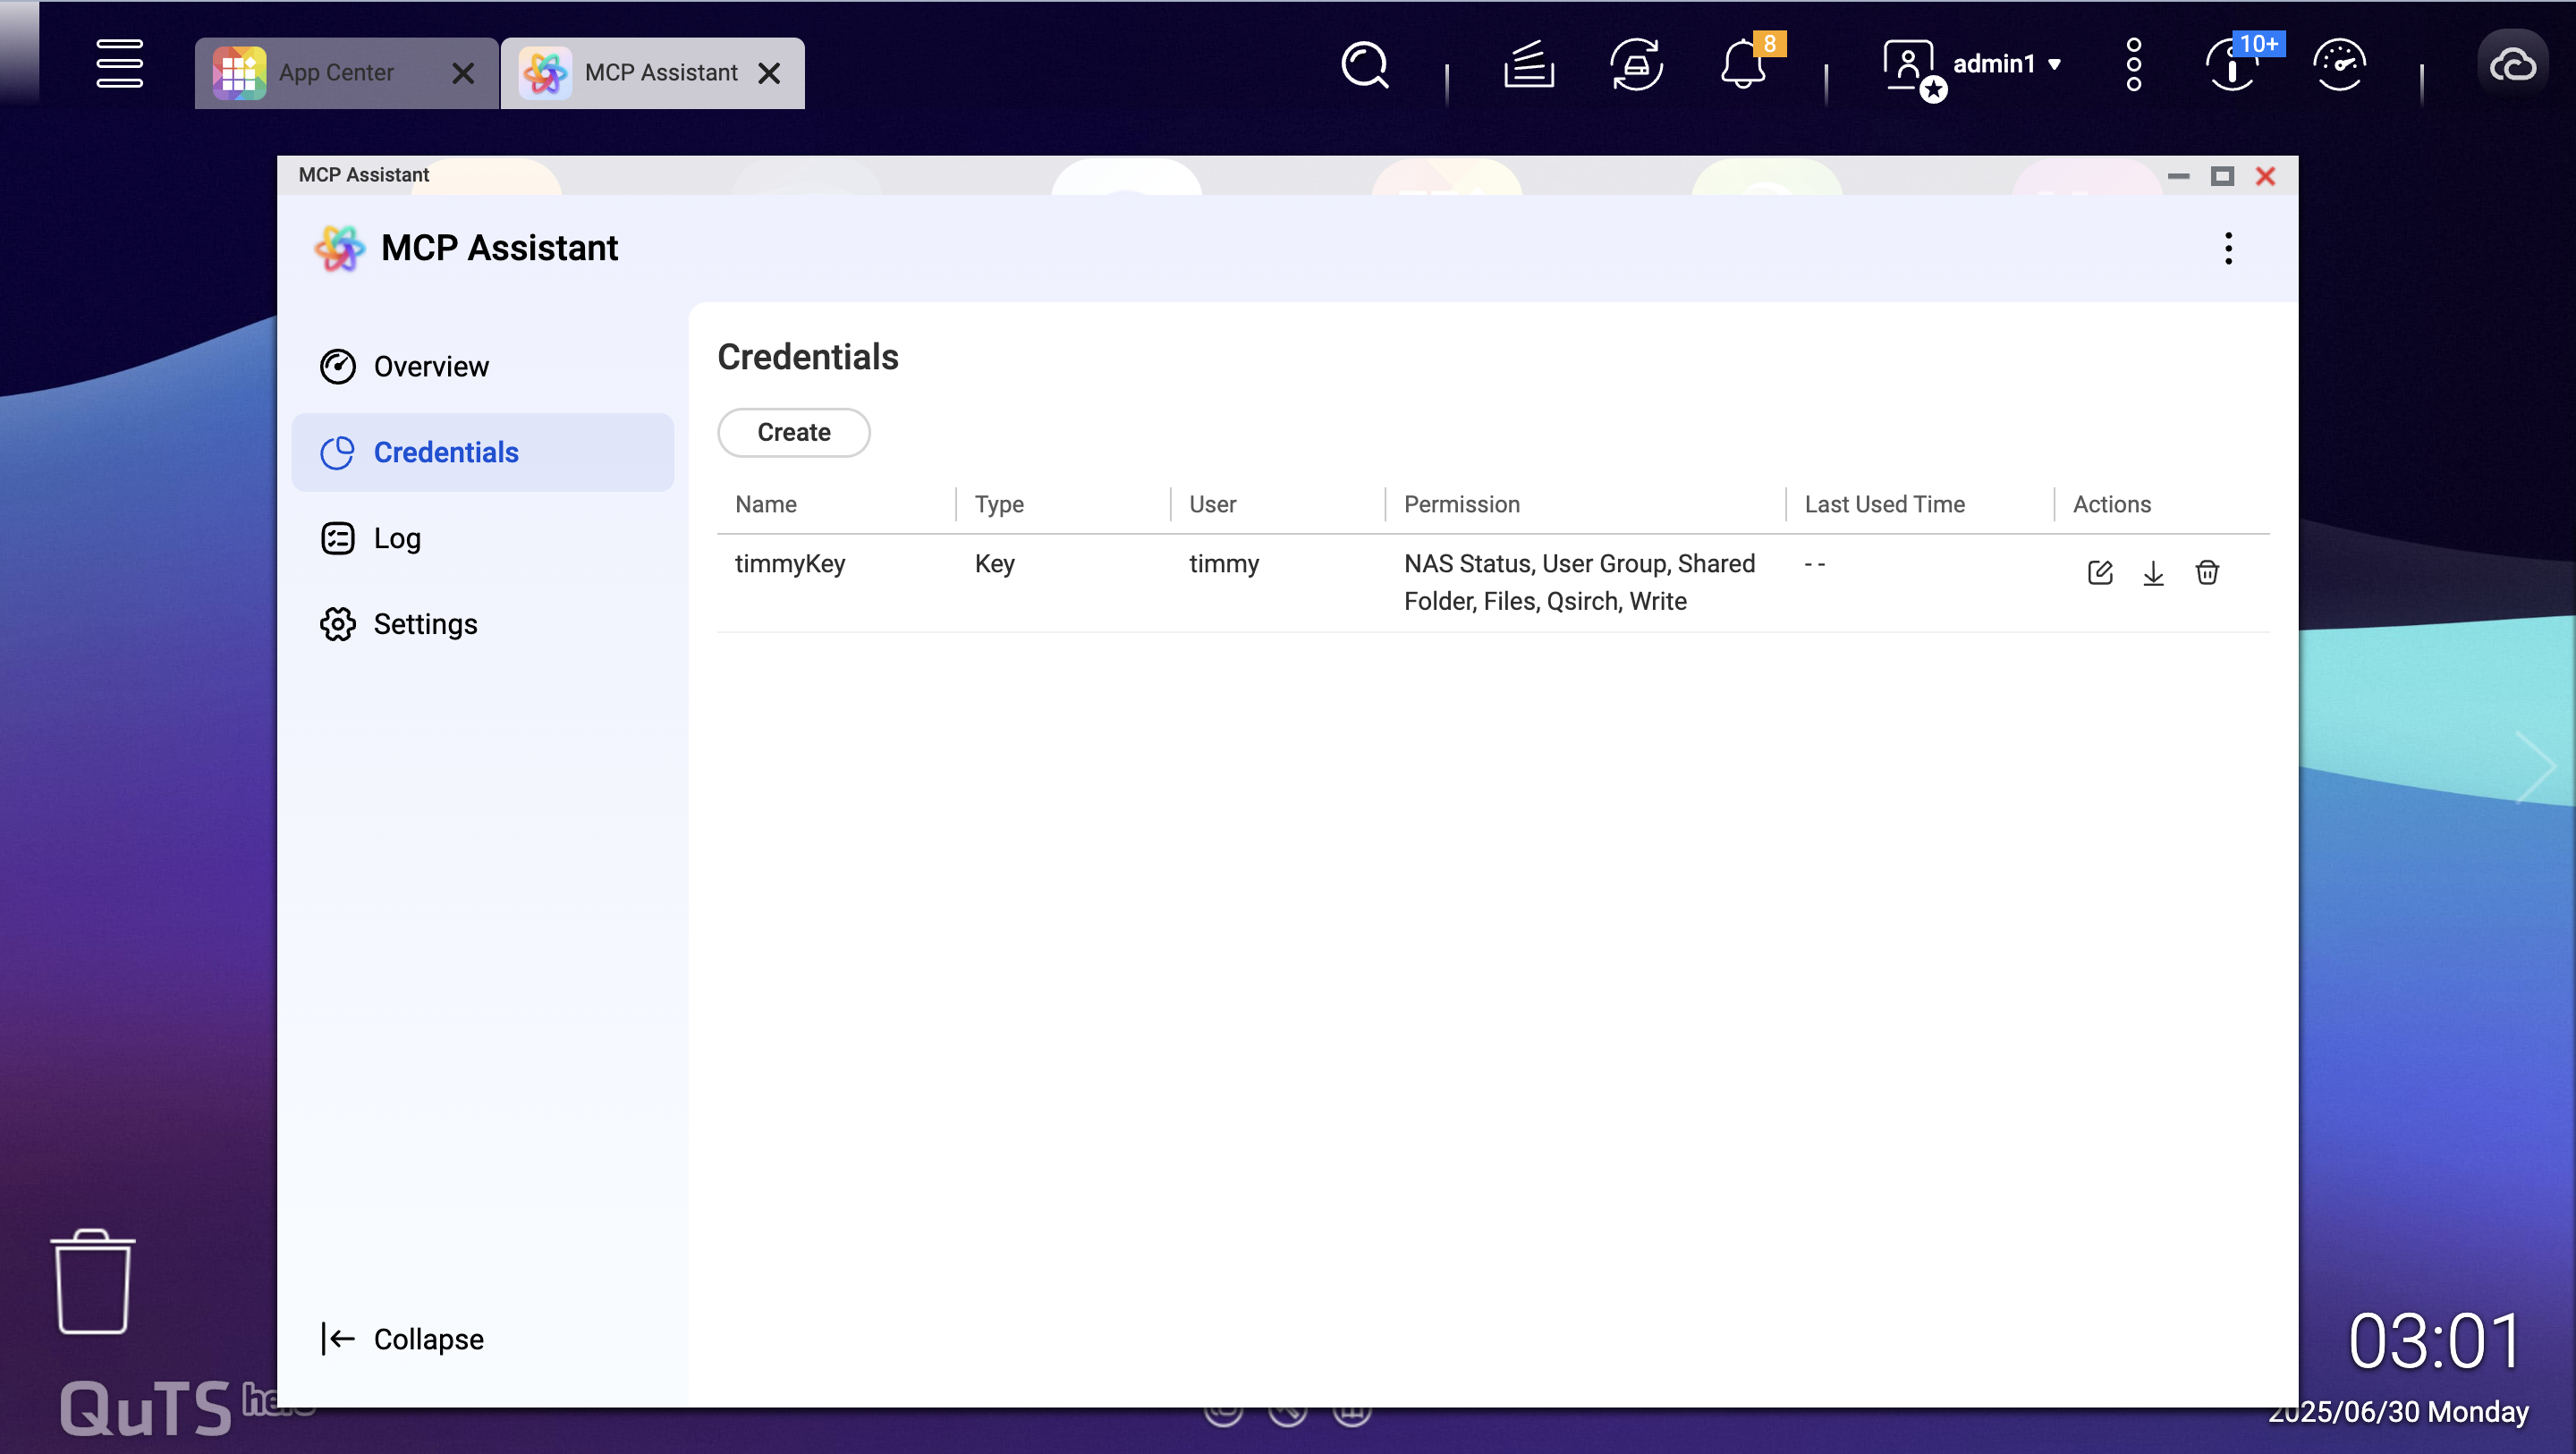
- After the key is created, click the download arrow under Actions.
- The Download Key and MCP Server dialog will appear, which allows you to download the authentication key and MCP Server files to your computer.
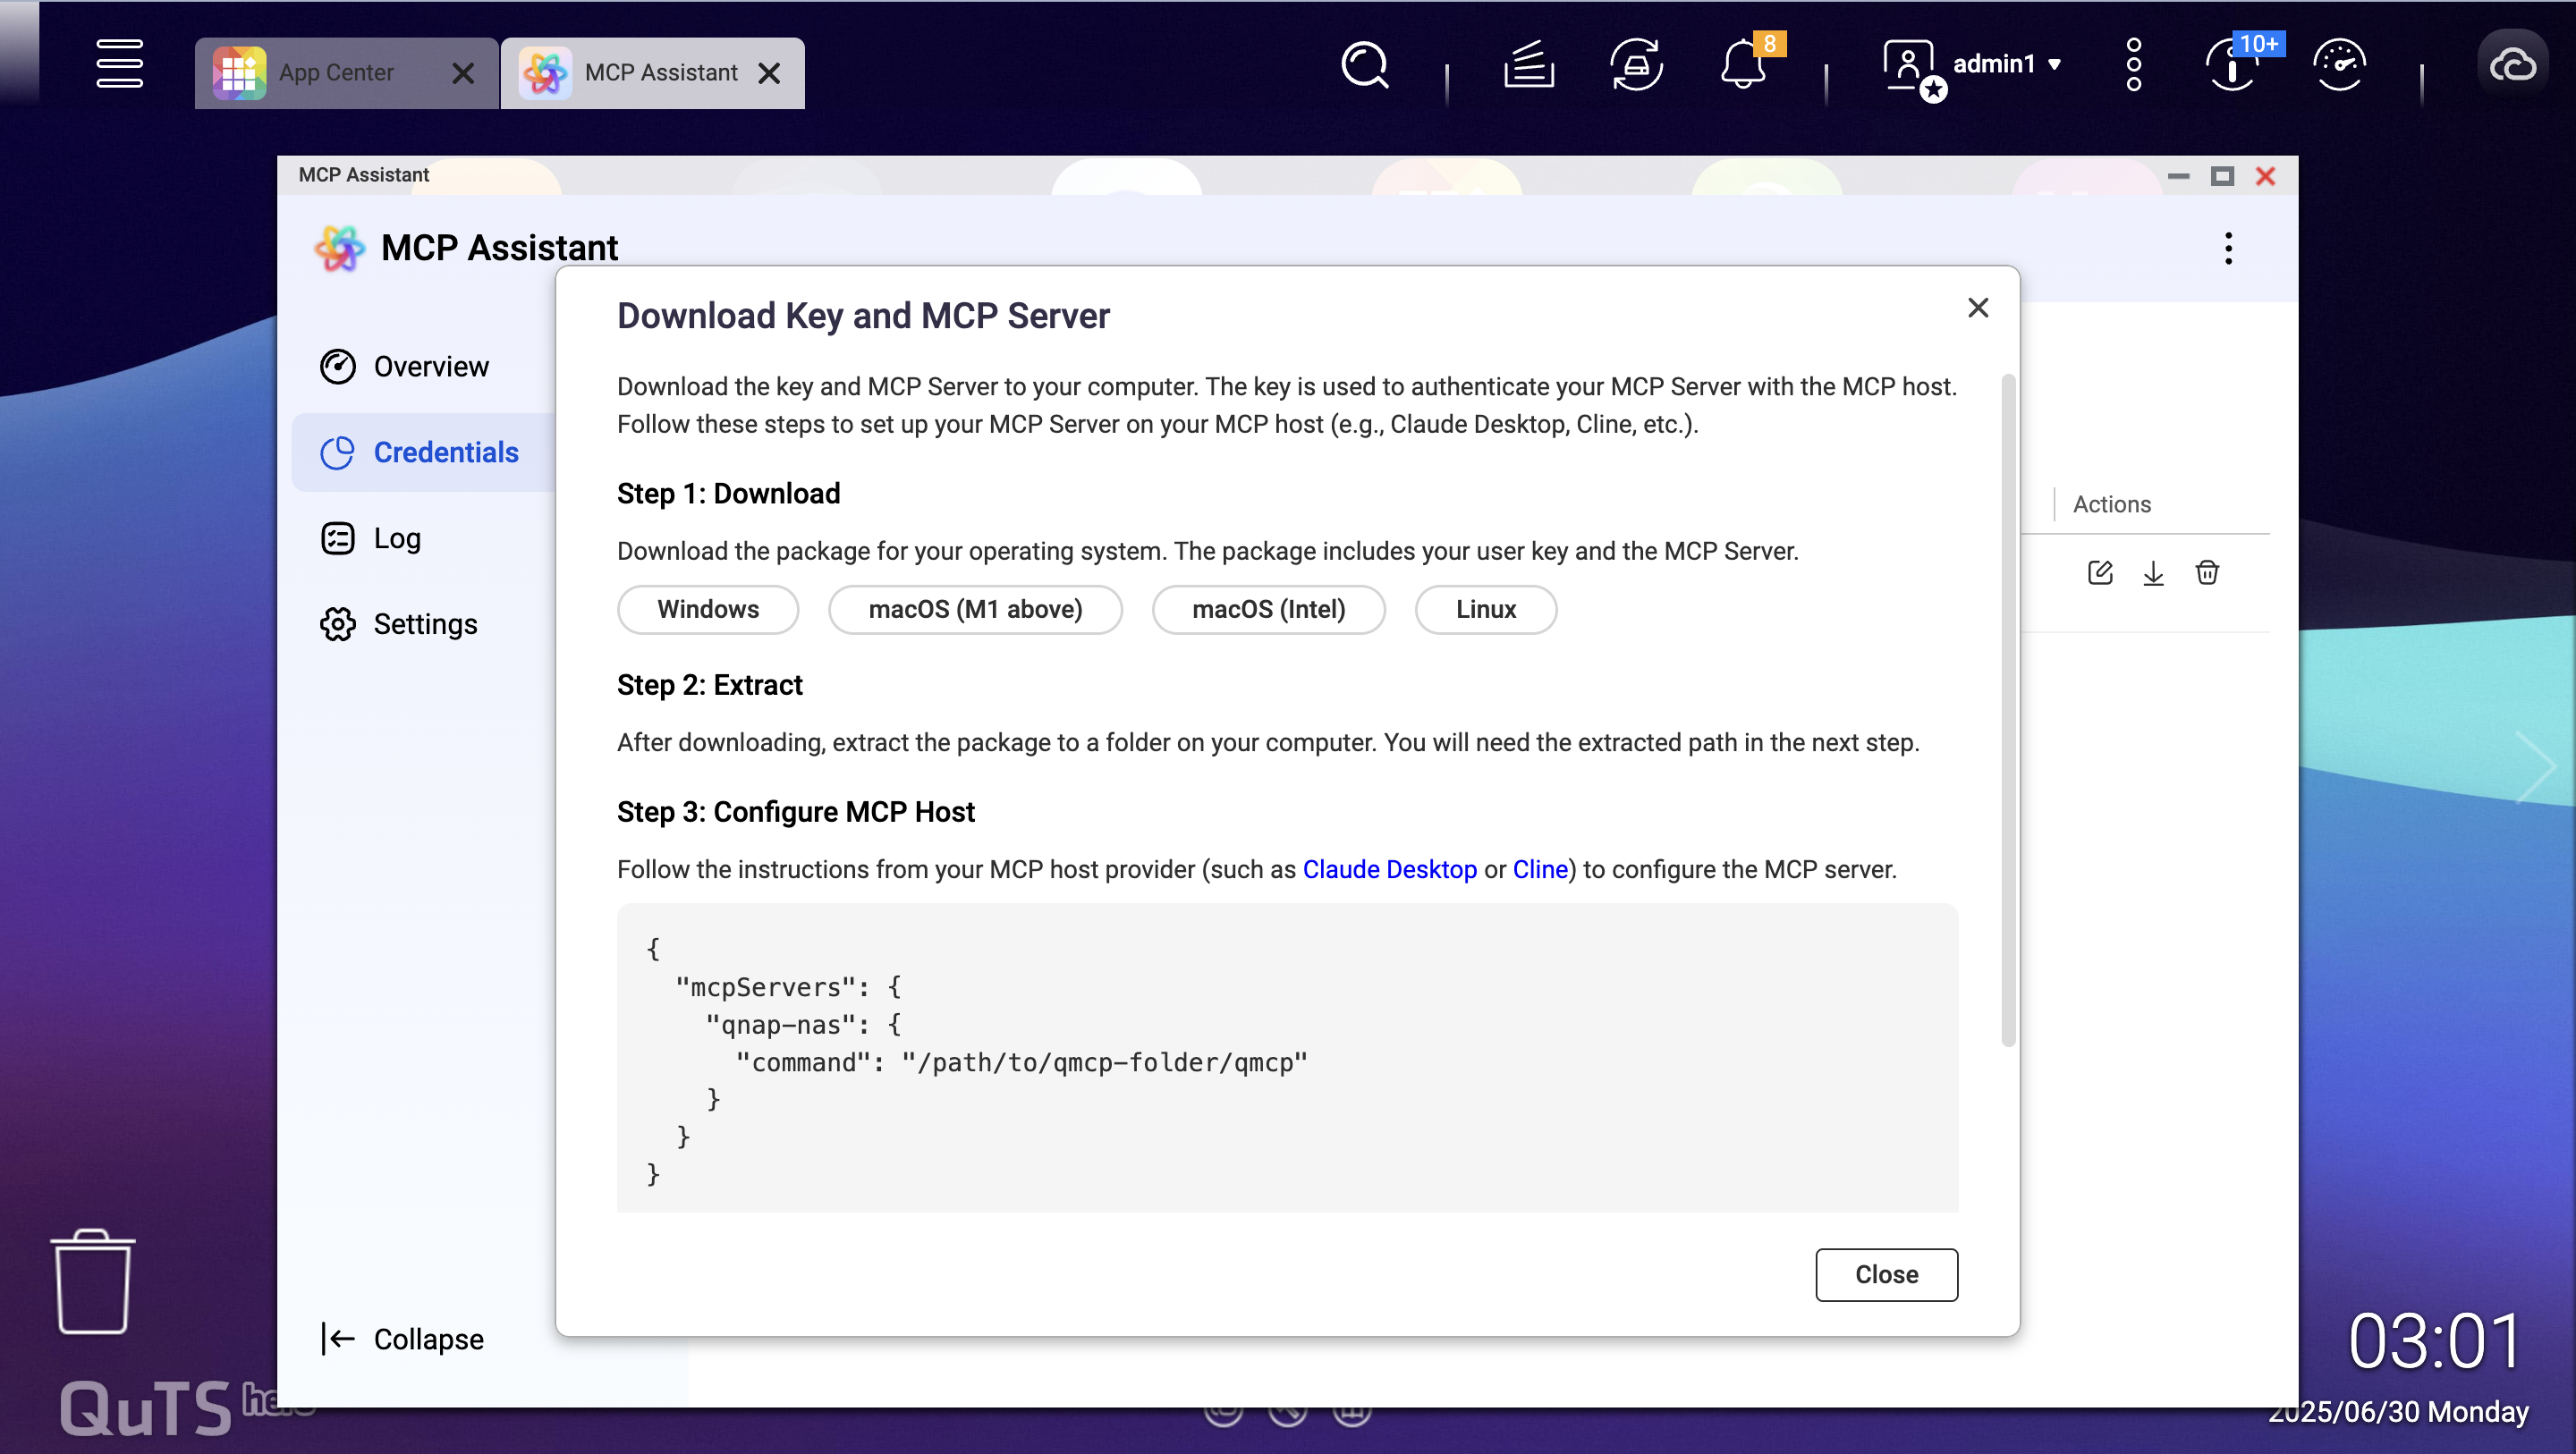
- The Download Key and MCP Server dialog will appear, which allows you to download the authentication key and MCP Server files to your computer.
- Select your operating system:
- Windows – For Windows-based computers
- macOS (M1 and above) – For Apple Silicon Macs
- macOS (Intel) – For Intel-based Macs
- Linux – Claude Desktop is not available for Linux; use other MCP hosts.
- Click the button matching your OS to download the package, which includes both your user key and the MCP Server files.
- Extract the MCP Server ZIP package.
- Locate the downloaded file:
- The filename will vary (e.g., qmcp-darwin-arm64-250630_1502.zip).
- Check your Downloads folder or the location you selected.
- Extract the ZIP file:
- Windows: Right-click the ZIP file and select Extract All or use your preferred extraction tool.
- macOS: Double-click the ZIP file to extract it automatically or use a tool like The Unarchiver.
- Verify extraction:
- You should see a folder containing the MCP Server executable and configuration files.
- Note the folder path; you will need it for Claude Desktop configuration.ImportantKeep track of the extracted folder location for later configuration steps.
- Locate the downloaded file:
- Download Claude Desktop.
- Visit the official Anthropic website at claude.ai.
- Navigate to the Claude Desktop download section.
- Download the appropriate installer for your operating system:
- Windows: Download the .exe installer.
- macOS: Download the .dmg installer.
- Install Claude Desktop.
- Windows:
- Run the downloaded .exe installer.
- Follow the installation wizard prompts and accept the license agreement.
- Choose the installation location and complete the process.
- macOS:
- Open the downloaded .dmg file.
- Drag Claude Desktop to the Applications folder.
- If prompted, go to System Preferences > Security & Privacy and allow the application to run.
- Windows:
- Open Claude Desktop.
- Launch Claude Desktop from your desktop shortcut.
- If this is your first time launching Claude:
- Sign in with your Anthropic account.
- Complete any initial setup procedures.
- Accept terms of service if prompted.
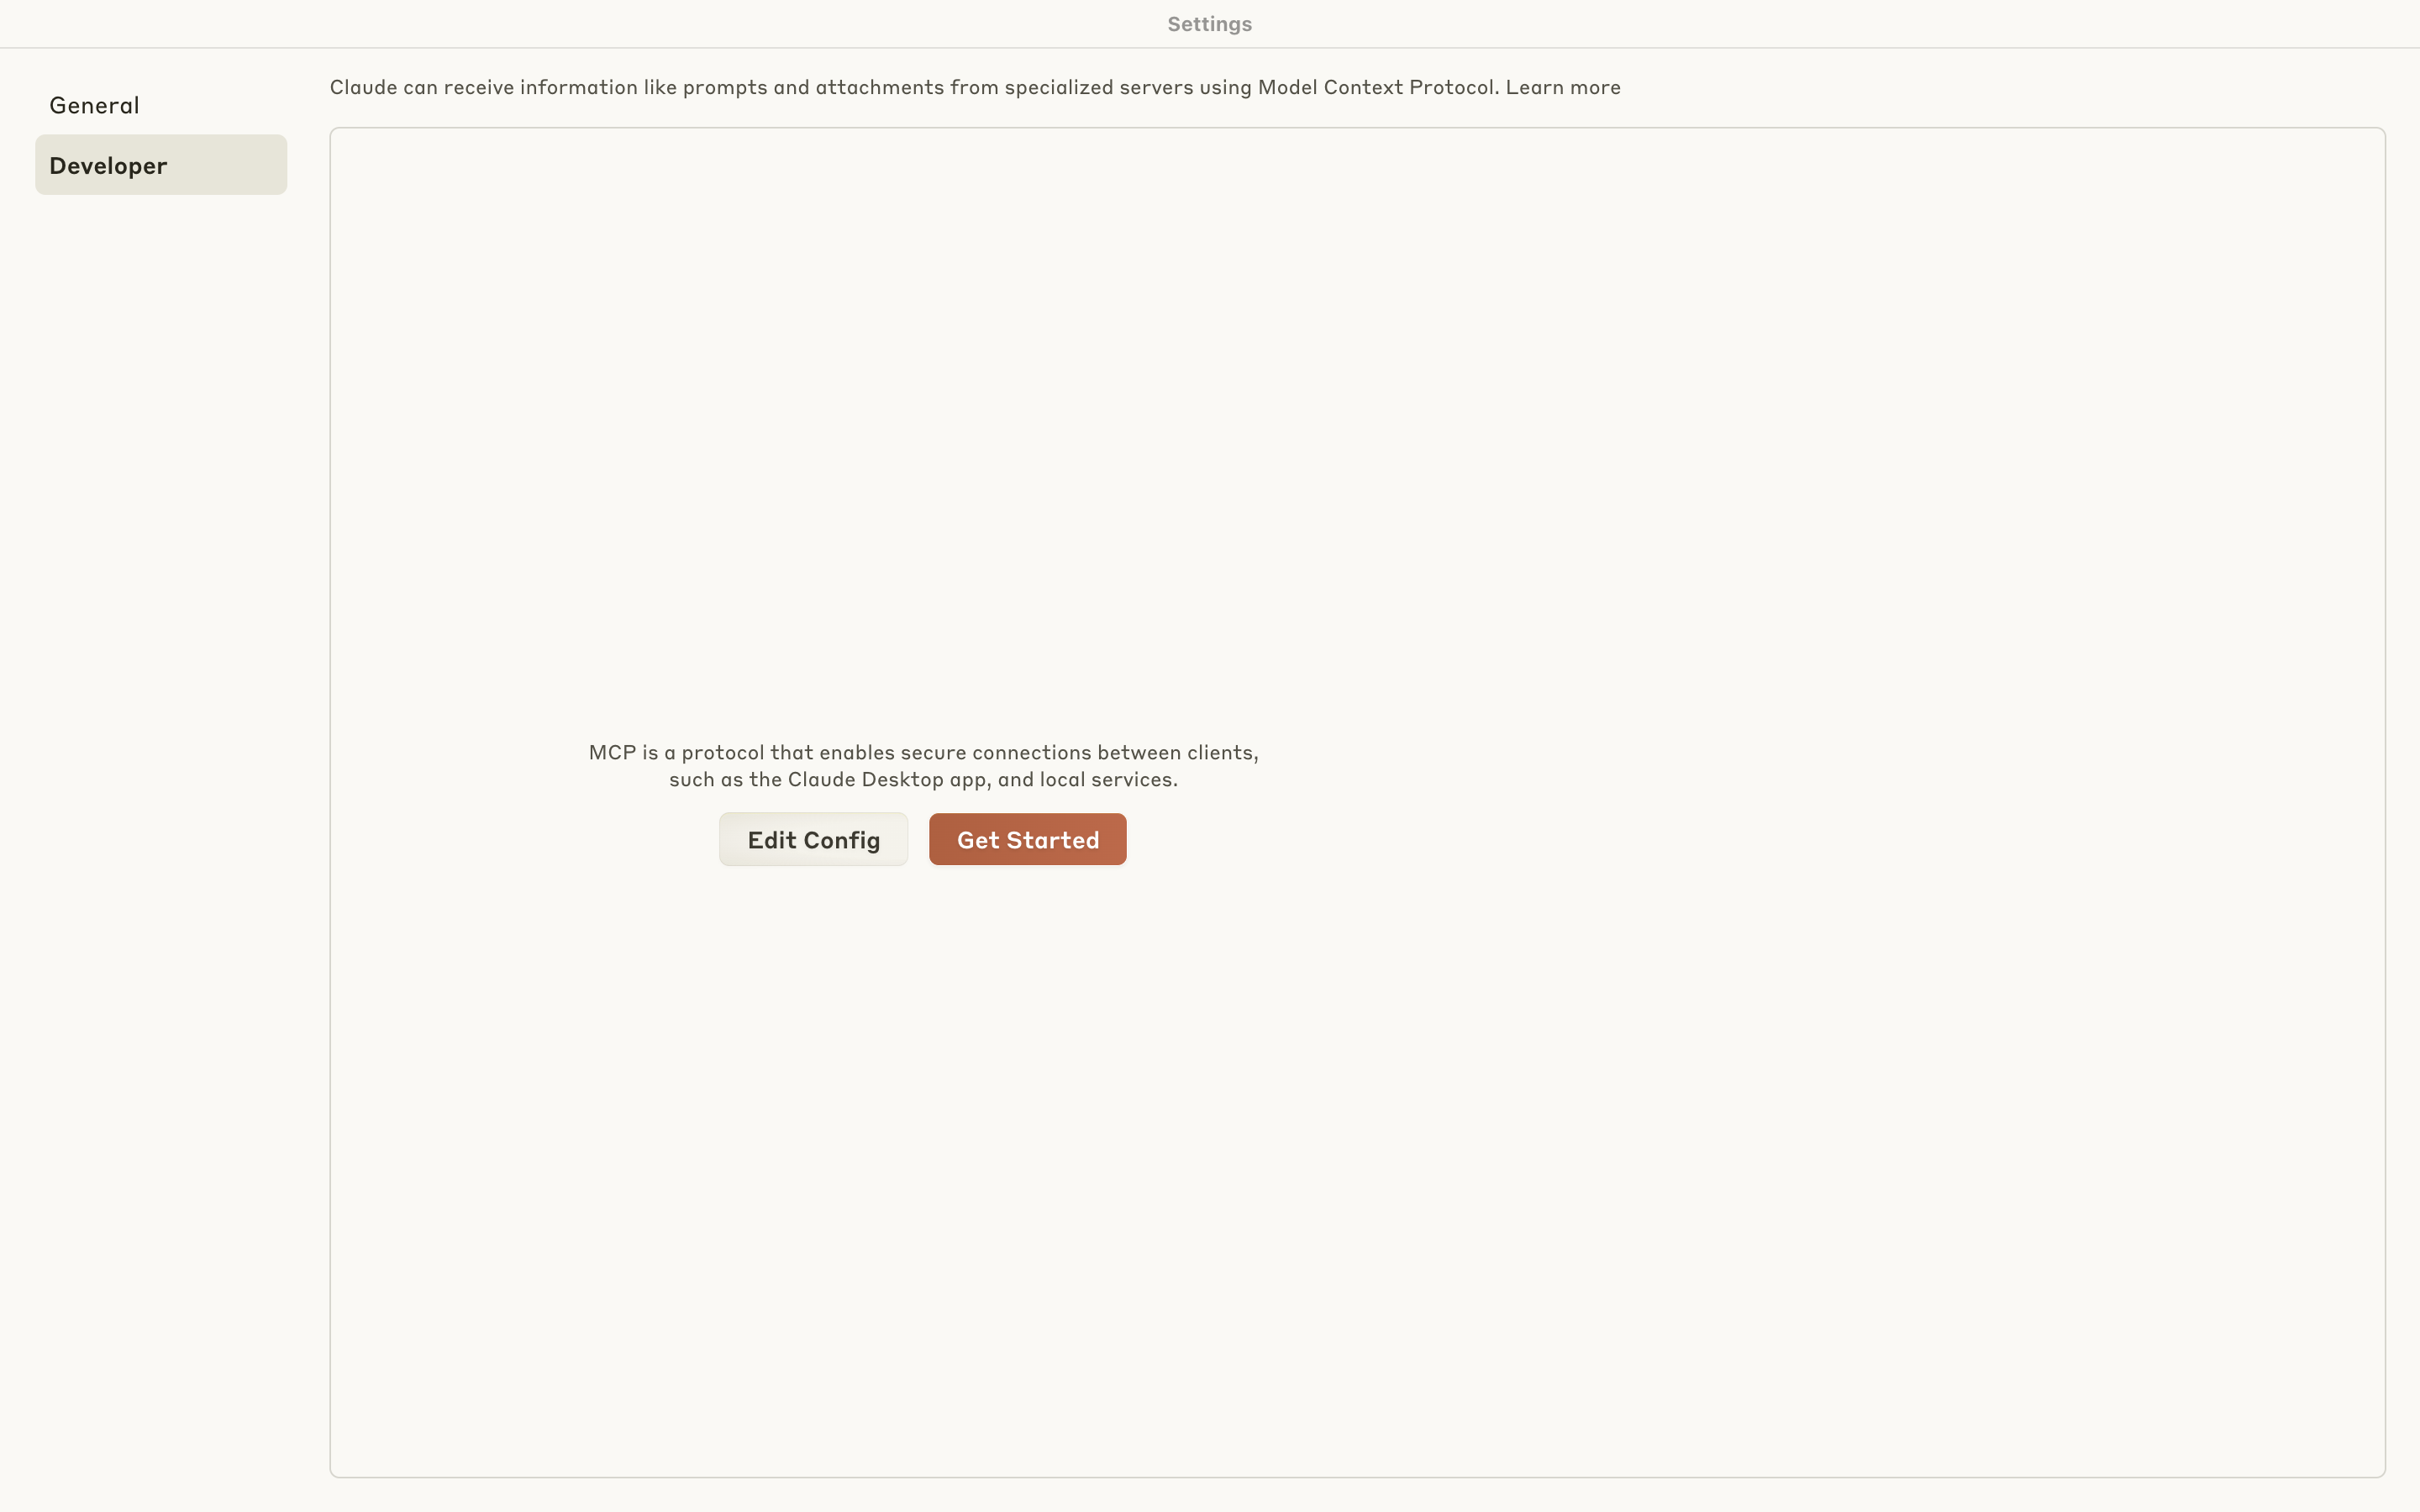
Edit the configuration of Claude Desktop.
- Locate the configuration file:
- Use Claude Desktop UI: Menu (top left) > Settings > Developer > Edit Config.
- You may also find the configuration file here:
- Windows: %APPDATA%\Claude\claude_desktop_config.json
- macOS: ~/Library/Application Support/Claude/claude_desktop_config.json
Edit the file:
- Open in a text editor (e.g., Notepad++, VS Code, TextEdit).
Add the MCP Server configuration as shown in the MCP Assistant dialog. For example:
{
  "mcpServers": {
    "qnap-nas": {
      "command": "/path/to/qmcp-folder/qmcp"
    }
  }
}
Replace
/path/to/qmcp-folder/qmcpwith the actual path to your extracted MCP Server executable.- On Windows, use double backslashes (\\) instead of single backslashes (\). For example:
C:\\Users\\YourName\\Downloads\\qmcp-folder\\qmcp.exe.
Save the configuration file.
- Locate the configuration file:
Allow execution of the MCP Server.
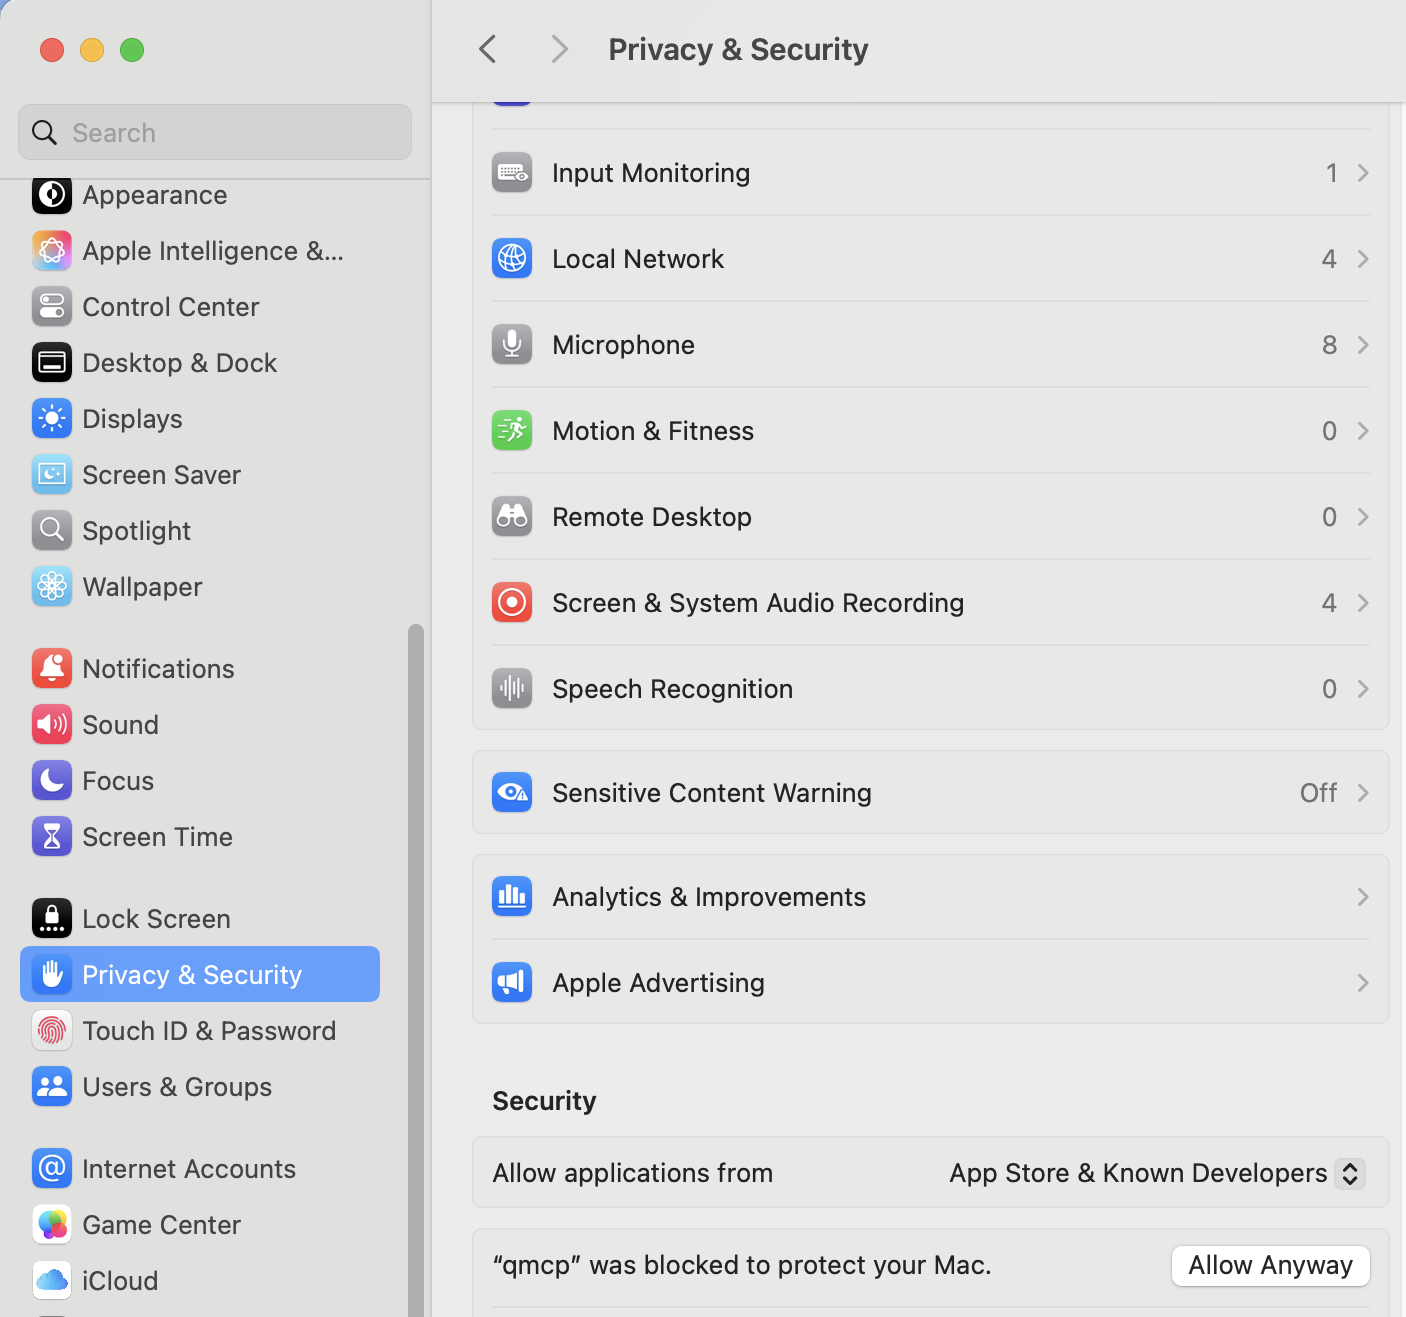
- macOS users:
- You may see a security warning when running the MCP Server executable. Click Done to close the warning.
- Go to Apple Menu > System Settings > Privacy & Security > Security.
- Click Allow Anyway next to the blocked qmcp executable.
- Only allow executables from trusted sources to avoid risks.

- Windows users:
- Ensure antivirus or firewall software does not block the MCP Server executable.
- Add exceptions if necessary.
- macOS users:
- Re-open Claude Desktop and test the setup.
- To load your previous configuration, completely quit Claude Desktop and reopen it.
- macOS: Force Quit the app or close the app in Activity Monitor.
- Windows: open Task Manager, locate the app, and select End task.
If this does not work, restart your computer.
- Test with prompts such as:
- Can you access my QNAP NAS?
- Show me the status of my NAS storage.
- List the files in my shared folders.
- Verify Claude responds with successful interactions related to your NAS.
- If errors appear, check the user interface for details.
- To load your previous configuration, completely quit Claude Desktop and reopen it.
Troubleshooting Tips
Below are tips for quickly troubleshooting common issues.
- Connection issues: Ensure that the MCP Server path in the configuration file is correct.
- Permission errors: Ensure that the MCP Server executable has appropriate permissions.
- Authentication problems: Ensure that the authentication key from MCP Assistant is in the correct location.
- Firewall blocking: Ensure that your firewall allows MCP Server communication.
Conclusion
You have successfully set up QNAP MCP Assistant with Claude Desktop. You can now leverage Claude's AI capabilities to interact with your QNAP NAS through natural language commands, including file management and system monitoring.


