How do I deal with the warning "Authorization has expired. Reauthorize the account" in Notification Center?
Applicable Products:
- Notification Center
Notification Center integrates several SMTP services for sending notifications, in some cases SMTP service provider request the SMTP client to do Re-authorization for re-consenting the SMTP requests, therefore you will meet the warning message "Authorization has expired. Reauthorize the account" after days.
Follow the steps below to know your current setting and re-authorize your email account.
-
Log in to QTS as an administrator.
-
Open Control Panel.
-
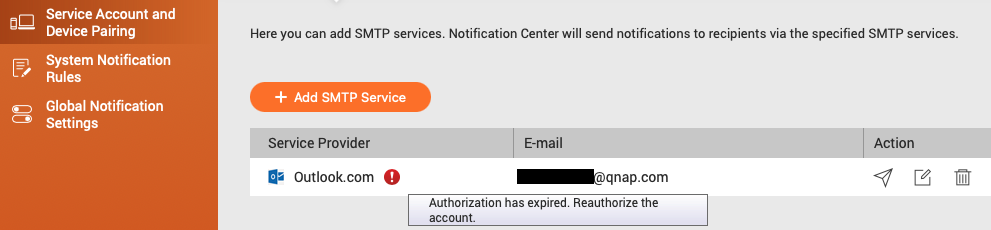
Go to Notification Center > Service Account and Device Pairing > Email.
-
Try the following actions depending on the Service Provider with
 (exclamation sign)
-
(For example: Outlook.com has the warning message)
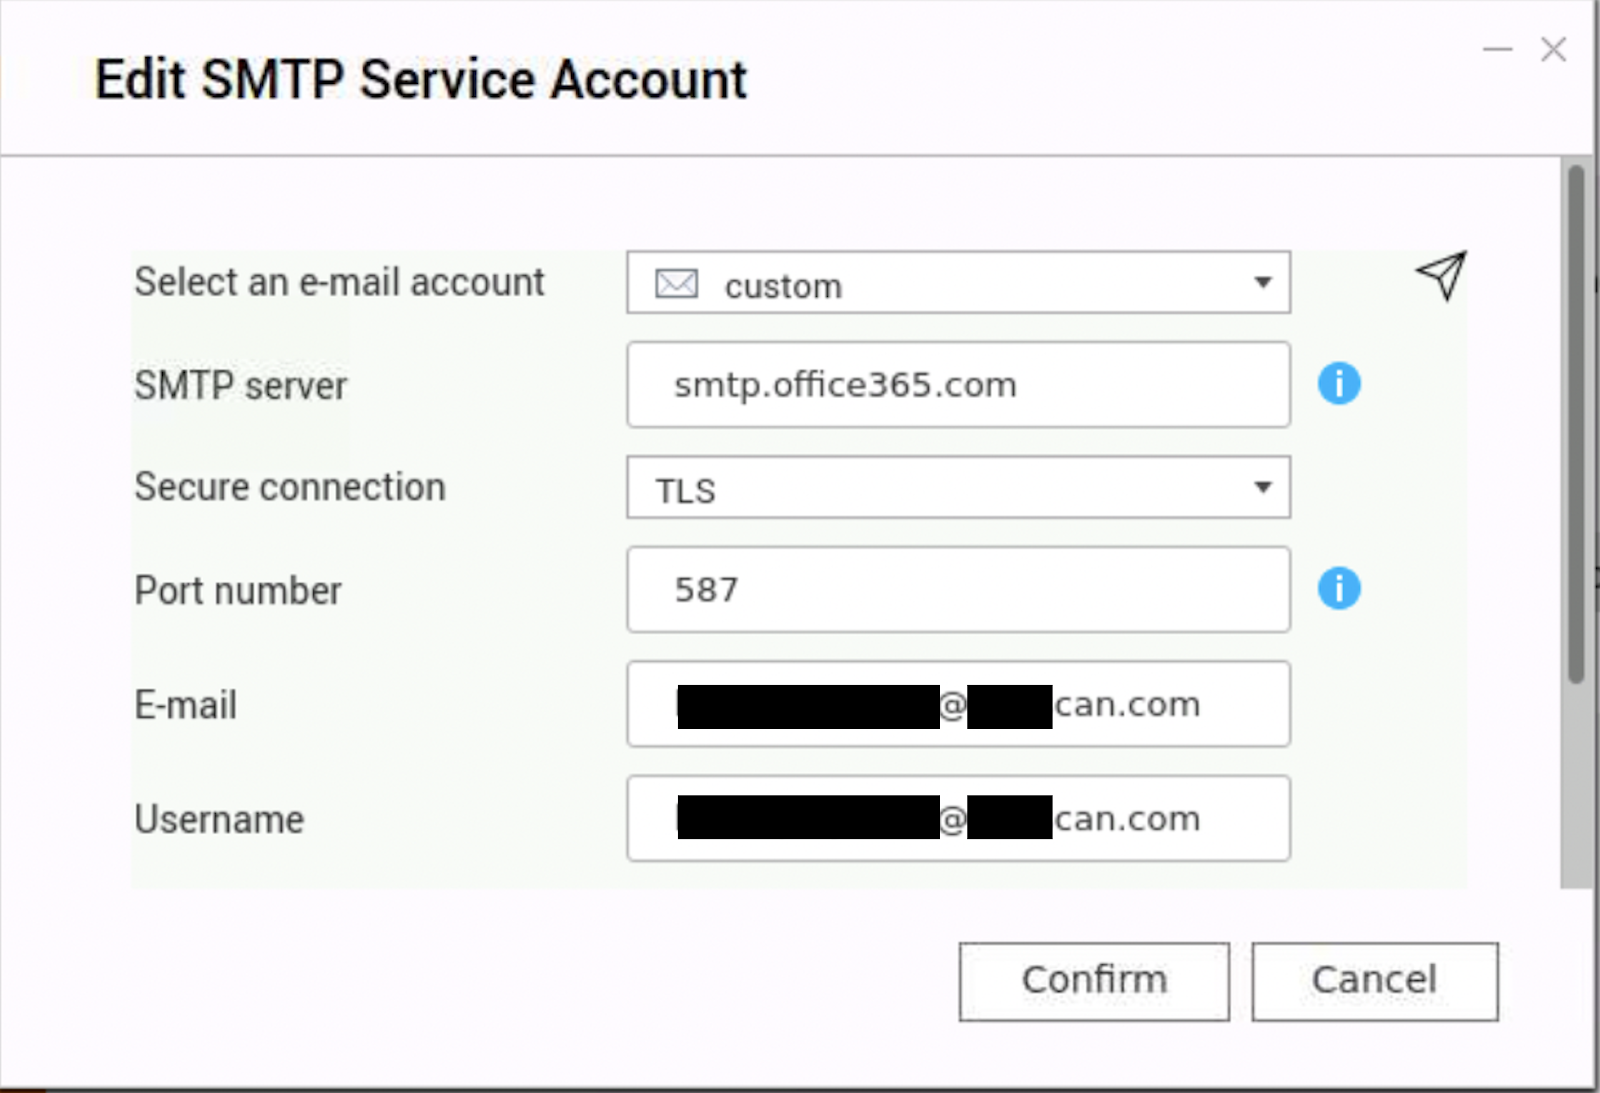
Custom
Do note, there is no Re-authorization button in Custom setting.
- Follow the steps below If you are using Custom Service Provider with the following Public SMTP server.
| Public SMTP server | Service Provider |
|---|---|
| smtp.gmail.com | Gmail |
| smtp.office365.com | Outlook.com |
| smtp-mail.outlook.com | Outlook.com |
For example, Email address xxxxx@xxxxcan.com use outlook.com as the SMTP server.
-
Go to Notification Center > Service Account and Device Pairing > Email
- Click
 (Delete) to remove Custom Service Provider with (exclamation sign)
 - Click + Add SMTP Service.
Add SMTP Service window opens.
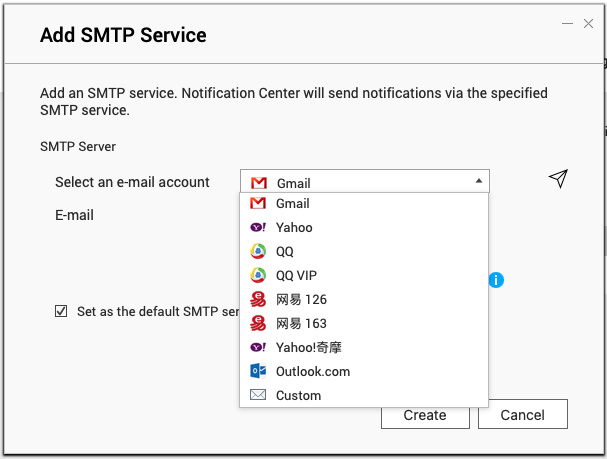
- Select Gmail or Outlook.com from the drop-down menu.
- Click Type an email address.
Gmail or Outlook.com Authorization page opens in web browser. - Finish the authorization.
- Click
-
Go to Notification Center > System Notification Rules.
- Identify a rule to modify.
- Click Edit > Methods and Recipients.
- Add email account to the sender list.
-
Follow the steps below If you are using other SMTP services in Custom SMTP settings.
Remove and re-configure the service provider can do re-authorization.
-
Go to Notification Center > Service Account and Device Pairing > Email.
- Click (Delete) to remove Custom Service Provider with (exclamation sign).
- Click + Add SMTP Service.
- Select Custom from the drop-down menu.
- Re-configure the SMTP server with original setting.
- Click
-
Go to Notification Center > System Notification Rules.
- Identify a rule to modify
- Click Edit > Methods and Recipients
- Add email account to the sender list.
Yahoo!
If you are using Yahoo! Mail as the SMTP service provider, you must set up a special password in your Yahoo account for SMTP service and use the password in Notification Center, click here for the detail.
Gmail
If you are using Gmail as the Service Provider, edit your Gmail SMTP Service setting and click Re-authorization.
-
Go to Notification Center > Service Account and Device Pairing > Email
-
Click
 (Edit) on Gmail Service Provider with (exclamation sign).
 -
Click
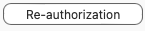 (Re-authorization button).
Gmail Authorization page opens in web browser.
-
Finish the Re-authorization.
Outlook.com
If you are using Outlook.com as the Service Provider, edit Outlook.com SMTP Service setting and click Re-authorization
-
Go to Notification Center > Service Account and Device Pairing > Email
-
Click
(Edit) on Outlook.com Service Provider with (exclamation sign). -
Click
(Re-authorization button).Outlook.com Authorization page opens in web browser.
-
Finish the Re-authorization.


