Installing pfSense on a QNAP NAS
pfSense is an open-source firewall software package featuring a web-based interface to configure settings related to DHCP/DNS servers, an Intrusion Prevention System (IPS), and more. This tutorial will guide you through installing, running, and accessing pfSense on your NAS.
Requirements:
- QTS 4.3.0 (or later)
- Virtualization Station 3.0 (or later)
- At least two virtual adapters for WAN and LAN.
- A pfSense ISO image
- Creating a pfSense Virtual Machine
- Importing a pfSense Virtual Machine
- Creating Virtual Adapters for pfSense
- Configuring a pfSense Installation
- Connecting to the pfSense WebGUI
- Purchase Netgate subscriptions for pfSense Support
Creating a pfSense Virtual Machine
Before creating the virtual machine (VM), you must upload a pfSense ISO image to the NAS. The ISO image can be downloaded from https://www.pfsense.org/download/.
- Log in to the NAS.
- Launch Virtualization Station. Click Create VM.
The Create VM window will open.

- Enter a VM name.
- Select Generic in the OS Type.
- Allocate system resources to the VM using CPU Cores and Memory. pfSense requires at least 512MB memory.
- Select the ISO image you downloaded earlier in CD Image.
- Select "Create image" in HDD Location and choose where to save it by clicking "Browse".
- Allocate at least 4GB of HDD Storage to the VM.
- Click OK.
- Check the Network Adapter configuration.
Visit Creating Virtual Adapters for pfSense for more information.

Importing a pfSense Virtual Machine
QNAP also provides a ready-to-use pfSense VM that can be uploaded to the NAS. This VM can be downloaded from https://www.qnap.com/solution/pfsense/en/
- Log in to the NAS.
- Launch Virtualization Station. Click Import VM.
The Import VM window will open.

- Select NAS in Import from.
- In the navigation window, go to the location of the VM file, select the VM file and click OK.
- Click Next.

- Enter a VM name.
- Allocate system resources to the VM using CPU Cores and Memory. pfSense requires at least 512MB memory..
- Assign the Virtual Switch and Model for both Adapters.
Visit Creating Virtual Adapters for pfSense for more information. - Click Import.

- Start the VM and click Console.
For further settings, refer to Configuring a pfSense Installation.

Creating Virtual Adapters for pfSense
Before using pfSense you must create virtual adapters and connect them to a Virtual Switch.
- Go to the Settings page for the pfSense virtual machine.
- Go to the Settings tab and click Add Device.
- In the Add Device window, select Network in Device Type.
- Select an existing Virtual Switch
- Select VirtIO in Model.
- Click OK.

- Change the model of Adapter 1 to VirtIO.

- Go to Network & Virtual Switch > Virtual Switch and click Add.
- Select the mode.
- Click Basic Mode to create a bridged network
- Click Advanced Mode to specify a network configuration.

- Start the VM and click Console.

Configuring a pfSense Installation
- Start the console for a pfSense Virtual Machine.
- Read and accept the Copyright and distribution notice.

- Choose Install and select OK.

- Choose Auto (UFS), then select OK.

- Choose a keyboard map or Continue with default keymap and select Select. The installation will begin.

- After the installation is completed, select No.

- Select Reboot. pfSense will reboot and offer further configuration options.

- Configure VLANs.
- If VLANs are required enter y and confirm.
- If VLANs are not required enter n and confirm.

- Follow the prompts to assign WAN and LAN interfaces. This tutorial uses WAN: vtnet0 and LAN: vtnet1.

- Make any additional configuration changes. For more information, visit https://doc.pfsense.org/index.php/Installing_pfSense.

Connecting to the pfSense WebGUI
To access the pfSense WebGUI, you must create an additional VM on the NAS, and use the virtual switch connected to the pfSense LAN interface.
- Log in to the pfSense WebGUI at https://192.168.1.1/. The default username and password is below.
- Username: admin
- Password: pfsense

- Follow the on-screen instructions for the pfSense Setup Wizard.

- Increase pfSense WebGUI Performance.
- Log in to the pfSense WebGUI.
- Go to System > Advanced > Networking.
- Enable Disable hardware checksum offload.
- Click Save.

Purchase Netgate subscriptions for pfSense Support
If you require pfSense support (such as configuration assistance) you can purchase Netgate subscriptions for pfSense Support.
- Go to https://license.qnap.com/ and sign in using your QNAP ID.
- Find “Netgate pfSense Support”. In the "Item" menu you can choose the type of coverage you require.

Note:
1) The license can only be issued to one QNAP NAS and is non-transferable.
2) Only one license can be activated per QNAP NAS.
How to issue a Netgate pfSense support ticket
- Go to Control Panel > System > License Center and take a note of your pfSense License ID.

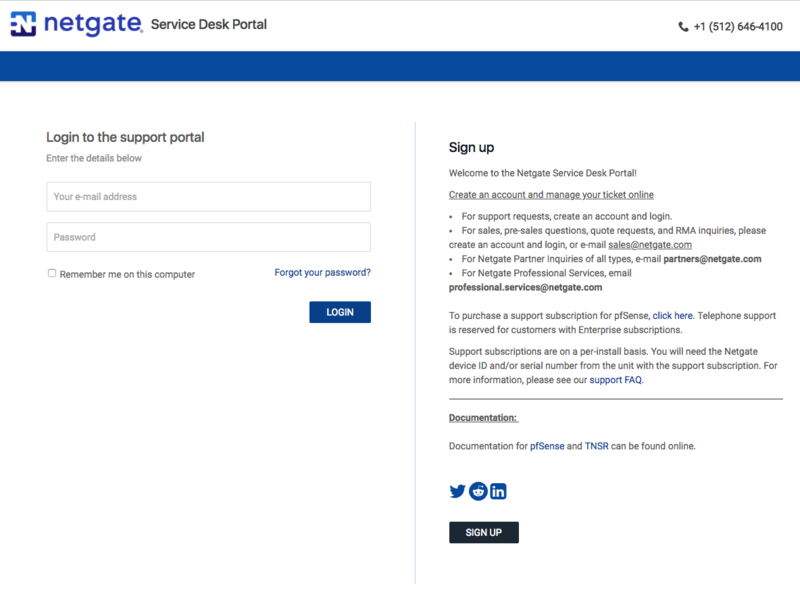
- Go to https://go.netgate.com/support/login and log in using your account (or sign up for a new account).

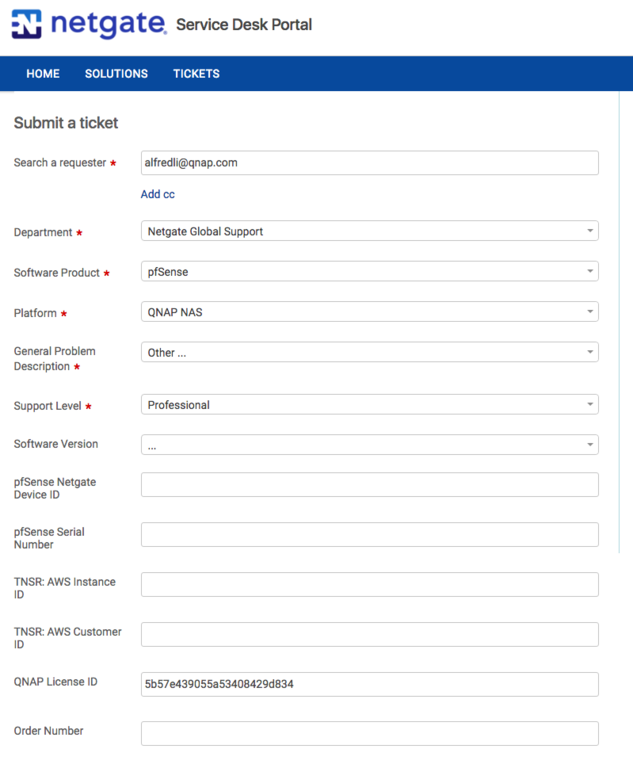
- Click “Open a Ticket”. In the "Submit a ticket" window, select “Netgate Global Support” in the Department menu, “pfSense” in Software Product, “QNAP NAS” in Platform, and your License ID in QNAP License ID. Select an appropriate description for your issue in "General Problem Description".


