How do I back up and restore my Windows PC or server with NetBak PC Agent?
Applicable Products
Hyper Data Protector, NetBak PC Agent
Introducing NetBak PC Agent
NetBak PC Agent is a flexible and powerful Windows PC and Windows server application that can back up your Windows PC/server to your QNAP NAS. The operating system and data of your Windows PC/server are backed up to your NAS via Hyper Data Protector (HDP). Backups can be performed manually when needed or automatically according to a customized schedule. Your PC/server can be restored with a USB boot drive created with NetBack PC Agent.
A USB boot drive allows you to restore volumes with a USB drive, but you can also restore individual files and folders over the internet with HDP Backup Explorer. For details, see How do I restore files to my Windows PC or server with HDP Backup Explorer?
Requirements
To backup your Windows PC/server, ensure the following:
- Your QNAP NAS user account is an administrator account.
- Hyper Data Protector 2.0 or later is installed on your QNAP NAS.
- NetBak PC Agent is installed on your Windows PC/server.
- If restoring your PC/server with a USB boot drive, a USB drive with at least 1 GB space is required, and the USB boot drive must be created prior to restoring the device.TipQNAP recommends creating a USB boot drive immediately after completing the first backup of your PC/server. This will ensure the device can always be restored even in cases where your PC/server cannot start up or operate properly.
1. Back Up Your Windows PC or Server
- Open NetBak PC Agent on your Windows PC or server.

- Log into your QNAP NAS.
- Enter your NAS IP address or NAS server name. Alternatively, if your NAS is connected to your computer's local network, then you can find your NAS by clicking the search LAN button.
- Enter your NAS username and password.
After logging in to the NAS, Netback PC Agent automatically creates an HDP inventory for this PC/server: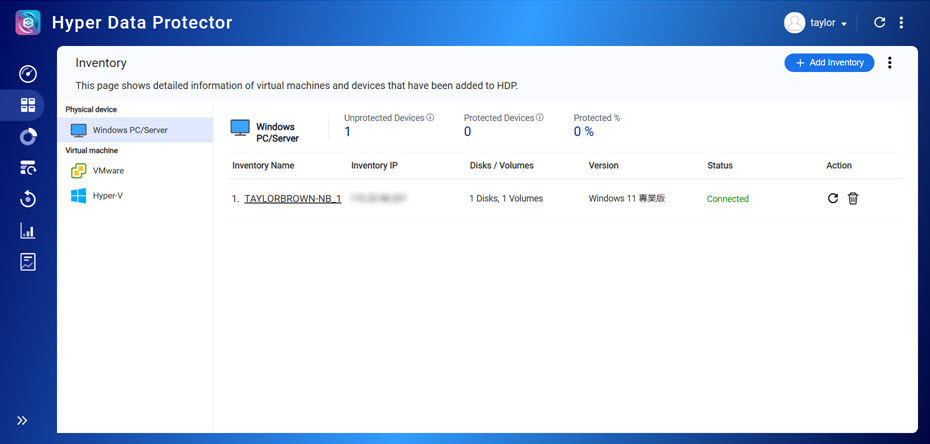
- Create a repository on your NAS. A repository is a location on your NAS where the backed-up data of your PC/server will be stored.
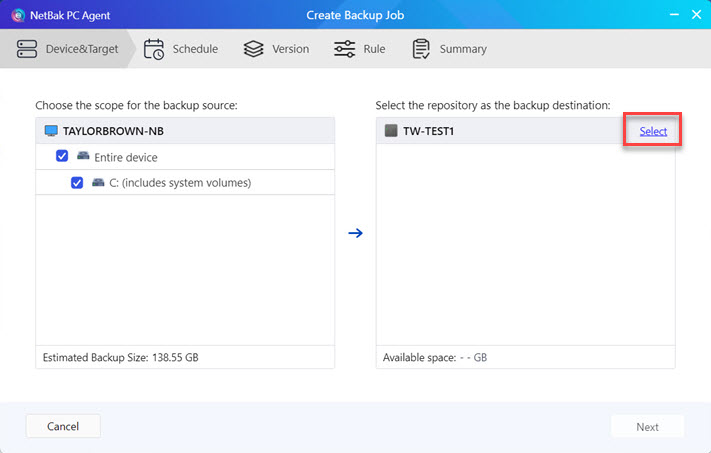
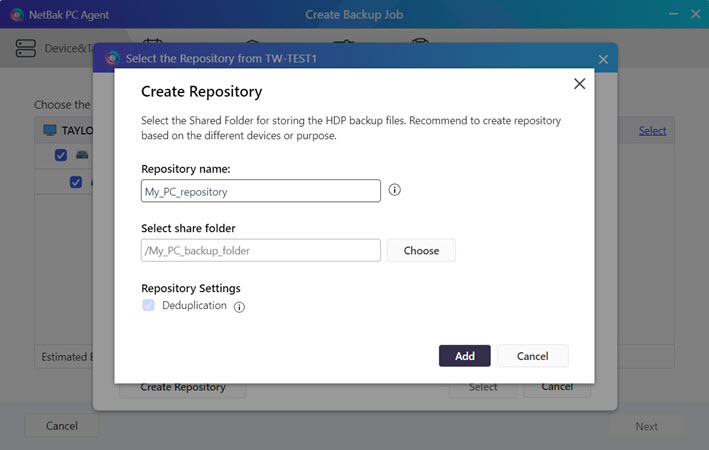
- Enter a name for the repository.
- Select a shared folder for the repository.
- Create a schedule for the backup job. Backups can be performed manually, automatically on a daily or monthly basis, or after certain system events are triggered.
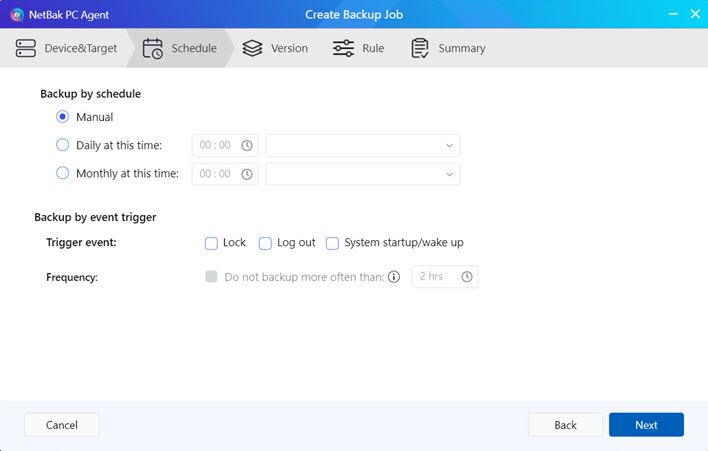 TipSpecifying a schedule with re-occurring backups will ensure your system is protected from data loss resulting from unexpected system failure.
 - Specify how many backup versions will be kept in the repository. When restoring your PC/server, you will select one of the backup versions to use for the restore.

- Specify further miscellaneous options to apply.
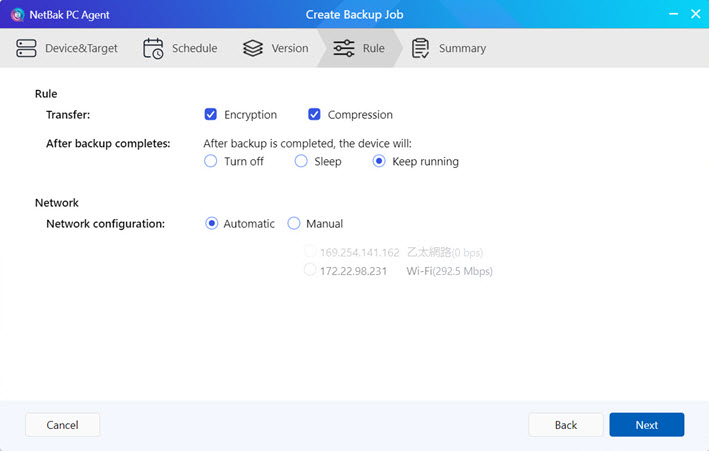
- Review the settings of your backup job before finishing.
- Complete the backup job creation.
- After the backup job is created, perform an immediate backup.WarningDo not power off, sleep, or log out of your device while the backup job is running.

- After the backup job is finished, a backup version is created.

- To use this backup version for a future restore of the device, you will first need to create a USB boot drive with NetBak PC Agent. See the next section for details.
2. Create a USB Boot Drive
To restore your PC/server, you can create a USB boot drive. The USB boot drive only needs to be created once, and can thereafter be used to restore your PC/server with any backup version. Backup data is not stored on the USB boot drive itself, but is downloaded from HDP during the restore process. Therefore, your PC/server must have a network connection to HDP during the restore process.
To create a USB boot drive for your Windows PC/server, perform the following steps:
- Insert the USB drive into your PC/server.
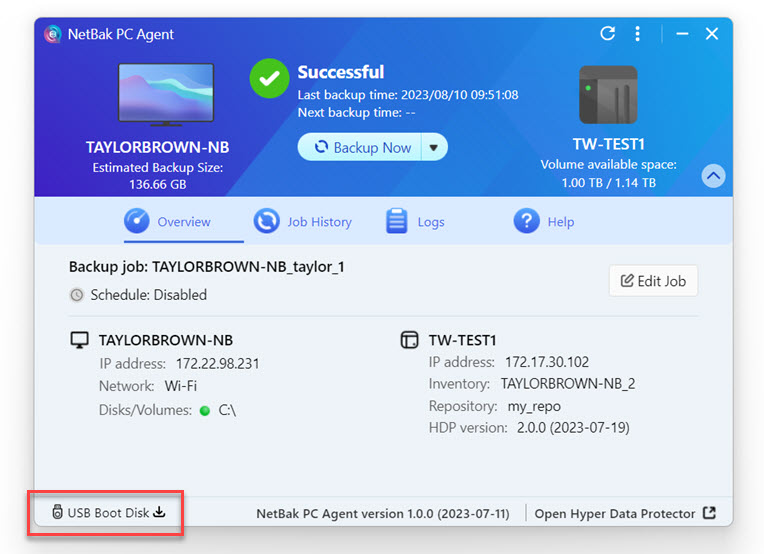
- Open NetBak PC Agent.
- Open NetBak PC Agent Recovery Media Creator.
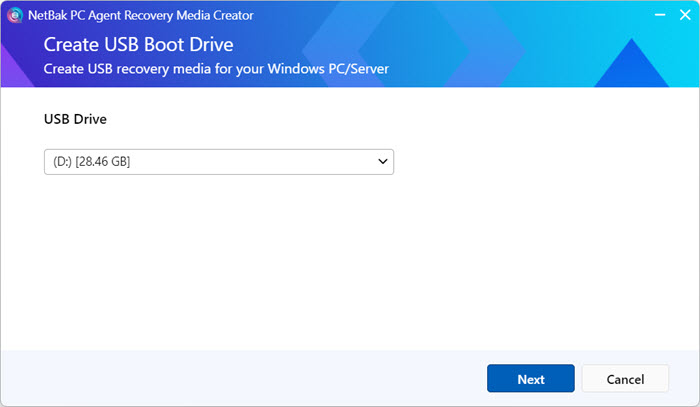
- Select the USB drive.
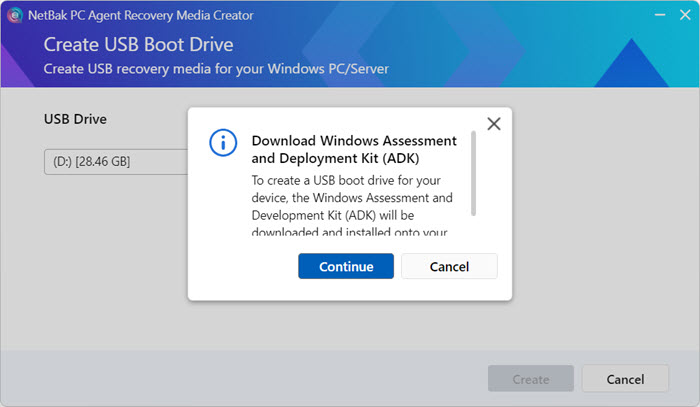
- If you are asked to download the Windows Assessment and Deployment Kit (ADP), then continue to download and install it.
- Accept the default Windows ADK features.
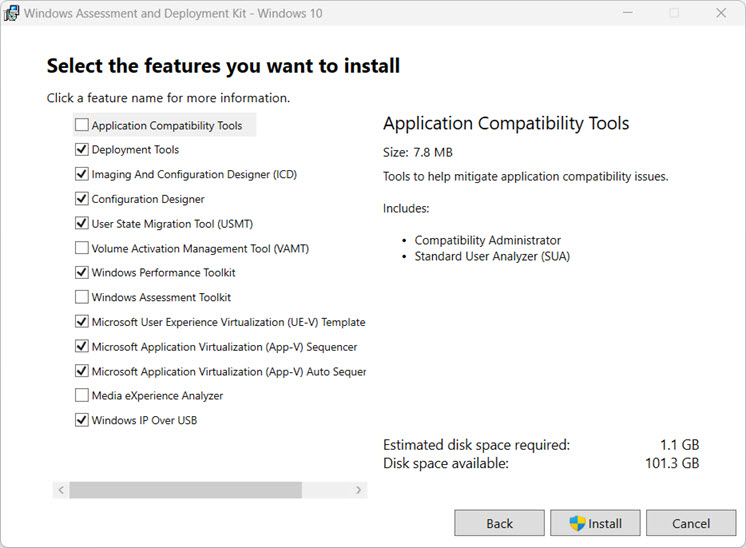
- If you are asked to download Windows Preinstallation Environment (PE), then continue to download and install it.
- Accept the default Windows PE features.
- After the USB boot drive is created, NetBack PC Agent will display instructions on how to use the USB boot drive to restore the device. You may remove the USB boot drive from your PC/server now.

3. Restore Your Windows PC or Server
To restore your Windows PC or server with the USB boot drive, perform the following steps:
- Power off your PC/server.
- Inset the USB boot drive created in the previous step into your PC/server.
- Power on your PC/server.
- Before your PC/server finishes booting up, enter the BIOS screen. The exact steps for entering the BIOS screen may vary depending on the device manufacturer, but for many devices the BIOS screen can be entered by repeatedly pressing the F2 key before Windows finishes booting up.
- After entering the BIOS screen, configure the boot order for your PC/server to boot from the USB boot drive. The exact steps for configuring the boot order of your PC/server may vary depending on the device manufacturer.
- Leave the BIOS screen and continue booting up the PC/server.
- The recovery wizard appears. Restore your PC/server by following the instructions in the recovery wizard.
- Optional: Configure network settings.
- Optional: Load additional hardware and network drivers onto the USB boot drive.
To restore additional hardware or network drivers that may be required for your PC/server, download the drivers onto your PC/server, then load the drivers onto your USB boot drive. During the restore process, the drivers will be installed onto your PC/server. - Log into to the NAS.TipTo connect to the NAS, if the default system port has not been changed use the NAS IP address "XXX.XXX.XXX.XXX". If the default system port has been changed, then use the full network address including the port number "http://XXX.XXX.XXX.XXX:YYYY"
- Select your device and select the backup job you created with NetBak PC Agent in the first part of this tutorial.
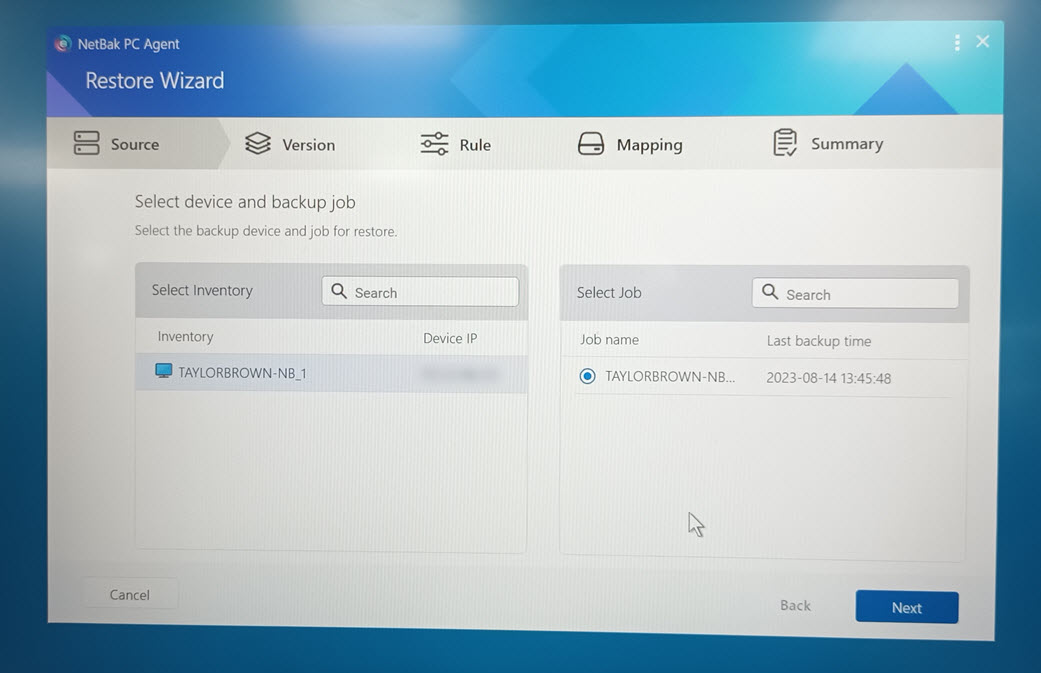
- Select the backup version to use for restoring the device.
- Select the restore mode.
Restore Mode Description Full device restore Restore all volumes of the device. System volume restore Restore only system volumes. A system volume is a volume where the Windows operating system is installed. - Optional: Specify a volume mapping.
The original backed-up volumes can be restored to different volumes by specifying a volume mapping. A volume mapping is mapping between backed-up volumes and target volumes, and determines which target volumes the backed-up volumes get restored to.WarningIf a volume is mapped to a target volume that is greater in size, then extra space on the target will become unusable during future operation of your PC/server. - Review the restore settings.
- Start the restore.
The restore process may take several minutes. After the device is restored, the device will automatically restart.
Further Reading
How do I restore files to my Windows PC or server with HDP Backup Explorer?
Using Hyper Data Protector to Back Up Hypervisors to a QNAP NAS
How to Back Up and Import HDP Repositories to a Remote QNAP NAS


