How to configure stream settings for each camera view in QVR Pro Client?
Overview
In this tutorial, you will learn how to configure stream settings for each camera view in QVR Pro Client.
Step 1: Configuring multiple streams for each camera on the QVR Pro server.
- Go to the desktop of QVR server (QVR Pro, QVR Elite, etc.).
- Click Camera Settings.
- In the Action column of any camera, click the Edit icon.

- Set up a second or more streams on the Camera Stream tab.
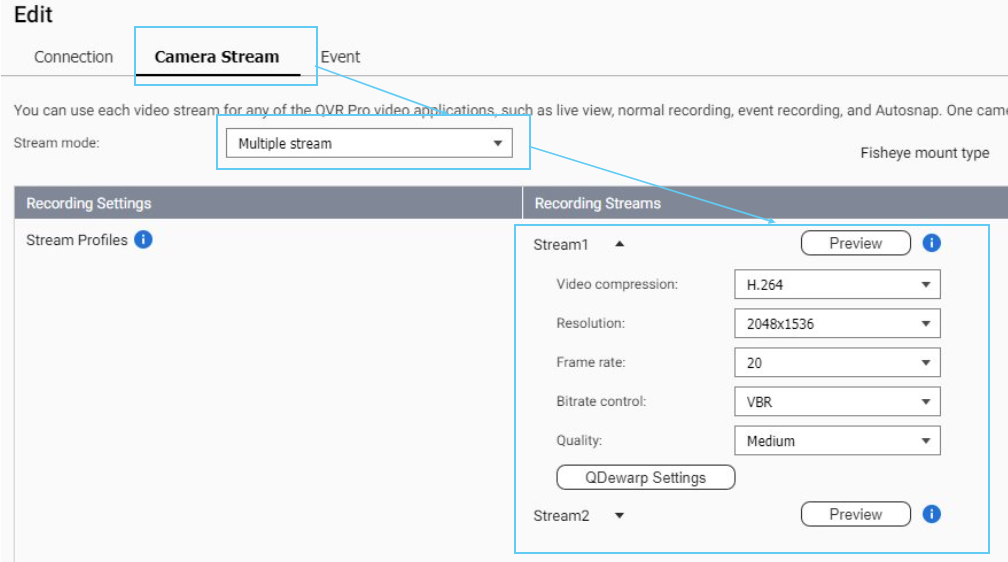
- A camera may support multiple streams, depending on its hardware capabilities. Multi-stream options only appear if the selected camera supports this feature.
- You can select the highest stream quality for recording while choosing a different quality for live monitoring.
Step 2: Select suitable streams in QVR Pro Client.
QVR Pro Client on PC / QVR Smart Client on the NAS
- Open any camera view.
- Hover any channel and click More (three dots).
- Select a suitable stream under Stream option.
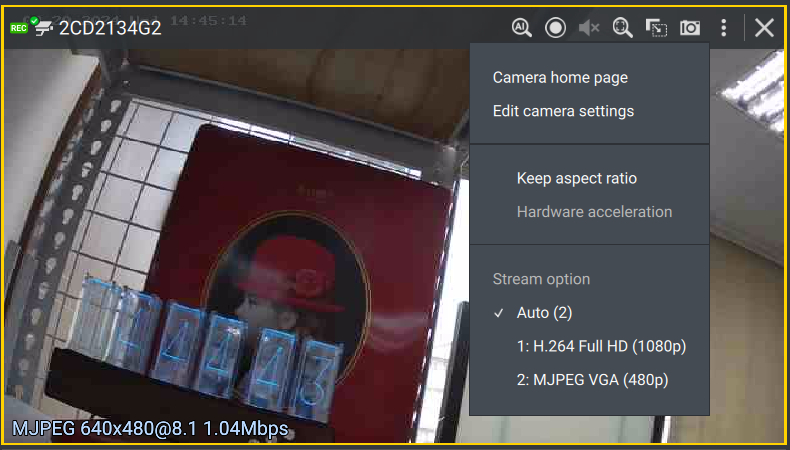
- Save the settings.
When the Auto option is selected, QVR Pro Client automatically chooses a stream based on the camera unit size (pixels) and current working status to ensure smooth viewing. The number after Auto represents the ID number of the stream automatically selected at the moment.
QVR Pro Client on iOS / Android mobile device
- Open any camera view.
- Click More (three dots).
- Select Edit Stream.
- Click any channel.
- Choose a stream suitable for this channel.
- Save the settings.
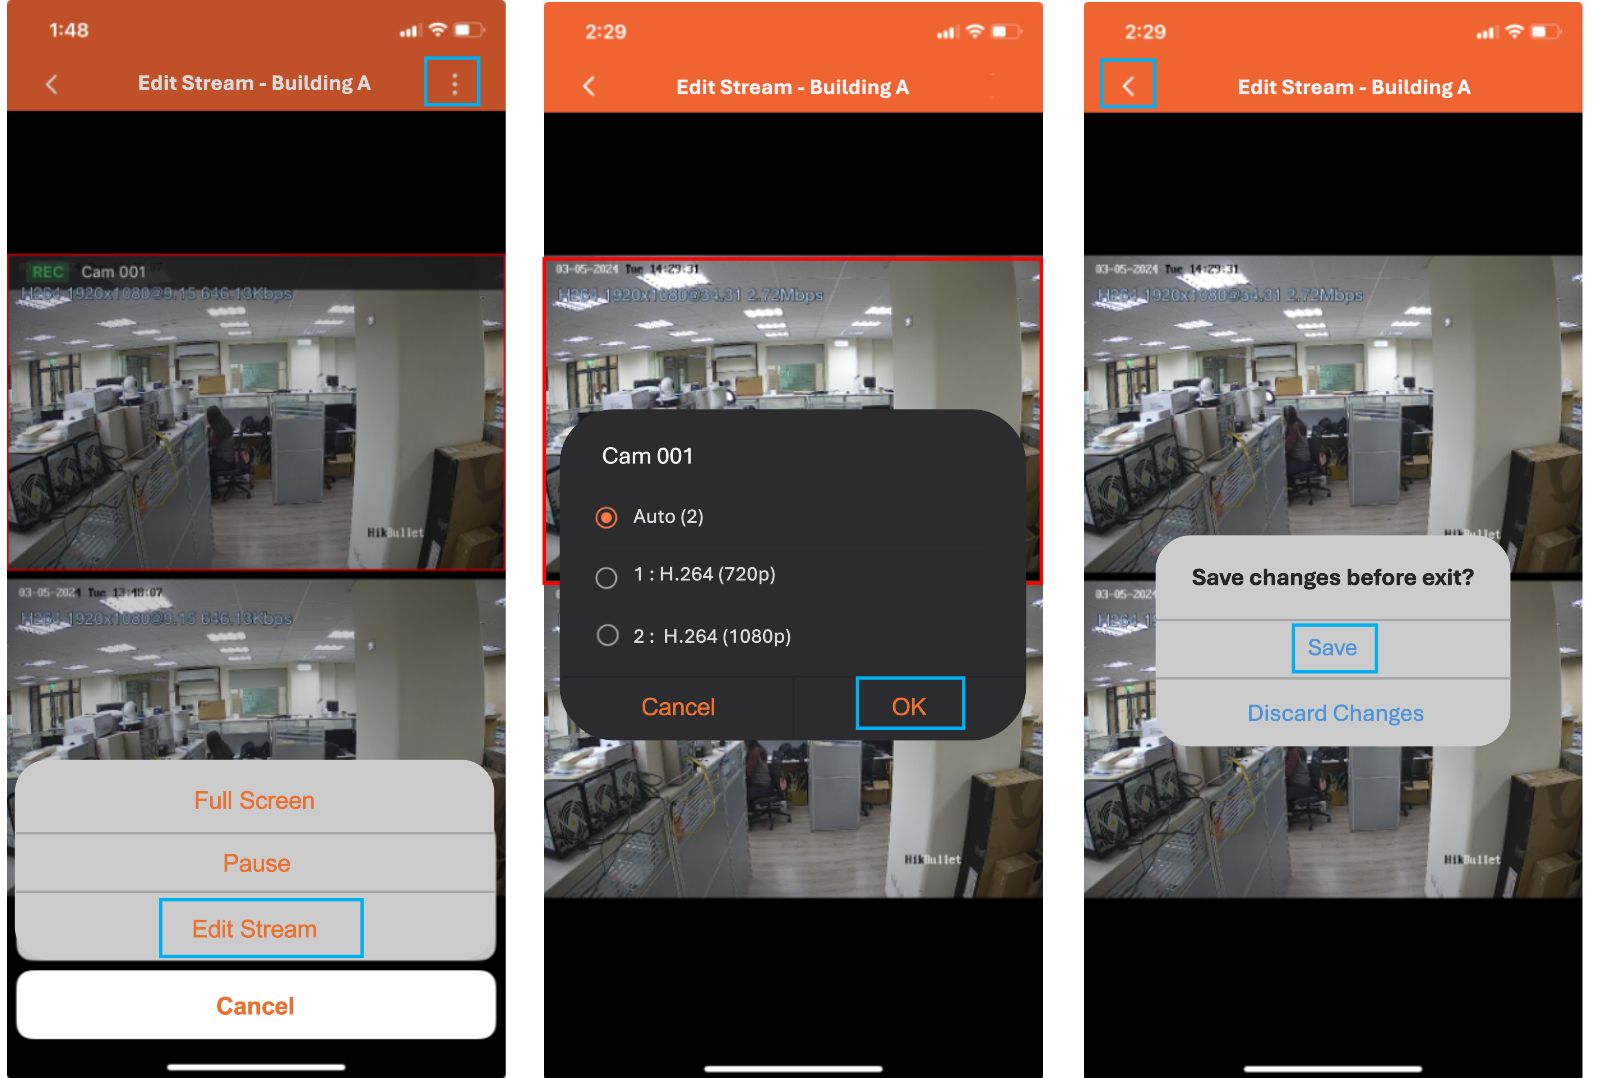
When the Auto option is selected, QVR Pro Client automatically chooses a stream based on the camera unit size (pixels) and current working status to ensure smooth viewing. The number after Auto represents the ID number of the stream automatically selected at the moment.
QVR Viewer on Apple / Android TV
- Open any channel.
- Click Select Stream.

- Choose a stream suitable for the current device.


