How can I create a guest VLAN network without allowing clients access to LAN-connected devices on a QHora-301W router?
Last modified date:
2023-05-17
Applicable Products
QHora-301W
Solution
I. Create a new VLAN ID in QuRouter.
- Log in to QuRouter.
- Go to Network > VLAN & DHCP Server Service Settings.
- Click Add VLAN.
- Configure the IPv4 VLAN settings.
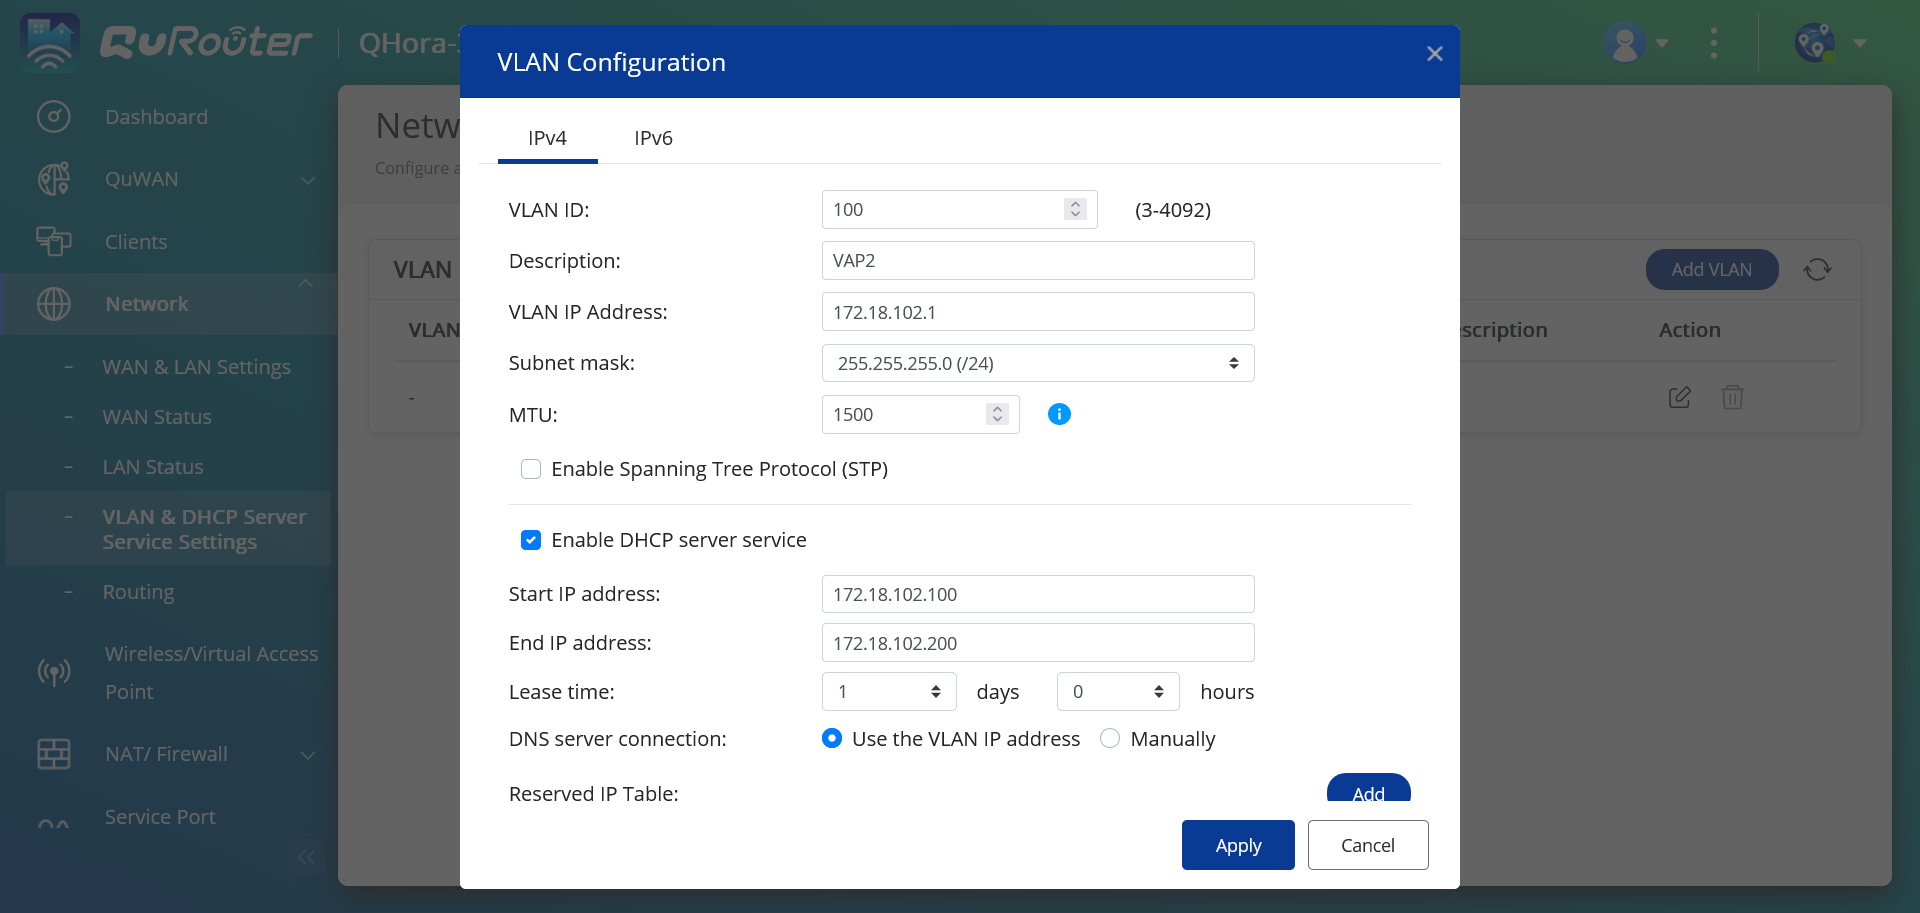
- Specify a VLAN ID.
- Specify a VLAN description that contains a maximum of 256 characters.
- Specify a fixed IP address.
- Specify the subnet mask.
- Specify an MTU value.
- Select Enable Spanning Tree Protocol (STP) to prevent bridge loops.
- Select Enable DHCP server service.
Field Description Start IP Address Specify the starting IP address in a range allocated to DHCP clients. End IP Address Specify the ending IP address in a range allocated to DHCP clients. Lease Time Specify the length of time that an IP address is reserved for a DHCP client. The IP address is made available to other clients when the lease expires. DNS Server Specify a DNS server for the DHCP server. Reserved IP Table - Click Add to configure a reserved IP table.
- Specify the following:
- Device name
- IP address
- MAC address
- Click
 .
.
- Configure the IPv6 VLAN settings.
- Click IPv6.
- Click Enable IPv6 VLAN
- Select the outgoing WAN interface from the drop-down list.
- Specify the IPv6 IP address prefix.
- Select the prefix length from the drop-down list.
- Select the interface identifier to identify interfaces on a link.
Setting User Action Interface identifier Select from the following: - EUI-64: Select Extended Unique Identifier (EUI-64) to automatically configure IPv6 host address.
- Manually: Specify an interface ID to configure the IPv6 host address.
- Assign a client IPv6 addressing mode from the drop-down list.
Setting Description IPv6 addressing mode Select from the following: - Stateful: The stateful DHCPv6 or managed mode enables you to manually assign a unique IPv6 address to each client.
- Stateless: The stateless DHCPv6 mode enables users to manually enter additional IPv6 information including the lease time, but automatically assigns a unique IPv6 address to each client.
- SLAAC+RDNSS: Stateless Address Auto-Configuration (SLAAC) along with Recursive DNS Server (RDNSS) enables users to manually assign an IP address based on the IPv6 prefix and uses recursive queries to resolve the domain name.
- Disabled: Disables IPv6 client addressing.
- Click Apply.
II. Assign the VLAN ID to virtual access point 2 or 3.
- Go to Wireless/Virtual Access Point.
- Under Virtual Access Point 2, click
 .
. - Select the newly created VLAN ID.
- Specify an SSID, security encryption, and password.
- Click Apply.
- Click
 to enable the virtual access point.
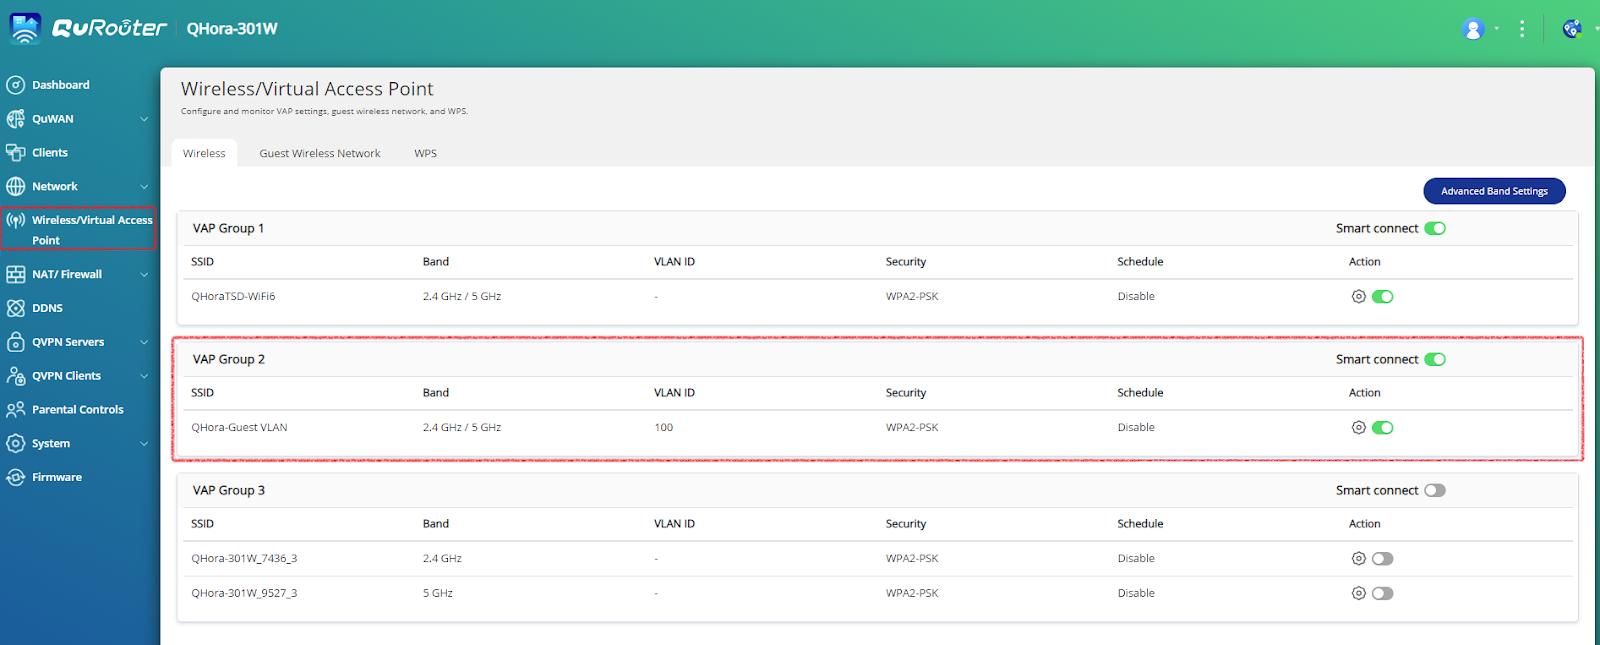
III. Create a firewall rule for the virtual access point.
- Go to NAT/Firewall.
- Click Firewall Rule.
- Click Add.
- Configure the firewall settings.
Setting User Action Rule Name Specify the firewall rule name. Protocol Specify the IP protocol. Source Specify the connection source for this rule. - Selecting Any applies this rule to all connections.
- Selecting Define applies this rule to traffic coming from the sources defined for this rule.
- Selecting None allows you to apply the rule to traffic coming from the client operating system.
- Selecting Interface allows you to apply the rule to traffic originating from all the IP addresses from the selected WAN, LAN, or VLAN interface.
- Selecting IP allows you to apply the rule to connections from a single IP, a specific subnet, or every IP within a specific range.
Destination Specify the connection destination for this rule. - Selecting Any applies this rule to all connections.
- Selecting Define applies this rule to traffic directed to all destinations defined for this rule.
- Selecting IP allows you to apply the rule to connections going to a single IP, a specific subnet, or every IP within a specific range.
- Selecting Domain name allows you to apply the rule to traffic going to all the IP address associated with the specified domain name.
Port Specify the IP protocol type for this rule. This field is available only if you select the TCP or UDP protocol. Action Specify whether this rule allows or blocks matching connections. - Click Apply.
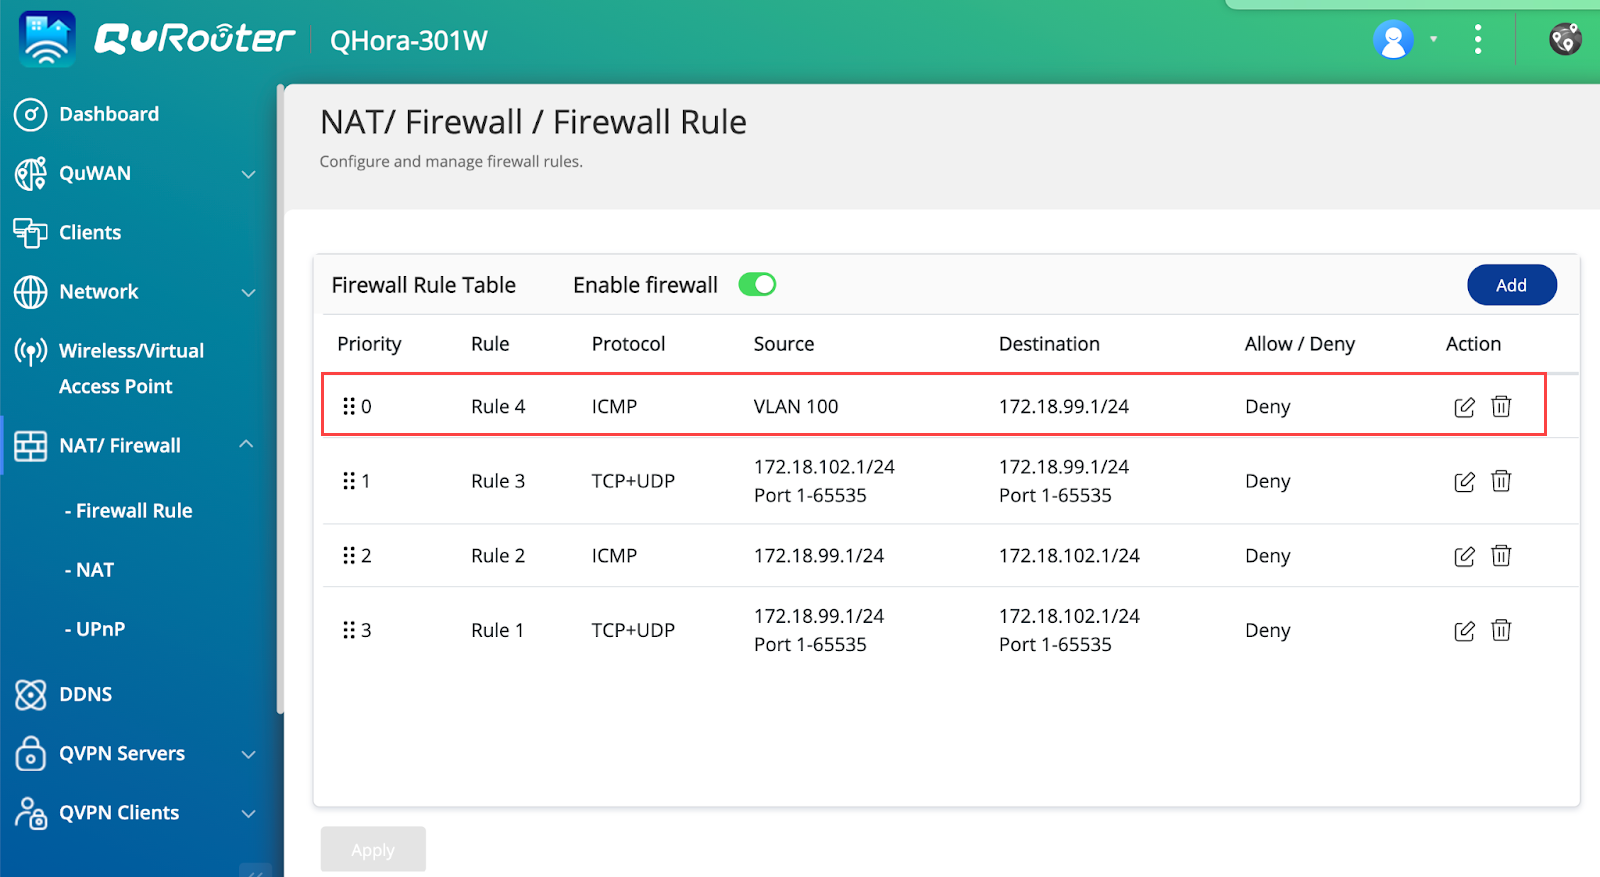
Users can now connect to the guest network without being able to access the devices connected through LAN on the router.


