Save Snapshots to other QNAP NAS with Snapshot Replica
Last modified date:
2021-05-28
General Information
This tutorial teaches you how to save and manage snapshots taken from one QNAP NAS to another using Snapshot Replica and Snapshot Vault.
System Requirements and Compatibility
| NAS | Requirement |
|---|---|
| Source and Destination NAS | Must be a QNAP NAS that supports snapshots. |
| Source and Destination NAS | Must have at least 1GB RAM. |
| Source and Destination NAS | SSH port 22 and TCP data ports 50100-50199 must be open. |
| Destination NAS | Must have at least one storage pool with free space greater than or equal to the size of the shared folder or LUN being backed up. |
| Destination NAS | Allow SSH connections must be enabled in Control Panel > Network & File Servers > Telnet / SSH. |
How to save snapshots to another QNAP NAS
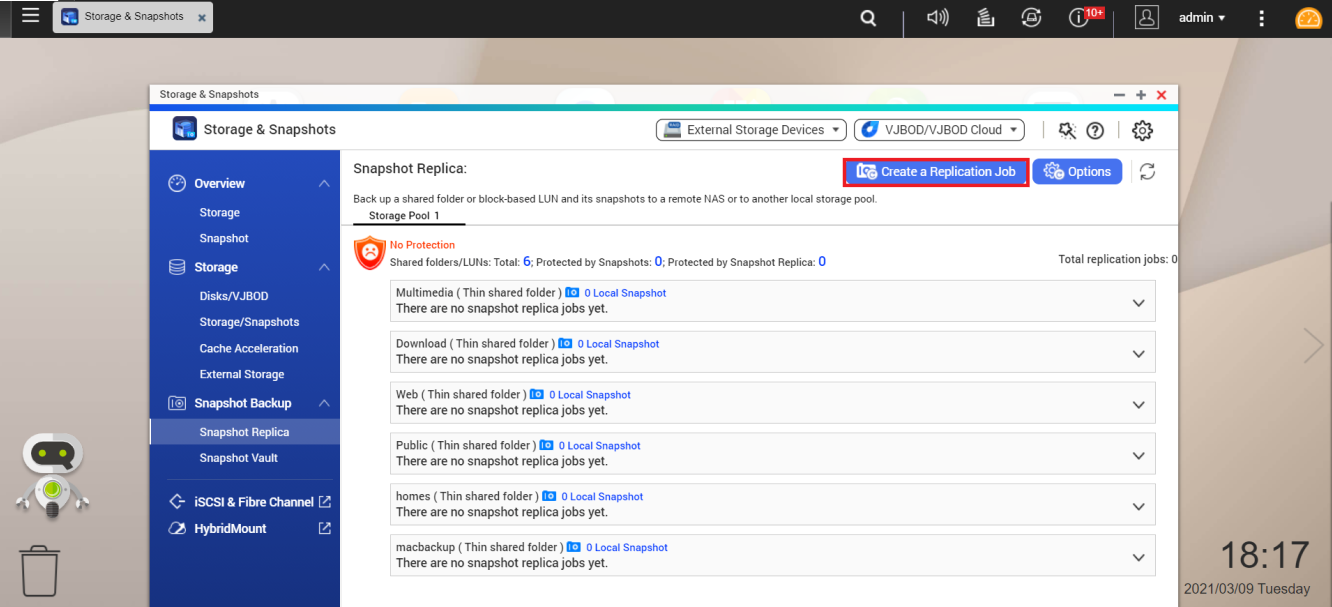
- Open Main Menu > Storage & Snapshots.
- Click Snapshot Replica.

- Click Create a Replication Job.
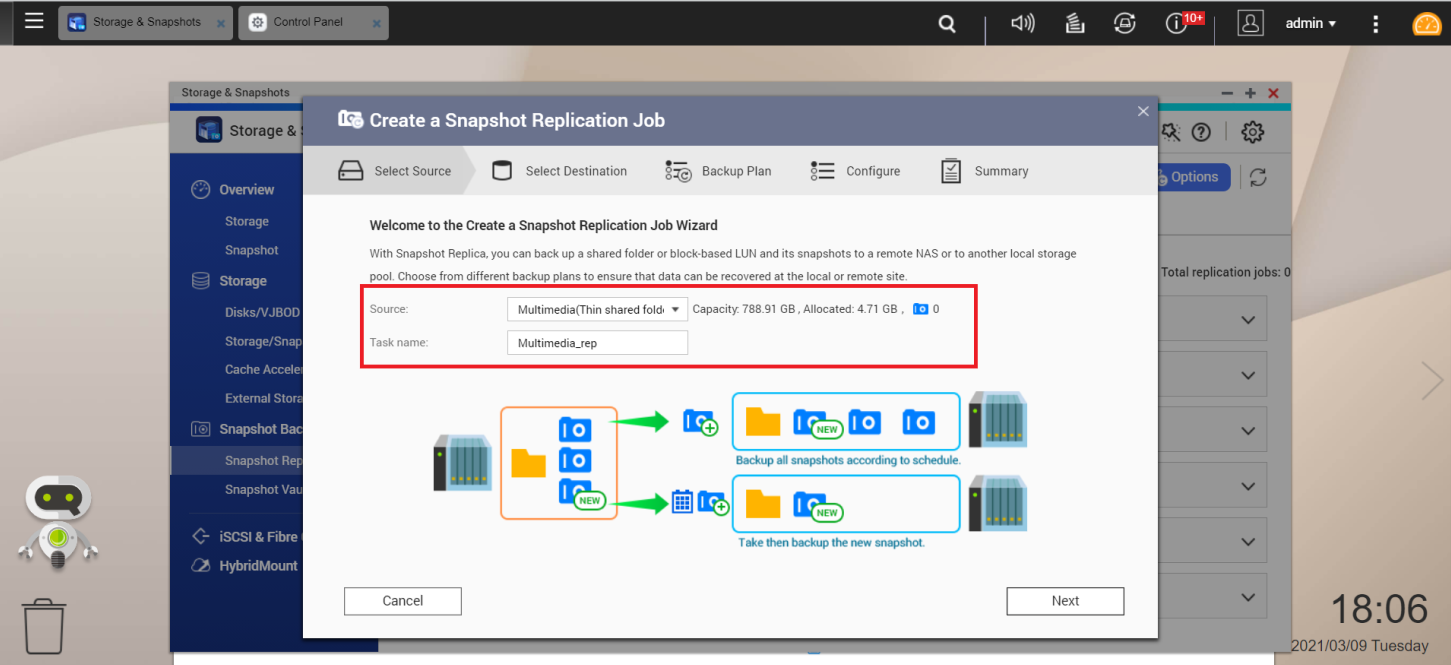
The Create a Snapshot Replication Job window opens. - Select Source.
- Choose the source shared folder.
- Enter a Task name for the replication job.
- Click Next.
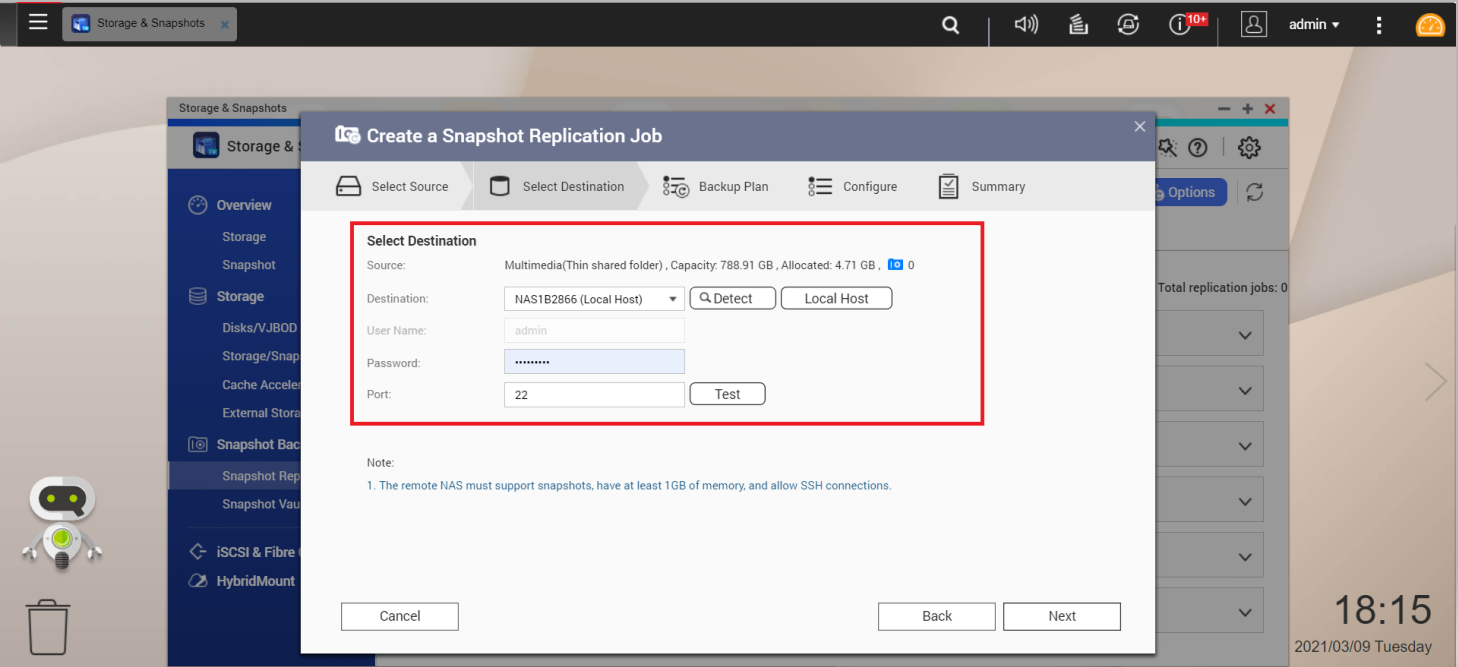
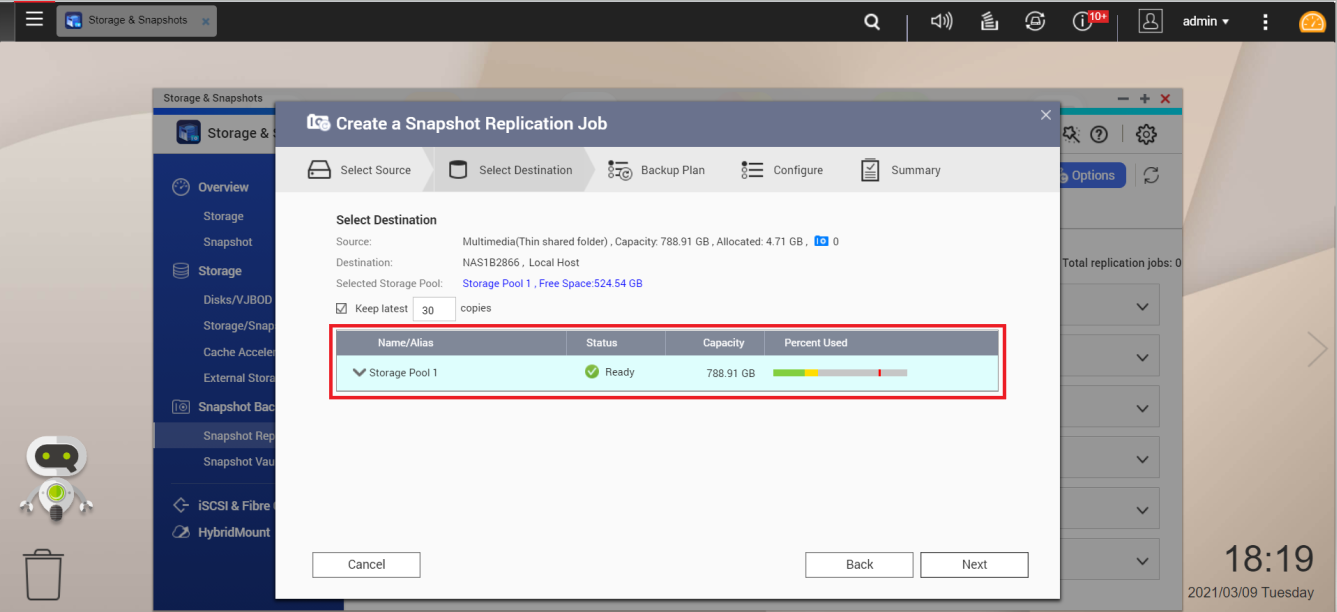
- Select Destination.
- Enter the Destination name/IP address.
- Enter a User Name and Password for the Destination.
- Click Test to confirm your settings.
- Click Next.
- Select the source shared folder to take a snapshot of.
- Select the destination storage pool to store the data to.
- Click Next.
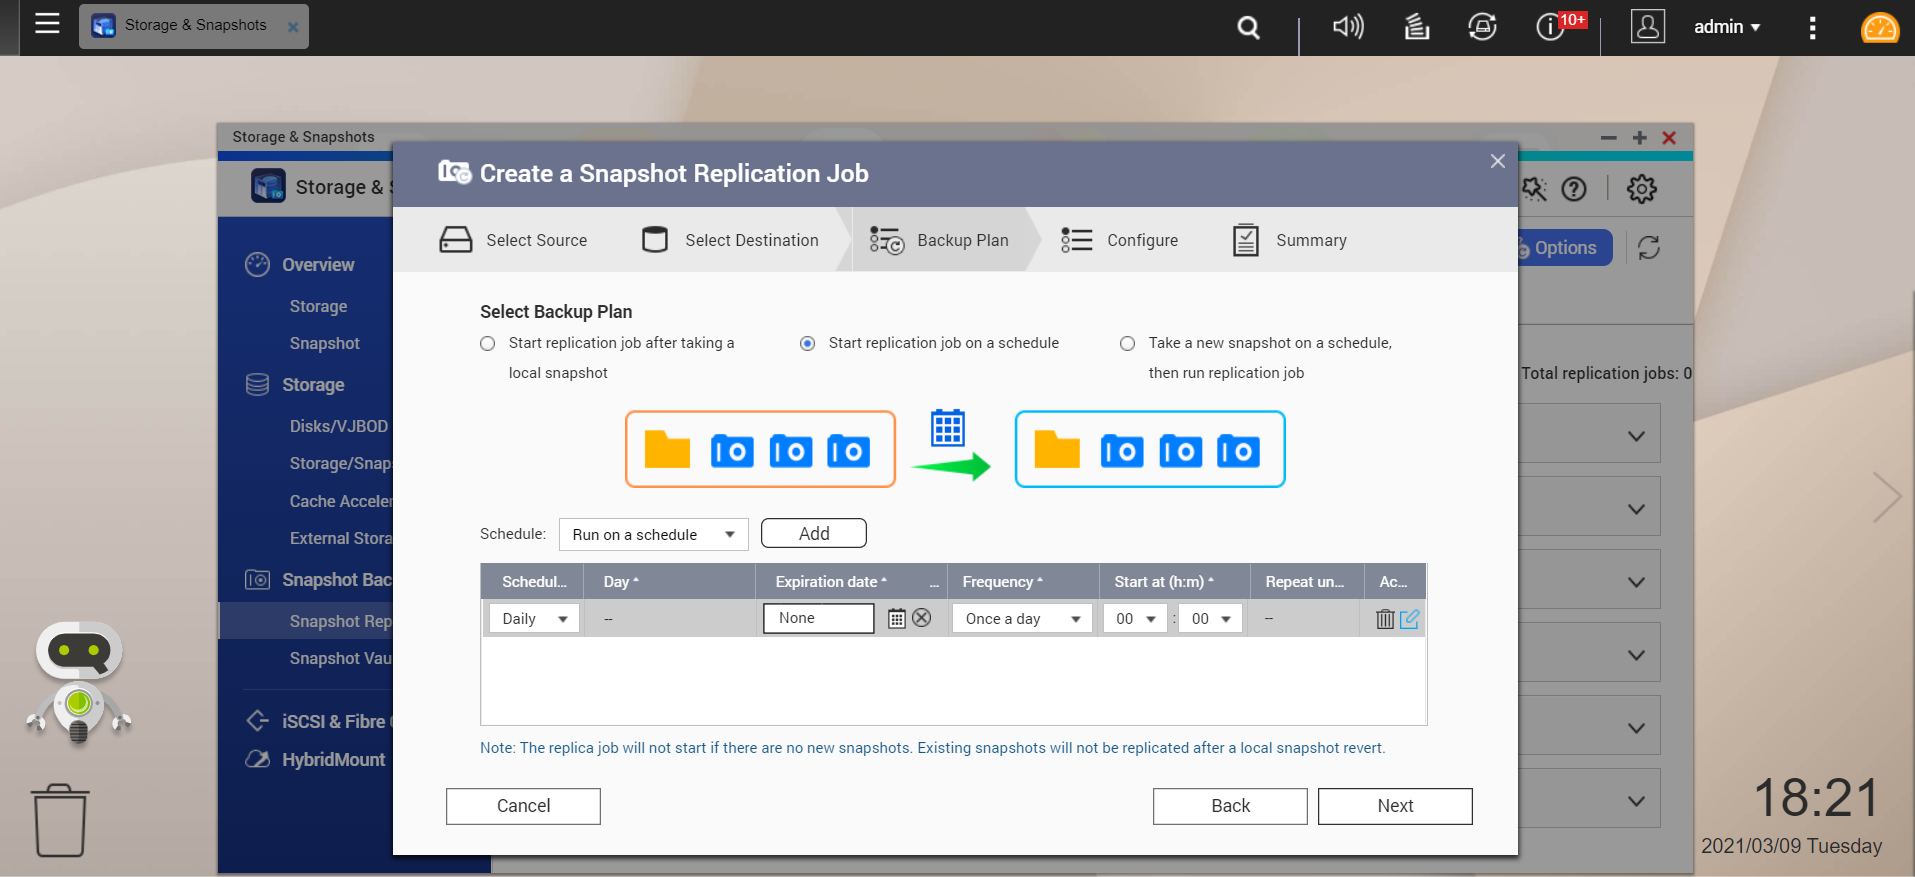
- (Optional) Backup Plan.
- Select a backup plan.
- Select a backup schedule
- Configure the time, day, frequency, and repeating pattern of the backup plan.
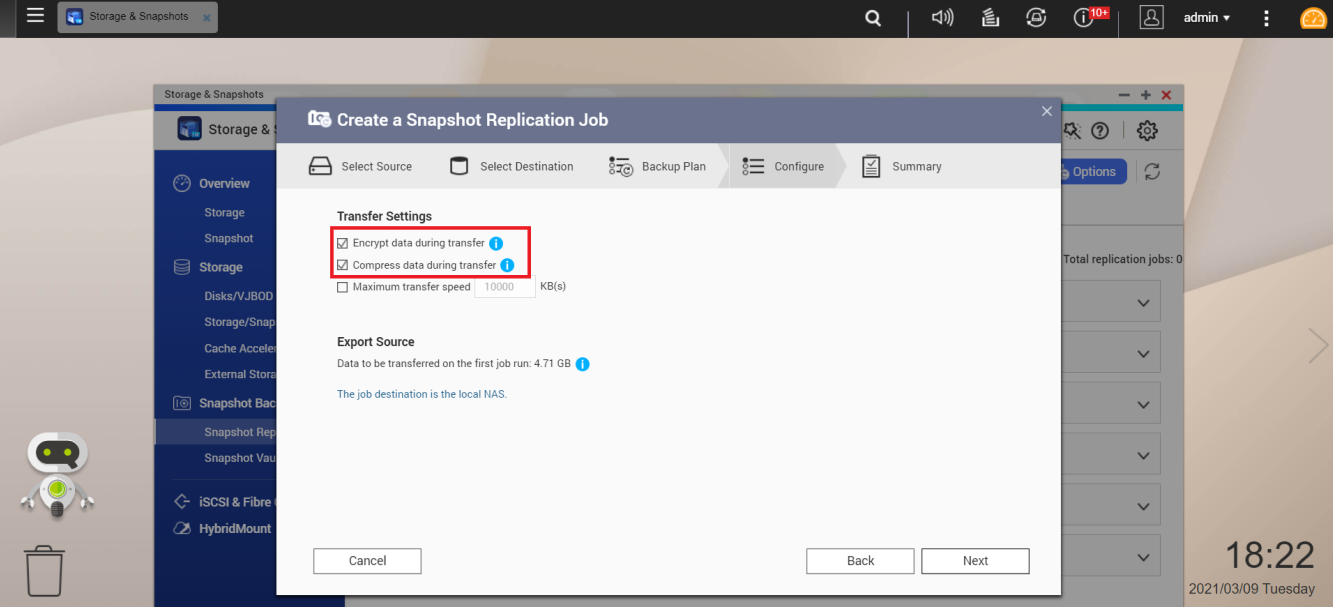
- (Optional) Configure.
- If confidential/sensitive data is being transferred, check Encrypt transfer.
- If you are transferring across a low-bandwidth connection, check Compress transfer.
- To minimize the impact of the transfer on other network tasks, check Maximum transfer speed and enter a value in KB.
- Click Next.
- Summary.
- Review the replication job settings.
- Click Finish.
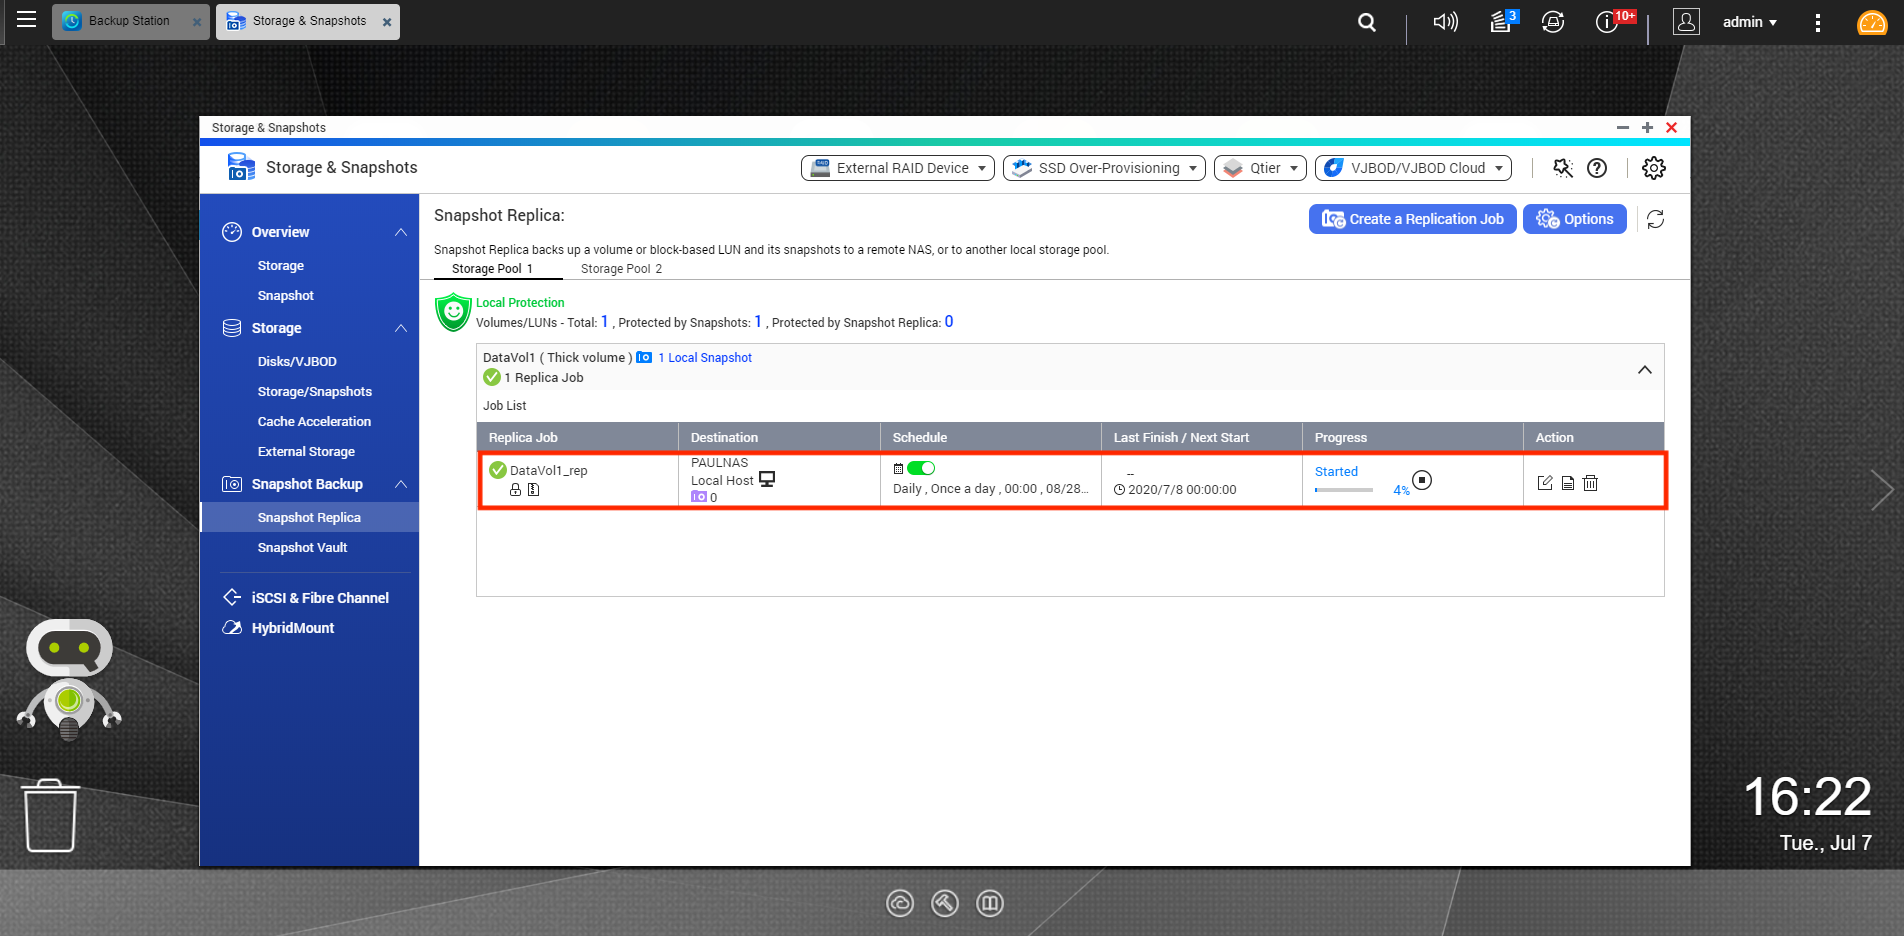
Result: Your replication job will be created and started.
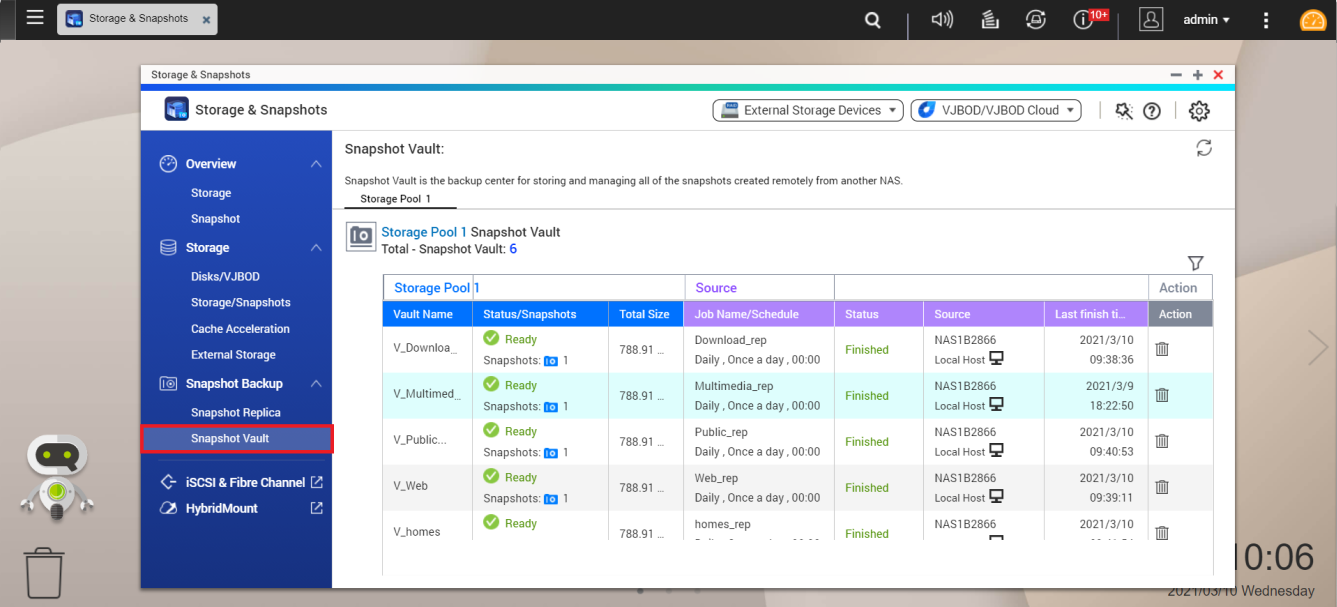
How to manage snapshots from another QNAP NAS
- Open Storage & Snapshots.
- Go to Snapshot Vault.
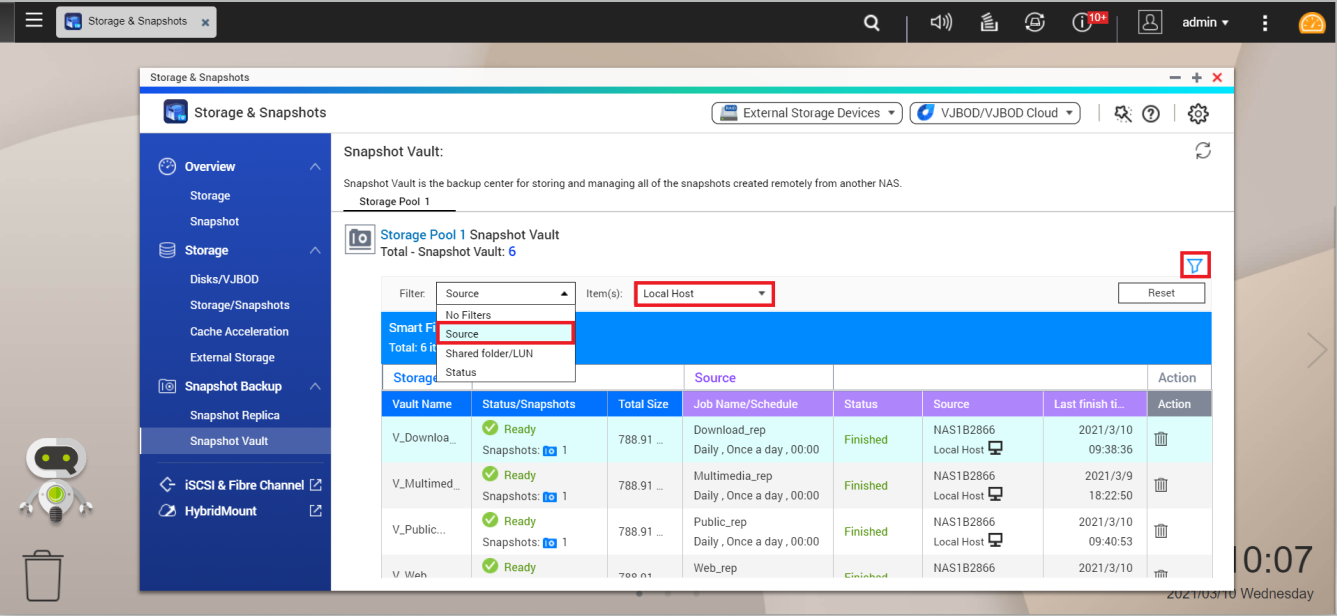
Tip: You can filter the snapshot list based on Source, Shared folder/LUN, and Status.
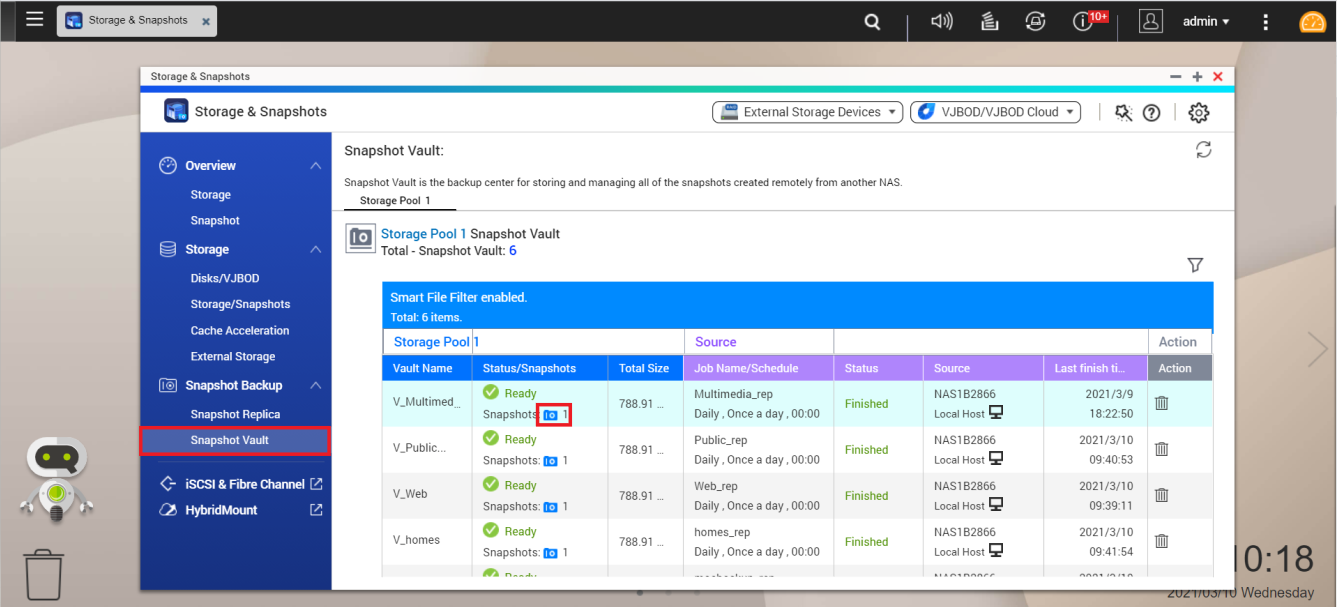
How to clone a snapshot in Snapshot Vault
- Open Storage & Snapshots.
- Go to Snapshot Vault.
- Click
 .
.
- Choose a snapshot and click Clone.
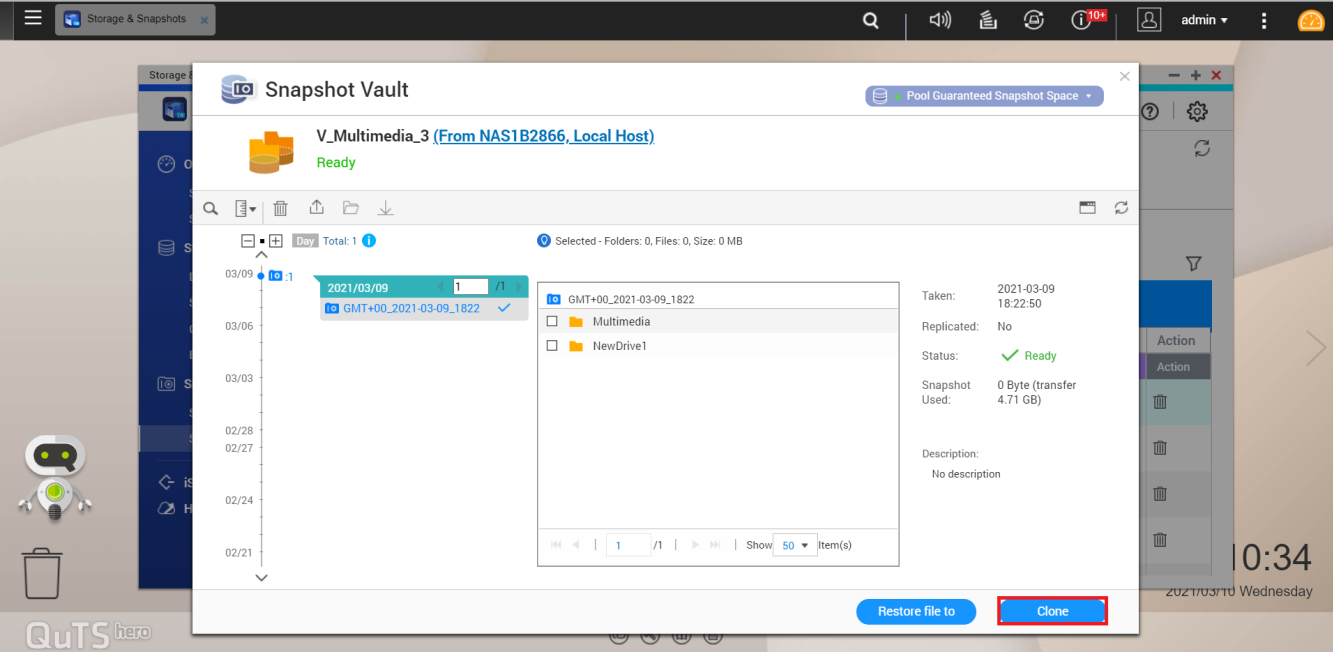
The Clone Snapshot window opens. - Configure the snapshot clone.
- Enter the shared folder name (or use the default name).
- Select the folders/files to clone.
- Click OK.
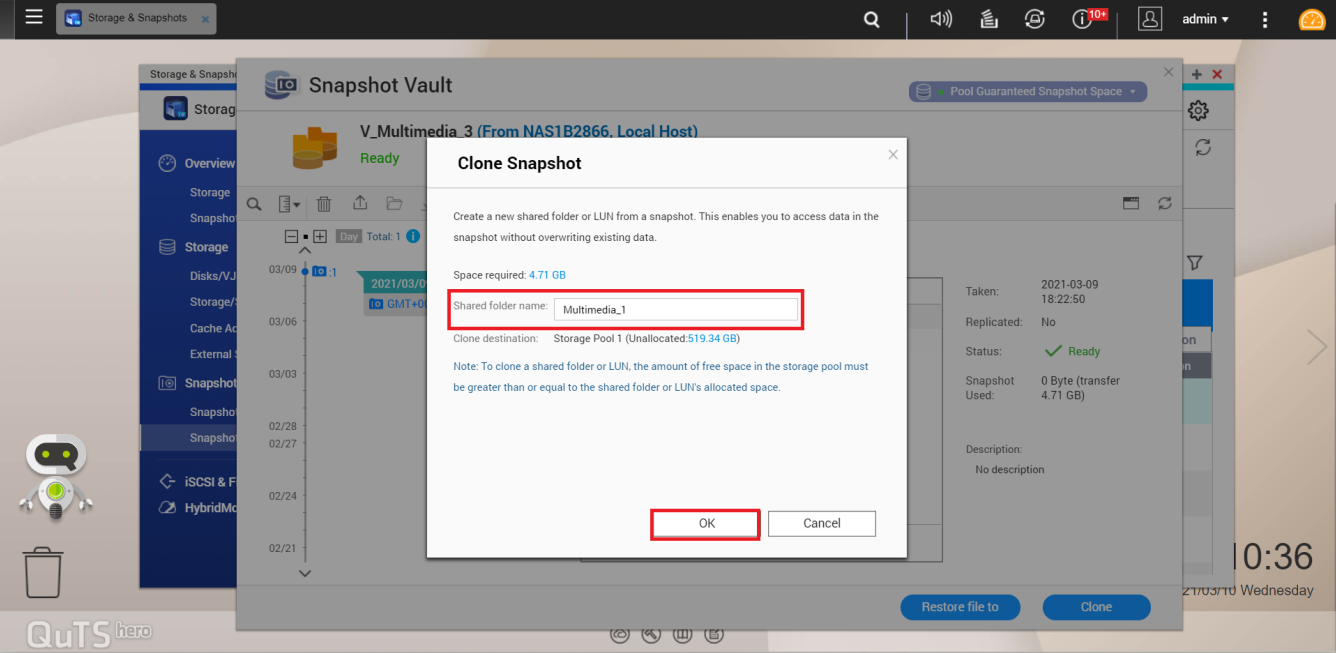
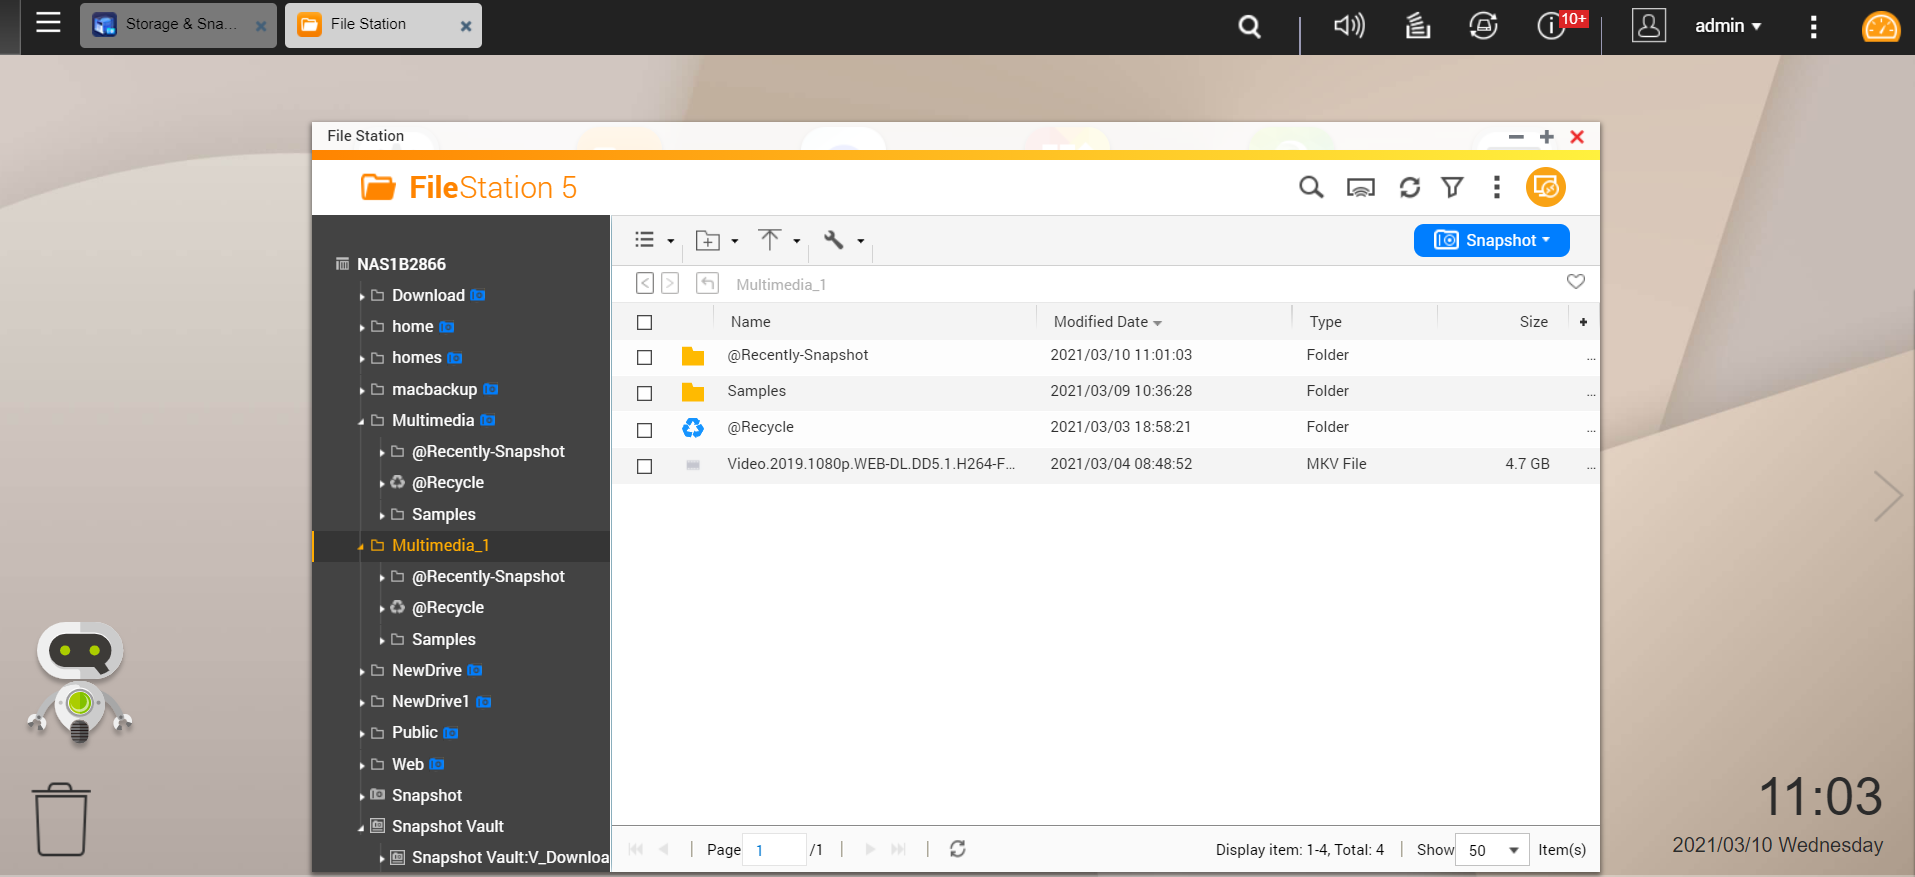
Result: A new shared folder has been cloned from the Snapshot Vault and can be viewed in Storage/Snapshots.
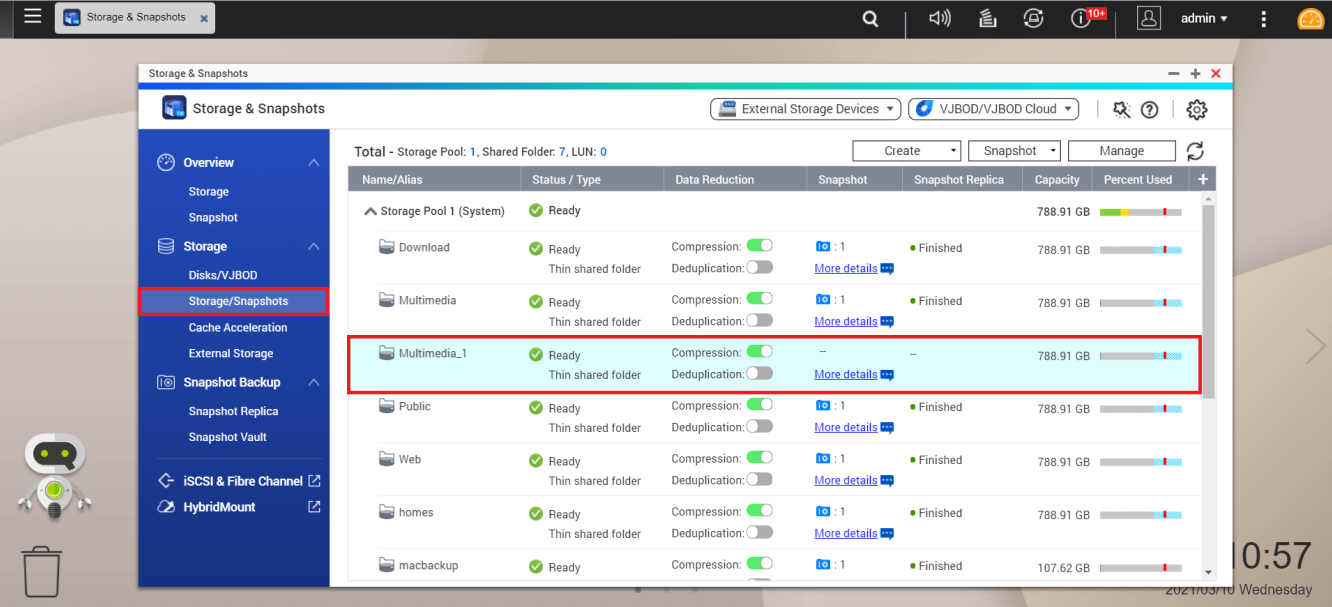
Tip: The files in the new shared folder can also be viewed and managed in File Station.