How to Import an ESXi Virtual Machine into Virtualization Station
Introduction
This tutorial explains the process of transferring a virtual machine (VM) from ESXi into Virtualization Station.
Exporting a VM from ESXi
- Click Export.

The Download File window opens.
- Select the .vmdk format.

ESXi prepares two export files (.ovf & .vmdk) for download. You'll need both files to import the VM into Virtualization Station.
Importing a VM into Virtualization Station
- Import the VM file.
- Click Import VM.

The Import VM window opens.
- Under Import from, select PC.
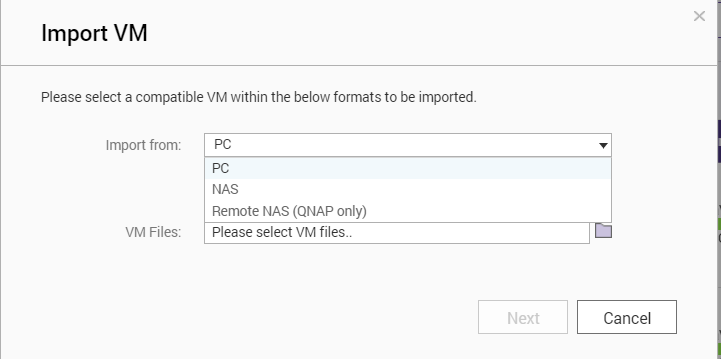
A file explorer window opens.
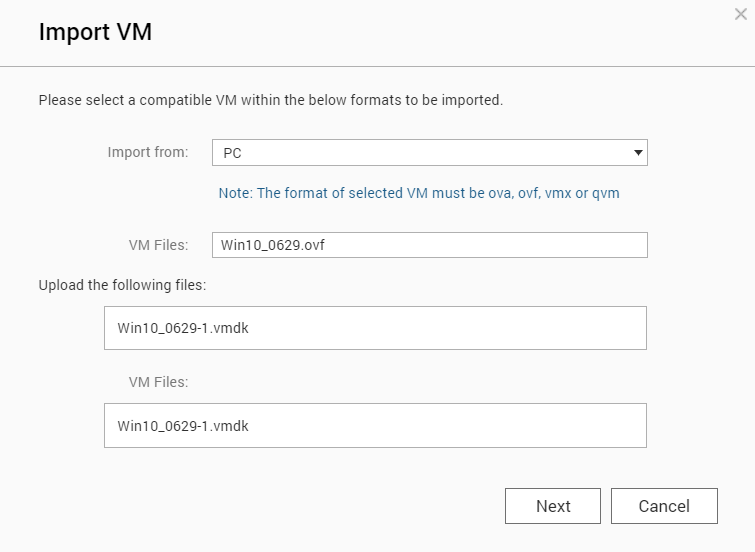
- Select the VM file.
Important:
ESXi will have created two files during export (.ovf & .vmdk).You'll need to select both during this step.
- Click Import VM.
- Configure the VM settings.
Setting
Description
VM Name
The name used to identify the VM
Description
The description for the VM
CPU Cores
The maximum number of CPU cores available to the VM
Memory
The maximum amount of memory available to the VM

- Optional: Configure the advanced settings.
- Modify any of the following settings.
Setting
Description
CPU
The CPU type used by the virtual machine
Tip:This setting is typically used when exporting the VM to another device.
Network
The MAC address and NIC model used by the VM
Tip:Click
 to generate a MAC address.
Hard Disk
The source path, cache mode, and drive controller type used by the VM
- Modify any of the following settings.
Virtualization Station imports the VM.

Accessing the VM Console
- Click
 .
.
Virtualization Station opens the VM console.


