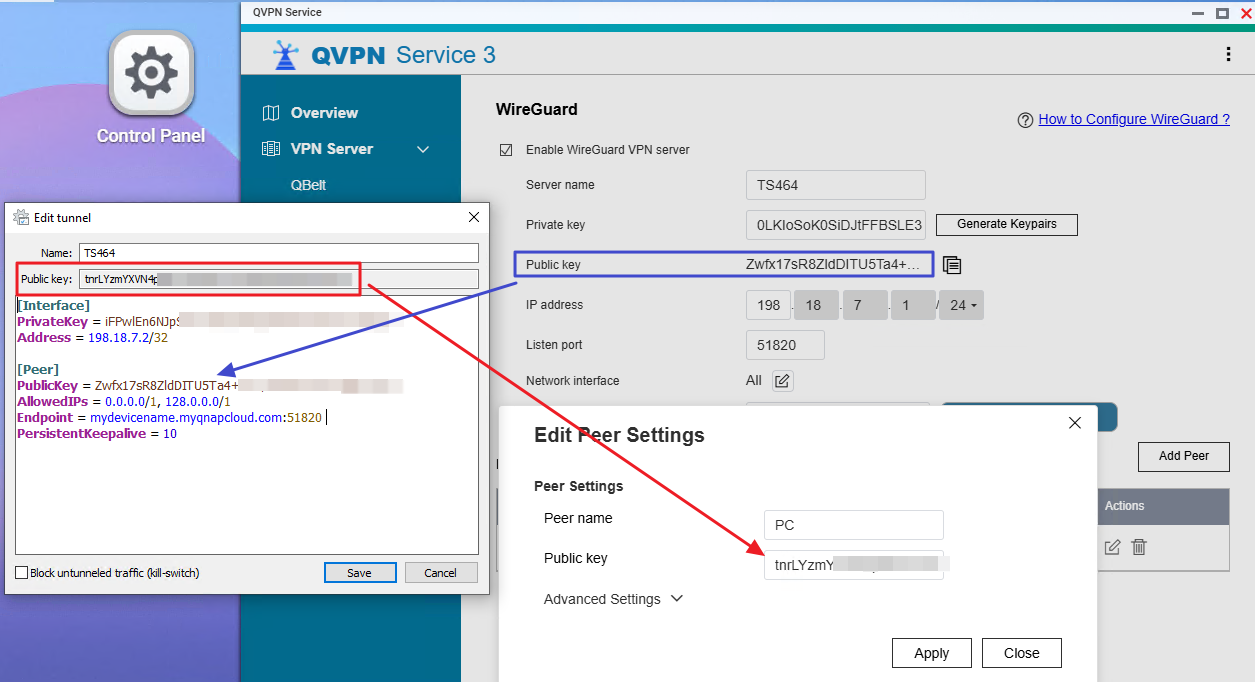
How to create a WireGuard VPN key between QNAP NAS (QVPN App) and Windows/Mac WireGuard tool?
Applicable Products
All QNAP NAS models that support QVPN Service with WireGuard
Windows / macOS with the WireGuard client tool
Scenario
Users may want to establish a secure VPN tunnel between their QNAP NAS and a Windows/macOS client using the WireGuard protocol. This guide explains how to generate and configure the required keypairs and connection settings on both the NAS and client.
Procedure
Follow these steps to create and configure a WireGuard VPN tunnel between QNAP NAS and Windows/macOS:
On QNAP NAS:
- Open QVPN Service on your NAS and go to the WireGuard page.
- Enable WireGuard VPN Server by checking the box.
- Set a Server name.
- Click Generate Keypairs to auto-generate the NAS’s 32-byte private key and public key.
On Windows/macOS Client:
- Open the WireGuard client and press Ctrl + N to create a new tunnel.
- Enter a tunnel name and copy the Public Key generated by the client.
Back on NAS:
- In QVPN WireGuard page, click Add Peer.
- Enter a Peer name (e.g., WindowsClient), and paste the client’s Public Key into the NAS’s Peer configuration.
- Click Apply to save the peer.
Configure Tunnel on Windows/macOS:
- Under [Interface], add:
Address = 198.18.7.2/32
DNS = 1.1.1.1 # (Optional - only if DNS was set in NAS WireGuard config)- Under [Peer], add:
PublicKey = <NAS Public Key>
AllowedIPs = 0.0.0.0/1, 128.0.0.0/1
Endpoint = mydevicename.myqnapcloud.com:51820
PersistentKeepalive = 10
Replace mydevicename.myqnapcloud.com with your NAS WAN IP or myQNAPcloud DDNS address.
Click Save on the WireGuard client, then click Activate to establish the VPN connection.

Ensure that QuFirewall allows incoming traffic on UDP port 51820.
Replace IPs and DNS as needed based on your actual configuration.


