How to use Surfshark on a QNAP Device Using OpenVPN


Last modified date: 2022-02-14

How to Configure Surfshark on QVPN Service using OpenVPN

This tutorial explains how to configure Surfshark on your QNAP device using OpenVPN. This tutorial is also available on the Surfshark website.

Downloading Surfshark Server Information

The first step is to download a Surfshark OpenVPN configuration file. These files are used to configure QVPN Service to access the Surfshark VPN server that best meets your needs.

  1. Go to https://surfshark.com/.
  2. Click Log in.
  3. Enter your email account information.
  4. Click Log in.
  5. Go to VPN > Manual setup.
  6. Click Router.
  7. Click OpenVPN.

Surfshark downloads the single OpenVPN configuration file to your computer.

Installing QVPN Service

  1. Depending on your device, log on to QTS or QNE as an administrator.
  2. Open App Center, and then click .

    A search box appears.

  3. Enter QVPN Service.

    The QVPN Service application appears in the search results.

  4. Click Install.

    The installation window appears.

  5. Select a volume to install QVPN Service.
  6. Click OK.

    The operating system installs the application.

Creating an OpenVPN Client Connection

The next step is to configure QVPN Service using the file you downloaded earlier.

  1. Open QVPN Service.
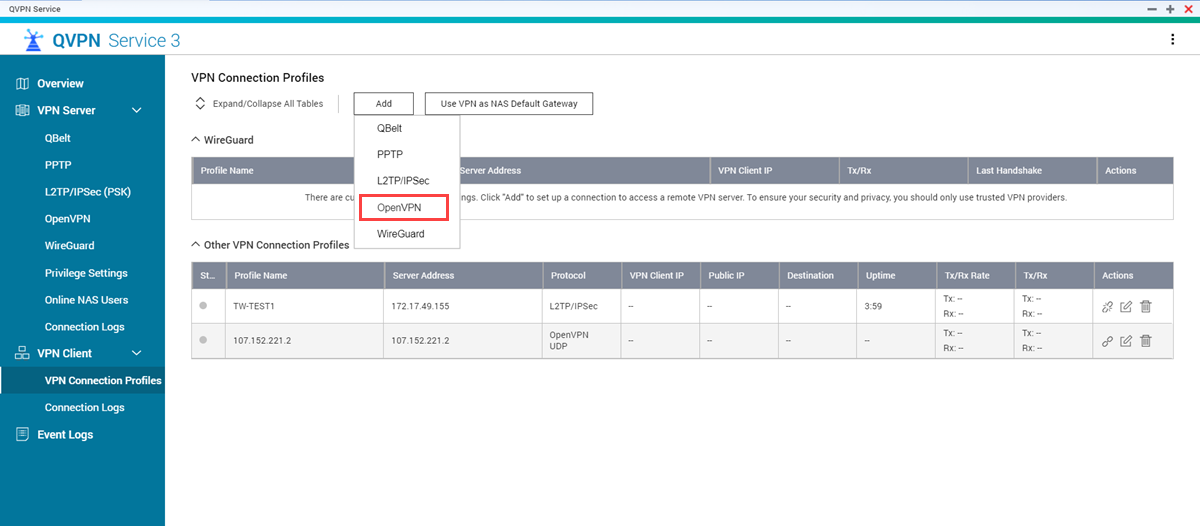
  2. Go to VPN Client > VPN Connection Profiles.
  3. Click Add.
  4. Select OpenVPN.

    A File Explorer window opens.

  5. Locate the OpenVPN configuration file on your device.
  6. Click Open.

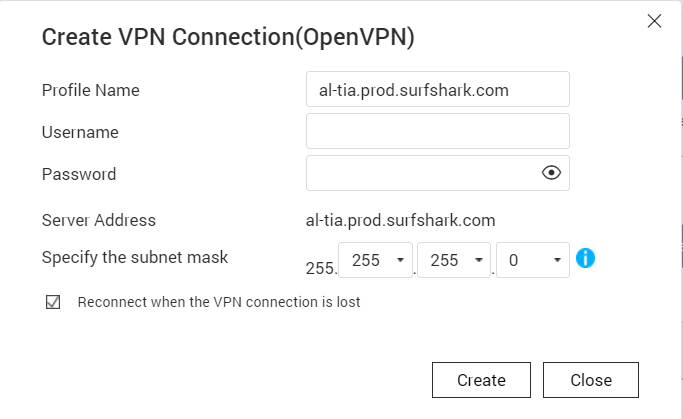
    The Create VPN Connection (OpenVPN) window opens.

    Setting

    User Action

    Profile Name

    Specify a name to help identify this profile.

    Username

    Specify the username to access the VPN server.

    Password

    Specify the password to access the VPN server.

    Specify the subnet mask

    Specify the subnet mask.

  7. Optional: Select Reconnect when the VPN connection is lost.
  8. Click Create.

QVPN Service saves the OpenVPN VPN client settings.

Connecting to the VPN

The final step is to connect to the VPN from the QNAP device.

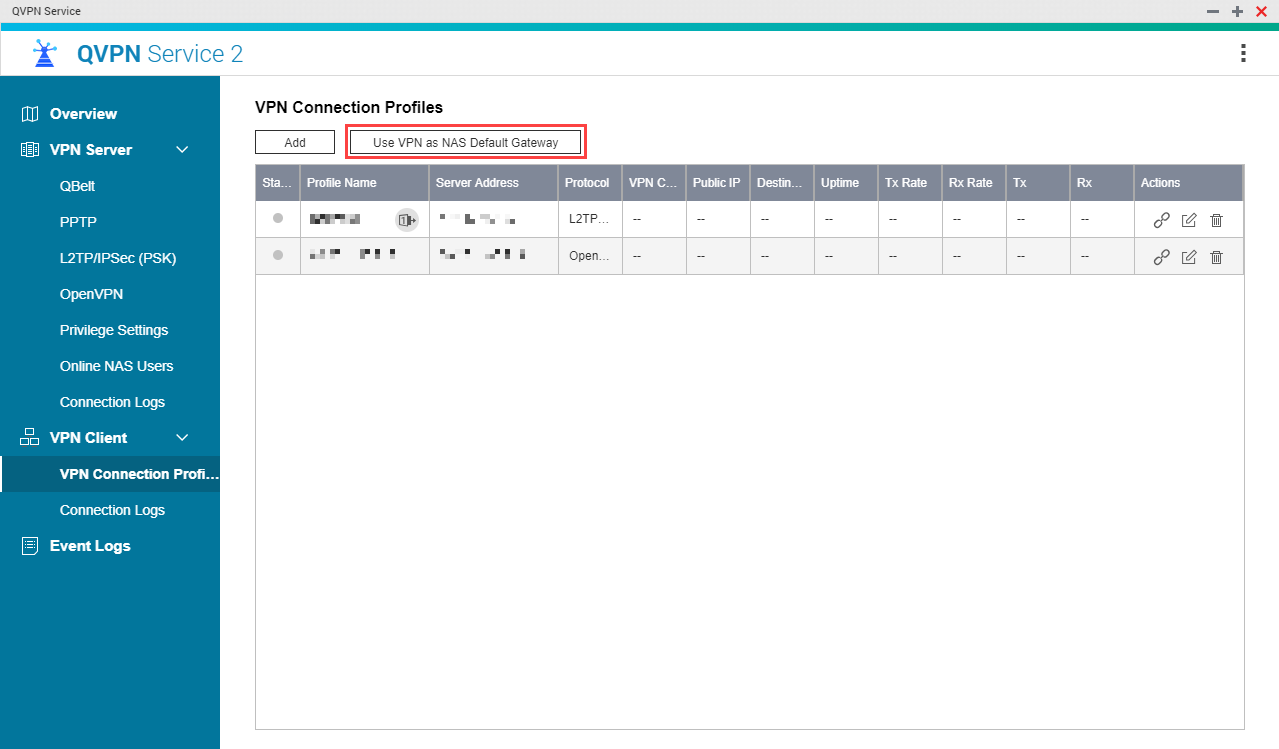
  1. Open QVPN Service.
  2. Select the VPN profile you created previously.
  3. Click Use VPN as NAS Default Gateway.

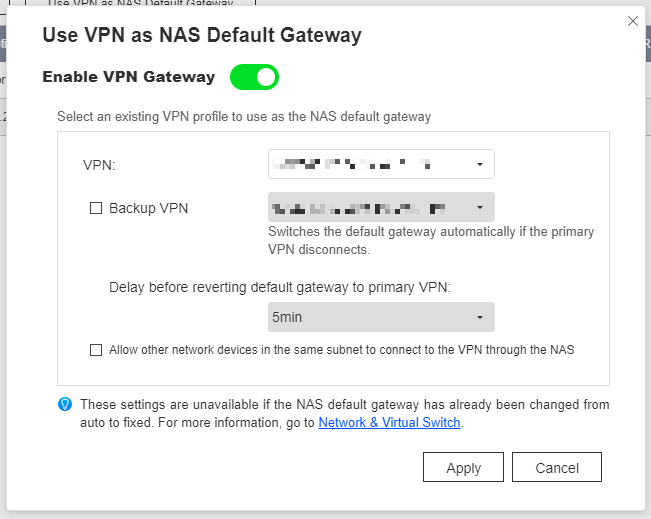
    The Use VPN as NAS Default Gateway window opens.

  4. Click
  5. Optional: Enable a Backup VPN.
    1. Select a backup VPN profile.
    2. Specify a delay.
  6. Optional: Select Allow other network devices in the same subnet to connect to the VPN through the NAS.
  7. Click Apply.

QVPN Service establishes the client VPN connection.

Was this article helpful?

69% of people think it helps.
Thank you for your feedback.

Please tell us how this article can be improved:

If you want to provide additional feedback, please include it below.

เลือกสเปค

      ดูเพิ่มเติม น้อยลง

      This site in other countries/regions:

      open menu
      back to top