How to Build a High-speed Media Editing Environment for Adobe Premiere Pro


Last modified date: 2019-04-11

About This Tutorial


Your QNAP NAS is the perfect tool to help create a high-speed media editing environment that integrates well with Adobe Premiere Pro. Whether dealing with multiple projects, HD audio, or 4k video, your QNAP NAS can help you:

  • Create a network drive to access NAS folders from your PC.
  • Transfer files from your PC at lighting quick speeds.
  • Import files stored on the NAS directly into Adobe Premiere Pro.
  • Instantly share files with clients or colleagues.

QTS Configuration

In order to use your QNAP NAS to consolidate and store your media files, you must connect your PC to the shared folders on your NAS.

Configuring SMB 3

  1. Log in to the NAS.
  2. Go to Control Panel > Network & File Services > Win/Mac/NFS > Microsoft Networking.
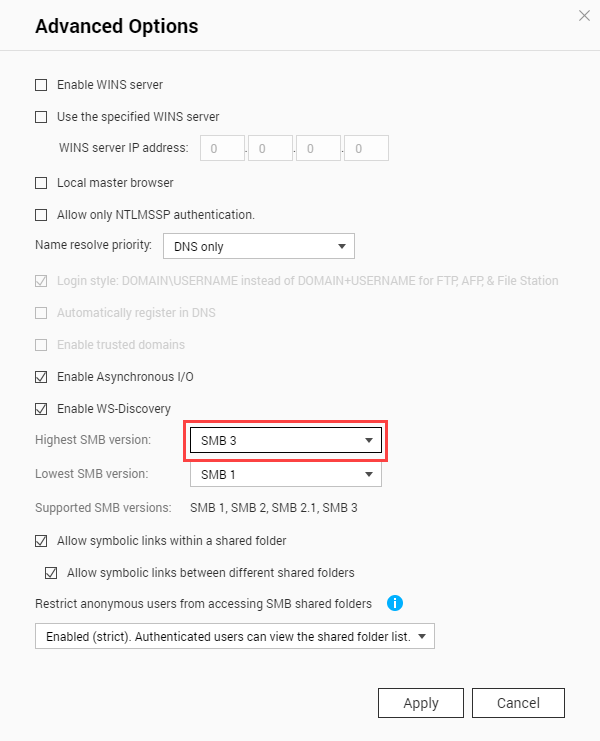
  3. Click Advanced Options.
    The Advanced Options window opens.
  4. Locate Highest SMB version.
  5. Select SMB 3.
  6. Click Apply.

Editing Shared Folder Permissions

  1. Go to Control Panel > Privilege > Shared Folders > Shared Folder.
  2. Locate a shared folder.
  3. Under Action, click .
    The Edit Shared Folder Permission window appears.
  4. Under Select permission type, select a permission type to edit.
  5. Perform any of the following tasks.
    Permission Type Description User Action
    Users and groups permission Edit user and user group permissions for shared folders that can be accessed through Windows, macOS, FTP, and File Station.
    1. Specify permissions for each user and user group.
    2. Optional: Add a user to the list of users with permissions for the shared folder.
      1. Click Add. The Select users and groups window appears.
      2. Select the type of user or user group from the drop-down menu in the upper left.
      3. Select the permissions for the users you want to add.
      4. Click Add. QTS adds the users and their corresponding permissions to the list.
    3. Optional: Remove a user from the list of users with permissions for the shared folder.
      1. Click the user you want to remove.
      2. Click Remove. QTS removes the user from the list.
    4. Optional: Modify guest access rights. Under Guest Access Right, select the permission type for guest accounts.
    NFS host access Edit NFS host access rights for shared folders.
    1. Select the Access right to enable NFS access rights.
    2. Under Host / IP / Network, enter an IP address or domain name.
    3. Optional: Add an NFS host. Under Allowed IP Address or Domain Name, click Add. QTS adds an entry to the list.
    4. Optional: Delete an NFS host.
      1. Select an NFS host from the list.
      2. Click Delete. QTS removes the host from the list.
    Microsoft Networking host access Specify which computers can access shared folders through Microsoft Networking.
    1. Add a Microsoft Networking host. Click Add. QTS adds an entry to the list.
    2. Under Host / IP / Network, enter an IP address or domain name.
    3. Optional: Delete a Microsoft Networking host.
      1. Select a Microsoft Networking host from the list.
      2. Click Delete. QTS removes the host from the list.
  6. Click Apply.

Shared Folder Mounting

Qfinder Pro

Qfinder Pro can discover available QNAP NAS devices and shared folders on your network. Mounting a NAS shared folder as a network drive allows easy access and management of files from your PC.

Note:

To download and install Qfinder Pro for macOS, go to https://www.qnap.com/utilities/.

Mounting a Shared Folder to Windows 10

  1. Open Qfinder Pro.
    Qfinder Pro displays all QNAP NAS devices connected to the local area network.
  2. Select the NAS and then go to Tools > Map Network Drive.
  3. Select a shared folder and then click Map Network Drive.
  4. Enter the NAS user name and password.
  5. Specify a drive letter for the shared folder.
  6. Click Finish.

The shared folder is mapped as a network drive and can be accessed using Windows Explorer.

Mounting a Shared Folder to macOS

  1. Open Qfinder Pro.
    Qfinder Pro displays all QNAP NAS devices connected to the local area network.
  2. Select the NAS and then click Network Drives.
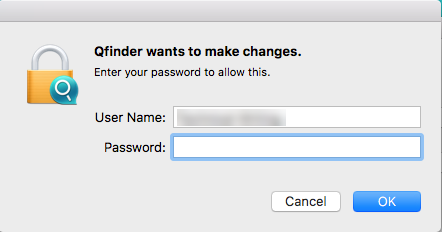
  3. Enter the NAS user name and password.
  4. Click OK.
    The Mount Network Drives window appears.
  5. Select SMB/CIFS.
  6. Select Add mounted folders to "Favorites" in Finder and then click OK.
    A confirmation window opens.
  7. Click Yes.
  8. Enter the macOS user name and password.
  9. Click OK.
  10. Select the shared folder and then click OK.

The shared folder is mapped as a network drive can be accessed using Qfinder.

Operating System

Mounting a Shared Folder to Windows 10

  1. Open Windows Explorer.
  2. Enter the NAS IP address.
  3. Right-click a shared folder.
  4. Select Map network drive.
    The Map Network Drive window opens.
  5. Specify a drive letter for the shared folder.
  6. Click Finish.
  7. Enter the NAS user name and password.
  8. Click OK.

The shared folder is mapped as a network drive and can be accessed using Windows Explorer.

Mounting a Shared Folder to macOS

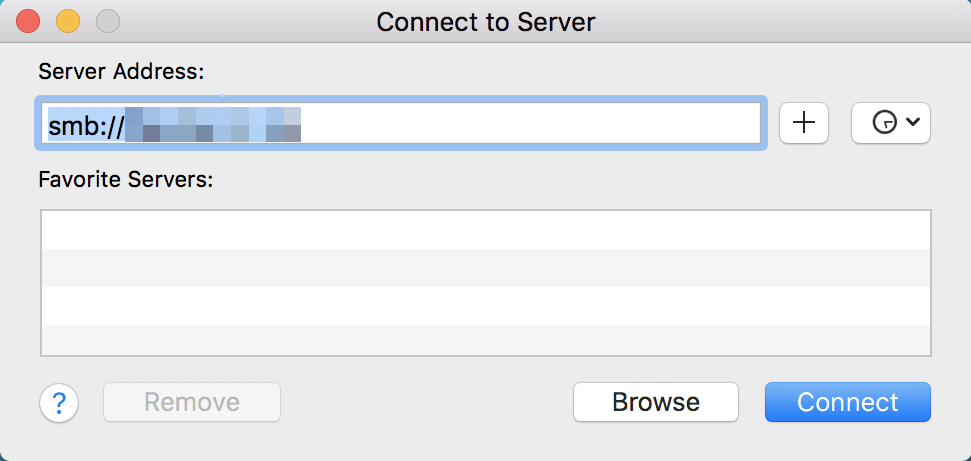
  1. In Finder, go to Go > Connect to Server.
    The Connect to Server window opens.
  2. Enter the protocol and NAS IP address.
    Important: Use SMB:// before the IP address.
  3. Click Connect.
    The Volume Mountwindow opens.
  4. Select a shared folder.
  5. Click OK.

The shared folder is mapped as a network drive and can be accessed.

Creating projects on the NAS with Adobe Premiere

  1. Open Adobe Premiere.
  2. Click New Project.
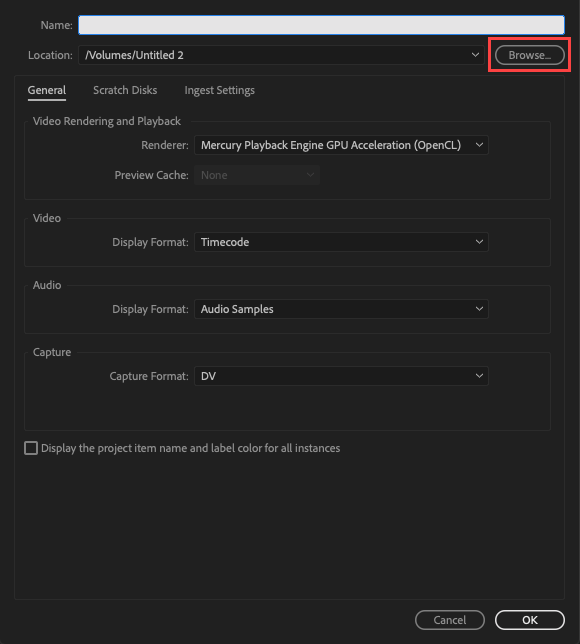
    The New Project window opens.
  3. Click Browse.
    A window opens.
  4. Locate the shared folder on the NAS.
  5. Click Select.
  6. Configure the new project.
  7. Click OK.

An Adobe Premiere project is created on the NAS.

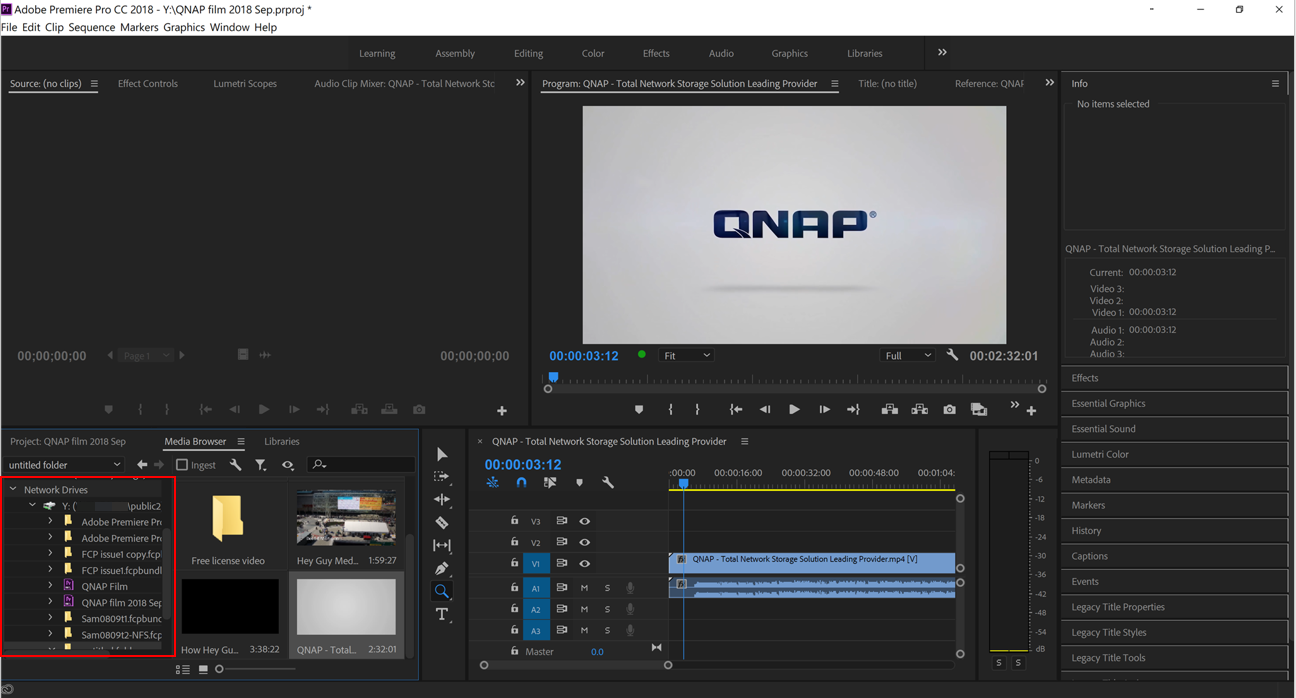
Importing from the NAS to Adobe Premiere

  1. Open an Adobe Premiere project.
  2. Go to Media Browser.
  3. Locate the shared folder.
  4. Select one or more files.
  5. Import media files.
    • Select File > Import From Browser.
    • Right-click the files and then select Import.
    • Drag the files from the media browser into the Project panel.

The media files are imported into the Adobe Premiere project.

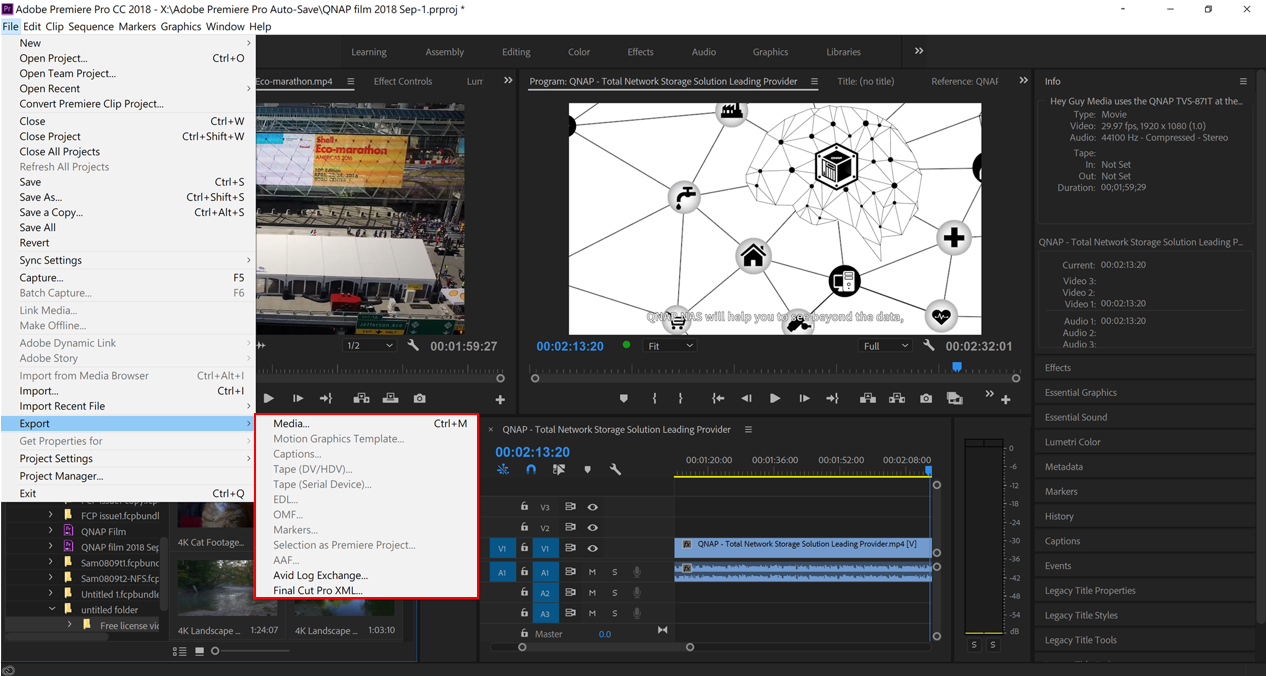
Exporting to the NAS from Adobe Premiere

  1. Open an Adobe Premiere project.
  2. Go to File > Export > Media.
    The Export Settings window opens
  3. Click the Output Name.
    The Save As window opens.
  4. Locate the shared folder.
  5. Enter a file name.
  6. Click Save.
  7. Configure remaining export settings.
  8. Click Export.

The Adobe Premiere project is exported to the NAS.

Adobe Premiere Performance Tips

The following steps can help improve the performance of Adobe Premiere on your device.

For more detailed information, please go to the Adobe support site.

  1. Open Adobe Premiere.
  2. Click Edit > Preferences.
    The Preferences window opens.
  3. Optional: Change the Media Cache location.
    1. Go to Media Cache.
    2. Locate the Media Cache Files section.
    3. Click Browse.
      A window opens.
    4. Specify a local folder.
    5. Click OK.
    6. Locate the Media Cache Database section.
    7. Click Browse.
      A window opens.
    8. Specify a local folder.
    9. Click OK.
    Tip: For best performance, use a PCIe SSD drive to store the cache.
  4. Optional: Change the available memory.
    1. Go to Memory.
    2. Lower the RAM reserved for other applications.
  5. Optional: Disable audio waveform generation.
    1. Go to Audio.
    2. Disable Automatic audio waveform generation.
  6. Click OK.
  7. Optional: Change the playback resolution.
    1. Open an Adobe Premiere project.
    2. Right-click in the program monitor window.
    3. Go to Playback Resolution.
    4. Select a lower resolution.
      Note: Reducing Playback Resolution only applies to playback; it does not affect your export settings.

Was this article helpful?

87% of people think it helps.
Thank you for your feedback.

Please tell us how this article can be improved:

If you want to provide additional feedback, please include it below.

เลือกสเปค

      ดูเพิ่มเติม น้อยลง

      This site in other countries/regions:

      open menu
      back to top