What are access and trunk modes? How to configure them?
Applicable Products
- QHora-301W
Answer
QHora-301W LAN ports supports both access and trunk modes. By default, a port uses access mode and transfers data if VLAN is not required. You can use trunk mode if you want to transfer data over one or more VLANs.
The router allows users to configure LAN ports and assign specific LAN ports to VLAN IDs in order to enable port trunking. Depending on whether you have configured a VLAN on QuRouter, QHora-301W supports access and trunk modes on individual LAN ports for added flexibility.
Access Mode
Access mode is used in an environment where VLANs are not configured. The router carries traffic without VLAN tagging and uses this mode to connect end-user devices such as laptops, NAS, and printers.

Trunk Mode
Trunk mode is accessible in a VLAN-configured environment and is designed for connecting devices using tagged VLANs (e.g., VLAN-enabled switches and NICs). Ports using trunk mode can be linked between various network devices and are capable of carrying traffic across multiple VLANs.

Configure the VLAN settings
- Log in to QuRouter.
- Go to Network > VLAN & DHCP Server Service Settings.
- Click Add VLAN.
- Configure the IPv4 address assignment settings.
- Specify the VLAN ID.
- Specify a VLAN description that contains a maximum of 256 characters.
- Specify a fixed IP address.
- Select a subnet mask from the drop-down menu.
- Specify the MTU value.
- Select Enable Spanning Tree Protocol (STP).
- Configure the DHCP server settings.
- Specify the start IP address.
- Specify the end IP address.
- Specify the DHCP lease time.
- Configure the DNS server connection.
- Use the VLAN IP address: Selects the fixed IP address assigned to the VLAN ID.
- Manually: Specify new primary and secondary DNS server IP addresses.
- Configure the IP reservation settings.
- Click Add.
- Specify the device name.
- Specify the IP address.
- Enter the MAC address of the device.
- Click
 .
.
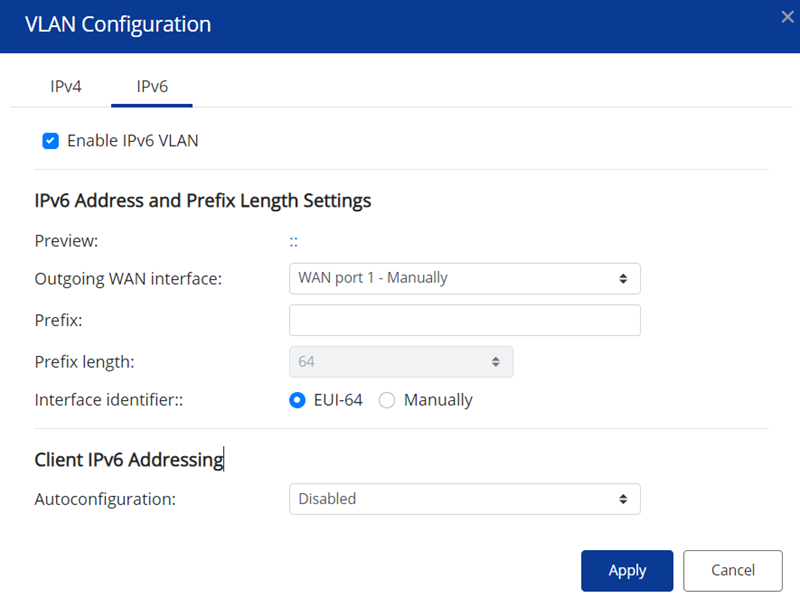
- Configure the IPv6 address assignment settings.
- Click IPv6.
- Select the outgoing WAN interface from the drop-down list.
- Specify the IPv6 IP address prefix.
- Select the prefix length from the drop-down list.
- Select the interface identifier to identify interfaces on the link.
- EUI-64: Select Extended Unique Identifier (EUI-64) to automatically configure the IPv6 host address.
- Manually: Specify an interface ID to configure the IPv6 host address.
- Assign a client IPv6 addressing mode from the drop-down list.
- Stateful: The stateful DHCPv6 or managed mode allows you to manually assign a unique IPv6 address to each client.
- Stateless: The stateless DHCPv6 mode enables users to manually enter additional IPv6 information including the lease time, but automatically assigns a unique IPv6 address to each client.
- SLAAC+RDNSS: Stateless Address Auto-Configuration (SLAAC) along with Recursive DNS Server (RDNSS) enables users to manually assign an IP address based on the IPv6 prefix and uses recursive queries to resolve the domain name.
- Disabled: Disables IPv6 client addressing.
- Click Apply.
- Go to Network > WAN & LAN Settings.
- Identify a LAN port.
- Click
 .
. - Select the VLAN mode.
- Click Apply.
QuRouter saves the settings.


