How do I set up or change the storage path in HDP for SaaS 2.0 and later?
Applicable Products
HDP for SaaS
Starting from version 2.4, the product previously known as Boxafe has been renamed to HDP for SaaS.
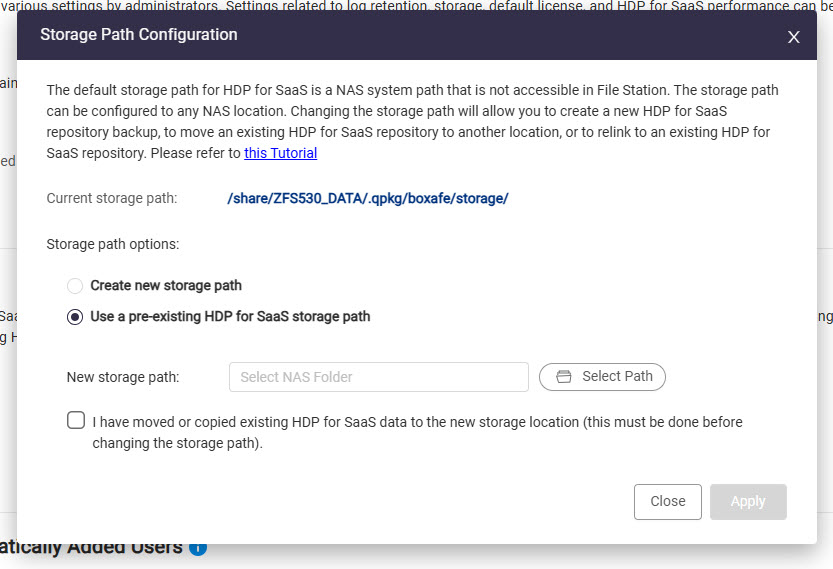
The HDP for SaaS Storage Path
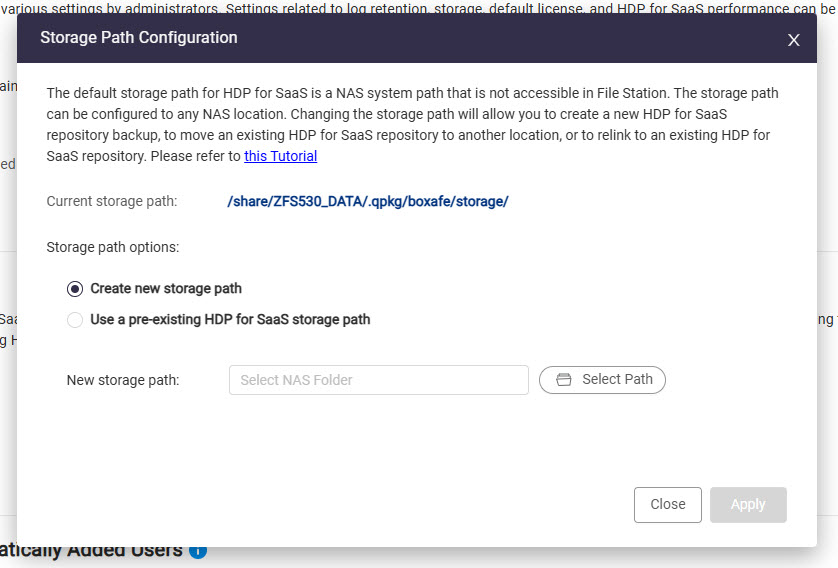
The HDP for SaaS storage path is the folder where HDP for SaaS backup data is stored. The storage path is set by default to a specific folder on your NAS and this folder cannot be accessed by other QNAP apps, such as File Station. In Boxafe version 1.x, the storage path cannot be changed, but in HDP for SaaS versions 2.0 and later, the storage path can be changed to be any folder on your NAS. By changing the storage path, HDP for SaaS backup data can be made accessible to other QNAP apps such as File Station, Storage & Snapshots, and Hybrid Backup Sync.
This tutorial explains the different options for the HDP for SaaS storage path and provides solutions to several common user scenarios involving the storage path.
Storage Path Options
| Storage Option | Description |
|---|---|
| Keep current storage path | Sets the HDP for SaaS storage path to the default HDP for SaaS storage path. Tip This option appears only when starting HDP for SaaS 2.0 for the first time |
| Create new storage path | Sets the HDP for SaaS storage path to a new location. The new location must be an empty folder. Important
|
| Use a pre-existing HDP for SaaS storage path | Sets the HDP for SaaS storage path to a storage location that had been used as a HDP for SaaS storage path previously. Tip
|
Scenarios
The following user scenarios involve configuring the HDP for SaaS storage path:
Configuring the HDP for SaaS storage path for the first time (new HDP for SaaS 2.0 and later users)
- Open HDP for SaaS.
The Storage Path Configuration window appears.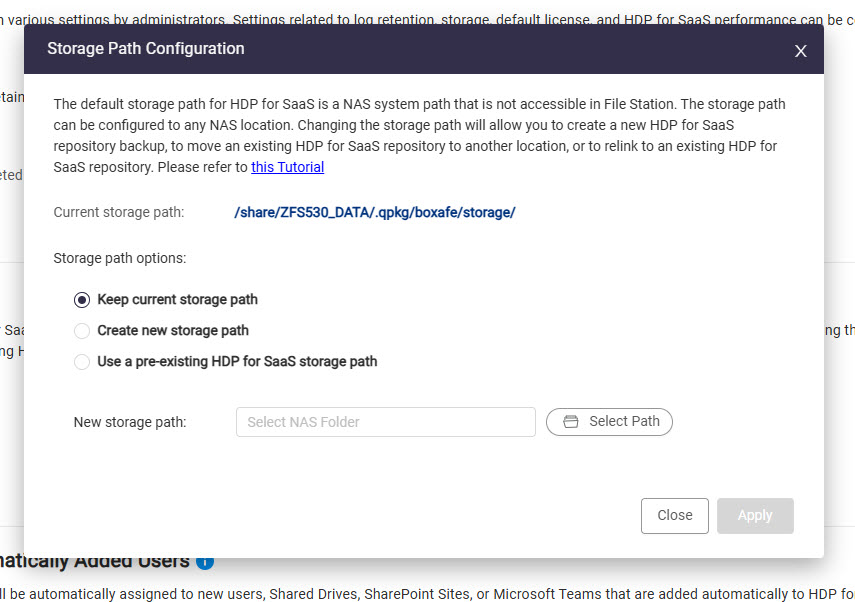
- Select one of the following:
- Keep current storage path
- Create new storage path
For details, see the section "Creating a new HDP for SaaS storage" below. - Use a pre-existing HDP for SaaS storage path
For details, see the section "Migrating an Existing HDP for SaaS Storage to Another Location" below.
- If Create new storage path was selected then specify the new folder, or if Use a pre-existing HDP for SaaS storage path was selected then specify the existing HDP for SaaS storage location:
- Next to New storage path, click Select Path.
The Select NAS Folder window appears. - Select the desired folder.
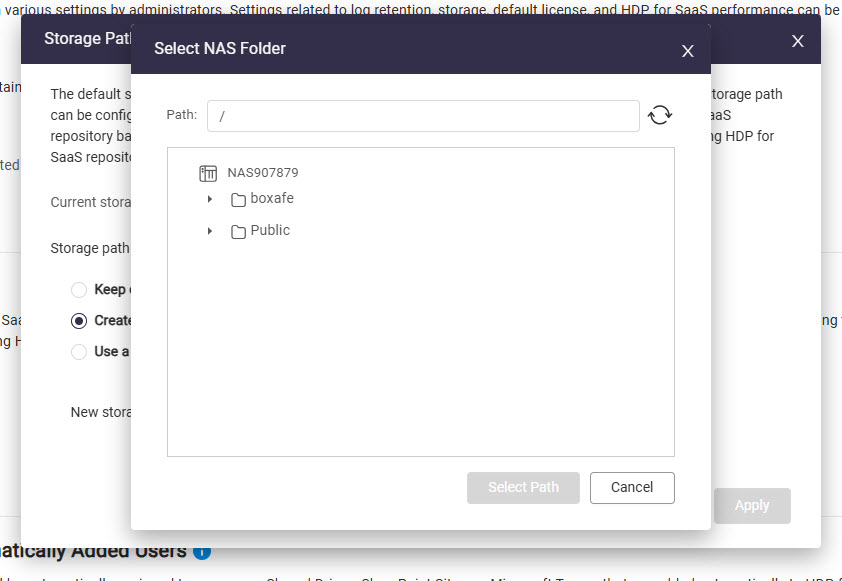
- Click Select Path.
- Click Apply.
- Next to New storage path, click Select Path.
- If Use a pre-existing HDP for SaaS storage path was selected, then select I have moved or copied existing HDP for SaaS data to the new storage location.
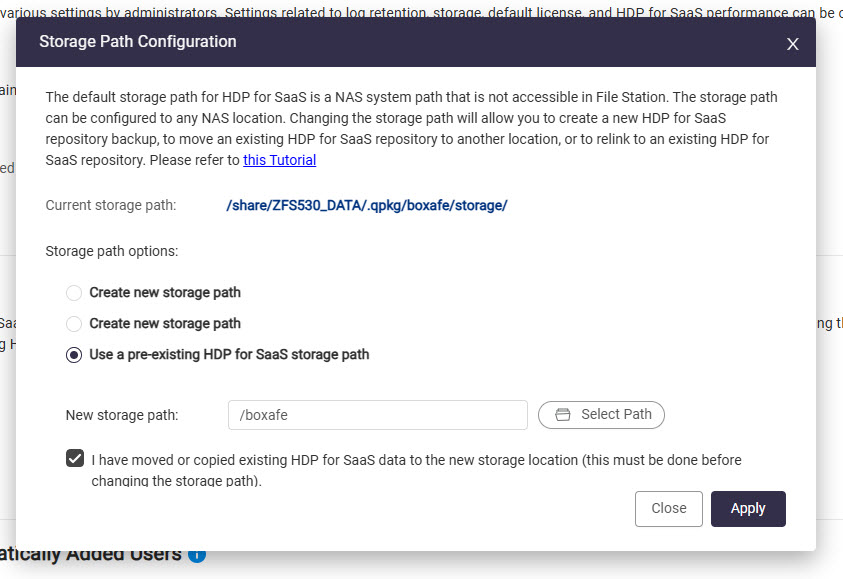
- Click Appy.
The Confirmation Storage Path Change window appears. - Enter your NAS account password.
- Click Confirm.
Creating a new HDP for SaaS storage
- Log into your NAS as an administrator.
- Create a new folder.
- Open File Station.
- Navigate to the desired parent folder.
- Create a new folder by clicking
 .
. The Create folder window appears.
 - Under Folder name, specify the folder name.
- Click OK.
- Open HDP for SaaS 2.0.
- Go to Settings > Preferences > Storage Settings.
- Next to Storage path, click
 .
.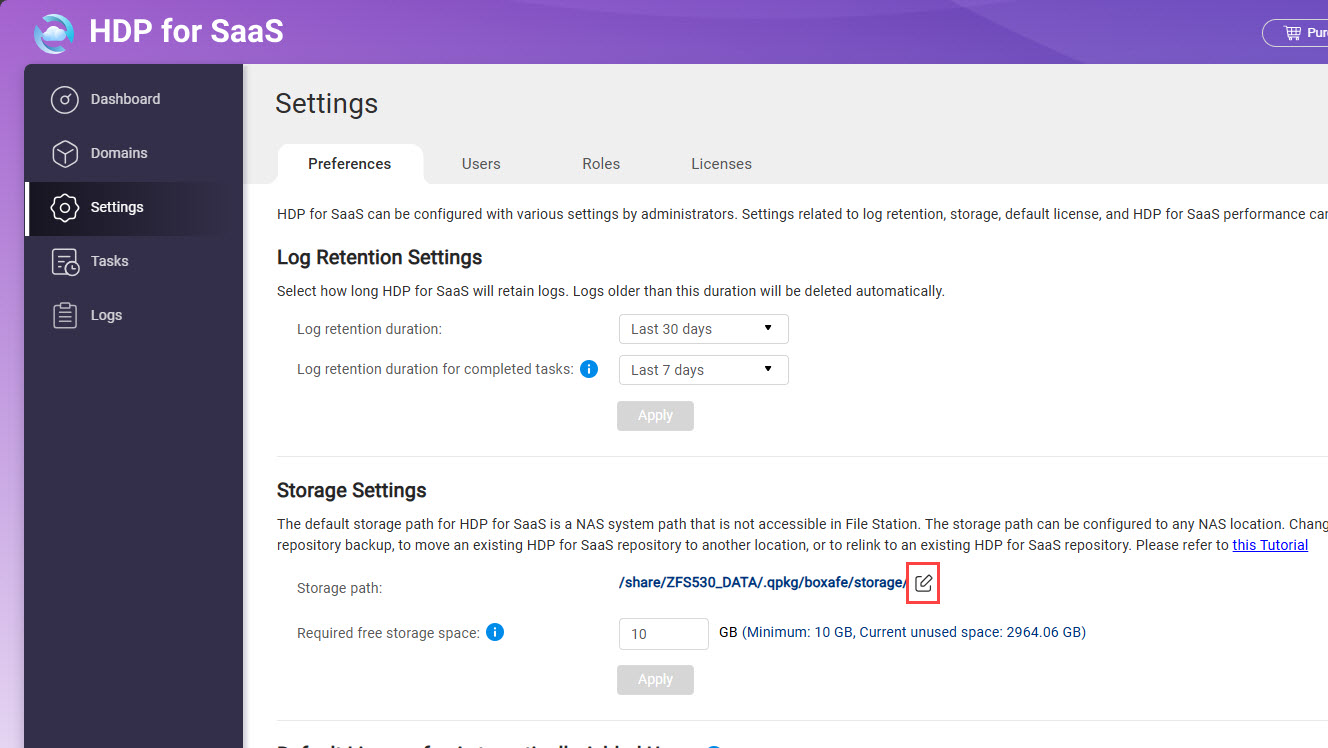 The Storage Path Configuration window appears.
 - Select Create new storage path.
- Next to New storage path, click Select Path.
The Select NAS Folder window appears. - Select the newly created folder from the above steps.

- Click Select Path.
- Click Apply.
The Confirmation Storage Path Change window appears. - Enter your NAS account password.
- Click Confirm.
The HDP for SaaS storage path is set to the new folder. Backup jobs can now be run as normal to backup your domain data.
Moving an existing HDP for SaaS storage to another folder
An existing HDP for SaaS storage can be moved to another folder by performing the following steps:
- Log into your NAS as an administrator.
- If HDP for SaaS is running, stop HDP for SaaS.
- Open App Center.
- Locate HDP for SaaS.
- Click
 .
. - Click Stop.
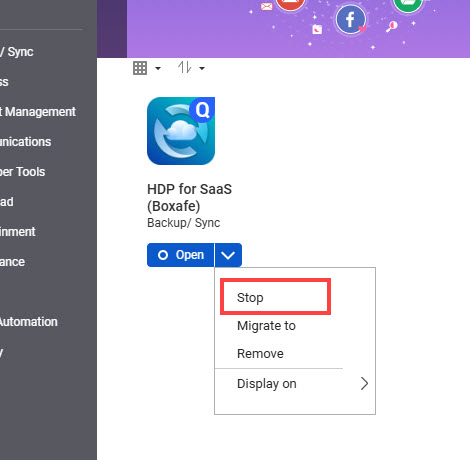
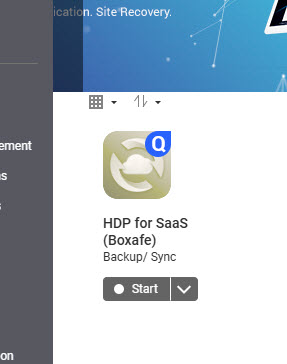
- Stopping HDP for SaaS may take several minutes. When HDP for SaaS is stopped, the HDP for SaaS app button will display "Start".
- Create the destination folder.
- Open File Station.
- Navigate to the desired parent folder.
- Create a new folder by clicking .The Create folder window appears.
- Under Folder name, specify the folder name.ImportantHDP for SaaS does not support folder names with special characters or spaces.
- Click OK.
- Move HDP for SaaS storage data from the current source folder to the new destination folder.
- Access your NAS via SSH by following the steps in How do I access my QNAP NAS using SSH?
- In the SSH terminal, enter the following commands:
mv -f <source_folder> <destination_folder>/Variable Description Example <source_folder> The source storage path /share/CACHEDEV1_DATA/.qpkg/boxafe/storage <destination_folder> The destination storage path /share/Public/BoxafeStorage A subdirectory "Storage" under <destination_folder> will be created and all files in the source folder are migrated to <destination_folder>/Storage.
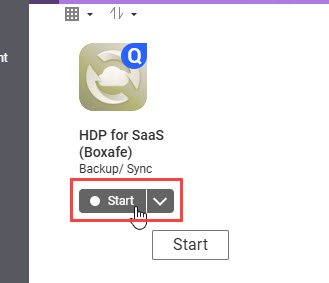
- Start HDP for SaaS.
- Open App Center.
- Locate HDP for SaaS.
- Click Start.
- Open HDP for SaaS.
- Go to Settings > Preferences > Storage Settings.
- Next to Storage path, click .
- Select Use a pre-existing HDP for SaaS storage path.
- Next to New storage path, click Select Path.
The Select NAS Folder window appears. - Select the destination storage folder.

- Click Select Path.
- Select I have moved or copied existing HDP for SaaS data to the new storage location.

- Click Apply.
The Confirmation Storage Path Change window appears. - Enter your NAS account password.
- Click Confirm.
It may take several minutes to apply the new storage path. After the new storage path is successfully applied, a success window appears. - Click OK.
- Refresh the browser page.
HDP for SaaS will now use the new storage path.


