Notes Station 3
- Installation Requirements
- User Interface
- Creating a Note
- Creating Notes with Notes Station 3 Web Clipper
- Securing Notes
- Sharing Notes
- Importing Notebooks
- Exporting Notebooks
- Managing Notes
- Managing Notes
Installation Requirements
| Category | Requirements |
|---|---|
| Hardware |
|
| Software |
|
Installing Notes Station 3
Installing Notes Station 3 Web Clipper
- Open a tab in Google Chrome.
- Go to the Chrome Web Store.
- Search for Notes Station 3 Web Clipper.
- Click Add to Chrome.
User Interface
Toolbar

| No. | Element | Possible User Actions |
|---|---|---|
| 1 | Search bar | Search all notes. |
| 2 | Profile | View profile details. |
| 3 | Notifications | Display notifications received. |
| 4 | Settings |
|
| 5 | New Note | Create a new note. |
Menu Bar

| No. | Element | Possible User Action |
|---|---|---|
| 1 | Trash can | View all deleted notes. |
| 2 | Share | Share notes |
| 3 | Tags | Add tags to notes. |
| 4 | Favorite | Save as favorite. |
| 5 | Encrypt note | Set password encryption to note. |
| 6 | Snapshot for version control | Take a note snapshot for version control. |
| 7 | Snapshot version manager | Take a note snapshot for version manager. |
| 8 | Fullscreen | Display in fullscreen. |
| 9 | Print mode | Print notes |
| 10 | Note information | View note information details. |
| 11 | Top | Display the menu bar on top of the note entry section. |
Left Panel

| No. | Element | Possible User Actions |
|---|---|---|
| 1 | Notebook |
|
| 2 | Tags | Filter tags by keywords. |
| 3 | Tasks |
|
| 4 | Shared notes |
|
| 5 | Collapse or Expand | Click Tip: You must expand the left panel to manage notes and view certain features. |
 to collapse or expand the left panel.
Text Formatting Toolbar
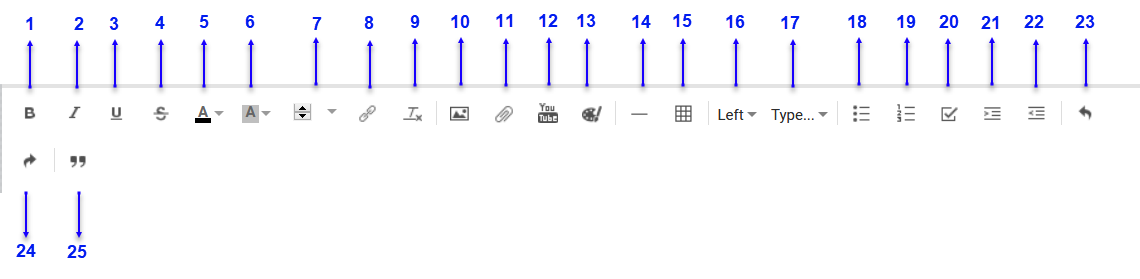
| No. | Element | Possible User Actions |
|---|---|---|
| 1 | Bold | Apply bold formatting. |
| 2 | Italics | Apply Italic formatting. |
| 3 | Underline | Apply underline formatting. |
| 4 | Strikethrough | Apply stikethrough formatting. |
| 5 | Font color | Select font color. |
| 6 | Highlight color | Select the text highlight color. |
| 7 | Font size | Adjust font size. |
| 8 | Link | Add URL link or note link. |
| 9 | Unformat | Clear text format. |
| 10 | Insert image |
|
| 11 | Attachment |
|
| 12 | Youtube | Insert a YouTube video link. |
| 13 | Image editor | Draw and save as an image. |
| 14 | Page break | Add page break. |
| 15 | Table | Add tables into the note. |
| 16 | Paragraph alignment | Align paragraph to the left, center, or right. |
| 17 | Style type | Format text into different style types. |
| 18 | Bulleted list | Create a bulleted list. |
| 19 | Ordered list | Create an ordered list. |
| 20 | Create task | Create a task. |
| 21 | Add indent | Add an indent. |
| 22 | Remove indent | Remove an indent. |
| 23 | Undo | Click |
| 24 | Redo | Click |
| 25 | Quotations | Format selected text as a quote. |
 to undo an action.
 to redo an action.
Note-taking Workspace
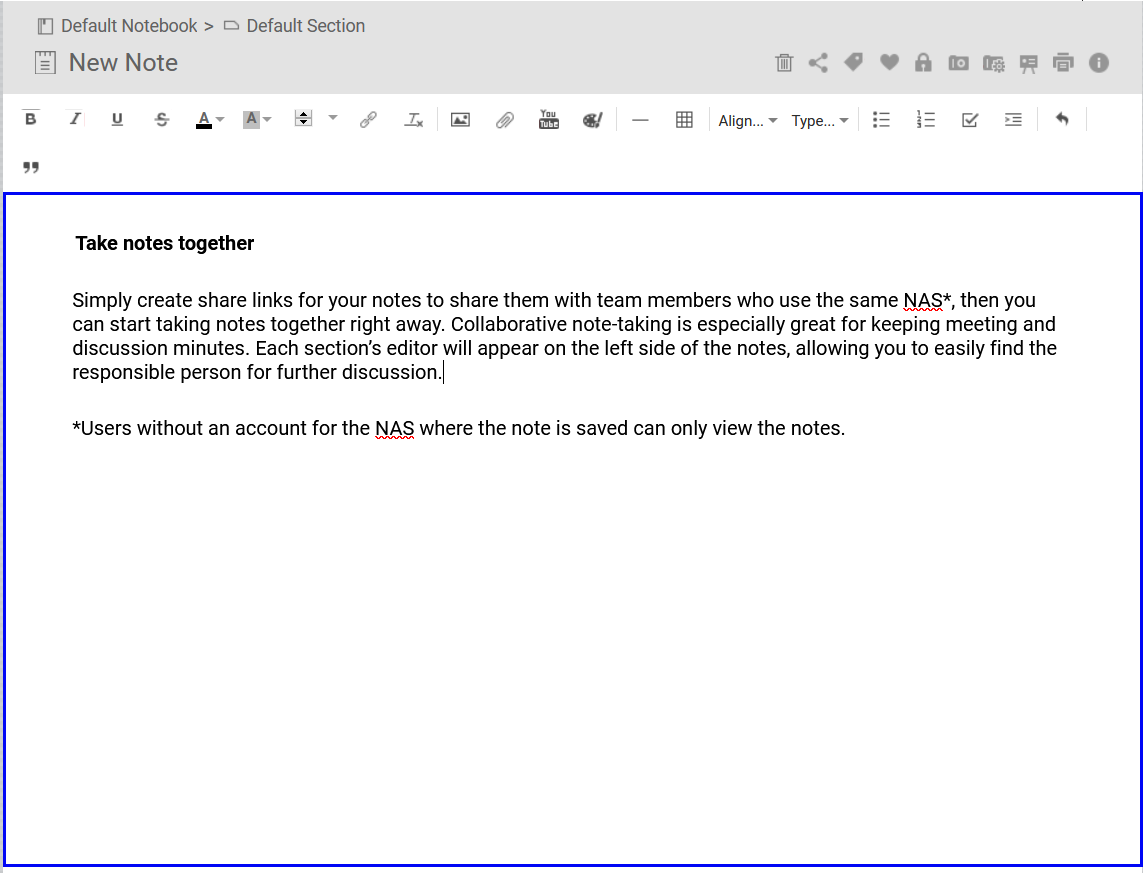
You can create text notes, insert images, attach files, embed links, and perform other tasks in the note-taking workspace.
Creating a Note
Select one of the following methods to create a note:
| Methods | Steps |
|---|---|
| Toolbar |
|
| Left Panel |
|
 .
.Inserting Images to Notes
- Click
 .
. The Choose Image window appears.
Attaching Files to Notes
- Click
 .
. Image upload methods
Steps
Upload from current computer
-
Click Choose File.
The file upload window appears.
-
Select a file.
-
Click Open.
NAS - Shared folder
-
Select a shared folder.
The files in the folder are displayed in the right panel.
-
Select the image file.
-
Click Submit.
The file is uploaded.
-
Creating Notes with Notes Station 3 Web Clipper
Create and edit a note using the Notes Station 3 Web Clipper.
About Notes Station 3 Web Clipper
Notes Station 3 Web Clipper is a Google Chrome extension for Notes Station 3 that allows you to save articles, images, and other content from the web directly to your NAS.
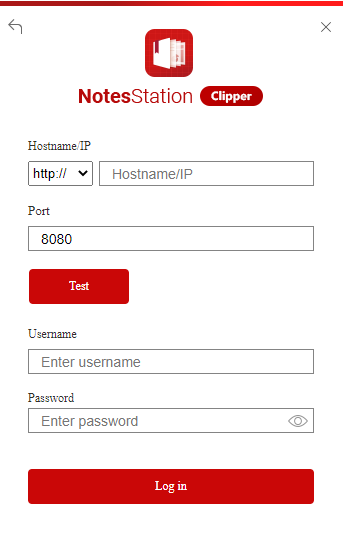
Logging In
- Open Notes Station 3 Web Clipper in Google Chrome.
The Notes Station Clipper login window appears.
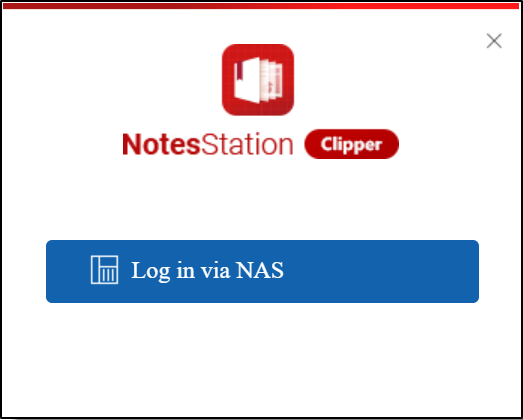
- Click Log in via NAS.
The login screen appears.
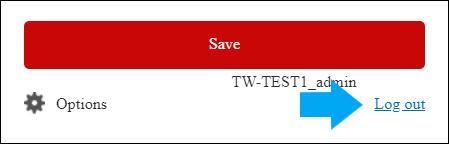
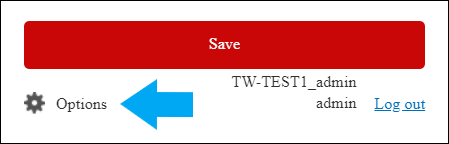
Logging Out
Below the Save button, click Log out at the bottom of the screen.
Clipping Web Pages
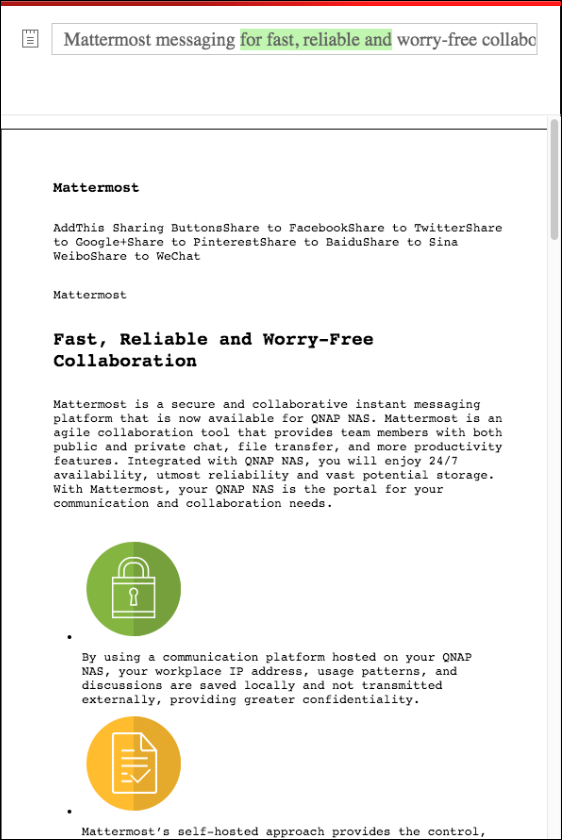
Use Notes Station 3 Web Clipper to save images and text from online articles as notes in Notes Station 3. You can clip entire articles and take full-page screenshots.
Organize notes before saving them by adding them to a new or existing notebook. You can also add tags so you can easily find them when searching for notes.
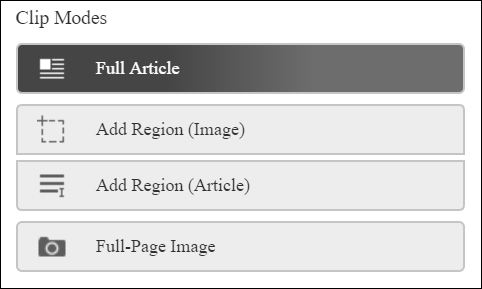
- Select a clip mode.
Clip Mode
Description
Full Article
Clip full articles and web pages. This clips everything visible on your browser, such as toolbars, tabs, and favorites.
Note:Full-page clips will contain advertisements and any other redundant elements on the web page.
Add Region (Image)
Take screenshots of specific areas of a web page.
Add Region (Article)
Select paragraphs or text excerpts from a web page.
Full-Page Image
Save an entire article or web page as an image. This clips everything in your browser window below browser-specific elements such as toolbars, tabs, and favorites.
Note:Full-page images may contain advertisements and any other redundant elements on the web page.
- Review the content of the clip on the preview screen.
 Tip:
Tip:-
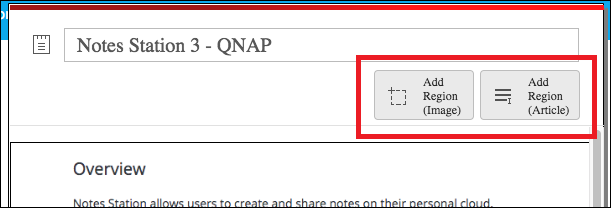
When clipping images or text, click Add Region (Image) or Add Region (Article) on the preview screen to add extra images and text to the note.
-
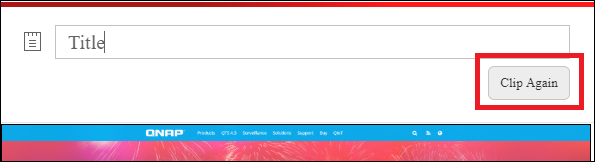
When editing full-page images, click Clip Again on the preview screen to take a new screenshot.
-
- Optional: Modify the title of the note.

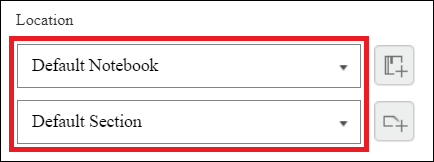
- Under Location, select the notebook and section where you want to save the note.
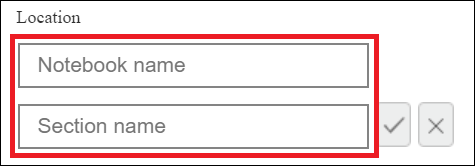
- Optional: Create a new notebook and section.
- Click
 .
. - Enter names for the notebook and section.
- Click
 .
.
- Click
- Optional: Create a new section for an existing notebook.
- Click

- Enter a name for the section.

- Click .
- Click
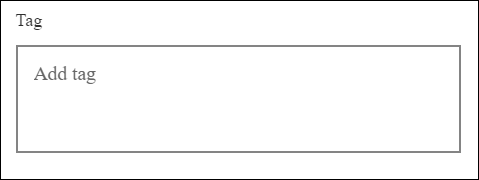
- Optional: Add tags to the note.
Configuring Options
- Below the Save button, click Options.
The Options screen appears.
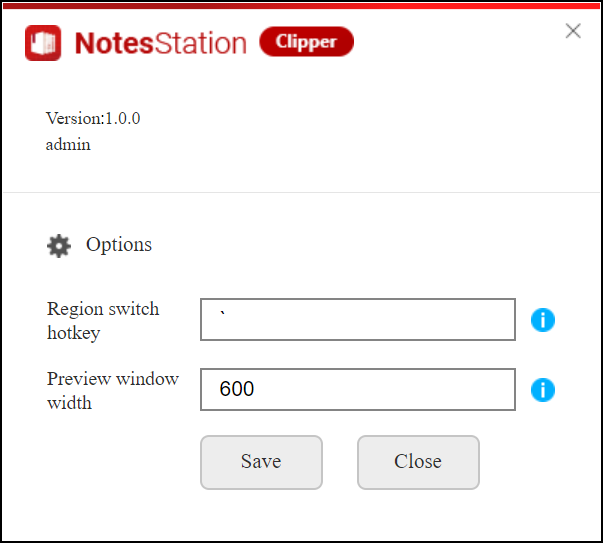
- Specify the Region switch hotkey.
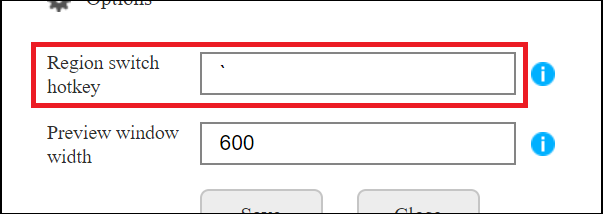
This hotkey is used for toggling between clip modes.
Note:The grave accent (`) is the default region switch hotkey.
- Specify the Preview window width.
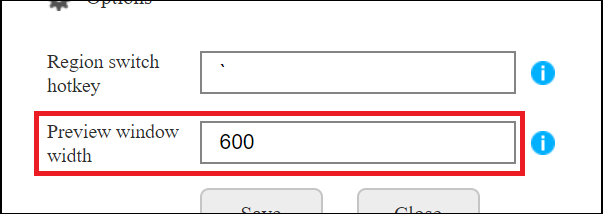
This value determines the width of the preview screen.
Securing Notes
Notes Station 3 allows you to secure your notes with password encryption or to create snapshots to back up important notes.
Encrypting Notes
You cannot encrypt a shared note that you do not own.
- Click
 .
. The Encrypt Note window appears.
Encrypting a Published Link
- Click
 .
.
Disabling Password Encryption from a Published Link
- Click .
Creating Note Snapshots
- Click
 .
. The Snapshot for version control window appears.
Viewing Snapshot Version Manager
- Click
 .
. The Snapshot version manager window appears.
Sharing Notes
You can share a note, a note section, or a notebook with others.
- Click
 .
. The Share with others window appears.
Importing Notebooks
You can import notes and notebooks from Evernotes or Notes Station from your computer or NAS.
Importing Notes to Notes Station 3
- Click
 .
. The settings drop-down menu appears.
Exporting Notebooks
You can export notes from Notes Station 3 by sharing notes with other people or exporting the notes into different file formats.
- Click
 .
. - Select one of the following note export destination options:
Options
Steps
Download
-
Specify the file format.
-
Specify the file name.
Export to NAS
-
Specify the file format.
-
Specify the file name.
-
Select a shared folder as the note export destination.
-
Click
 .
.The Choose Folder From NAS window appears.
-
Select a shared folder.
-
Click Apply.
-
-
Managing Notes
You can manage notes by notebooks, notebook sections, tags, tasks, and shared notes in Notes Station 3. You can also manage deleted items in Notes Station 3.
Managing Notebooks
- Click
 .
. - Optional: Add a notebook.
- Click
 .
.
- Click
- Edit a notebook.
- Click .
The notebook drop-down menu appears.
- Click
Managing Notebook Sections
- Click .
- Click .
The notebook section drop-down menu appears.
Managing Notes
You can manage notes by notebooks, notebook sections, tags, tasks, and shared notes in Notes Station 3. You can also manage deleted items in Notes Station 3.
Managing Tags
- Click
 .
. -
Notes with tags are displayed in the right panel.
-
All note tags are shown in the left panel.
-
- Click .
The tag options drop-down menu appears.
Adding New Tasks
- Click
 .
.
Filtering Tasks
- Click .
- Click
 .
. Directs to the note with the specified task.
Managing Shared Notes
- Click .
- You can view the following types of shared notes:
Options
Possible User Actions
Shared from Friends
View and manage notes shared from friends.
Shared to Friends
-
View and manage notes you are sharing with others.
-
Click Stop sharing to disable access to your note.
Published Link
-
View and manage public links of notes that you are sharing.
-
Click Stop sharing to unpublish the link.
-
Click
 to change note access privileges.
For details, see Changing Note Sharing Privileges.
-
Click Set Password to encrypt notes.
For details, see Encrypting a Published Link.
-
Click Cancel Password to remove password encryption from notes.
For details, see Disabling Password Encryption from a Published Link.
-
Click
 to copy the published link.
-
Modifying Note Sharing Privileges
- Click .
- Click .
The Share with others window appears.
- Click
 .
. The notes share privileges drop-down menu appears.
- Optional: Add members to a shared note.
- Click .
The notes share privileges drop-down menu appears.
- Click
- Optional: Click
 to delete members from a shared note.
 The member is removed from the shared note.
Managing Deleted Items in the Trash Can
- Click .
- Click .
The trash can drop-down menu appears.


