How to Configure Azure for Use with Cloud HAL Agent
- About This Tutorial
- Identifying the Tenant ID in Azure Portal
- Identifying an Application ID in Azure Portal
- Generating a Secret Key in Azure Portal
About This Tutorial
The Microsoft Azure portal manages access to Azure services and resources. The portal controls the creation & management of all Azure users and groups. Additionally, the portal controls user access to Azure resources.
This tutorial explains the basics of creating an Azure role for use with Cloud HAL Agent for QuTScloud. This tutorial assumes you already have an Azure account. Some parts of this process may require administrator privileges. If you are already familiar with the Azure infrastructure, you can create a custom role that best fits your needs. When creating a customer role, ensure the proper permissions are assigned.
Cloud HAL Agent requires the following information to communicate with the Azure portal.
-
Tenant ID
-
Application ID
-
Secret Key
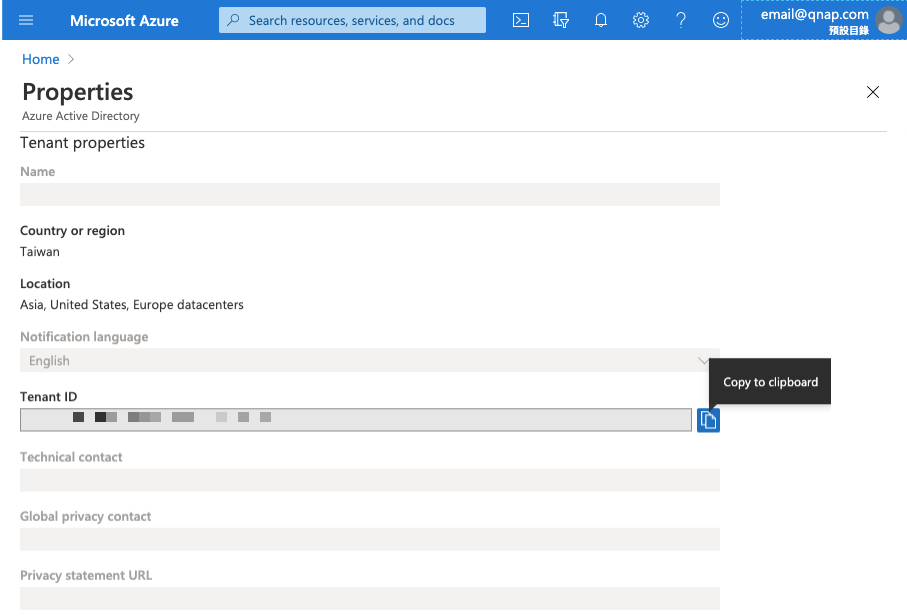
Identifying the Tenant ID in Azure Portal
An Azure subscription allows the creation of resources on the Azure platform. Azure provides several different billing methods to meet your needs. This tutorial assumes that your Azure account already has a subscription. For information on creating an Azure subscription, see here.
- Note the Tenant ID.
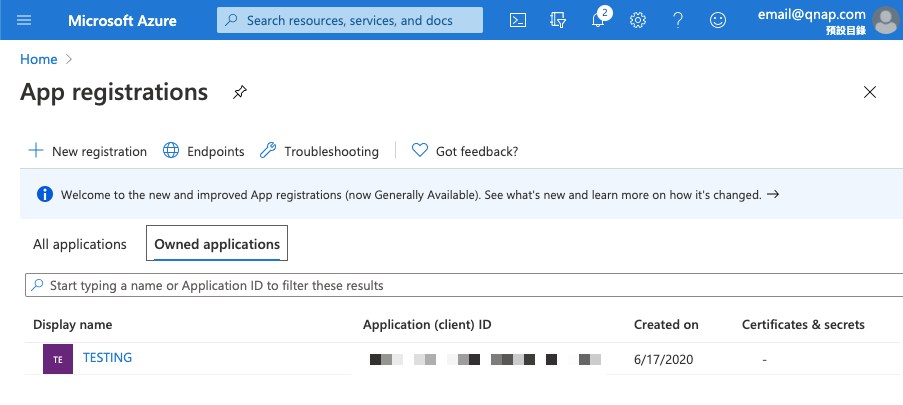
Identifying an Application ID in Azure Portal
In order for Cloud HAL Agent to access the Azure API, you must include an Application ID. This tutorial assumes that you already have registered an application. For information on registering an Azure subscription, see here.
- Note the Application ID. Note:
This is the Access key used by Cloud HAL Agent.
Generating a Secret Key in Azure Portal
In order for Cloud HAL Agent to access the Azure API, you must include a secret key. This tutorial assumes that you have already registered QuTScloud and assigned it the correct permissions on the Azure platform. For information on registering an Azure subscription, see here.
- Go to Certificates & secrets.

- Generate a secret key.
- Optional: Enter a description.

- Note the secret key value. Note:
This is the Access secret used by Cloud HAL Agent.
Important:You can not copy the secret key after leaving this page. If you lose the secret key, you will need to generate a new value.

- Optional: Enter a description.


