How do I set up QNAP vSphere Client Plugin (version 6.0.0) in vSphere 8?
最後修訂日期:
2023-01-09
The QNAP vSphere Client Plugin greatly reduces the complexity of creating datastores in vSphere.
| Without QNAP vSphere Client Plugin | With QNAP vSphere Client Plugin |
|---|---|
|
|
Procedures
Deploy QNAP vSphere Client Plugin
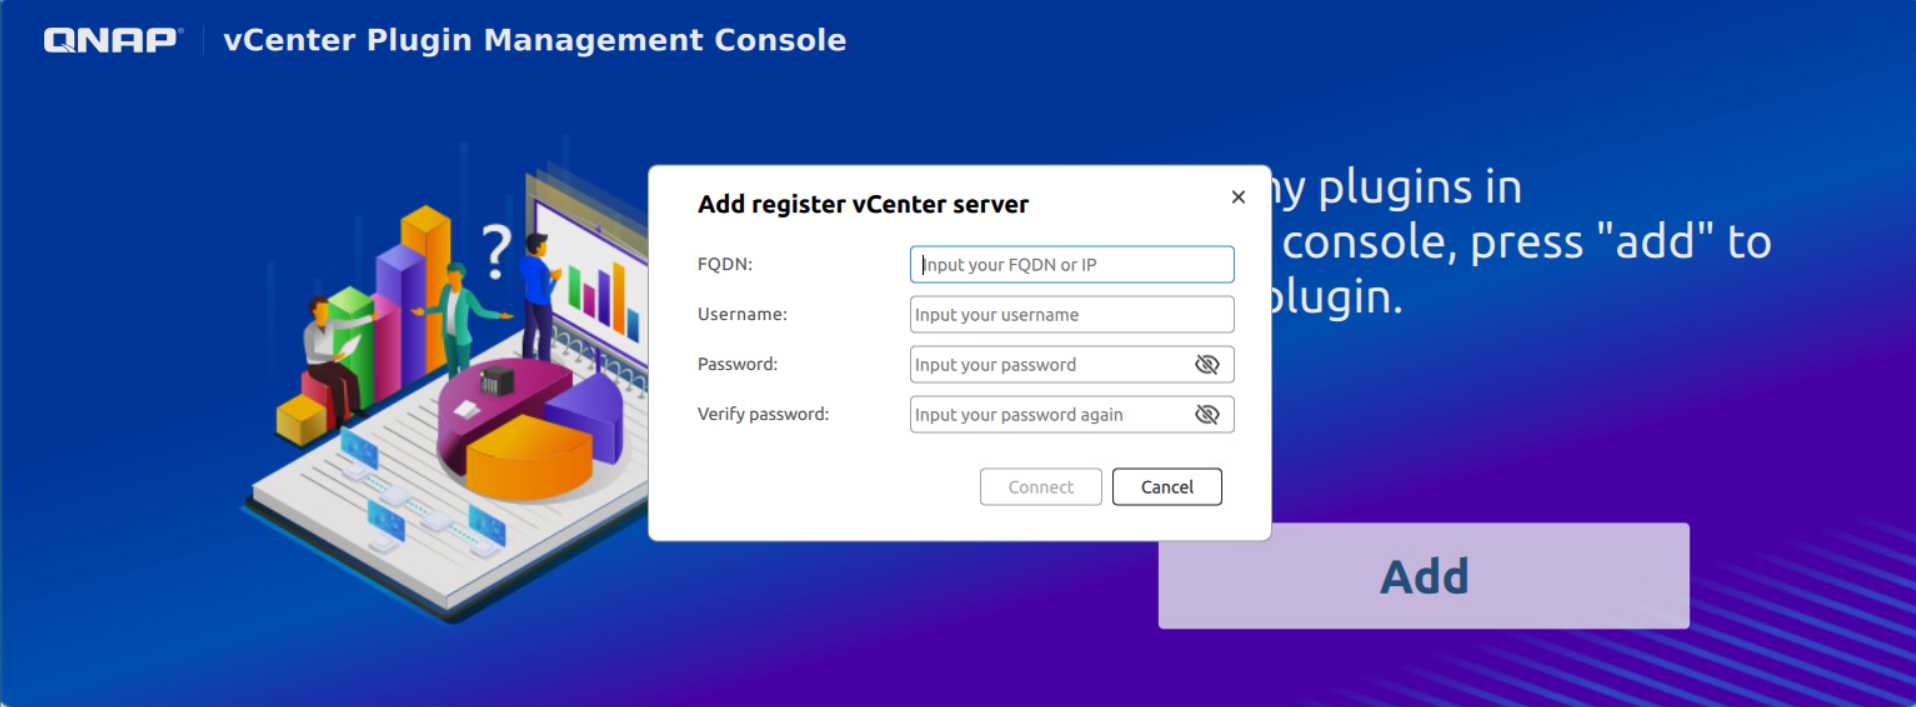
- Open the vCenter Plugin Management console and click Add.

- Enter your vCenter server IP, username, password, and click Connect.

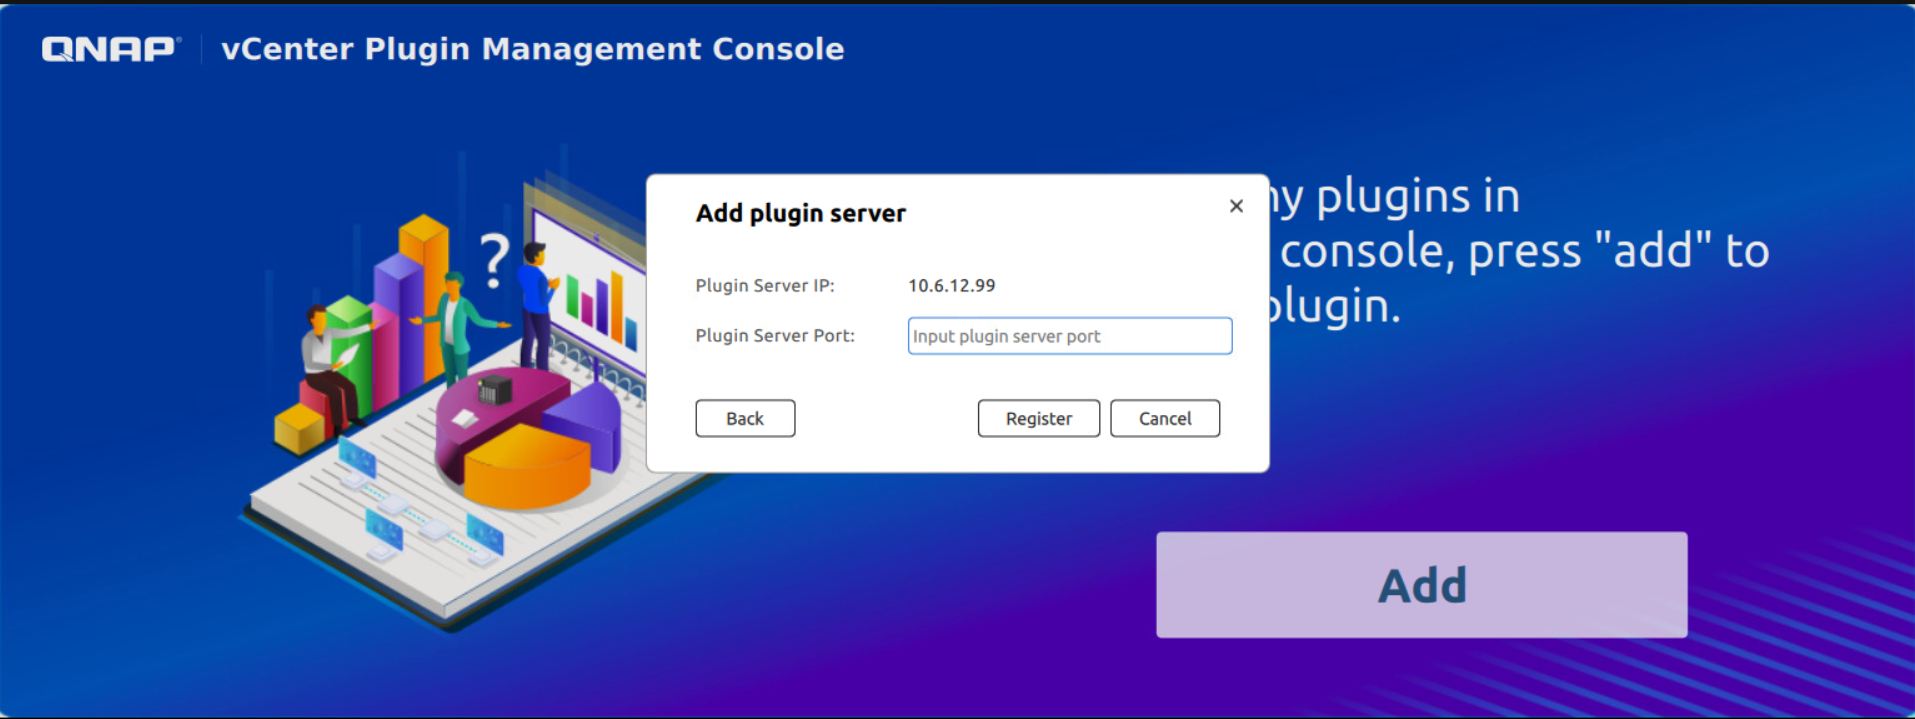
- Enter the Plugin Server Port and click Register.

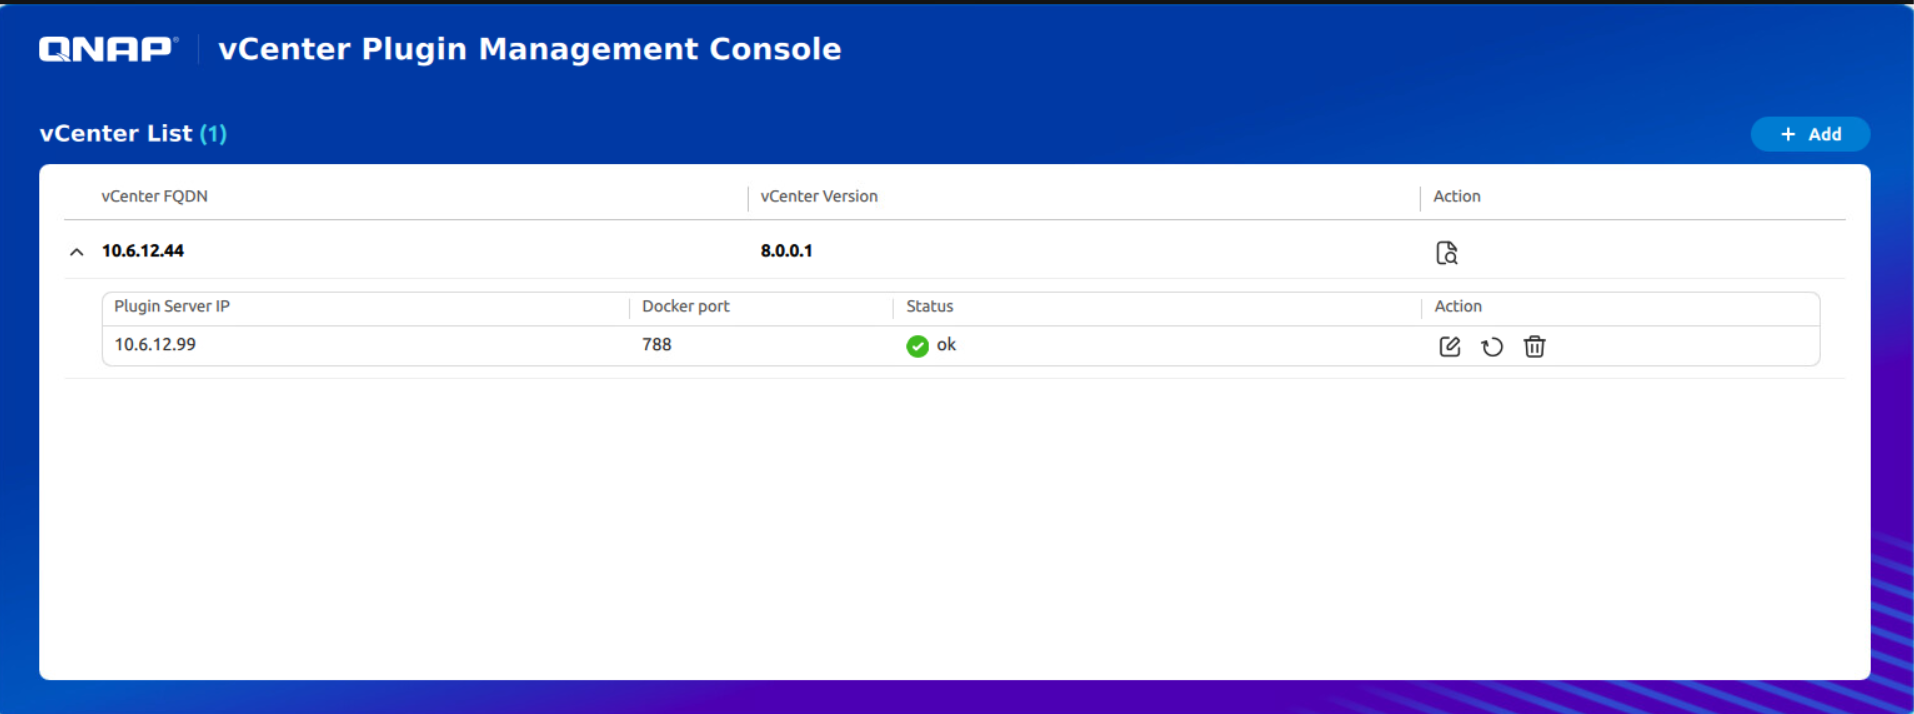
Your Plugin Server will be set up. The initial status of the Plugin Server will be Initializing and will change to OK when ready.

You can also check if the QNAP plug-in is active in vCenter.

Extend storage with QNAP NAS in vSphere Client
- Click the menu.
- Select QNAP Remote Plugin.

- Go to the Storage tab and click Add.

- Enter the NAS IP address, port number, and the user account credentials.

- Click OK.
Create a datastore
- Go to the Datastore tab and click Create.

- Select the NAS under Storage, select a connection type, and click Next.

- Configure the Datastore Settings based on your requirements and click Next.

- If required, configure CHAP Settings and click Next.

- Select the Target Hosts and click Next.

- Select the iSCSI Adapter and click Next.

- Review your settings and click OK.

Your Datastore will be set up. The initial status of the Plugin Server will be CREATING and will change to READY when ready.

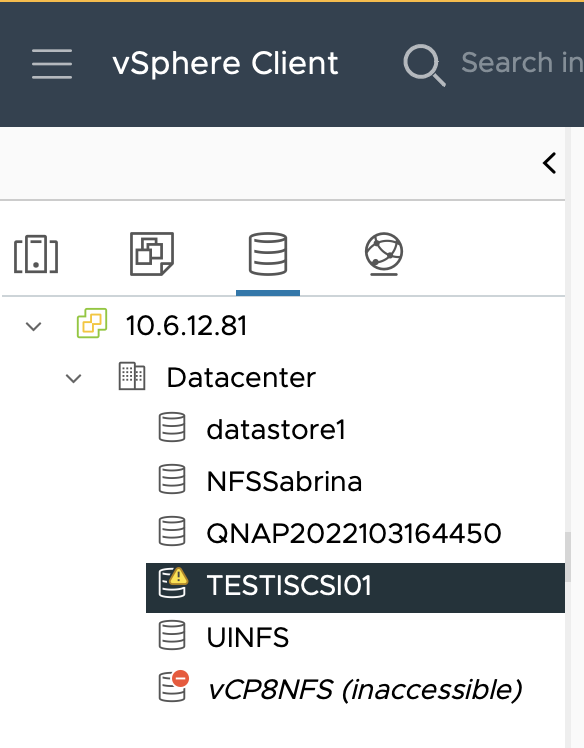
You can also find the Datastore in the vSphere Client inventory.


