How to set up Azure SSO on QTS?
Applicable Products
All NAS Series
Details
QNAP NAS supports single-sign on from Azure Active Directory Domain Service (Azure AD DS), allowing users to log into the NAS with their Azure AD DS for Single Sign On (SSO).
As Azure accounts are imported as domain users, the admin can also select the accounts from the domain user list and adjust each Azure domain users’ settings, including shared folder privilege, domain group privilege, and domain user storage.
Requirements
- A site-to-site VPN with Azure
- An Azure AD Domain Service
- A QNAP NAS with QTS 4.5.1 (or later)
- A text editor for storing the Client ID, Tenant ID, Reply URL and Public Key
If you are joining more than one NAS to the SSO service, you must follow this tutorial for every NAS.
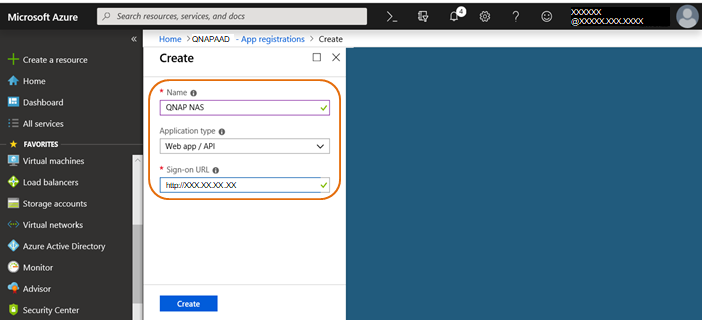
Get the ClientID and Reply URL
- Open Azure Active Directory.
- Go to Manage > App registrations.
- Click +New registration.
- Enter the registration details.
- Name: Enter a name for the app.
- Application type: Select Web app/API.
- Sign-on URL: Enter the NAS IP address.
- Click Create.
The summary page opens. - Copy the Application ID to your text editor.
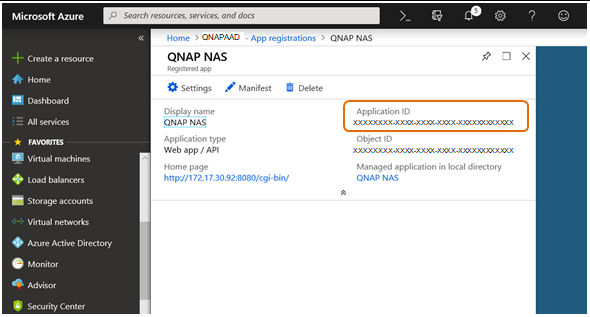 Important
The Application ID will be used as the Client ID in the SSO configuration.
- Click Settings.
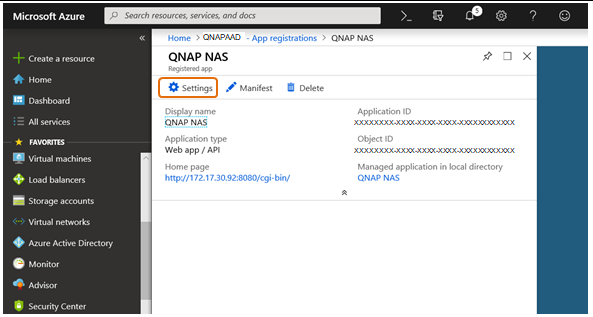
- Go to General > Reply URLs.
The Reply URLs sidebar appears.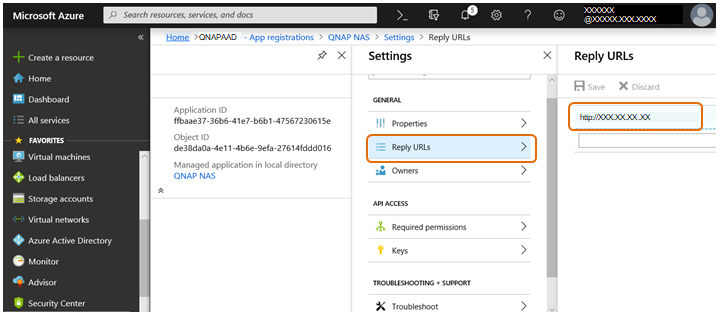
- Click the URL.
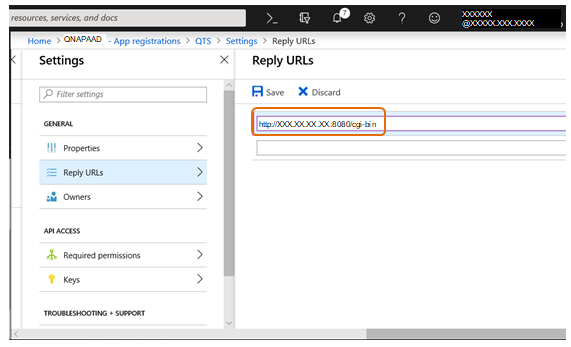
- Edit the URL by adding :8080/cgi-bin to the end.
- Copy this edited URL to your text editor.Important
This URL will be used at the Reply URL in the SSO configuration.
- Click Save.
Get the Tenant ID from Azure
- Open Azure Active Directory.
- Go to Manage > Properties.
- Under Directory properties, find Directory ID.
- Copy the Directory ID to your text editor.
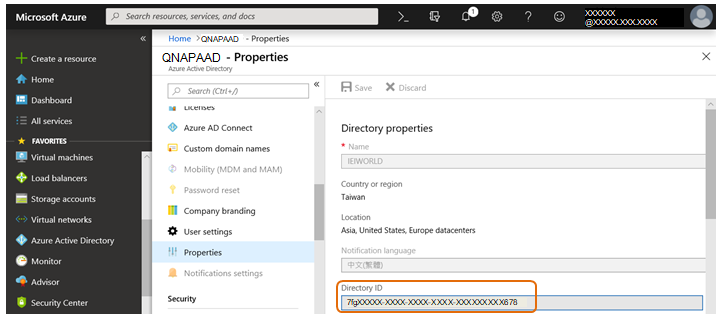 Important
The Directory ID will be used as the Tenant ID in the SSO configuration.
Get the Public Key from Microsoft
Obtain the CA certificate
- Go to https://login.microsoftonline.com/common/discovery/keys

- The CA certificate is the value of x5c.Note
Use a JSON Formatter to make the keys text more readable.
- Copy the CA certificate value to your text editor.
- For security consideration, there are many CA certificates which include signing keys.
- These certificates are rolling on a periodic basis and, in the case of an emergency, can be rolled over immediately.
- Please try these keys to find out the correct one which was used to sign the id_token.
- For more information, refer to Signing key rollover in the Microsoft identity platform.
Convert the CA certificate to a Key
There are several methods to convert a CA certificate to a key. In this example we use a Linux environment.
- Copy and paste the CA certificate from your text editor into the space between with the following command:
cat rsa_key_azure-cert.pem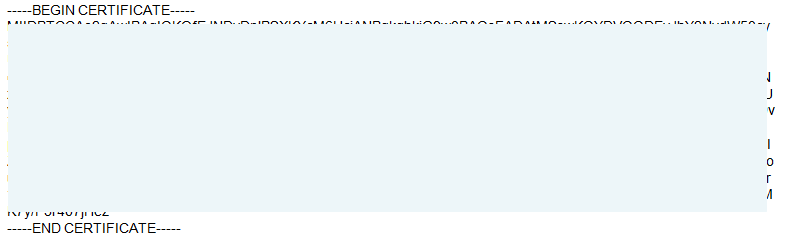
- Use the following command to generate the public key into a pem file:
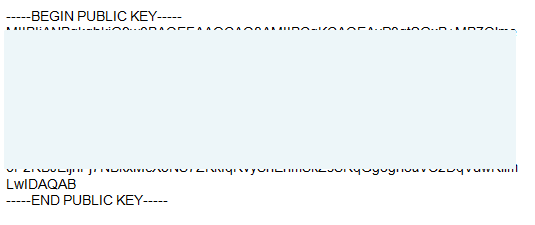
openssl x509 -pubkey -noout -in rsa_key_azure-cert.pem > rsa_key_azure-pub.pem - Copy the Public Key (including beginning and end) to your text editor.
 Important
The Public Key will be used as the Public Key in the SSO configuration.
Configure SSO on QTS
- Log into your NAS as an administrator.
- Go to Control Panel > Privilege > Domain Security > Windows AS/LDAP and select AD Authentication (domain members).
- Use the Quick Configuration Wizard or Manual Configuration to join Azure AD DS, as joining a on-premise AD domain.
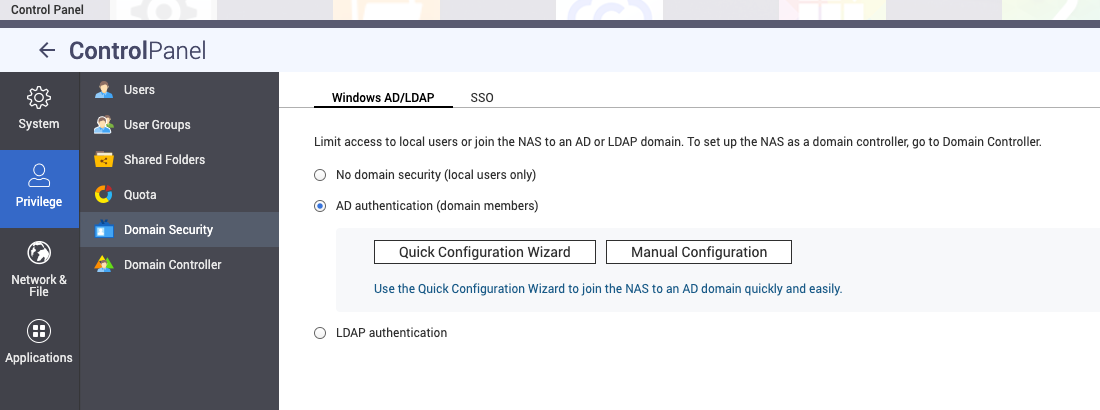
- Go to the SSO tab.
- Check Enable Azure Single Sign-on (SSO).
- Copy and paste the Client ID, Tenant ID, Reply URL and Public Key from your text editor.

- Click Apply.
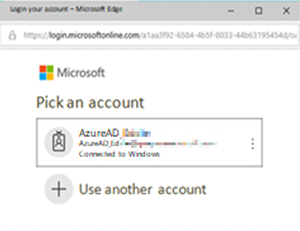
Sign into the NAS with an Azure AD account
- When logging into the NAS, click Azure SSO.
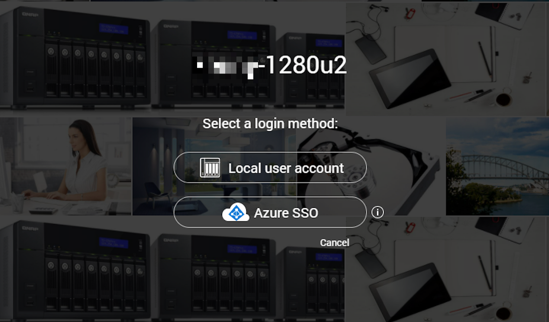
The Microsoft Pick an account window opens. - Select the account to log into the NAS with.