How to set up and use GPU pass-through in Virtualization Station 3
Last modified date:
2019-03-27
Overview
What is GPU pass-through?
When a graphics card is installed in a QNAP NAS, you can assign it to a virtual machine (VM) in Virtualization Station. This allows the VM to use the graphics card's resources to provide additional processing power and graphics output and to use graphics APIs including DirectX and OpenGL.
Support for GPU pass-through is limited to Windows-based VM and is only available for specific QNAP NAS models and graphics cards. For more information, visit https://www.qnap.com/go/how-to/faq/article/why-can-i-not-see-installed-graphics-cards-in-virtualization-station
- After installing the graphics card, power on your NAS and open Virtualization Station.
- Select a Windows-based VM, ensure that it is powered off, and open its "Settings".
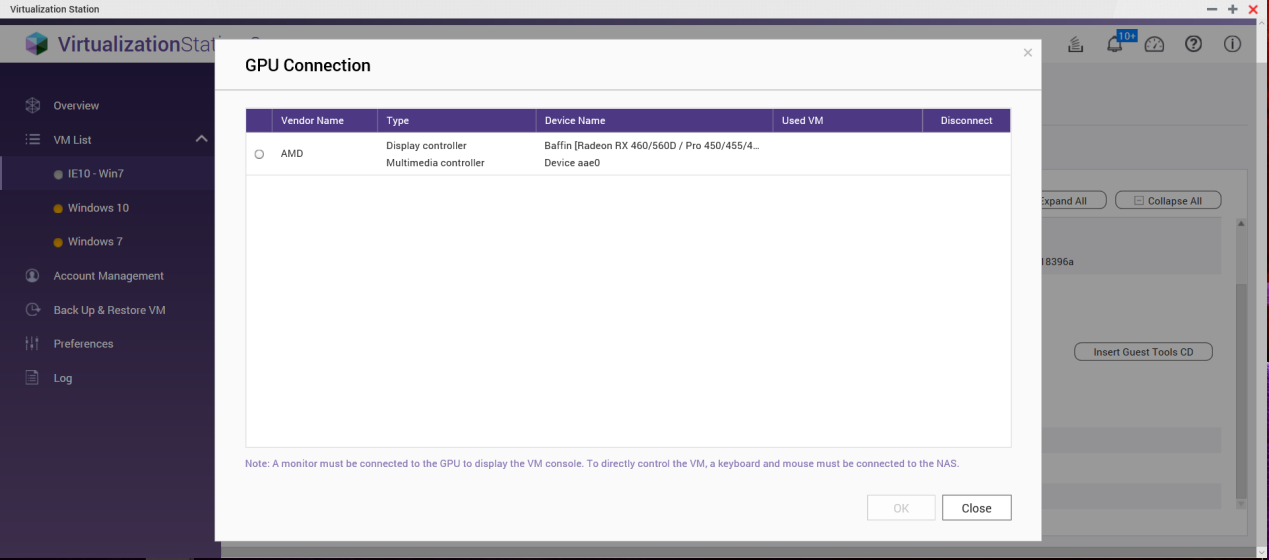
- Under "GPU" you can assign your installed graphics card to this VM.

- In "Settings", click “Insert Guest Tools CD”.

- Before powering on the VM, connect a monitor to the graphics card, and a USB keyboard and mouse to the NAS
- Power on the VM.
- Using the VM console, you must download and install the drivers for your graphics card. These can be downloaded from https://www.amd.com/en/support and https://www.nvidia.com/Download/index.aspx for AMD and NVIDIA graphics cards respectively.
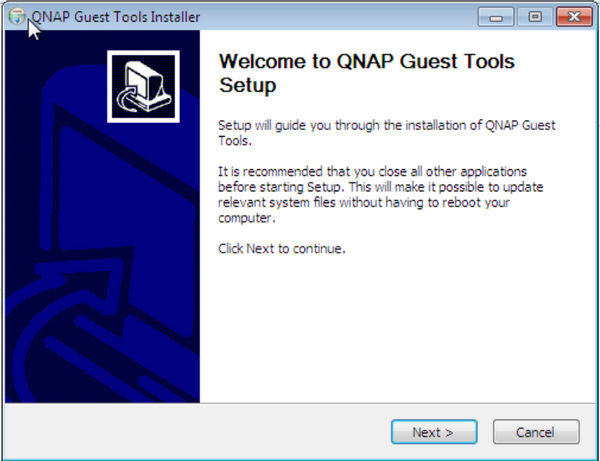
- Using the VM console, navigate to the D: drive and run "qnap-guest-tools-0.102.1.exe" (if you have multiple optical drives on the virtual machine, the drive letter may be different).

- Click “Next >”.
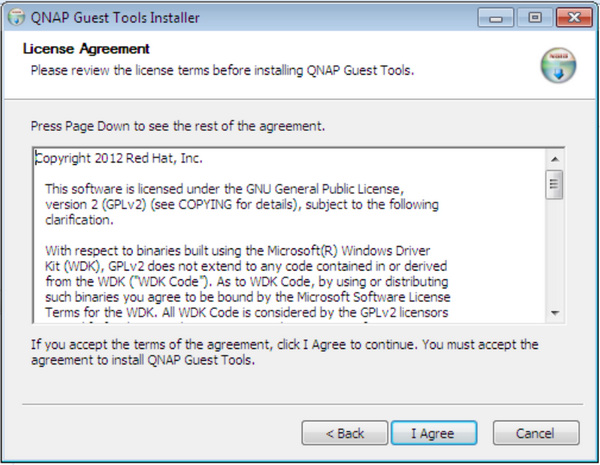
- Read and accept the terms of License Agreement.
- Select “QNAP Guest Agent” and “UltraVNC”. Click “Install”.

- Click “Finish”.

- Set a VNC server password
After installing UltraVNC, the Server Property page will be displayed. You must set a VNC password for accessing the VM console. Create a password and click “OK”.

- Restart the virtual machine.
- Go to the "Information" page of the VM.
The console button will now be available as the QNAP Agent has obtained the IP address. After clicking “Console”, the QNAP Agent will automatically enter the VM IP address and the default VNC port. Clicking “OK” allows you to remotely access the VM console. Your monitor will also output the VM console.

Limitation:
- If the monitor is unplugged from the graphics card, the VM's remote connection resolution will be fixed to 640*480. Reconnecting the monitor will allow you to readjust the resolution.
- VNC does not support DirectX 11. For DirectX 11 environments, use the VM console via the connected monitor or use another remote connection tool (such as TeamViewer™).
- Ensure your graphics card is compatible with the version of Windows on your VM before attempting to add it to the VM.
- The GPU will only be available to the VM once Windows has been completely installed
- If you modify the UltraVNC RFB Port, you must specify this port number when connecting to the VM console.


