How to set up ULINK DA Drive Analyzer on your QNAP NAS
Introduction
This tutorial goes over the requirements and necessary steps to start using ULINK DA Drive Analyzer on your QNAP NAS and obtain health predictions for your installed drives.
Instructions
Please read the requirements before you start. After installing DA Drive Analyzer on your QNAP NAS, you can purchase and activate a license, and then assign license seats to your drives. Once license seats are assigned to your drives, DA Drive Analyzer will start uploading drive data to the AI engine for analysis and drive health predictions.
A. Requirements
| Requirement | Description |
|---|---|
| Hardware and operating system |
|
| Internet connection |
|
| Licenses |
|
| Supported drives |
|
| QNAP ID | A QNAP ID is required to use DA Drive Analyzer and to purchase and activate licenses. |
B. Installing DA Drive Analyzer
- Log in to your NAS as an administrator.
- Open App Center.
- Search for "DA Drive Analyzer".
DA Drive Analyzer appears in the search results. - Click Install.
After installation, the DA Drive Analyzer icon appears on the desktop.
C. Initializing DA Drive Analyzer
- Open DA Drive Analyzer.
The Policy Agreement window opens. - Read and accept the terms of service and privacy policy.
- The Log In window opens.
 Important
- The main registered user (MRU) is the user who uses the same QNAP ID to log in to the DA Portal (https://qnap.ulinkda.com/). This portal contains additional features, and the MRU can also add other QNAP IDs as viewers. Viewers have fewer privileges but can also log in to the DA Portal using their own QNAP ID.
- A NAS administrator who is not the MRU or a viewer cannot log in to the DA Portal.
- The MRU must remain logged in at all times to continue using the service.
- Click Log In.
The QNAP Account page opens.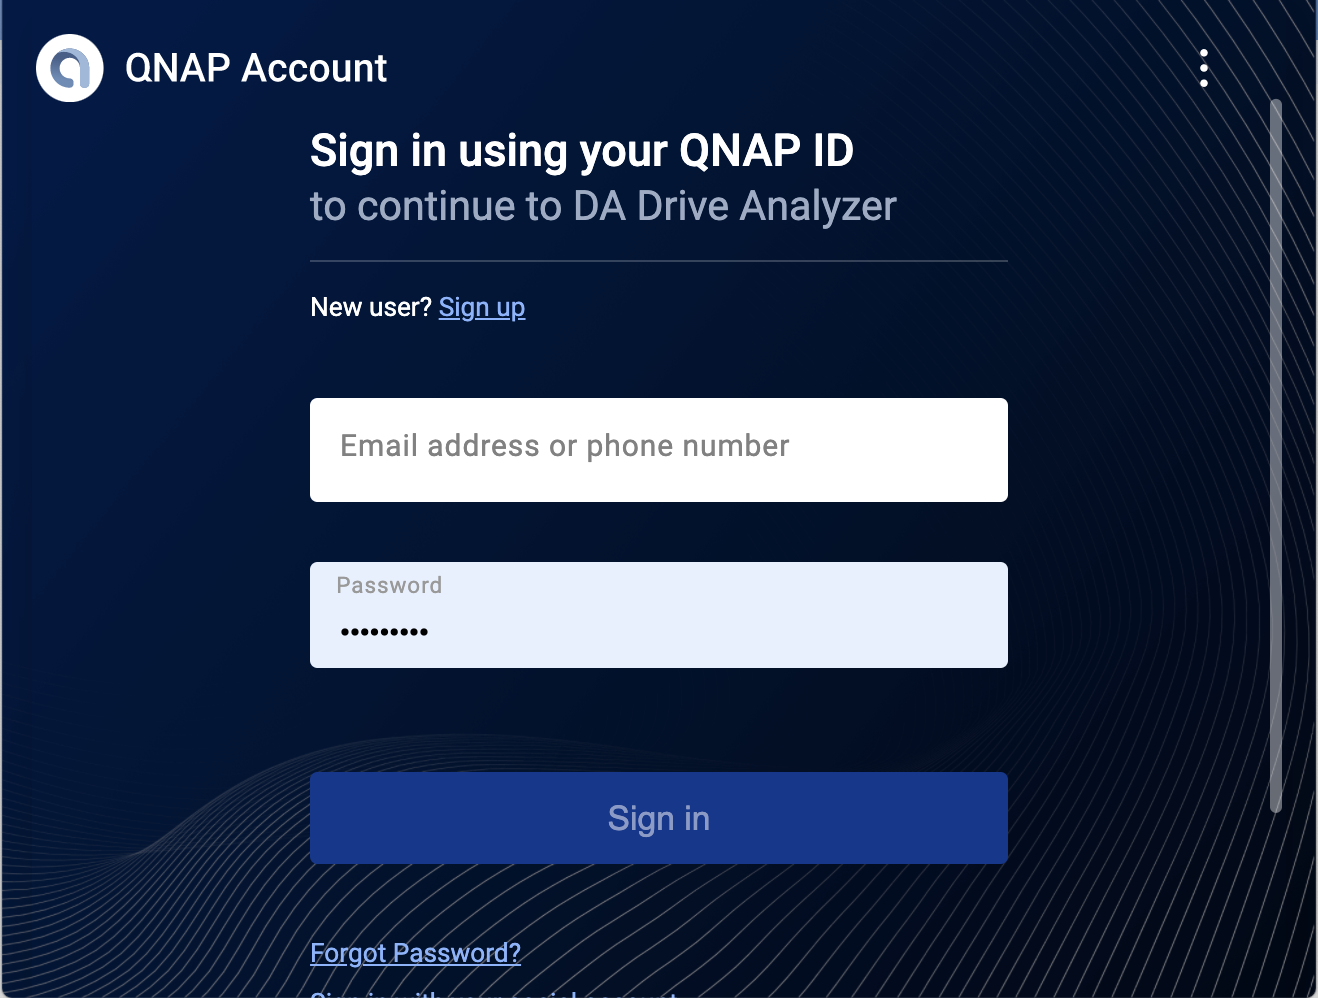
- Sign in with your QNAP ID.
Once signed in, the Overview page appears in DA Drive Analyzer.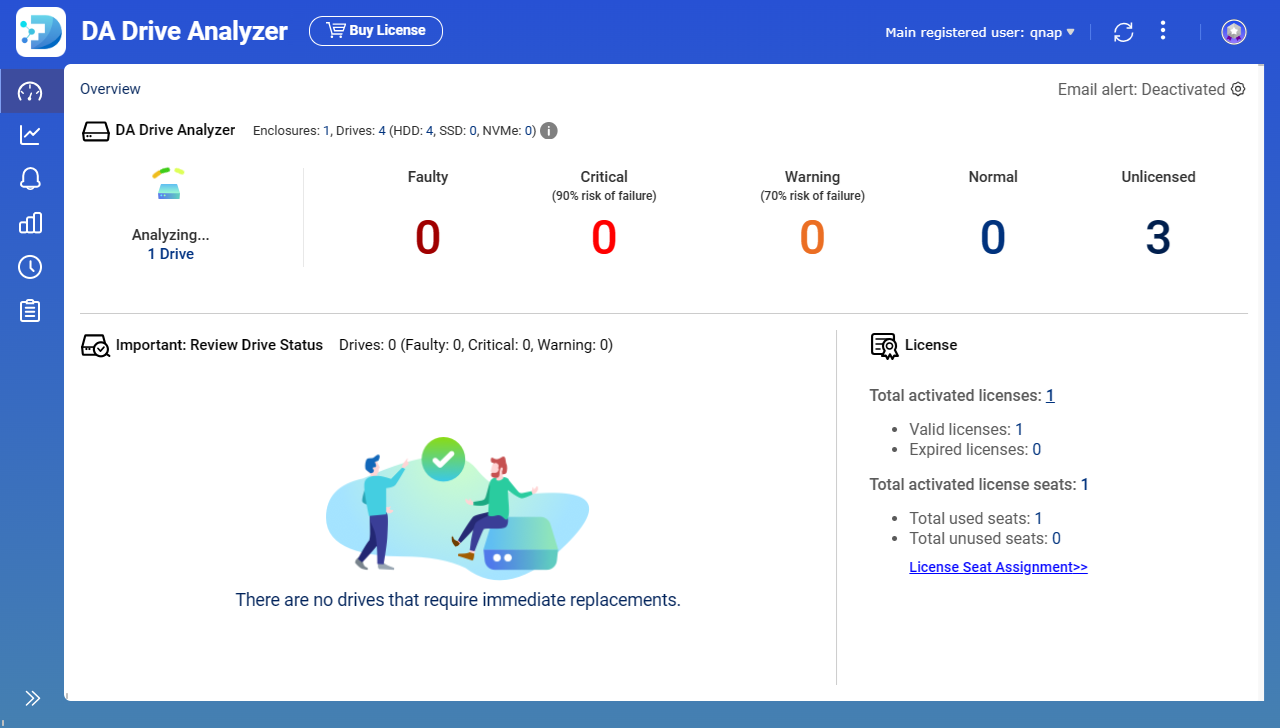 NoteThe DA Drive Analyzer AI engine requires at least 1 day of drive data to start generating drive health predictions.
D. Acquiring and Activating Licenses
Licenses can be purchased and activated within the DA Drive Analyzer app by clicking Buy License.
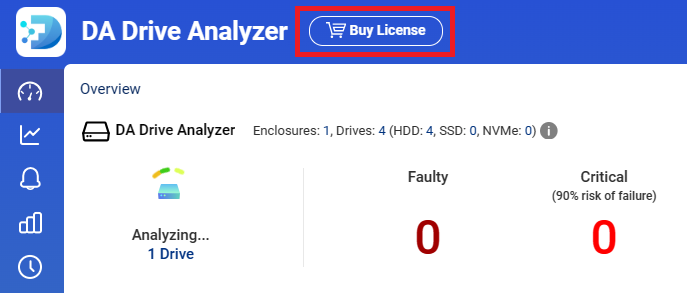
After clicking this button, you will be guided through the purchase and activation process, and the licenses will become immediately available for use. Discounts may be available for bulk purchases.
You can also purchase licenses at https://software.qnap.com/da-drive-analyzer.html, and then manually activate the licenses in License Center. For details, see the license activation topic in the QTS User Guide or the QuTS hero User Guide.
- If you purchase a license from within the app, the license seats can only be activated on the NAS where the app is installed.
- If you purchase a license from the license webpage (https://software.qnap.com/da-drive-analyzer.html):
- If the license contains one license seat, you can activate the license seat on any NAS device.
- If the license contains multiple license seats, you can divide the license seats and activate them on different NAS devices.
For example, if you purchase 6 seats from the license webpage, you can activate 3 seats on NAS-X and 3 seats on NAS-Y.
- Once a license seat has been activated on a NAS, it cannot be transferred to another NAS.
- In the near future, DA Drive Analyzer also will not support license seat transfers from one slot to another.
E. Assigning License Seats to Drives
- In DA Drive Analyzer, go to the Overview page.
- Click License Seat Assignment.
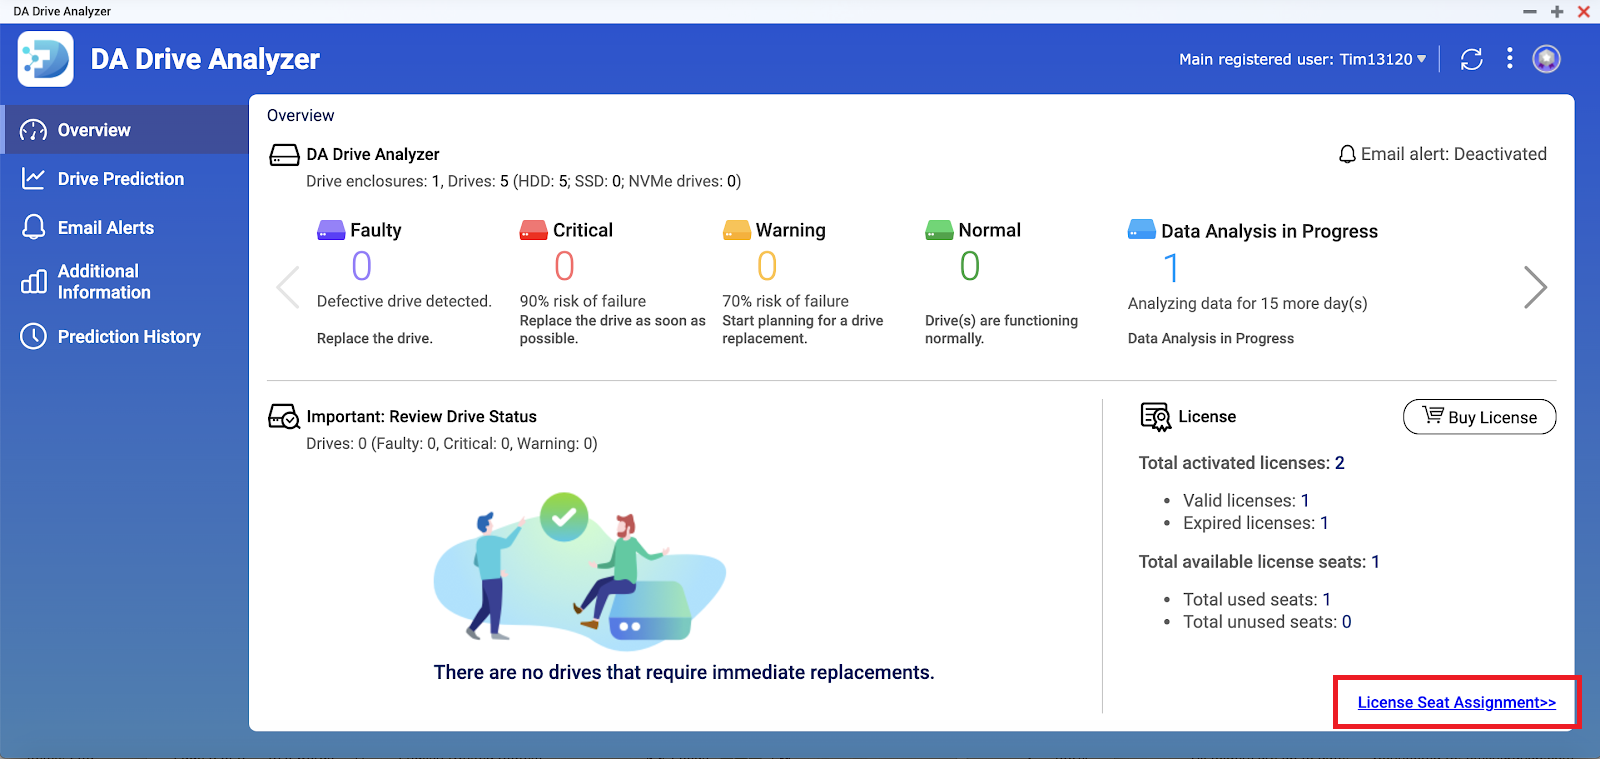
The License Seat Assignment window opens.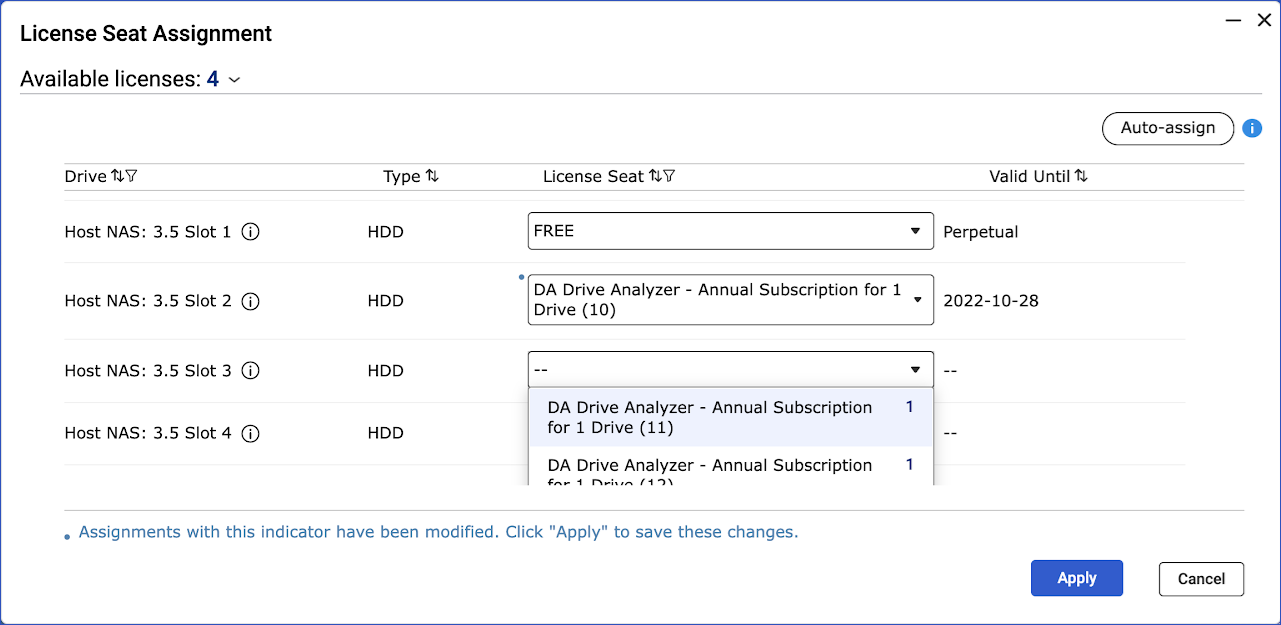
- Optional: Click Auto-assign to sequentially assign seats to available drives.
- Optional: Manually assign individual license seats to drives.
- Identify a drive.
- Under License Seat, click the drop-down menu to select an available license seat.
- Repeat the above steps for additional drive slots.
- Click Apply.
The licenses are applied and the License Seat Assignment window closes.Note- Assigning a license to an unlicensed drive may cause a new data collection period of 1–2 days.
- Once the AI engine finishes analyzing the drive data, drive health predictions will be available in DA Drive Analyzer and also the DA Portal.
- Up to one day of processing time is required before drive health predictions are updated.


